
Stripes worked flat 1: carrying your yarn.
In our exploration of crochet and colour, we’ve already discussed how to make a tidy colour change.
This time, we are going to start a discussion of a very simple but effective type of colourwork: stripes.
Stripes are an easy way to add colour and visual impact to your projects. However, if you work an entire project with lots of stripes and cut your yarn after every stripe, you will have many, many ends to weave in.
In some situations, this might be inevitable. If that’s the case, I can only recommend finding some time in peace and quiet, a good audiobook or podcast, and a cup (or glass) of your favourite beverage.
But very often, you can significantly reduce the number of ends to weave in by carrying the colour not in use along the selvedge. Let’s see how!
Double crochet, stripes over an even number of rows
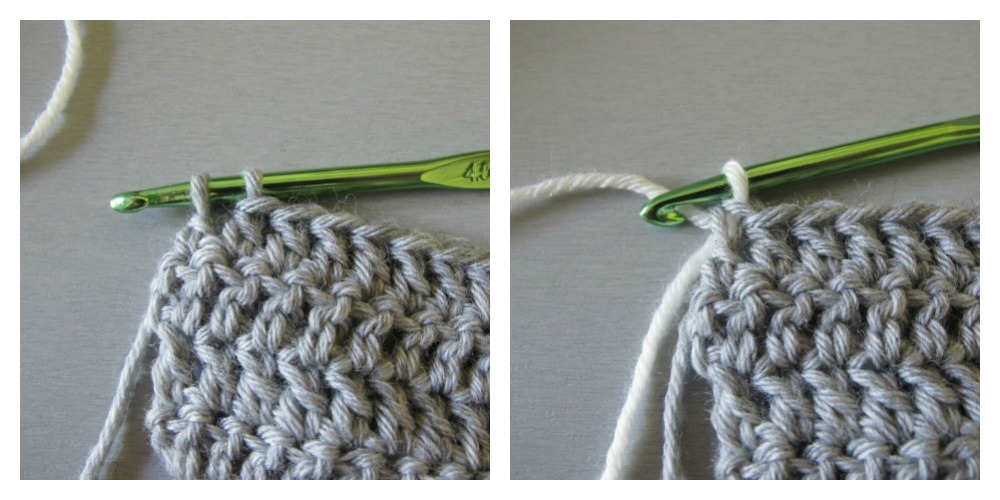
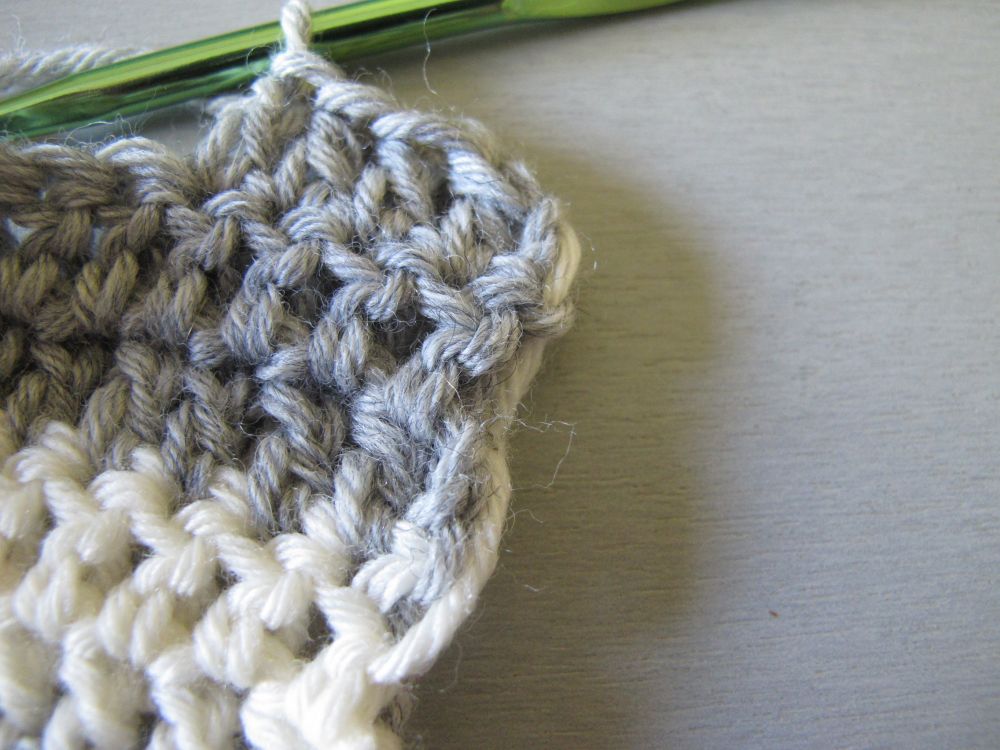
Let’s start our first stripe by a neat and tidy colour change worked at the finishing step of the last dc in the previous row.
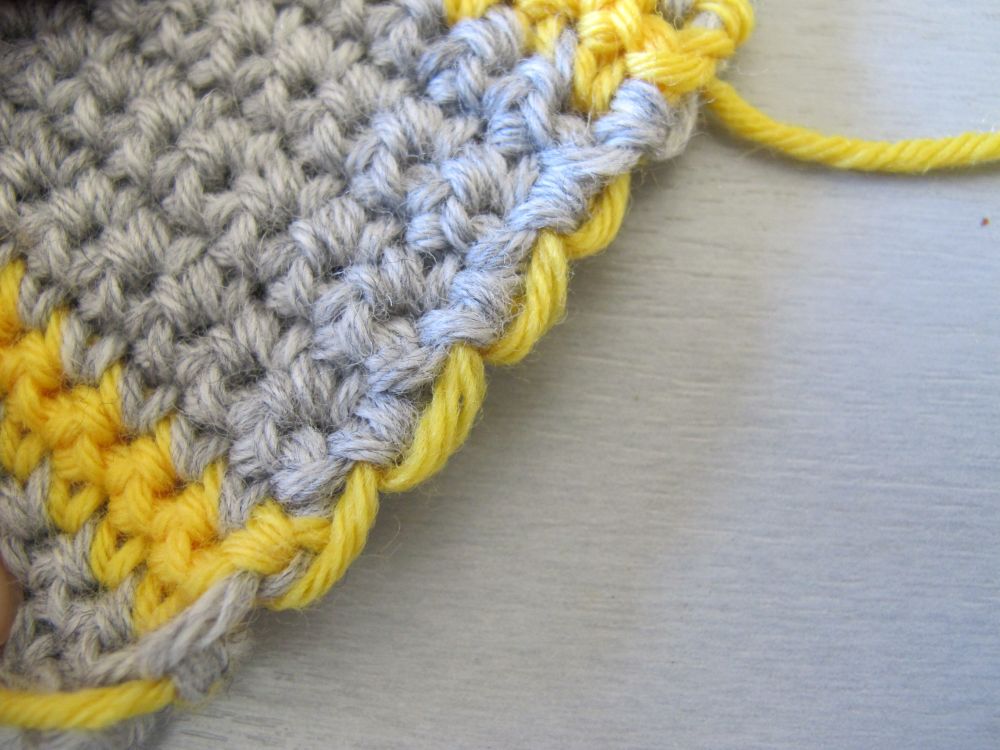
The unused colour will be carried along by crossing the yarns at the selvedge. Since dc’s are rather tall stitches, I suggest crossing yarns on every row, to avoid having too-long strands running along the edge of the work.
After making the chains at the start of the next row, we simply cross the yarns by passing the unused colour over the one in use.
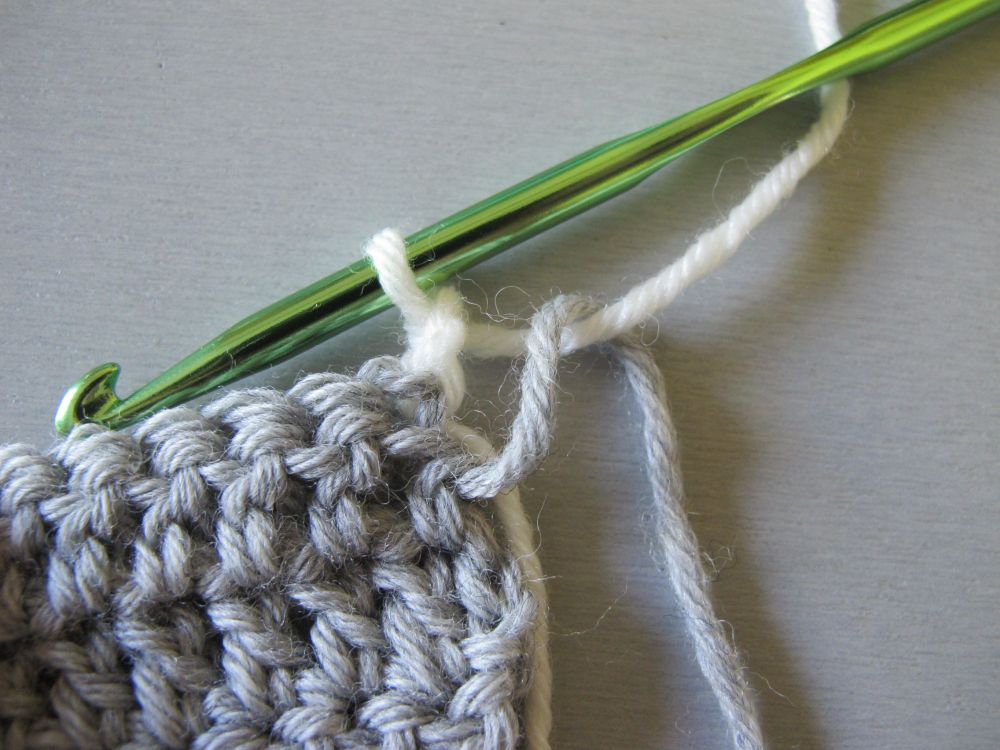
Then we continue the first row of our stripe. The unused colour is now attached at the top of the new row.

This is a two-row stripe. At the end of the second row, we’ll change colours by finishing the last dc with the unused (background) colour.

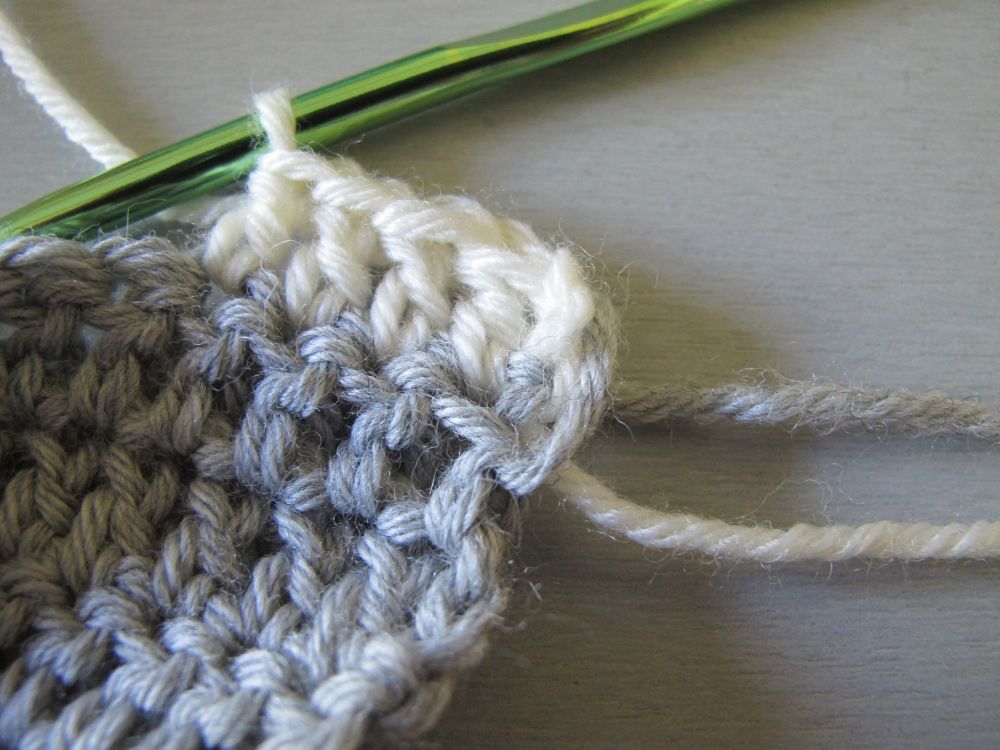
Since we’ll want to make a new stripe further along, we attach the unused colour at the top of the next row, exactly as before.
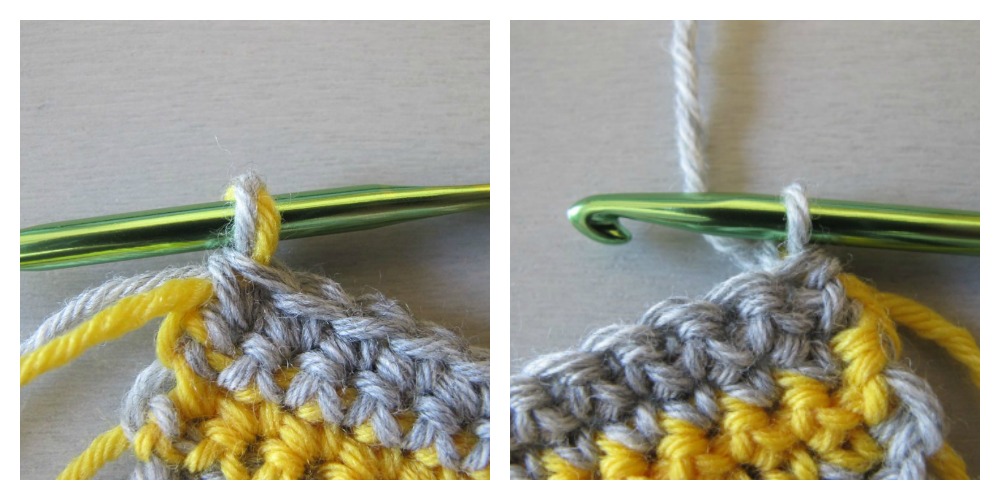
We are going to work several rows in the background colour before the next stripe. This means there is no colour change at the end of the second row. Instead, we simply cross the yarns when the row is completely finished.
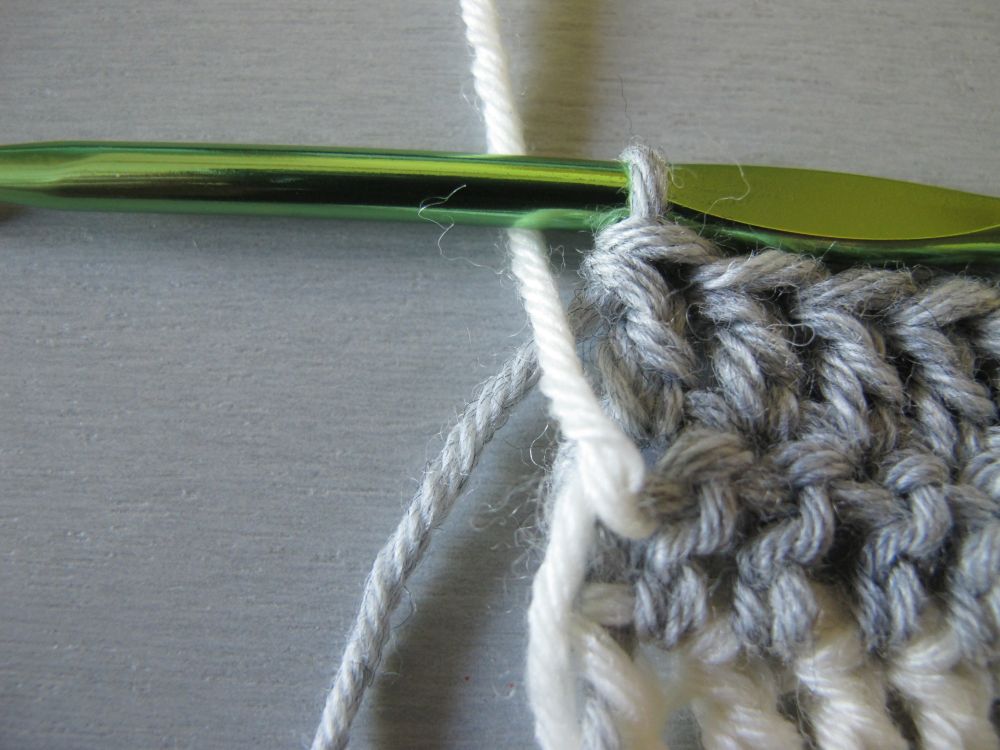
After the chains at the beginning of the next row, we cross yarns again. We repeat these steps to the next stripe.
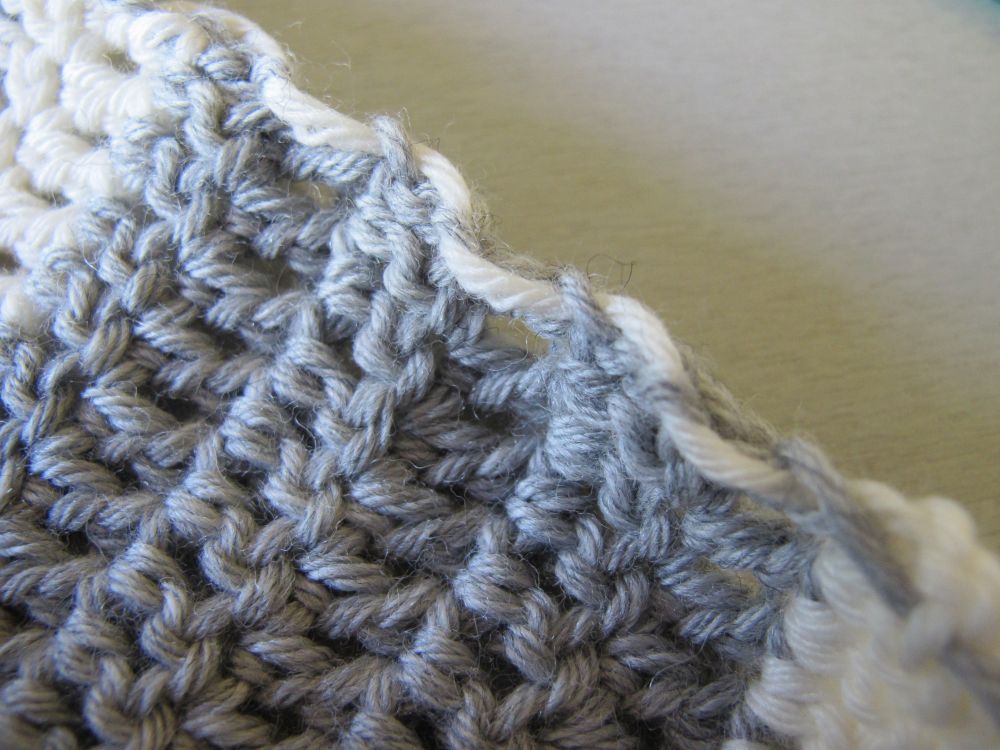
The unused yarn runs along the selvedge. It is important to check after each yarn crossing that it’s not too tight or too loose. We don’t want puckering or loose strands that can catch on things and be harder to hide in a border.
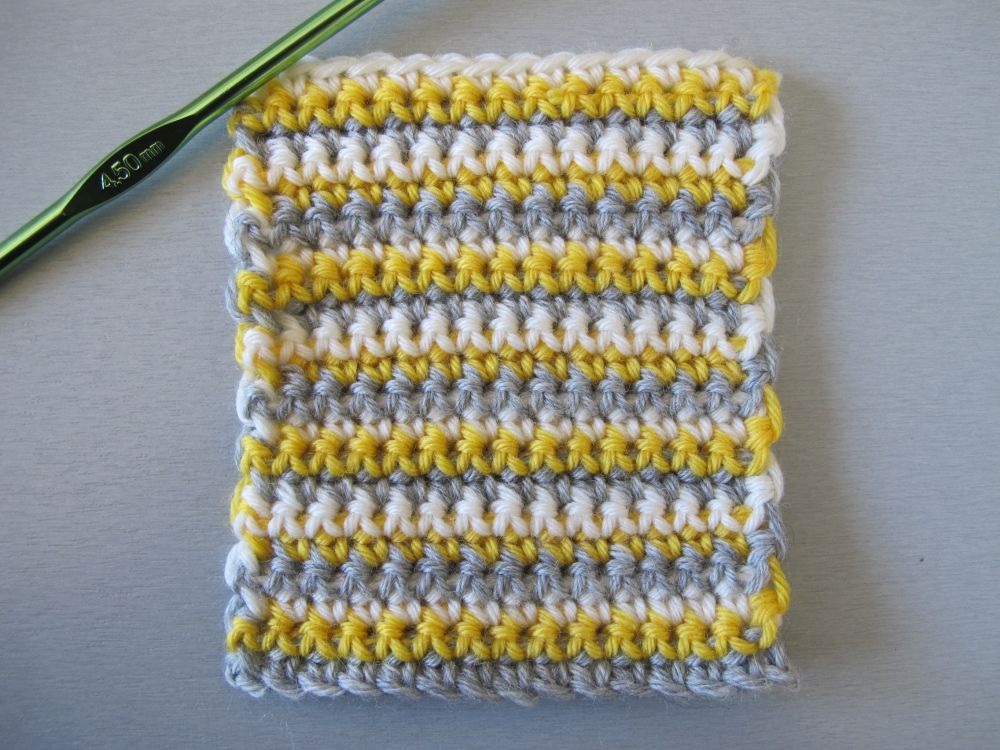
Double crochet, three-colour stripes
Three-colour stripes are a fun way to make narrow and colourful stripes, all while minimizing the number of ends to weave in.
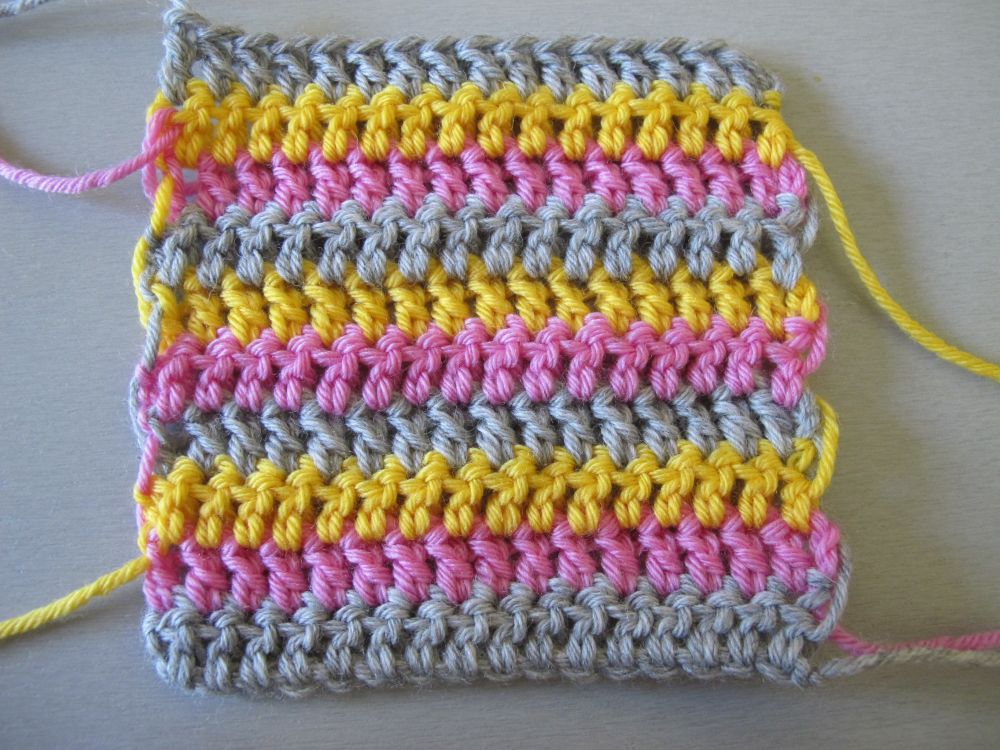
The strategies for colour changes and crossing of yarns are exactly the same as described above. At the end of each row, the next colour to work is waiting for you!
Single crochet, an easier way
As already stated, the height of the double crochet makes it very useful to cross yarns at each row. But if we work in single crochet, things get really quick and easy!

Here, we’re going to start a stripe. We’re going to finish the last stitch in the previous row with both colours, the old and the new.

Turn, ch 1 with the new colour only, and work the stripe. And that’s it!
To carry the unused colour over several rows, simply finish the last stitch on every second row (at the edge where the colour changes occur) with both yarns, and continue working with the colour in use.
The unused colour nicely follows along until you need it again.
And of course, three-colour stripes work really well in single crochet too!

There are so many things to say about crocheted stripes – I’ll come back to this topic again next time!
See you soon,
