
To start 2018, I want to explore colour in crochet in this and upcoming newsletters!
If you have subscribed for 10+ years (yes, I have published my newsletter for more than 10 years!) you will already have read about some of the topics I’m going to tackle in this series on colour. But I have many new subscribers, many of them beginners, or people getting back to crochet after a long break – and in any case, it never hurts to get back to basics!
This time, a simple but very important tip for successful colour changes in crochet.
It seems easy to change from colour A to colour B when crocheting a row – just crochet one stitch in colour A, then another in colour B.
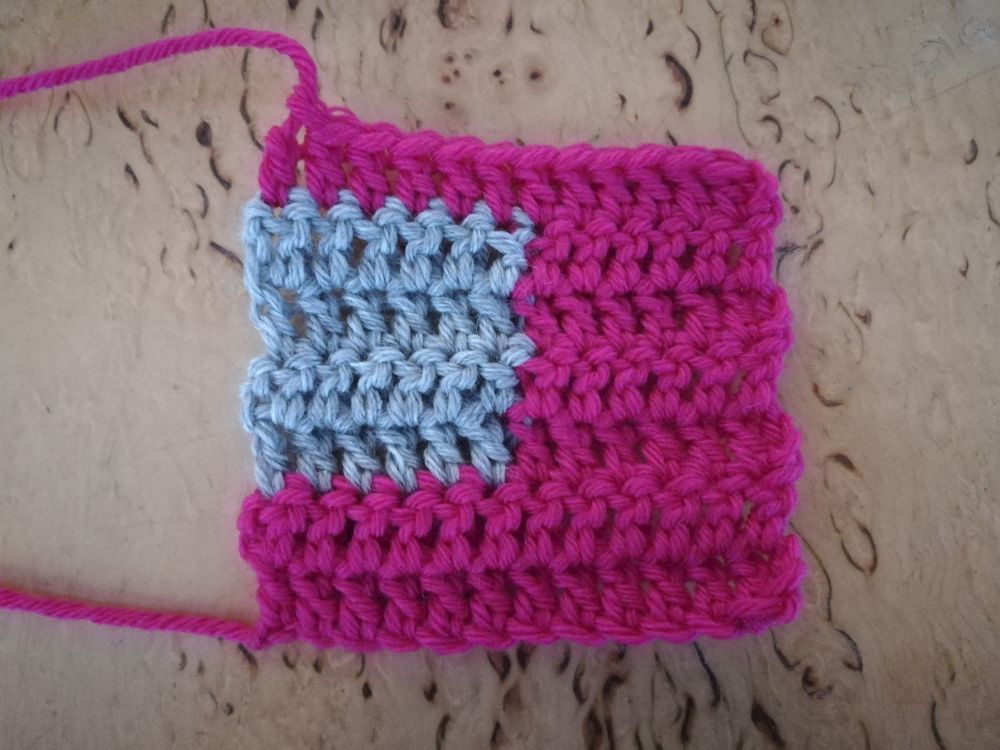
But just for once, the easiest way is not the best way. Just look at this little swatch:

The colour change isn’t perfectly neat. Small « blips » of the previous colour appear in the new one (at the arrows).

Also, the fabric is not perfectly cohesive. One of the strands that link the stitches together is missing at the colour change, making holes in the fabric. Of course, you could close up these holes when weaving in your ends, but that might be more or less practical, depending on how many rows you need to tidy up.
Here is another swatch:
The colour changes are neat and tidy, and there are no holes. This is all due to one simple technique. Let’s see how it’s done!
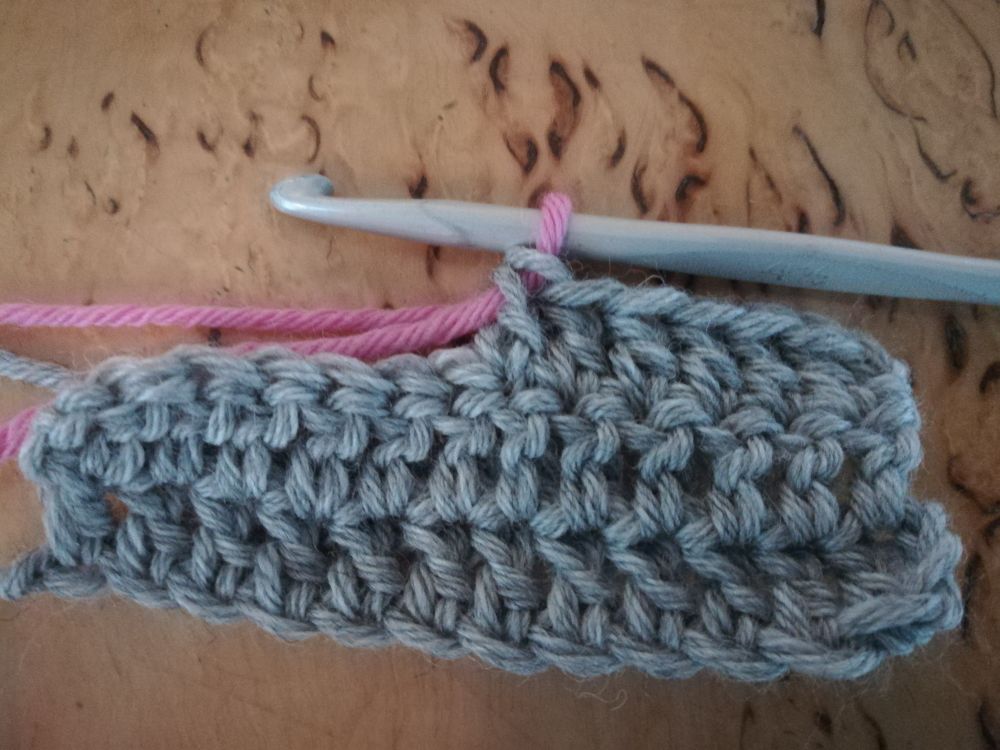
This is our last grey stitch (colour A) before changing to pink (colour B):

As you can see, this dc is not complete. I have stopped before the last step, which is the final step in any crochet stitch: yarnover and pull through.
I’m going to work this last step with the new colour:
Ta-daa! This is how to make a perfect colour change!
If you want a more in-depth explanation, let’s follow the destiny of a very special loop: the one left on the hook when a stitch is completed.
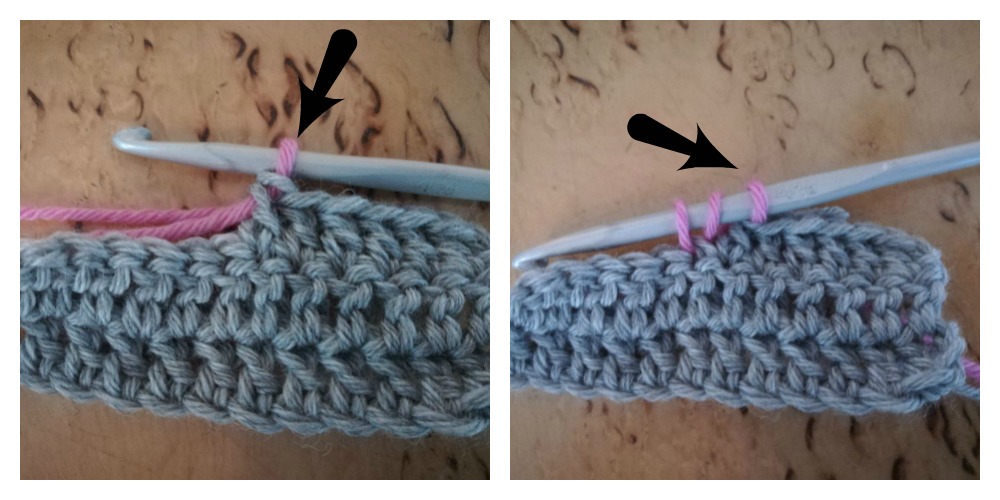
Back to our swatch – to the left above, you can see this loop sitting alone on the hook after completing the previous dc.
In the righthand photo, it is joined by the yarnovers that have been added to make the next dc. Our special loop is the rightmost one on the hook.

Now, watch carefully! Before the last « yarnover and pull through », our loop is still the rightmost one on the hook (left above).
The final picture shows where our loop ends up: as the « lid » of the new dc. It’s the « V » we can see on top if we tilt our work towards us.
So, if you want this new dc to be entirely worked in the new colour, you must take care to make the « lid loop » in the new colour, too.
If you find this detailed explanation utterly boring, all you need to remember is to make the last « yarnover and pull through » of the stitch (any stitch) with the new colour.
Next time, we’re going to start talking about stripes. I promise, there is much more to say about them than it seems!
Please feel free to comment and leave suggestions below!
See you soon!
