Newsletter February 2011: A tip for assembling squaresNews:In crochet news, I have the immense pleasure to present the latest shawl design by EclatDuSoleil: Victoria.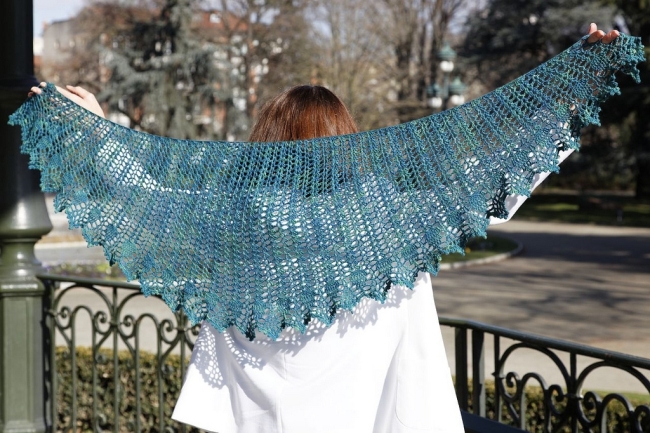 This little crescent-shaped shawl will be a great addition to your wardrobe as well as a fun project to crochet. The construction is top-down, which enables you to adapt it to the type and quantity of yarn you have on hand. The shawl in the photo was worked using a fingering weight yarn (Malabrigo Sock). More information is available in the shop.If you prefer to knit, the prolific Circé aux Belles Boucles has a new hat pattern out: BigBow, for ladies and babies.
 This adorable little hat was initially designed for a little girl. The pattern is now written for 5 sizes from baby to a woman’s size L. Big girls want a hat with a bow too! More information in the shop.A tip for assembling squares:I have been working on a blanket this month, for inclusion in a book. I wanted to tell you about the way I assembled the squares in my blanket. This is a tip that can be useful in many situations – I generally teach it in my crochet classes, as one of several alternatives.Of course, my favourite way of assembling crochet motifs is to do it « on the go », while working the last round of the new motif. That way, when you’ve finished crocheting, your project is done!This is not always possible, however. Attaching motifs as you go requires regularly spaced chains in the last round of the motif – and those chains should appear at the spots where you want your joins to be. But sometimes your motif might finish with a round of solid stitches, either because it was designed that way or because you decide you prefer it that way. Often a row or two of sc or dc frames the motifs nicely and creates visual unity when the project is assembled. In this situation, you will need to sew the motifs together.There are many ways to do this. However, most of the seams I’ve seen explained in various books create a definite right and wrong side. For example, a seam which is nearly invisible from the right side will show quite clearly on the wrong side of the fabric.This might not be a problem – after all, motifs that are crocheted in the round have a right and a wrong side, so why not the seam too? But many projects made from assembled motifs will show their wrong side in various siuations. A throw on your sofa that you really use (as opposed to one that is carefully folded and placed over the back or armrest, never to be touched) will sometimes have its flip side up, just as a baby blanket will. A shawl, and perhaps even more a scarf composed of motifs, will show its wrong side when you wear it.So a seam that is as smooth as possible on both sides can be a desirable feature. And it’s not really hard to achieve.
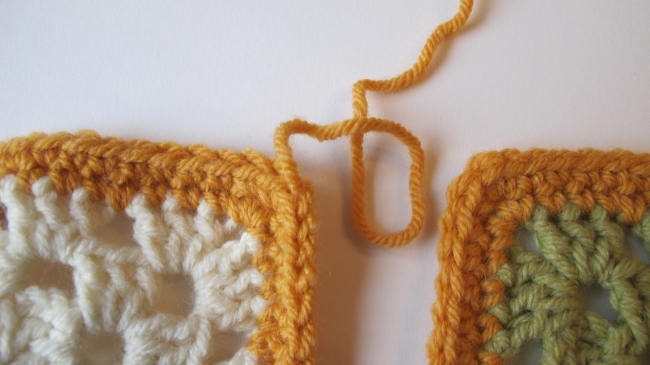 Place the motifs on the table in front of you, right side up. On the last round of each motif, the tops of the stitches lie toward the right side of the fabric. They are clearly visible from the right side, and not from the wrong side.With a tapestry needle, secure the yarn you will use for your seam on the wrong side of motif 1 (left). Pass the needle through the center of the top of the corner stitch (or any other stitch where you want to start your seam) so that the yarn runs through this stitch from the wrong to the right side of the fabric. You want your yarn to run between the two loops that form the top of the stitch.
 Put your needle down through the top of the corresponding stitch in motif 2 and up through the top of the next stitch, seaming towards you.
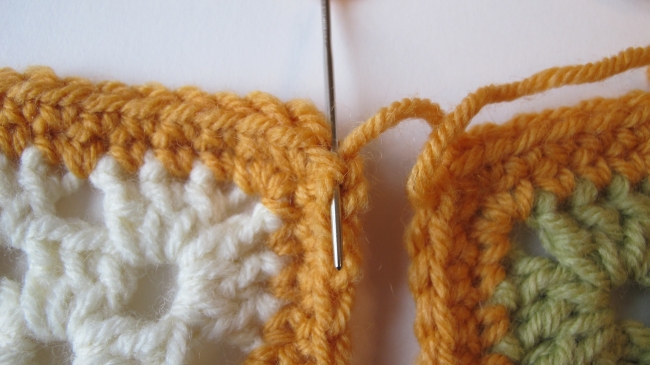 On motif 1, put the needle down through the top of the first stitch (where the yarn is already) and up through the next stitch.
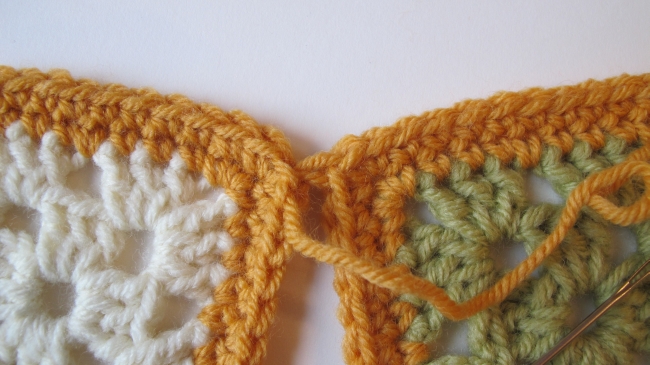 The seam starts to form – the yarn zig-zags between the motifs. It is time to start tightening things up, but note where the yarn runs.
 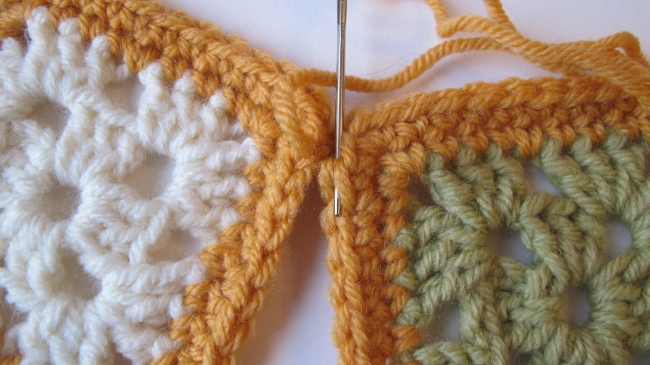 Go back to motif 2, and put your needle down through the stitch where it came up before. You are going to continue seaming alternate sides. Each time, your needle goes down into the stitch where the yarn came up last time. You don’t need to go deep down into the stitch, just under the horizontal bar that separates the tops of the two stitches – see picture above.
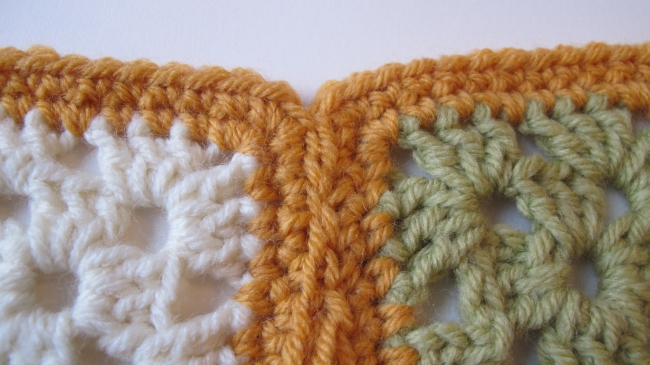 As you continue seaming and tightening up your yarn progressively, you will see how the motifs align, border to border. Only one loop of the top of each stitch is visible.
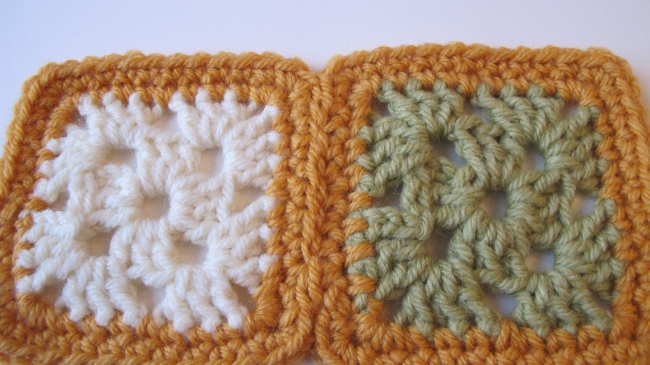 This is the finished seam on the right side…
 … and on the wrong side. The seam is a tiny bit thicker on the wrong side, but it’s a very slight difference.So, what projects do you have in mind where you can use this method? In my crochet fantasy life, I’m already making a beautiful scarf of tiny, multicoloured motifs! See you soon!