
I wanted to share with you my thoughts and ideas around a small project – a project worked with a one-of-a-kind skein of yarn. The thinking can be applied to any project using a limited amount of yarn; this is just an example to start your own creative process. I’ve decided to break this subject into two parts – part 2 will come in the newsletter for April.
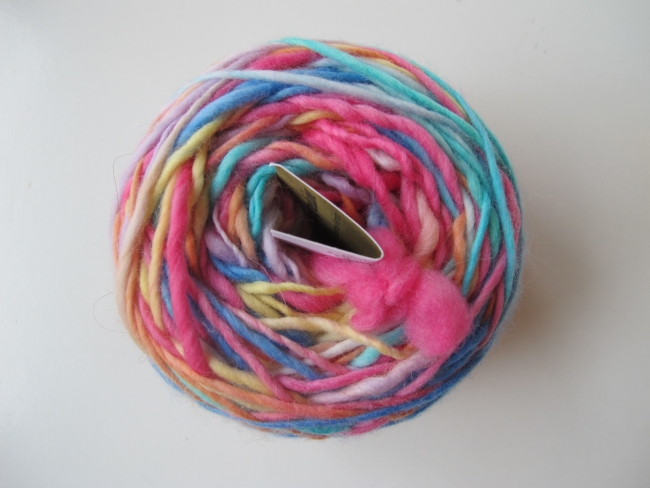
I think many of us have been there – you just can’t resist a single, wonderful skein of yarn. This time for me it was this lovely handspun:
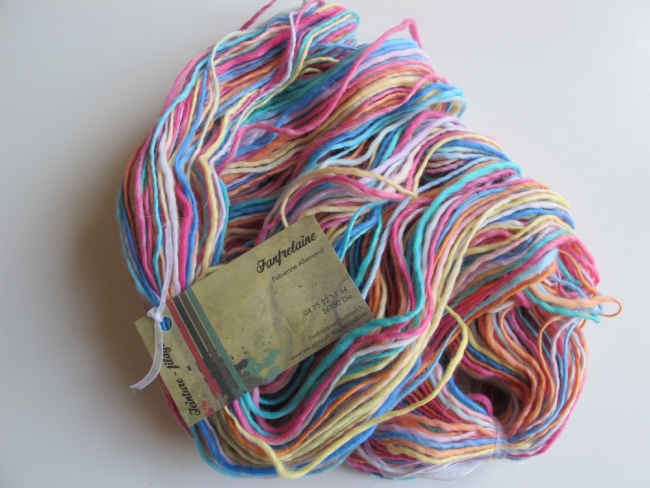
Spun by Fanfrelaine in maco merino, an incredibly soft wool from a small farm in the southern French Alps, approximately 180 m (195 yds) and 72 g of colourful beauty.
So, I had this limited amount of yarn and wanted to make something of it. I knew I wanted something to wear around my neck, to take full advantage of the very soft and warm yarn.
The success of a project in a short-repeat variegated yarn with highly contrasting colours like this one depends very much on the choice of the stitch pattern. The stitch pattern can enhance or tone down the yarn, and the end product will look very different depending on this initial choice. So I started swatching!
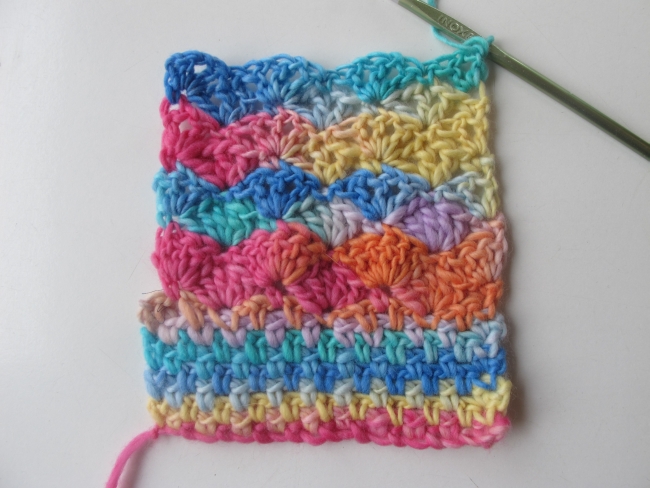
You can see how my ideas evolved in this swatch, starting at the bottom. My first idea was the granite stitch. Often, when you work with yarns of this type, it’s recommended to use a stitch pattern that breaks up the colour repeats. I guessed that this was what the granite stitch, with its small stitches and interlocking rows, would do.
In a way, it worked. In a project with longer rows, the stripey effect in the swatch would have been less clear, since one row would contain more than one colour. And the mottled effect would definitely be there.
However, I decided that this was not what I wanted. What attracted me to the yarn in the first place was its softness, but the happy splashes of colour came a close second. I didn’t want to break up the colours and tone them down. I wanted my finished project to render the joy I felt when I first saw the short bursts of intense colour in the yarn.
So, how could I hold the colour splashes together instead of breaking them up? Well, by working some kind of « larger units », where several stitches combine in one visual unit. Clusters, like dc3tog, could have been a good idea, but they are notorious yarn eaters, and I had a very limited amount of yarn. So instead, I turned to shells.
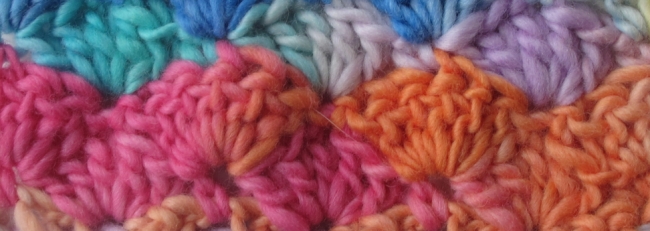
To me, this felt much more like a stitch pattern that could represent the yarn’s personality. The colours in the yarn formed « splashes » in the fabric and the visual impact was there.
However, these shells felt a bit dense and heavy. This was further underlined by the slight irregularities in the yarn, typical for a handspun single. At some spots, the yarn was quite thick, and the shells were just too dense.
I decided to try a shell variation in which I kept the general shape of the shell but lightened it up by replacing a couple of dc’s with chain spaces.
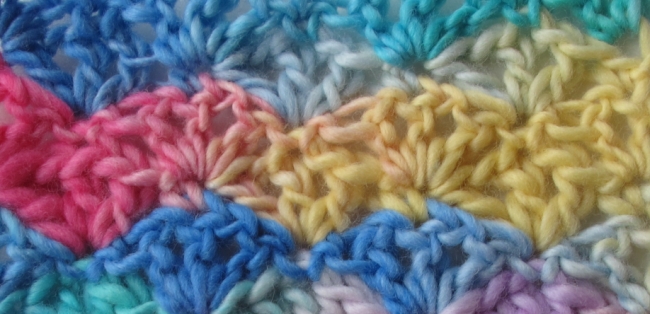
This was where it clicked for me. The shell shape was still there, but with less dc’s and a couple of chain spaces, the result was lighter and airier. The fabric was also softer with better drape.
Now I had decided on my stitch pattern. The next step was to determine what I could do with this stitch pattern, my general project idea, and the yarn on hand.
I carefully ripped out the first swatch and promptly made a new one.
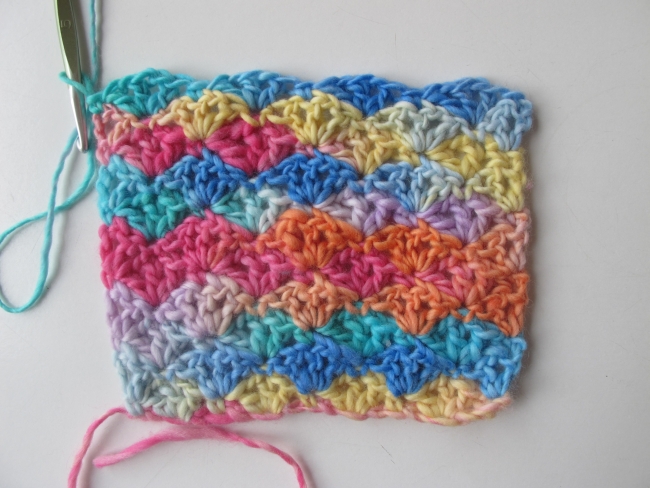
This is what I call the « master swatch ». I make one of these for any design project. Normally, the master swatch is much bigger than this one, especially if the end project is a garment, where fit and exact proportions are very important. But for a something-to-wear-around-my-neck, this was sufficient. The master swatch tells me a lot of things about the possibilities I have.
Here, the swatch measured 11 x 13 cm = 143 cm2. (I’m giving only the metric measurements here, but the principles are exactly the same whatever system you use – you need to know surface and weight).
The swatch weighed 9 g.
I knew that I had a total amount of yarn weighing 72 g.
This means I could make a project, using the same yarn, hook and stitch pattern, measuring approximately (143/9) x 72 = 1,144 cm2.
This might sound like a lot, but it would limit my options quite a bit. If I wanted to make, for, example a 30-cm-wide scarf, the maximum length was 1144/30 = 39 cm. That’s not a scarf, it’s a square!
But if I wanted something to wear rather closely around my neck, with an overlap for buttoning (wrapping and knotting were out of the question because of the limited quantity), it would need to be about 50 cm long.
That means the width could be up to 1,144/50 = 22.9 cm, which seemed like a decent height that would even allow for some « scrunch » between the collarbone and the chin.
Also, when deciding to button the cowl (because it looked like it would become a cowl), I needed to think about how to handle the buttonholes. My idea was to try to incorporate them into the stitch pattern; for example, by leaving out the center dc in some shells. Both for this reason and because the scalloped top edge of the swatch looked pretty, I decided to crochet the cowl from one end to the other so that the shells would lie on their sides. The starting edge (at the bottom of the swatch), which wasn’t particularly attractive, would be hidden by the overlap for the buttonholes.
Back to the swatch, to see how these measurements could translate into the stitch pattern. I needed to measure in the middle of my little swatch and to be aware that my measurements might not be completely accurate (a larger swatch in which you can measure well away from the edges, will always give a more precise result). However, if a cowl comes out a little smaller or a little larger is not a problem, as long as I have enough yarn to finish it.
My measurements showed that 2 shells = approx 6.5 cm wide. So 1 shell = 6.5/2 = 3.25 cm. How many shells would fit on a 22.9 cm wide row? 22.9/3.25 = 7.05. This is really close to a whole number, but to complete my process, I calculated the height of the cowl worked with this number of shells:
7 x 3.25 = 22.75 cm. Nice!
So up to this point things seemed to work quite smoothly.
But the story continues…
See you soon!
