
In the news
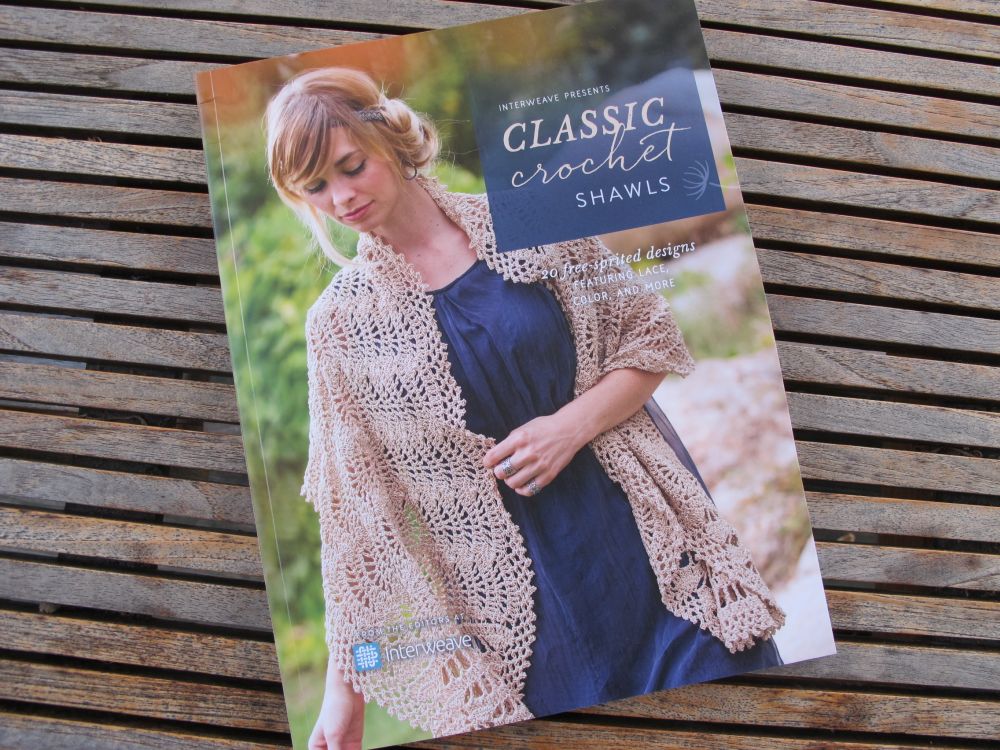

Interweave recently published the book Classic Crochet Shawls. I’m very happy (and a bit proud) to have one of my most popular patterns, the Buttercream Shawl, featured in this book.
There are lots of other interesting patterns as well – make sure to check out the book!

If you follow me on social media, you might have seen lots of crocheted squares in my pictures. These are squares I have collected for a yarnbombing project in Lyon in September. Many thanks to all those who have sent me their squares!
Above, a picture from our first gathering to assemble the squares, which took place quite recently. We need a couple more – there are almost 450 squares of various sizes and colours to be assembled. I’ll make sure to show pictures of the finished project!
Crocheted mini cables
Let’s continue to explore post stitches with crocheted cables! This time, I will discuss mini cables worked over 2 stitches, to show you several tips and tricks before launching into larger cables.
Most frequently, crocheted cables are made with post stitches worked on a background of sc. In most cases, only front post stitches are used, worked on right side rows. Wrong side rows are simple rows of sc.
To illustrate how this works, let’s make a swatch!
Ch 18 + 1 = 19.
Row 1 (RS): 1 hdc in 2nd st from the hook, 1 hdc in each ch to end of row.
There are 18 hdc.
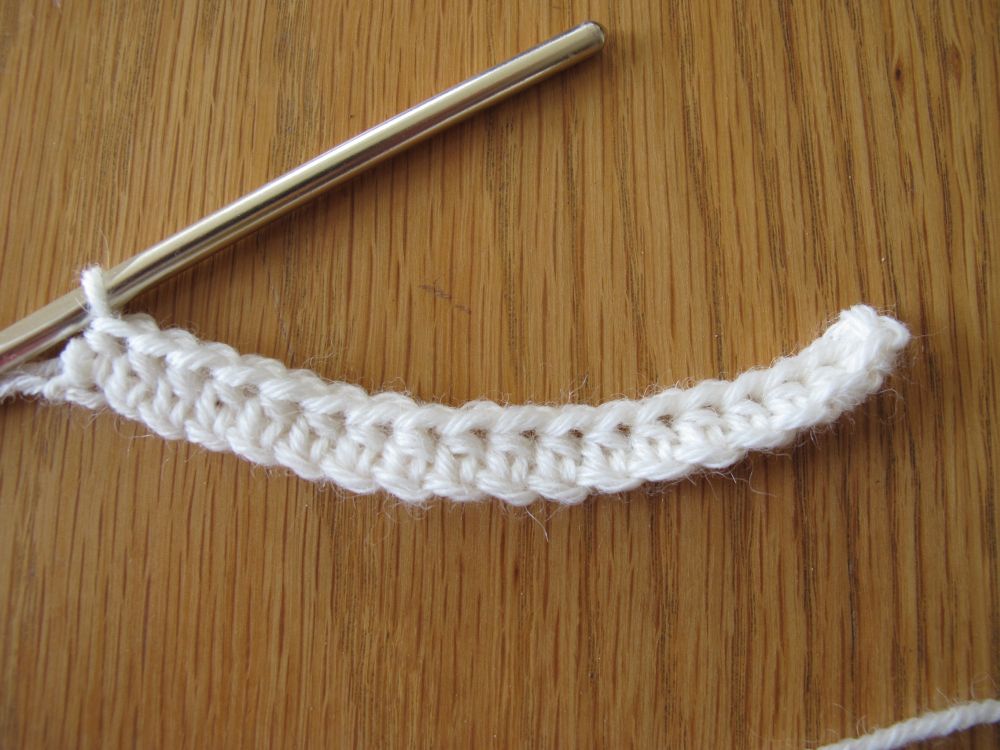

Even if our background is going to be all sc, our first row is a row of hdc. It will be much easier to work the first post stitches around hdc’s rather than around sc’s.
Row 2: Ch 1 (do not count as a st), 1 sc in each st to end of row.
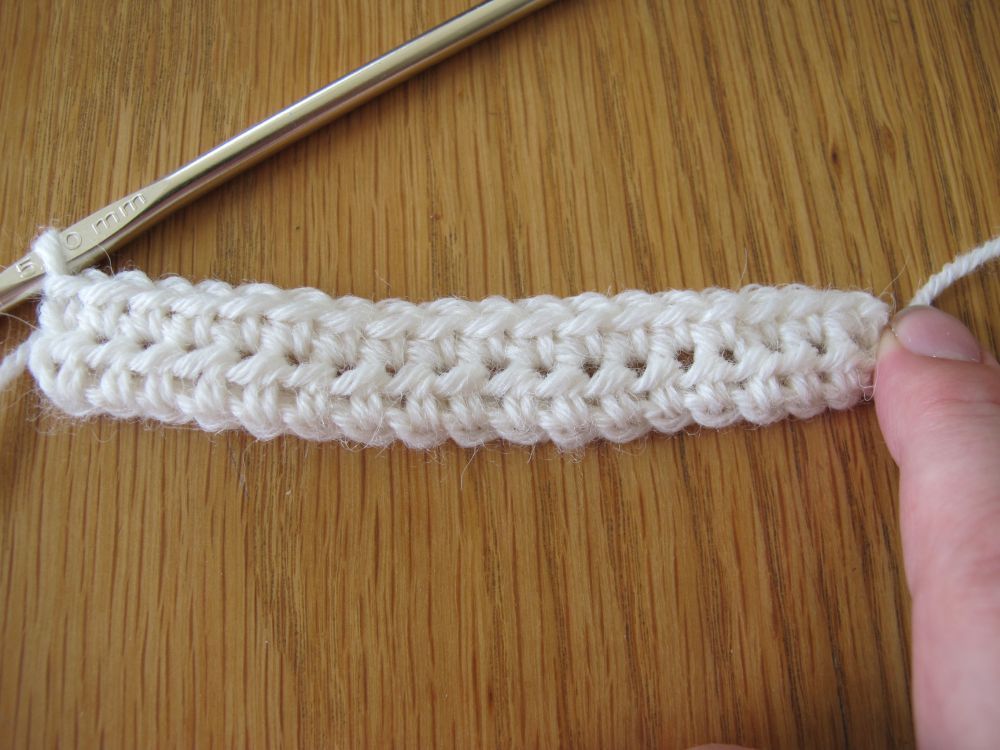
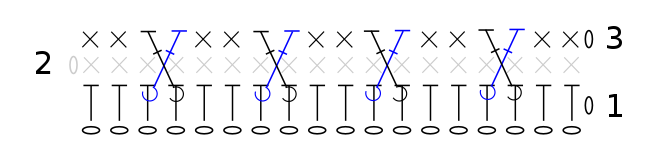
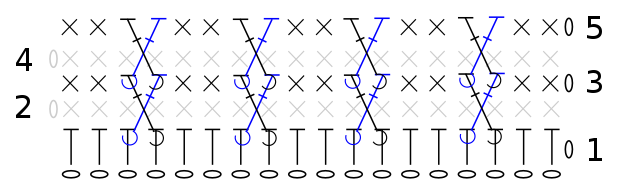
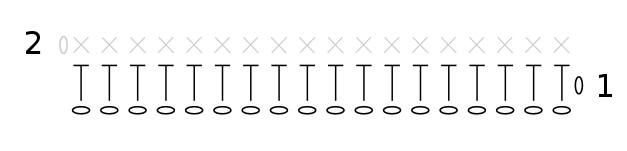 Nothing particular so far, except perhaps the colour of the sc’s in row 2 in the chart. Row 2 is worked entirely in sc’s, as will be all even-numbered, wrong-side rows. I’ve decided to show these stitches in a light grey, to try to make the finished chart clearer.
Let’s cable this up a bit!
Row 3: Ch 1 (do not count as a st), 1 sc in each of the first 2 sts, *skip 3 sts in row 1, 1 FPdc in next st in row 1, 1 FPdc in previous st in row 1, skip 2 sts in row 2, 1 sc in each of next 2 sts; repeat from * to end of row.
Let’s look at this row step by step. When working this first row of post stitches it is very important to clearly identify the stitches already made and correctly place the new stitches.
When you start the row it is not that easy to know where to place the FPdc’s which will form the first mini cable. I suggest counting the stitches in row 1 and looking closely at the chart. The chart shows you that the first mini cable is worked around stitches 3 and 4 in row 1.

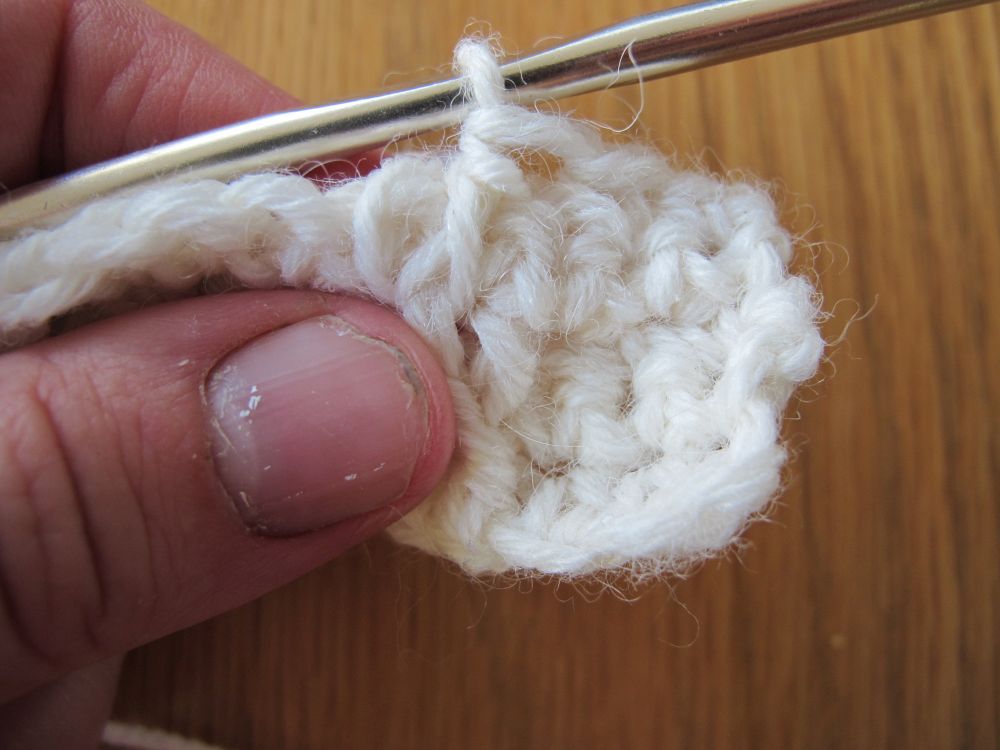
The first FPdc is worked around stitch no 4 in row 1
The second FPdc is worked around stitch no 3 in row 1, which is the stitch just to the right.
In my chart, some stitches are shown in blue. These post stitches will go under other post stitches in the finished cable.
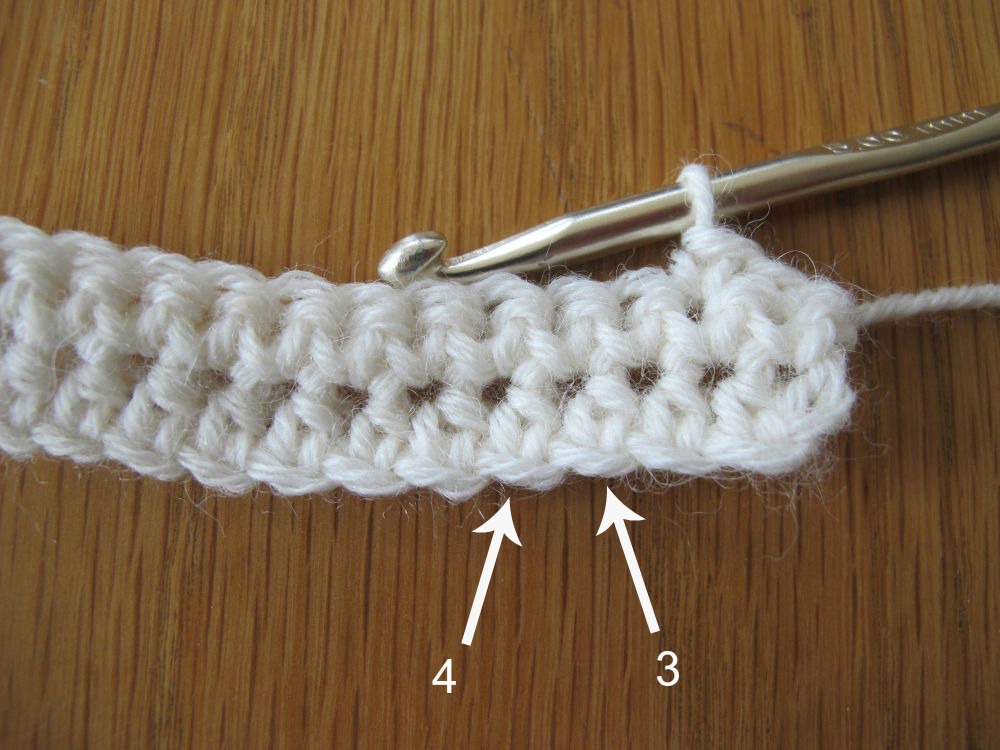
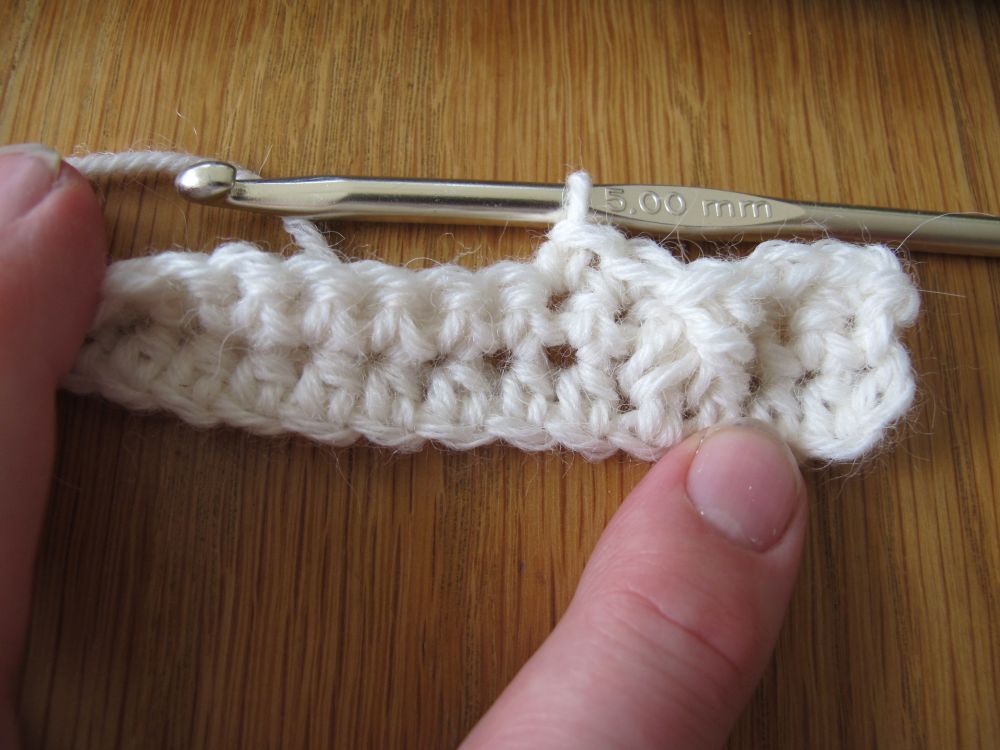
Our next challenge is to correctly place the 2 sc’s that will separate this mini cable from the next one. To do so, I suggest you tilt your work towards you so you can see the top of row 2.

The first 2 stitches in row 2 are « hidden » by the stitches that were already worked into them. In the picture above, these « used up » stitches are shown by the black arrows. Continuing along the row, you see very clearly the tops of the stitches where no stitch has yet been worked in row 3. The white arrow shows the first of these « available » stitches. To skip 2 stitches, count the visible tops of stitches and work the next sc in the 3rd one.
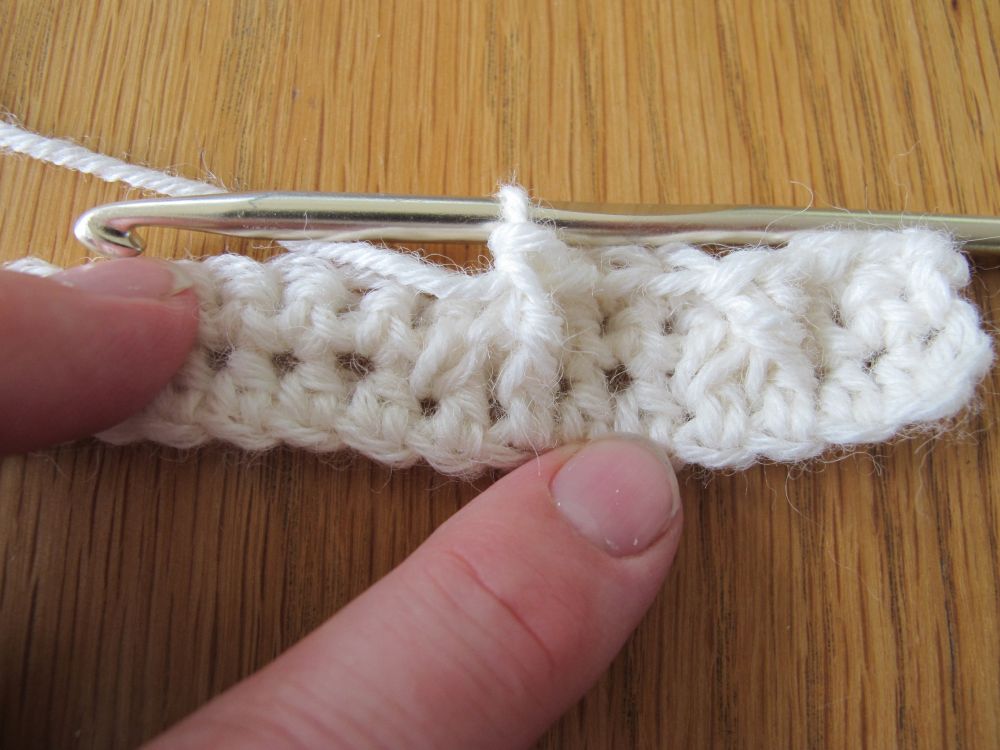
To place the next mini cable correctly, simply look at the previous one. It is easy to spot the two stitches in row 1 taken up by the first mini cable.
Skip 3 sts in row 1 and work the first FPdc in the 4th st.

The second FPdc of the mini cable is worked around the previous stitch.
Continue to apply these tips to complete the row.
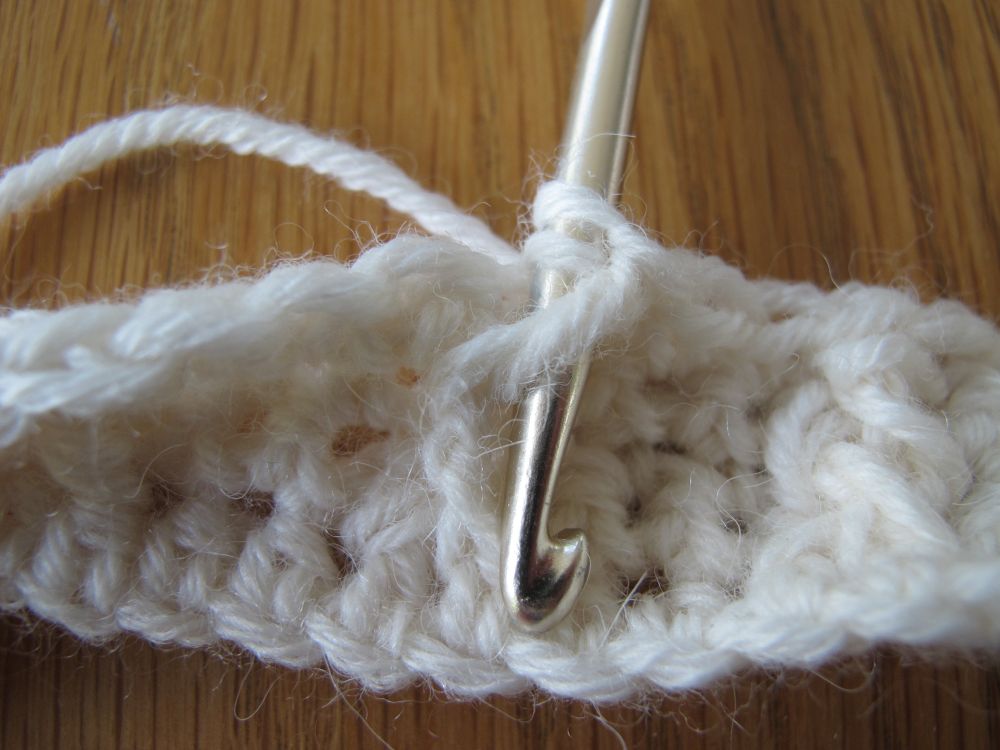
The next row (row 4) is yet another row of sc’s.

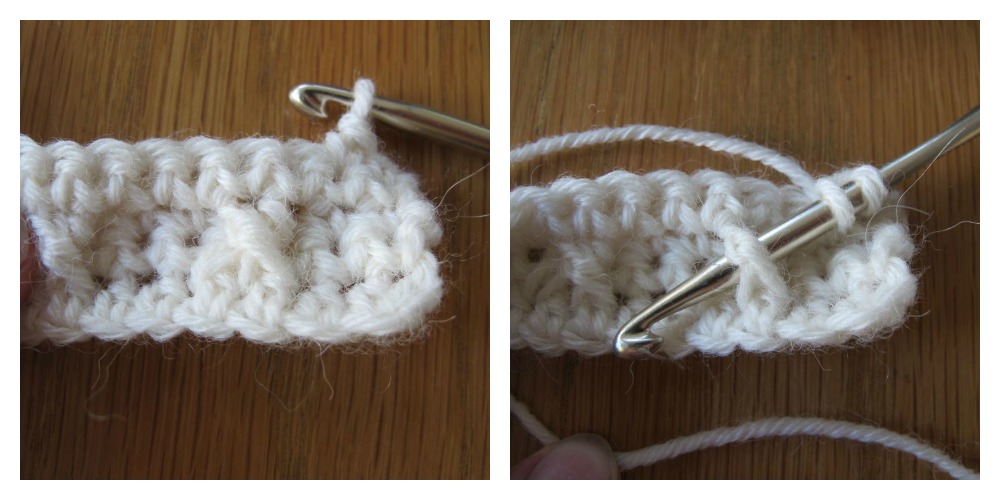
All you need to know is that you should not be tempted to insert your hook in the skipped stitches in row 2 (circled in the picture below), but they are quite clearly situated below the stitches in row 3.

Row 5: Ch 1 (do not count as a st), 1 sc in each of the first 2 sts, *skip 3 sts in row 3, 1 FPdc in the 2nd st in the next mini cable, 1 FPdc in the 1st st in the same mini cable, skip 2 sts in row 4, 1 sc in each of next 2 sts; repeat from * to end of row.
In this row (and in all following RS rows) it’s easier to spot the stitches where you should work your FPdc’s, since the cables build up vertically and always involve the same stitches.
When you have worked the first FPdc, you might need to push aside the stitch around which you made it to find the stitch where you should work your second FPdc.
Feel free to continue using the technique explained for row 3 to make sure that the sc’s between the cables are correctly placed.
Repeat rows 4 and 5 to work your swatch to the desired size.
These mini cables twist to the left. How can we make cables in the other direction?
Let’s look at this chart showing mini cables twisting to the right:
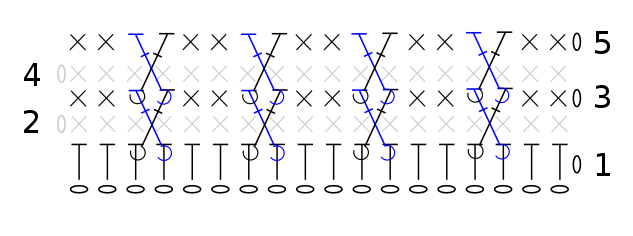
At first sight, it looks very similar to the previous chart. However, there is a very important difference: in this chart, for each mini cable, it’s the second FPdc that’s shown in blue and consequently is worked under the first FPdc.
This might seem very difficult the first time you try to do it, but there are a few tips and tricks to facilitate the maneuver.
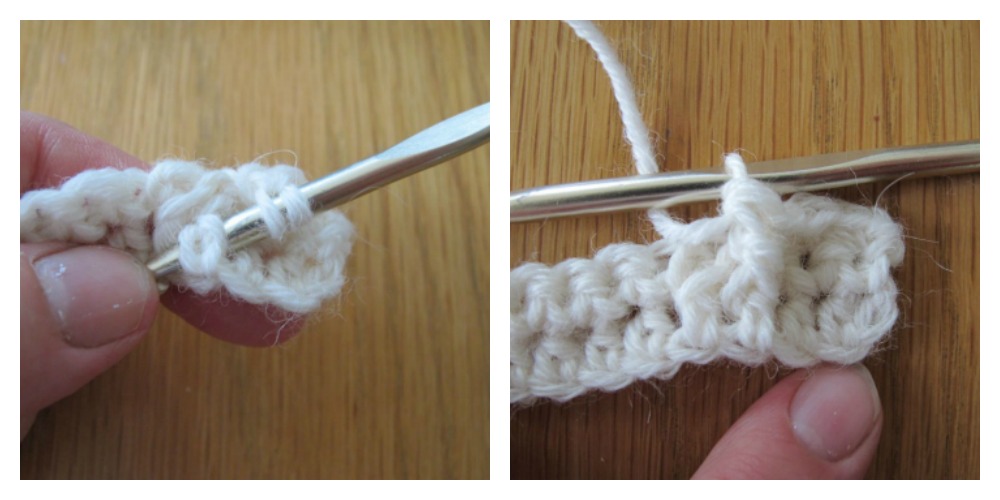
The first FPdc is made. I have prepared my second FPdc by making the first yarn over and inserting my hook under the first FPdc.
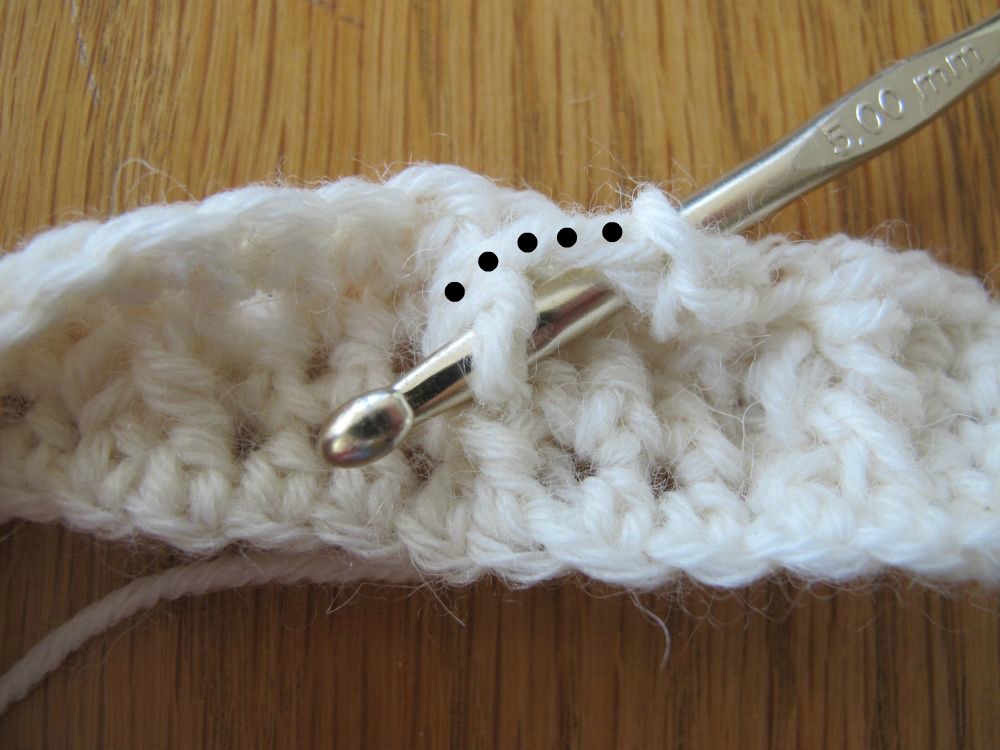
Here, I have found the stitch around which my second FPdc will be made, and inserted my hook under it. The first FPdc is emphasized with small black dots in the picture, for better visibility. Before completing my FPdc I’m going to catch the stitch (the one around which the second FPdc will be made) with my hook and pull it up under the first FPdc.
Feel free to use your left hand to pinch the dotted, first FPdc and pull it down!
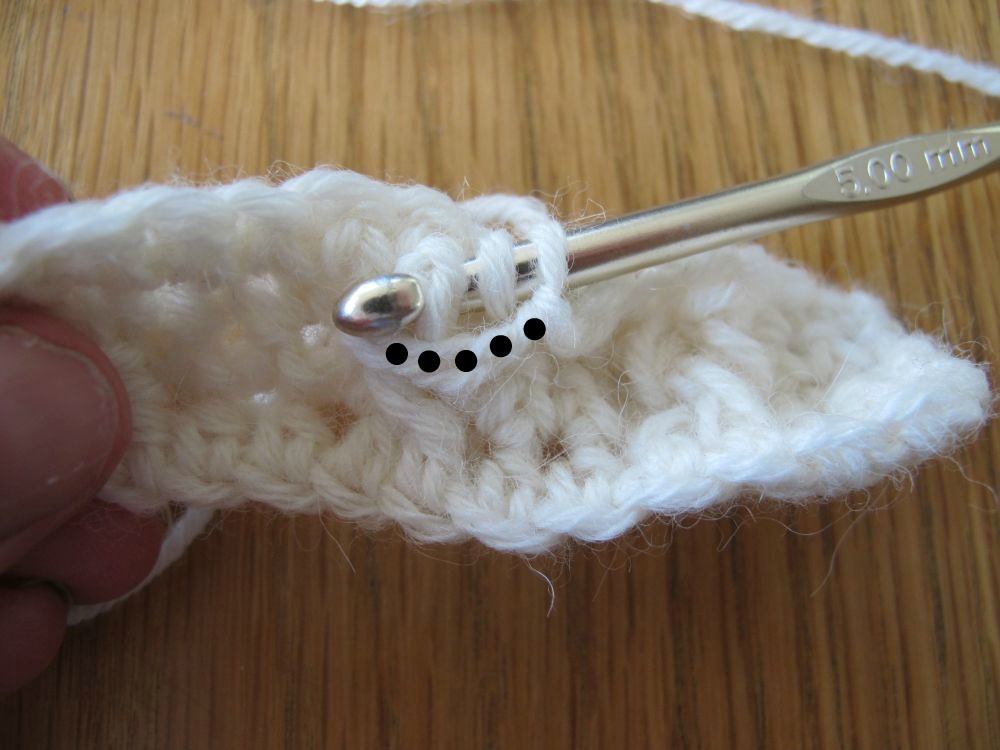
It looks as though I have three loops on my hook, but the one to the left (closest to the tip of the hook) is simply the stitch around which the second FPdc will be made. Yarn over and pull through this stitch.
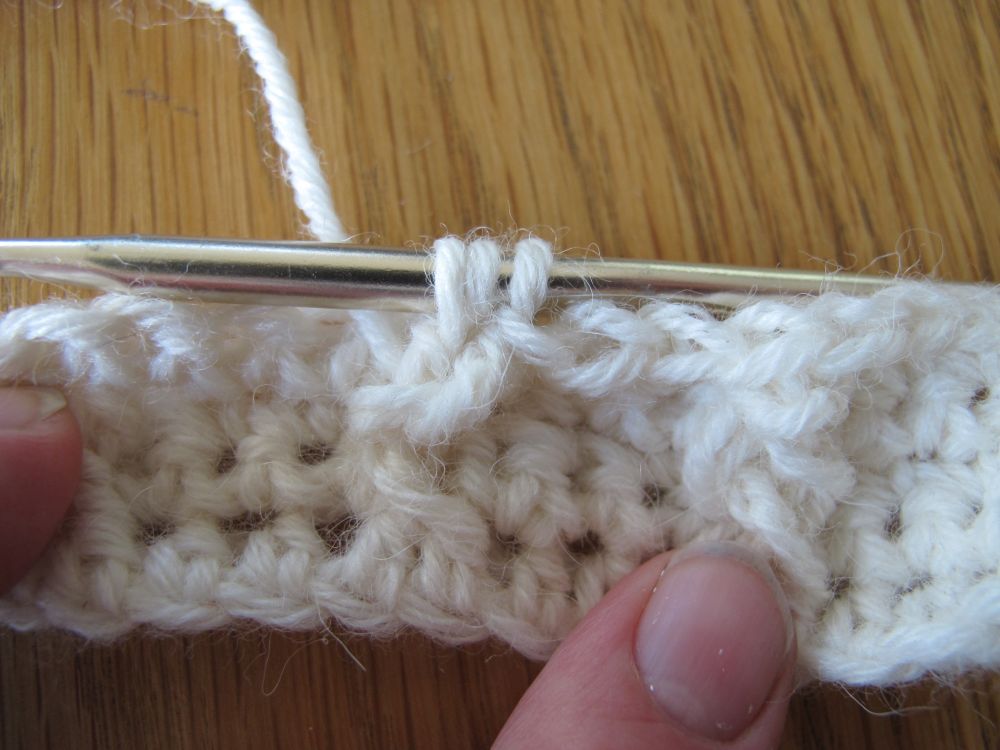
Now you can complete your stitch as usual!

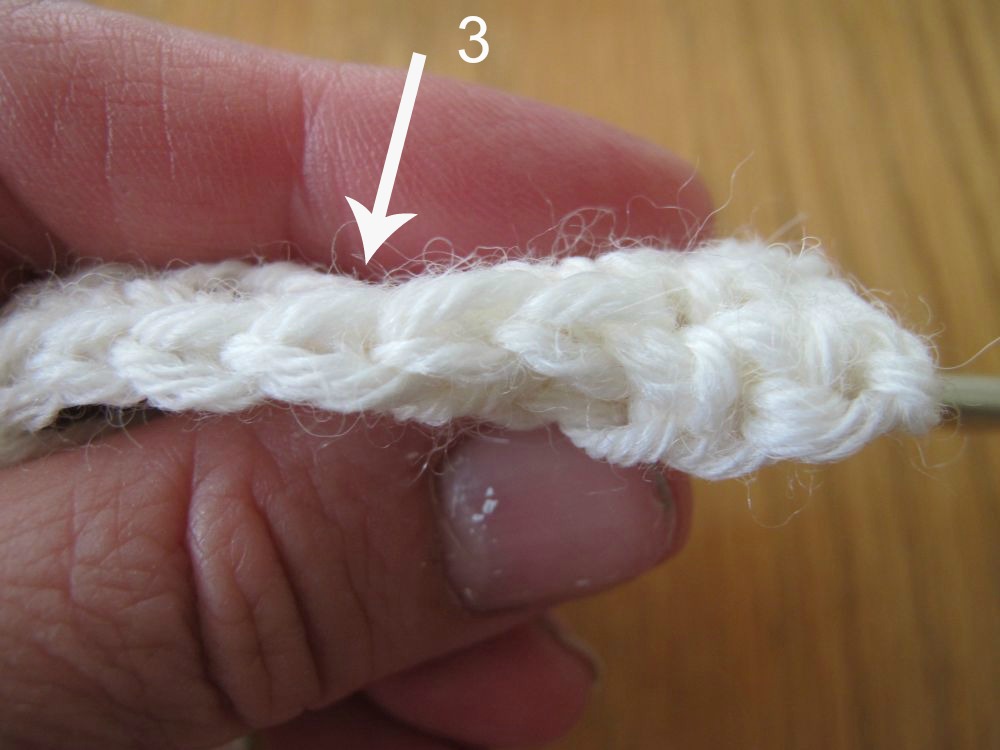
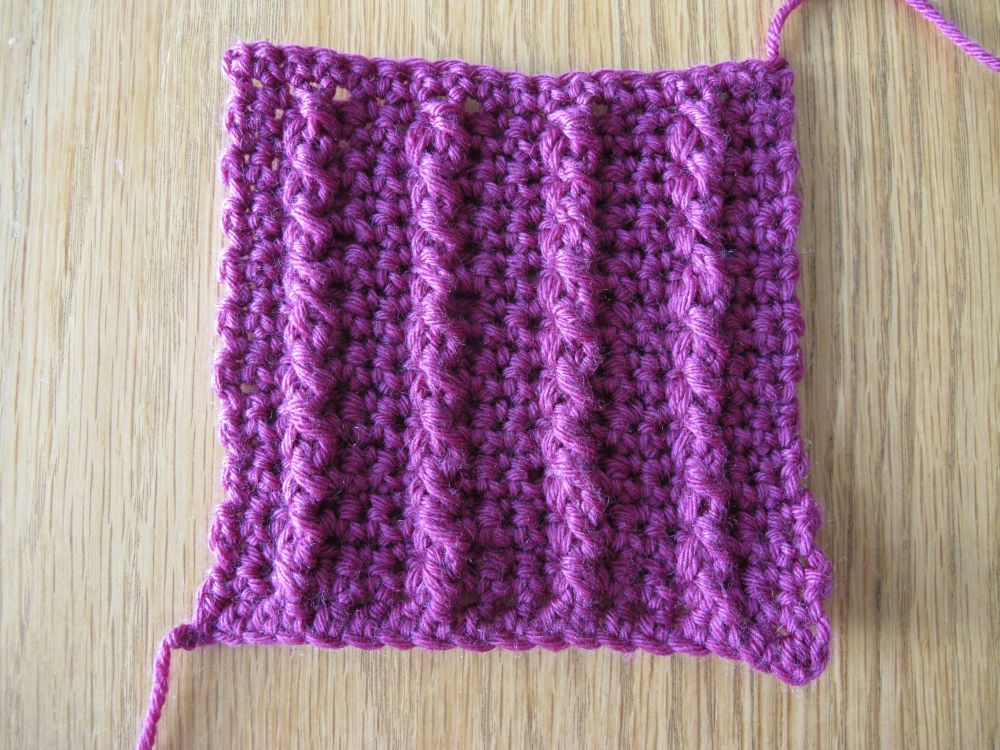
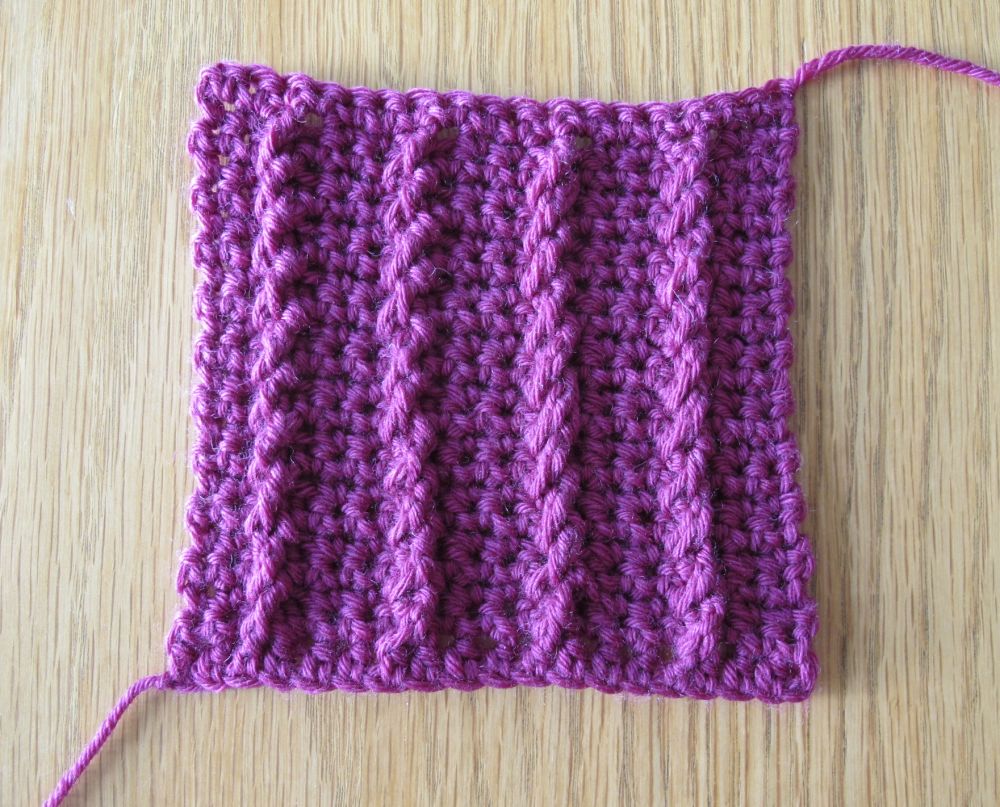
Here is a completed swatch with mini cable twisting to the right:
Both swatches side by side:

Next time we’ll make larger cables!
Please share your thoughts, comments, and ideas below.
See you soon,

Greetings. I’ve purchased quite a few of your crochet Shawl patterns. Do you have a site where you post corrections to older patterns?