News:
A new, very versatile pattern from EclatDuSoleil: A striped life.
In this pattern, EclatDuSoleil gives instructions for the narrowly striped center part of the shawl, as well as three different borders. Play with colour combinations and border options, and make a whole range of unique and different shawls!
More information in the shop.
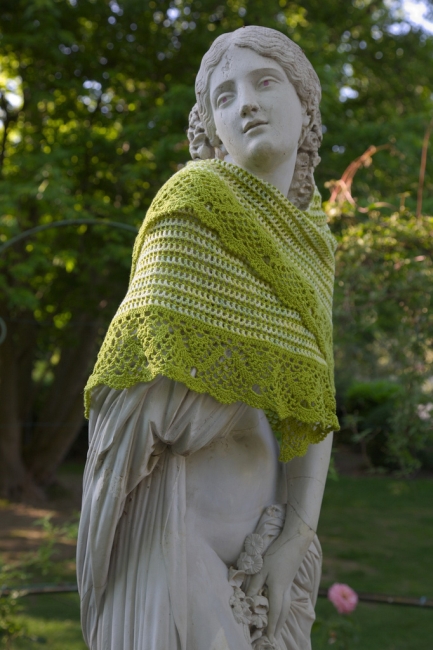
The stole Organic is a revised version of a pattern of mine that first appeared in the UK magazine Inside Crochet in 2010.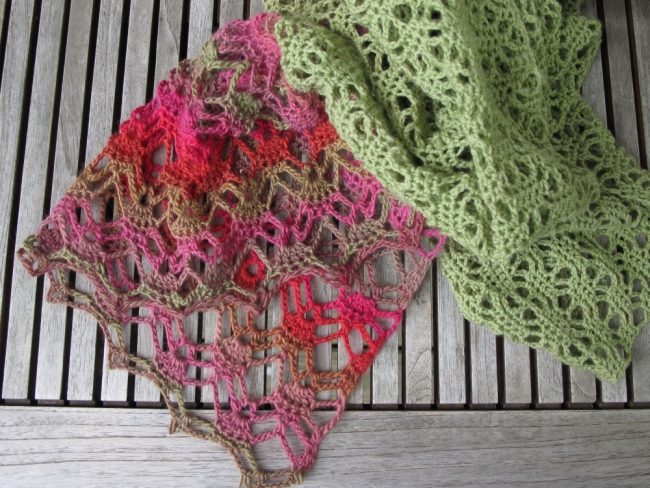
The new pattern is edited for US terminology (standard in my shop) and adapted to be worked in fingering weight merino and Mini Mochi. The pattern also includes tips for how to adapt it, should you choose to use an entirely different yarn.
More information in the shop!
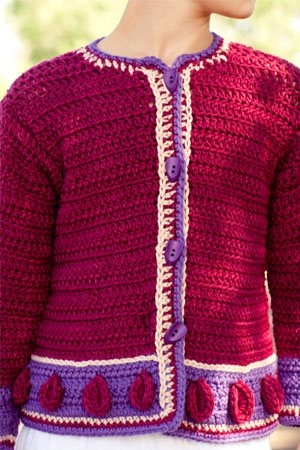
And finally, a new pattern by me, published in Interweave Crochet Fall 2012: Poppy, a child’s jacket.
Weaving in ends:
A simple topic, yes – but this is the question every single person who has ever taken a beginner’s crochet class with me has asked: How do you weave in the ends?
No doubt, many of the readers of this newsletter are seasoned crocheters who can weave in ends in their sleep. But others are less experienced – and this is a topic that is often neglected in crochet books. Also, as with almost everything else in crochet, you can weave in ends in many different ways. If your way is different from mine, please let me know!
First of all, if you can weave in your ends as you go, it’s a good idea. The technique was explained in the newsletter for January 2009.
But perhaps this is not a suitable technique for your project. Perhaps the stitch pattern is lacy, and the ends show. Perhaps you are working in narrow stripes, and crocheting over the ends deforms your project. Perhaps the yarn you’re using is very thick, or unsuitable for this method for some other reason.
So what do you do?
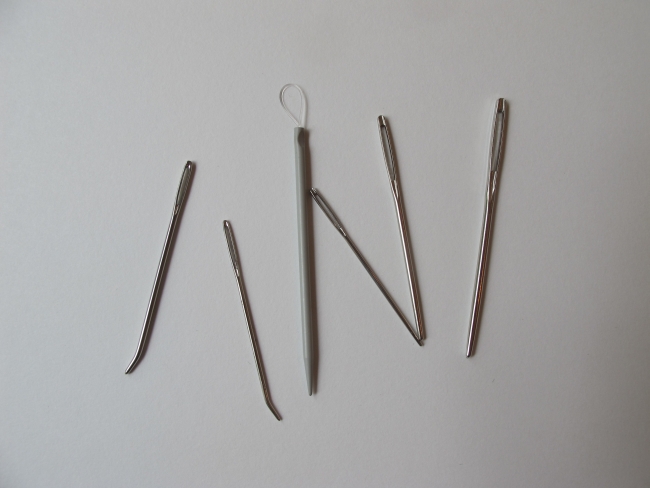
First make sure to have some relatively thick, blunt-ended needles, called yarn needles, on hand. It’s good to have a few sizes so you can pick the best one for the yarn you’re using.
Some people weave in their ends using their crochet hook. It’s true that this avoids using another tool, but I prefer a yarn needle. I think it’s more precise, which makes it easier to achieve a neat result.
Since you are going to thread your needle, don’t cut your yarn ends too short when fastening off. As a start, aim for a length somewhere around 20 cm (8″) to be able to work comfortably.
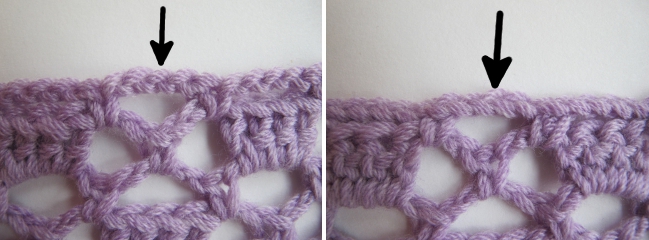
You are going to weave in your ends on the wrong side of your work (if there is one – some projects are reversible). To tell the right side from the wrong, one method is to check the top of the last row worked (if this is a right side row). If you can see the tops of the stitches, you are on the right side (to the right below). If you see mainly bumps at the top of your work, you are on the wrong side (to the left below).
However, the stitch pattern might have major elements that are turned in the other direction. In my swatch, I considered that the last row would be a wrong side row, and that the right side was the side where the dc groups were right side up. Thread a yarn needle with your yarn end – choose a needle that looks neither too thin nor too thick compared to your yarn. The yarn should go easily through the eye of the needle, but the needle shouldn’t be so thick that it distorts the stitches when it passes through them.
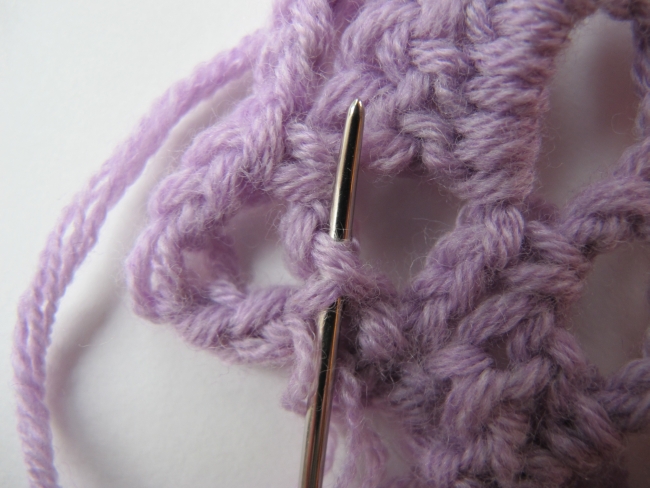
If your last stitch in the last row is a dc (it’s not unusual), look for the little bump at the outer side of the stitch, resulting from the yarnover in the dc. Secure the last loop in your work by passing your needle through this bump – if nothing else is indicated, always pass your needle under the yarn, not through it.
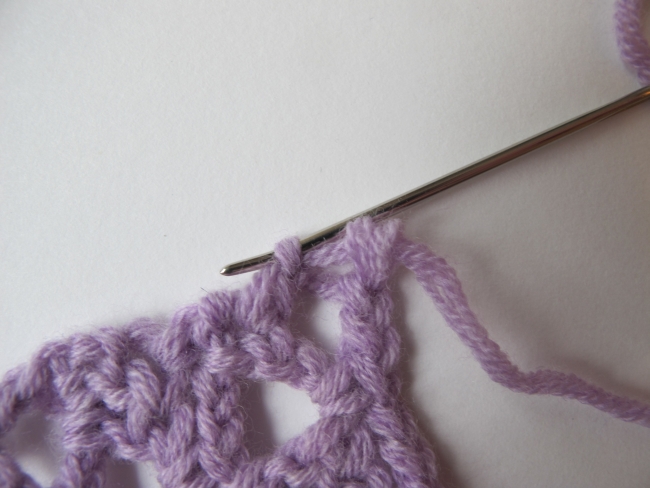
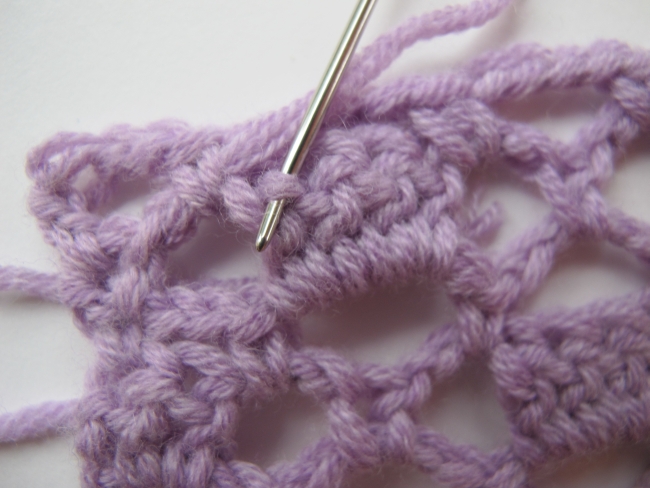
Turn over the work as needed to continue on the wrong side. If the last stitch in the last row is very tall, you might want to pass under one or two strands of yarn along the backside of the stitch. In my case, it’s a dc, so I’m already pretty close to the bottom of the stitch. I pass my needle through the bottom of the stitch, under the two « legs ».
The bottom of the stitches is a good place to hide your yarn ends. However, in my swatch, this stitch is isolated at the edge. I have to « travel » over a chain space to get to the closest dc group.
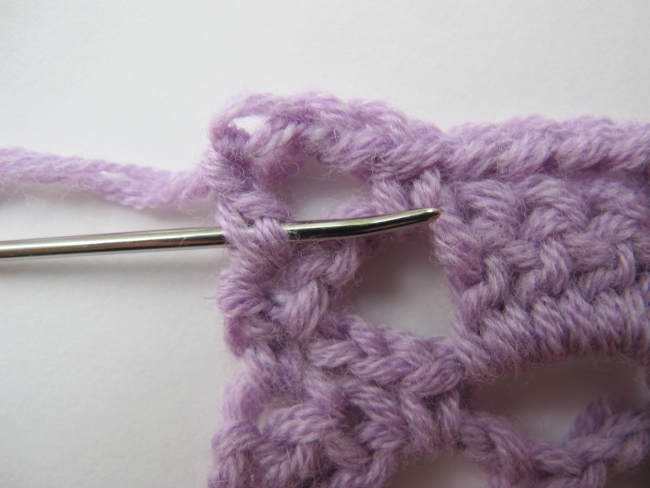
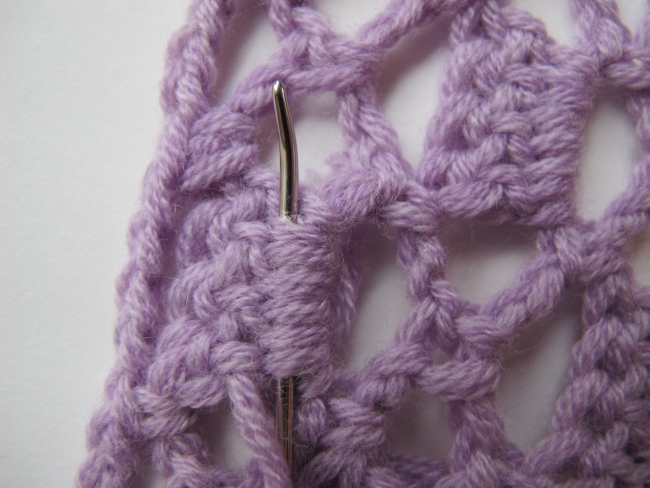
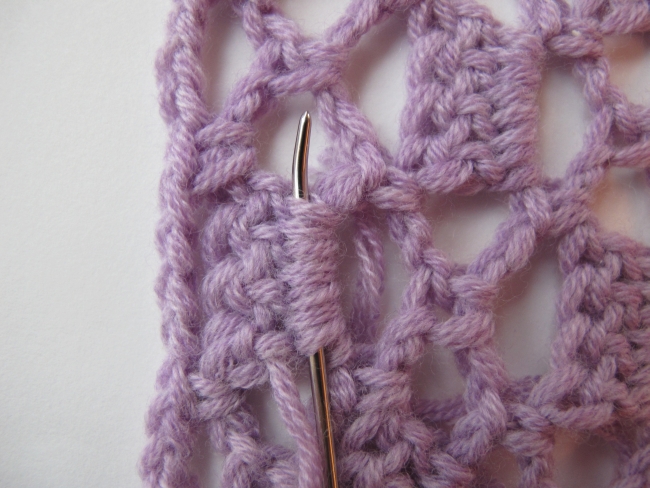
When I have to work in an end through a number of chains, I try to weave it in up and down along the chain arch. Here the chain arch is short, but sometimes you need to do this over a larger number of chains. Go down through one chain, up through the next, down through the next, up through the next etc.
After having passed through the bottom of a sc, I arrive at my dc group. However, I’m now at the top of the first stitch in the group, and I need to « travel » down to the convenient stitch bottoms. Now I look for the « bumps » at the back of the stitch, and pass through a couple of them (more if the stitch is taller).
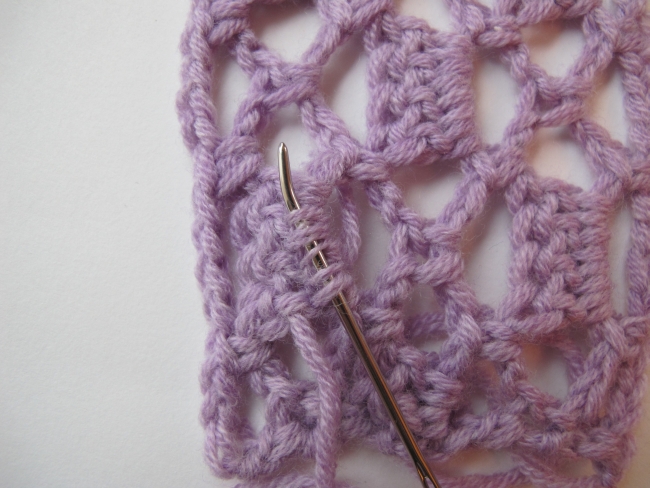
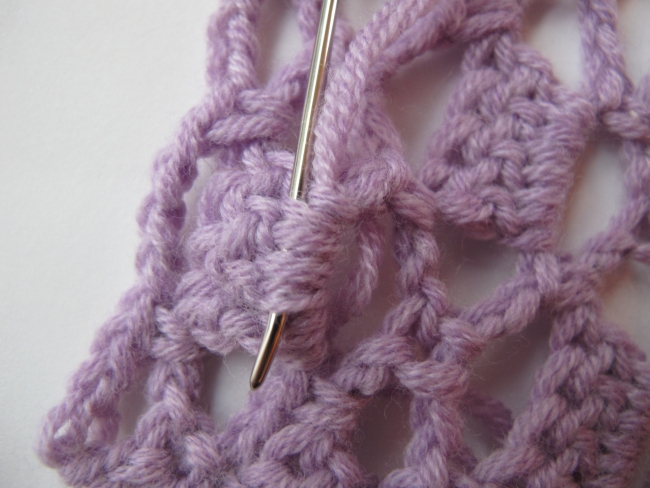
When I come down to the stitch bottoms, it’s smooth sailing. Please note though, that I’m planning to cut my yarn end at this spot. This is why I haven’t caught the last « leg » of the last stitch in the group. The cut end will be less likely to show on the right side if I cut it here, instead of at the very edge of the dc group.
When should you consider yourself done and cut your yarn? It depends a lot on the yarn you’re using. Generally, to weave in 2 – 3 cm (about an inch) of yarn is the strictest minimum, and I’d much rather go to 4 – 5 cm (2 inches). This way, if a small length of the end works its way out, your work still won’t unravel.
However, if your yarn is slippery, you might need to work in a longer length of the end and to secure the last bit with extra care. I use two different methods for this.The first way is to pass through the yarn of the last few stitches instead of under it.
Depending on the yarn, this might require changing to a sharp-tipped needle. The end will be caught in the individual plies of the yarn, and thus secured more safely.
Sometimes this is impractical or impossible to do. In this case I go back over my steps as follows:
Pass under the stitch bottoms, including the last leg in the last stitch in the group. Turn and pass over the last leg, and back under the yarn in the stitch bottoms.
Doing a U-turn with the yarn secures it in the work.
When your yarn end is well secured, it’s time to trim it. Cut your yarn end a few millimeters from the surface of your work. I prefer not to cut it too short, especially if the work clearly has a right and wrong side.
If your yarn is cotton, you might want to rub the cut end a little with your fingers to fluff it up – it will stay put more easily this way. If your work is reversible, you can give the fabric a small tug to conceal the yarn end inside the stitches (this works best if you have woven in the last bit of the end through several stitch bottoms).
If you think you have a better way of weaving in ends, please let me know!
See you soon!