Newsletter May 2013: Tunisian crochet in the roundNews:I am happy to announce that I now stock Alana Dakos’s new book, Botanical Knits:  This book contains 12 gorgeous knitting patterns by Alana Dakos: 3 cardigans, 1 sweater, 3 hats, coordinated mittens and socks, fingerless mittens, an infinity scarf and a shawl that is a new, larger version of Alana’s famous Cedar Leaf Shawlette.Please note that additional shipping charges apply to orders outside France.More information in the shop!Also, there are two new colours available in the fabulous laceweight wool/silk blend London:
  Discover all eight colours in the shop!Tunisian crochet in the roundAs you may realize, I have had Tunisian crochet on the brain lately. In the newsletter for March, I discussed how double-ended hooks could be used for a reversible result. This time, let’s have a look at how to use them for working in the round.First of all, I want to make clear that the way I’m starting this swatch – by working a row flat, then joining – is a personal preference. You might as well work in the round from the beginning, by joining your starting chain in the round before picking up the loops in the first forward pass. That way you will avoid the small « jog » in the first round. But with my method it will be easier to count your stitches and to make sure you don’t twist the starting chain. The choice is yours! The basic method for working Tunisian in the round that I show will work no matter how you choose to start your piece. Here, I show the method using two different colours. You can, of course, also work in a single colour – but I strongly recommend testing out at least a swatch in two colours first. It makes it so much easier to understand the technique.
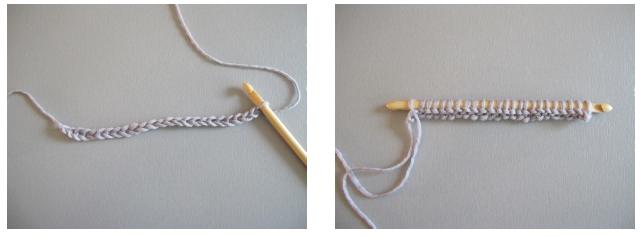 First, chain the desired number of stitches with col A. Skip the first loop from the hook and pick up a loop in each of the other loops. (If working immediately in the round, join before picking up stitches).
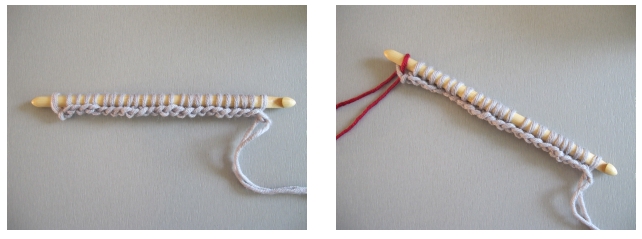 Flip over your hook to start the return pass at the other end of the hook. With col B, first pull through one loop and then continue working off the loops two by two.
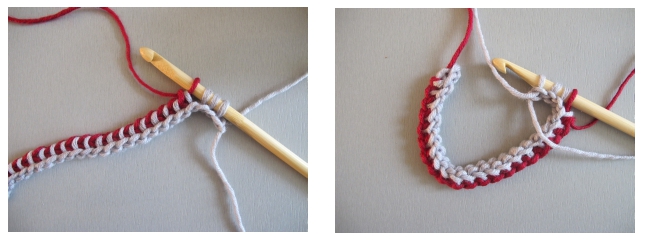 Stop working this return pass before the end, while a few loops in col A remain on the hook. Flip over the hook again, and form a ring with the almost completed first round, taking care not to twist it.
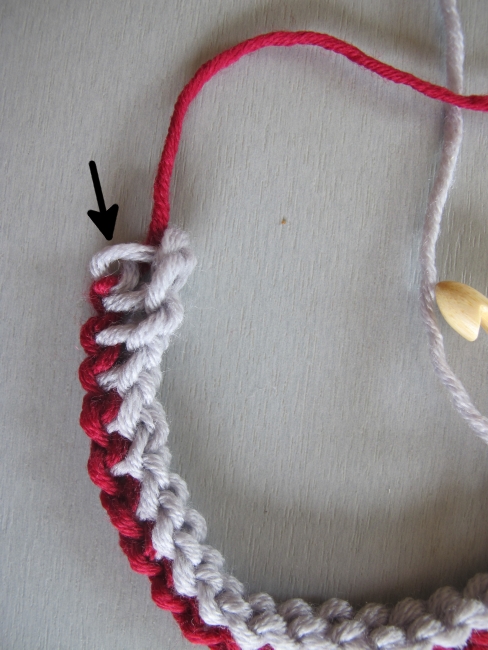 Take care to identify correctly the first vertical bar, where you should join in the round. It’s the one shown by the arrow in the picture above – it can have a tendency to « hide », since it isn’t pushed forward by col B as the other loops are. If necessary, count your stitches (including the ones in col A still on the hook) to make sure that you insert your hook in the correct bar.
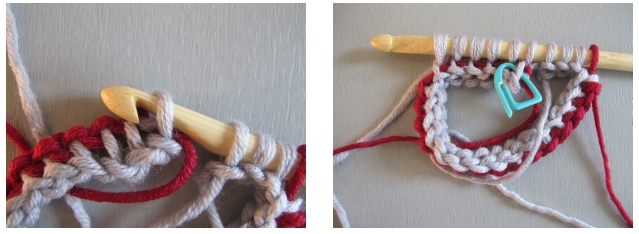 Join in the round by picking up a loop in the first vertical bar in the previous row. Continue picking up loops as long as you can comfortably do so (you can generally pick up roughly half the total number of stitches).Putting a stitch marker in the first stitch of the round makes it easy to identify the beginning of the round. The vertical bars will stack up in a line that is easy to identify, so you can move up the marker once in a while (and not necessarily on every row).You will work in a spiral, without joining the rounds.
 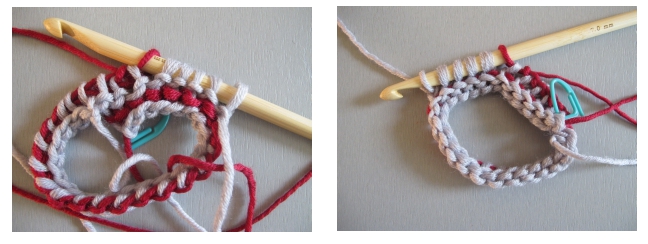 When the ring starts to stretch or your hook gets full of loops, flip over your work again and work off the loops two by two with colour B. When there are a couple of loops in colour A left, flip again and pick up more loops in colour A.As the tube starts forming, you will realize that you are working the return pass (in colour B) from the inside of the tube and the forward pass (in colour A) from the outside.
 This means that you will pick up your loops for the forward pass on the back of the return pass. The return pass in colour B will have a tendency to curl back on the loops and almost hide them. It will be less comfortable to work into them than in traditional, or even reversible, Tunisian crochet. Don’t hesitate to push the loop to the front of the work with your left thumb.
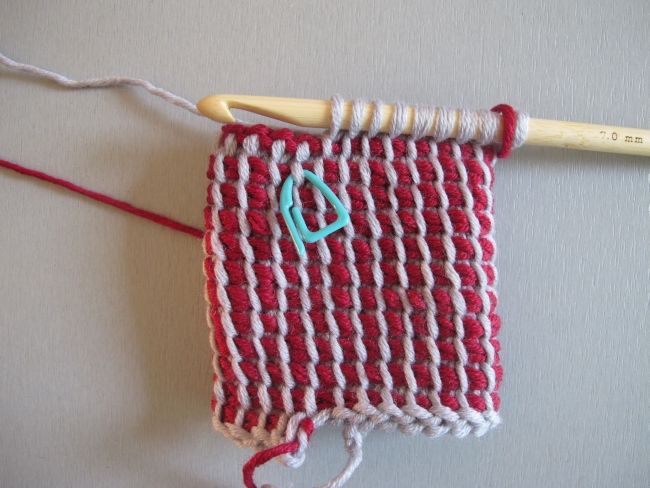 When the work has reached the height you’re aiming for, make sure to pick up the last loop in the last stitch of the row (the marker shows the first stitch in the row). Work the return pass in colour B, this time working off all loops in colour A.
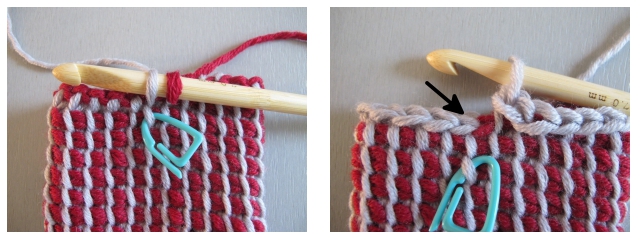 With colour A, work a slip stitch in every vertical bar around. At the end of the round, work an extra slip stitch in the first slip stitch in colour A (at the arrow) at the beginning of the round.
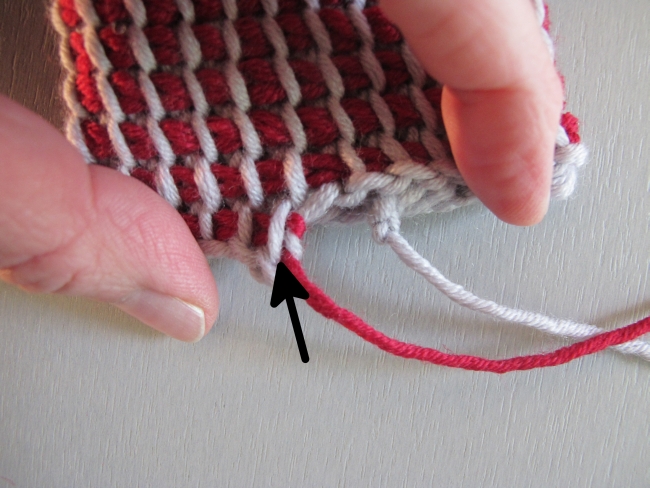 Now we need to close the gap at the bottom edge, created because we decided to work the first row flat. Weave in the end of colour A, starting by inserting your tapestry needle at the base of the first vertical bar in the first round (at the arrow). Continue weaving in the ends on the inside of the tube.
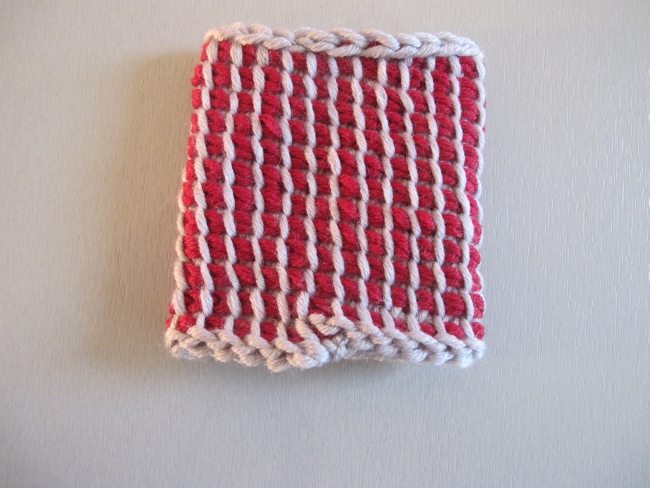 You can see the jog at the base of the work, especially in a worsted weight yarn like the one I used. It’s up to you to decide if you can live with that or if you want to try working in the round from the beginning.
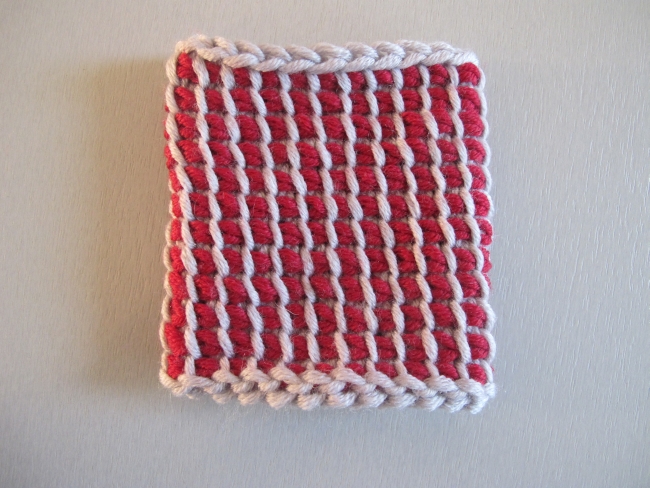 So what do you want to make? A phone case, a bag, a hat? Now you know how to work Tunisian crochet in the round!
See you soon!