
New pattern:
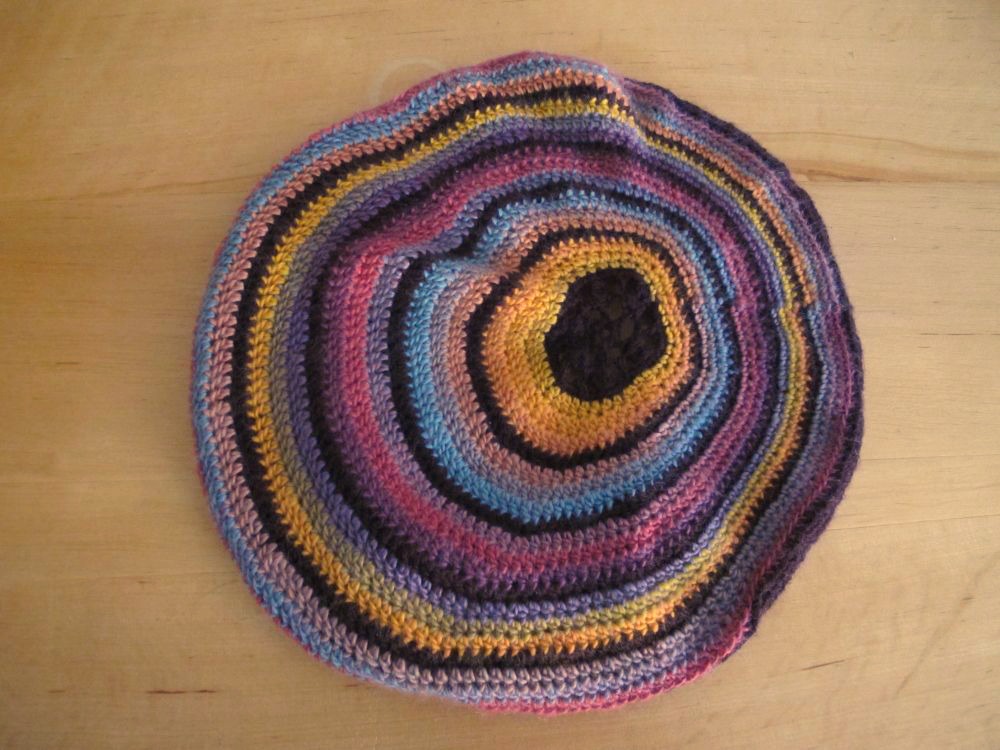
Have fun crocheting my colourful beret Excentrique!

Excentrique’s construction is innovative but easy to understand. You will work in the round to shape a round hat – but you will not start exactly in the middle.
The pattern for Excentrique is available on Ravelry. Enjoy!
Purchasing patterns:
My English webshop will no longer be updated, due to technical problems and the need to simplify both my business and your purchases. My patterns in English will, little by little, all be available on Ravelry, as well as those of most of the designers I work with.
In the meantime, you can still order via the webshop and pay via Paypal: select « bank wire » as your payment option at checkout. I will send you a Paypal invoice by email.
The newsletter will still be coming out in English on a monthly basis, of course!
Crochet ribbing:
Lately, I have been thinking about different kinds of ribbing. Ribbing is so useful, and can also be very aesthetically pleasing. If you are a crocheter, you need to know how to make ribbing!
When I started looking for ideas about ribbing, both in my own head and on the Internet, I thought that I would include decorative ribbing made with post stitches in this article. However, I quickly realised that this type of ribbing was a topic in itself. I will get back to it later, but for now, I want to concentrate on the type of elastic ribbing that is most often worked through one loop only.
The first type of ribbing I ever encountered was single crochet worked through the back loop only (blo). Let’s see how to make it.
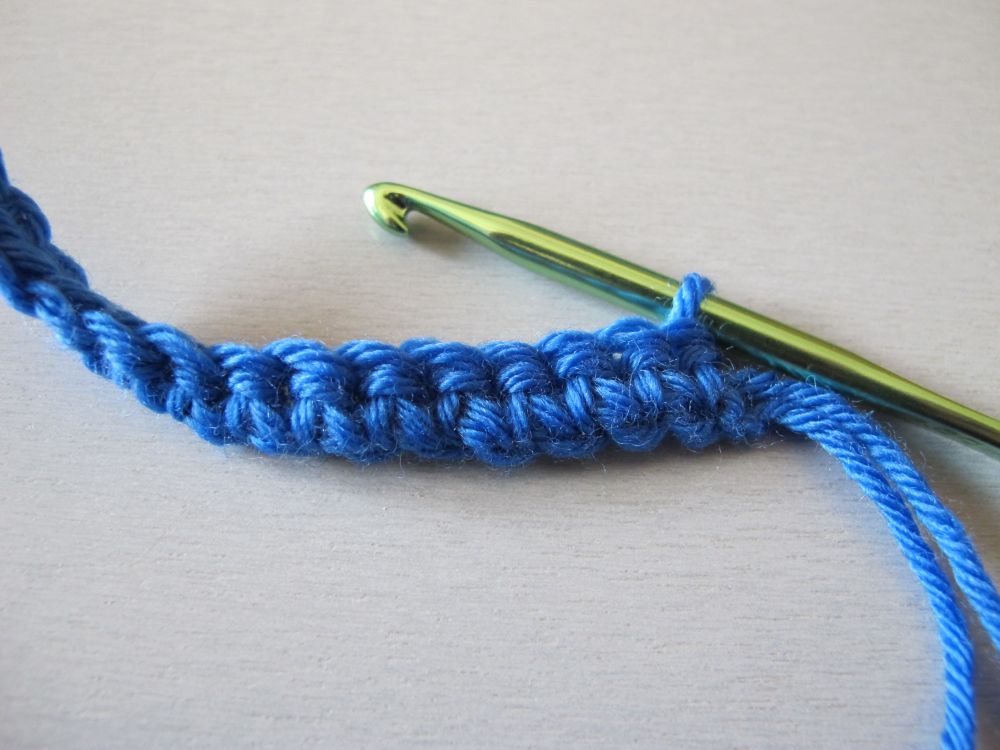
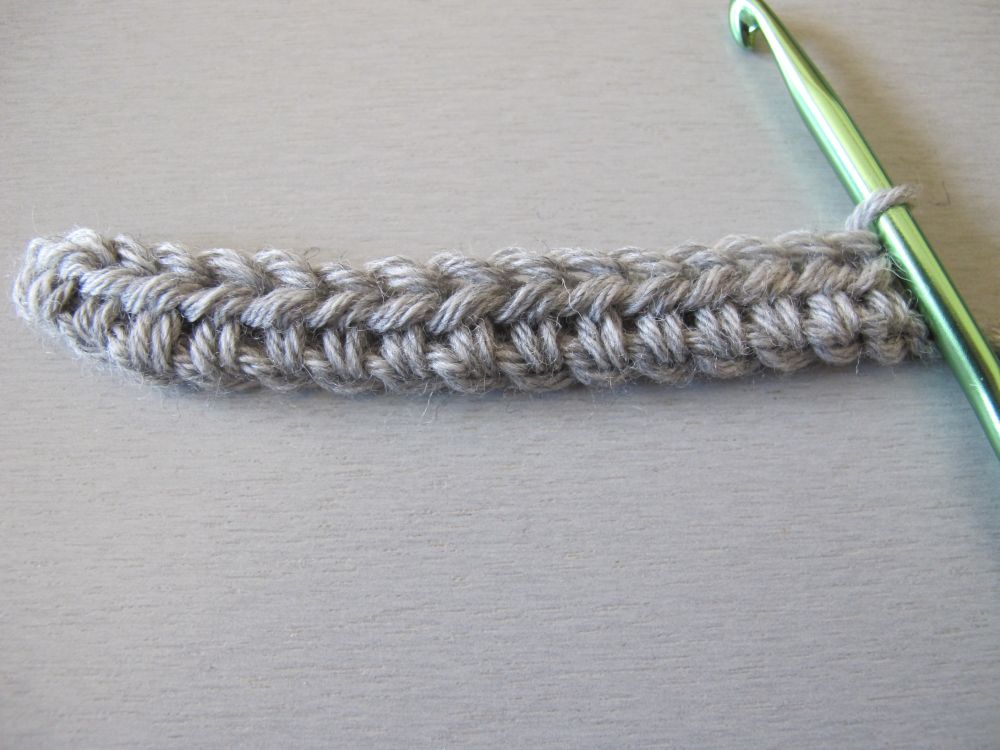
First, work a base row in sc and turn.
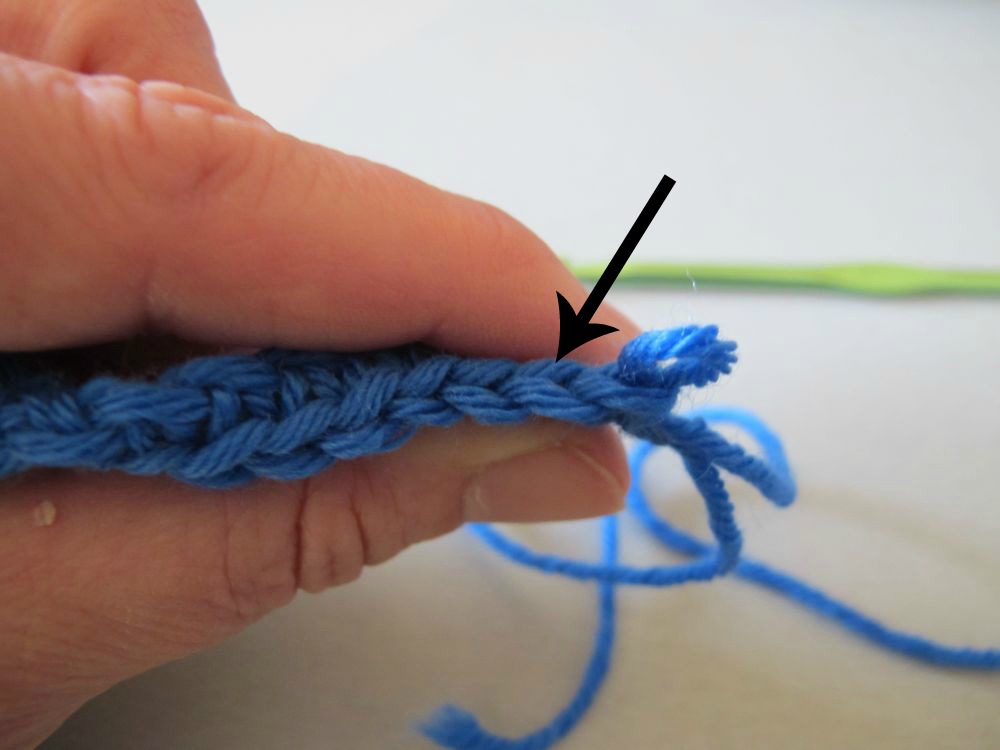
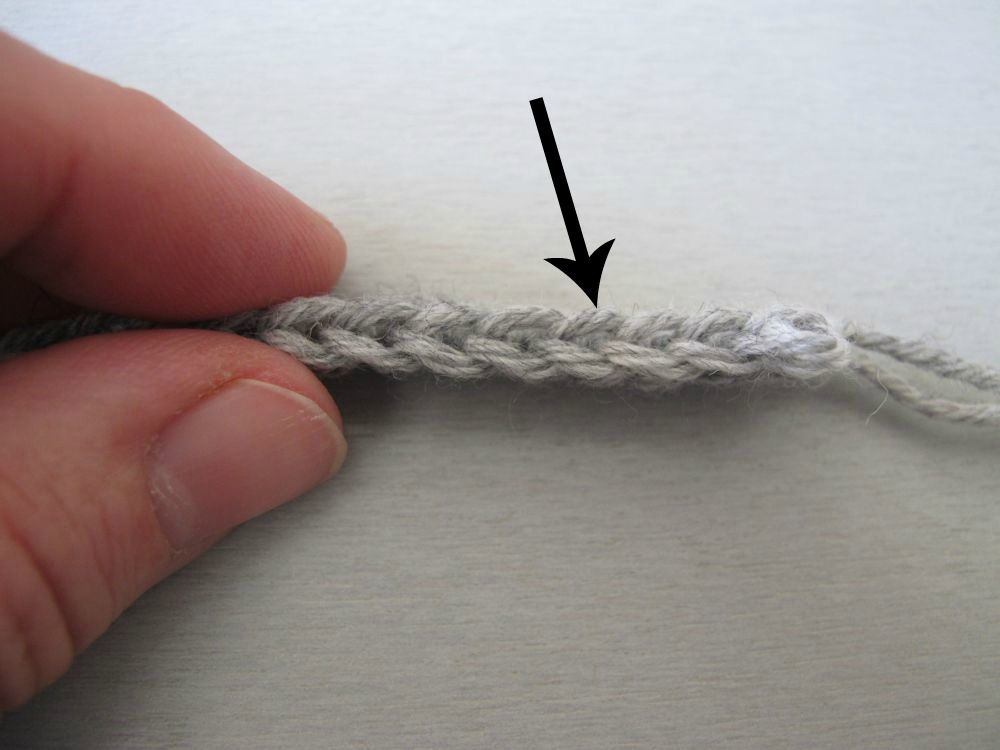
Tilt the row towards you so you can see the top of the stitches. The loop at the arrow is the back loop. Back loop and front loop are always designated as seen from the crocheter’s perspective. The front loop is the one closest to you, and the back loop is the one furthest from you.
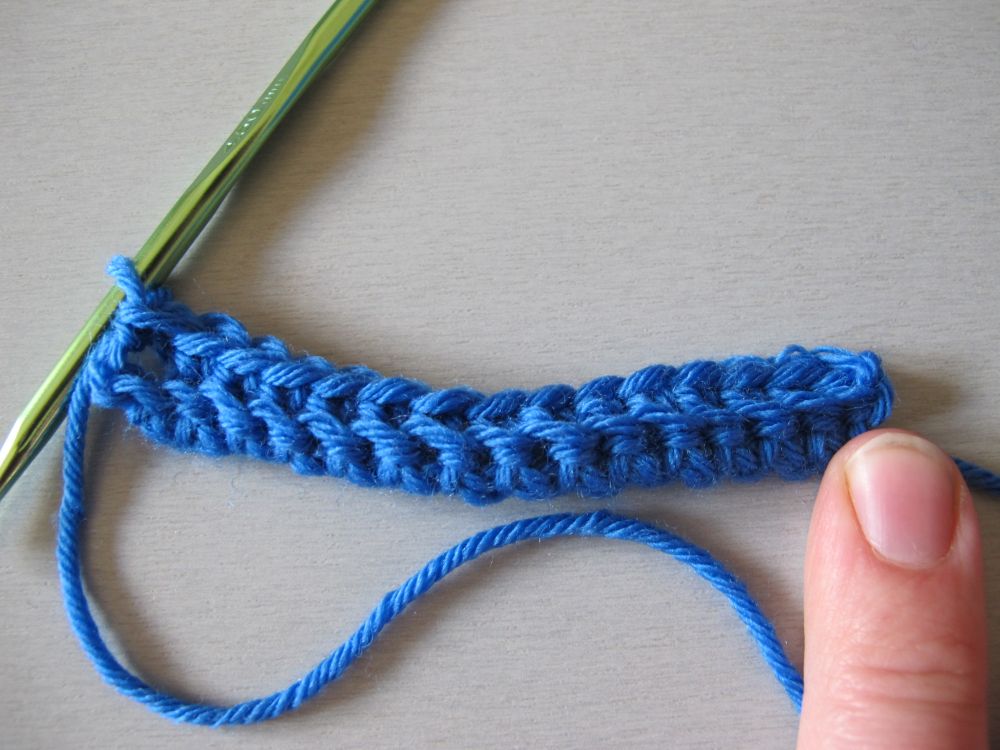
Ch 1 (do not count as a st) and work a row of sc blo (= single crochet in the back loop only). Repeat this row to the desired length.
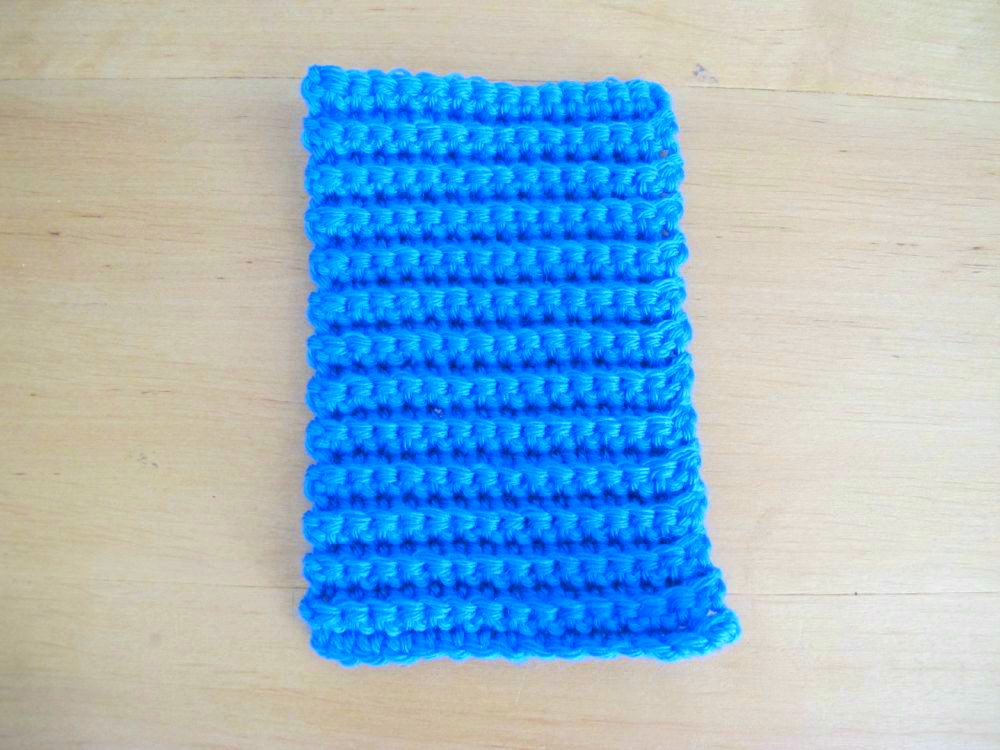
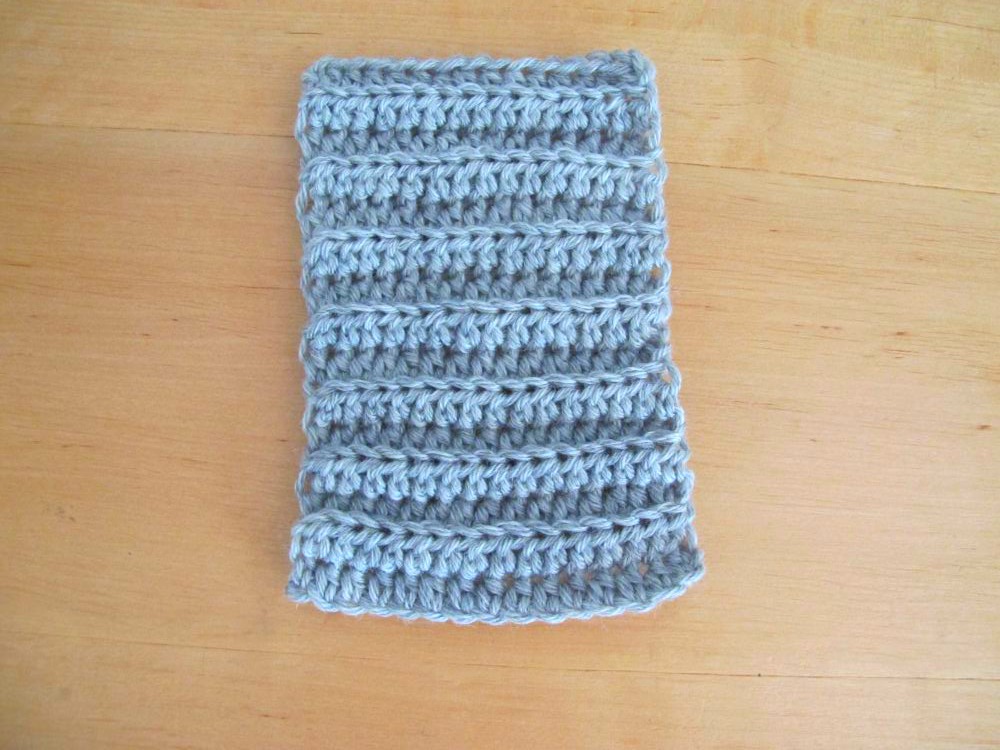
This is how the finished ribbing looks. It’s a rather heavily textured fabric, with lots of elasticity.
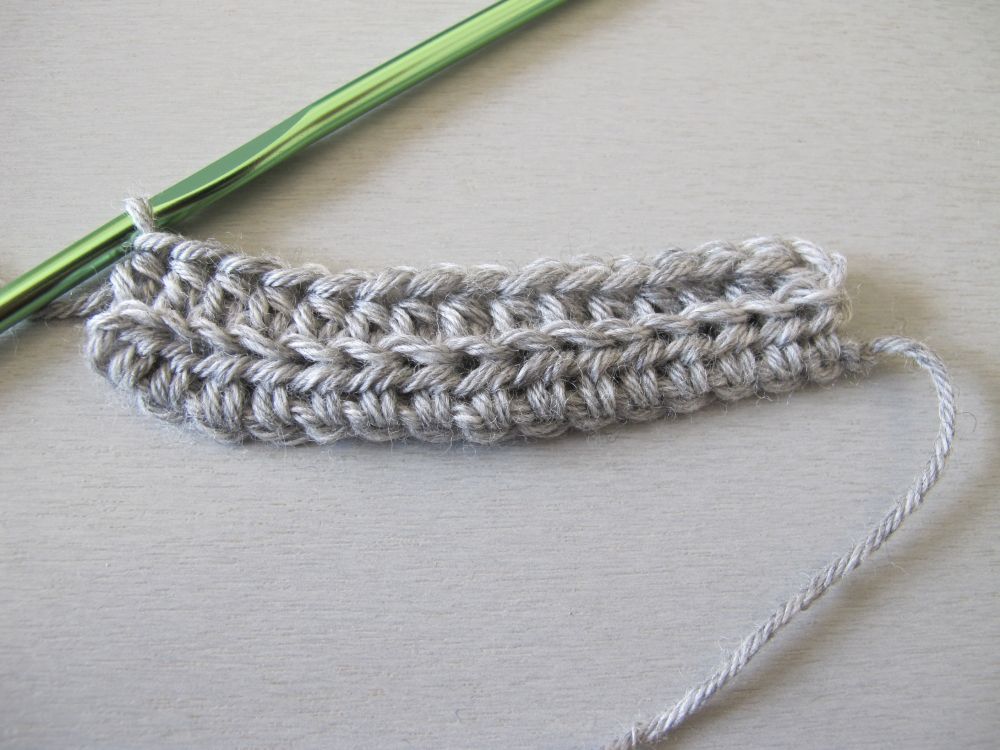
Let’s use half double crochet instead of single crochet. Because of the construction of the hdc stitch, we need to be careful when we select the loop we work into. As previously, work a base row in hdc and turn.
It is easy to believe that the two loops you see when the row is lying flat are the front and back loop. However, to be able to correctly identify these loops, you need to tilt the work towards you so that you see the top of the stitches.
The true back loop of the hdc is the one at the arrow. You might need to tilt your work slightly towards you when crocheting to catch this loop.
Ch 1 (do not count as a st) and work hdc blo to end of row. Repeat this row to the desired length.
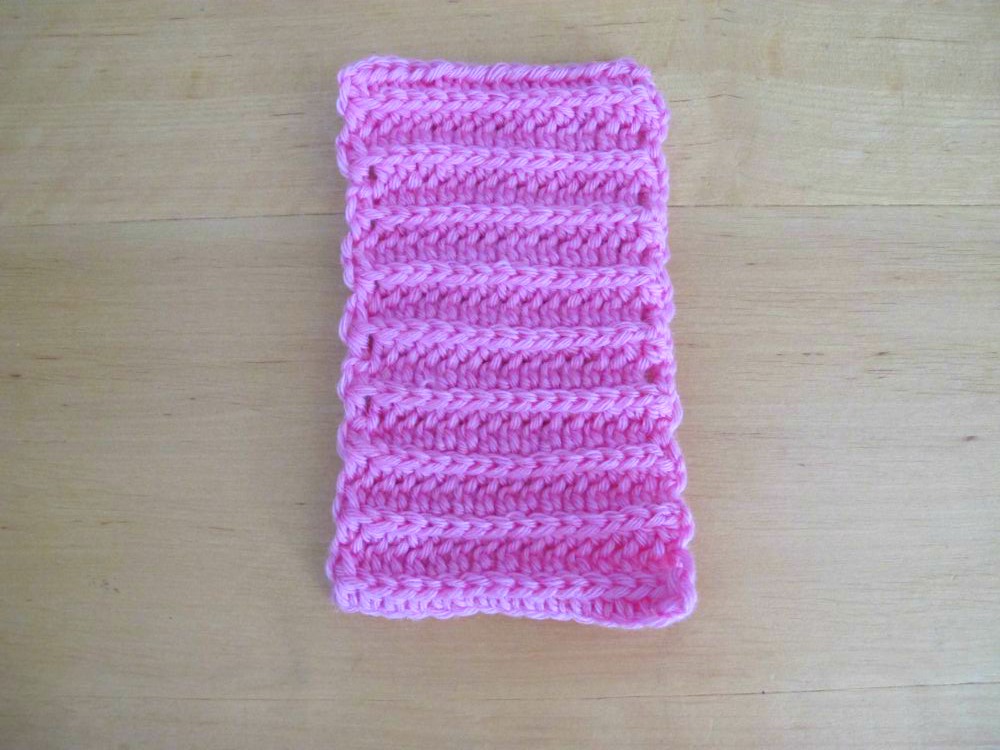
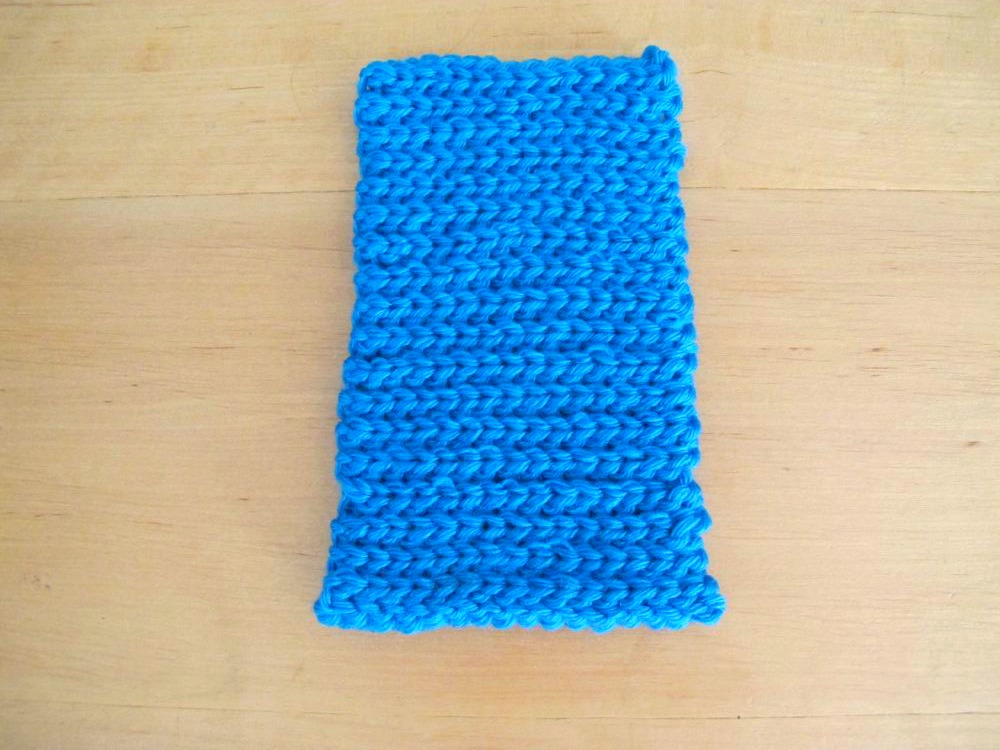
The finished ribbing looks like this. The look is very similar to knitted ribbing. This is the stitch used in the cuffs of EclatDuSoleil’s Hot Little Hands pattern as well as in my Naadam fingerless mittens pattern. When featuring these designs at shows, I regularly come across people who doubt my words when I tell them that the ribbing is crocheted.
However, the construction is of course very different compared to knitted ribbing. What looks like a knit stitch (= a loop of yarn) here is actually two very distinct loops: the front loop and the « third loop » in the stitch. And what is the third loop? Well, that’s the one we just ignored – the one at the arrow in this picture. It is actually the result of the yarnover in the hdc.

This fabric obtained by working hdc blo still has lots of texture and a fair amount of stretch, but it is a little slimmer than the sc blo ribbing. Also, the row gauge is very different, which might be an important factor when you decide on the ribbing to use for a specific project.
So what happens if you use hdc but choose to work through the third loop?
The difference in the finished ribbing is hard to convey in a photo. The fabric is firmer. Here, the apparent loops resembling knit stitches are formed by the front and back loops at the top of the stitch. They are a little tighter and slightly better defined than in the back loop ribbing. This third loop ribbing can be a good choice if you want something firm that holds its shape a little more than the previous kinds of ribbing.
When researching different kinds of ribbing, I came across a type of ribbing that combines sc and sl sts. This is how it’s made:
Make a base row in sc and turn. Work a row of sl sts in the back loops of the sc. Make sure not to work your slip stitches too tightly. I like to add a chain at the beginning of the row for ease, but that is up to you.

Before turning, you can see the sl sts sitting on top of the sc.
After turning, they are harder to spot. You might need to tilt your fabric towards you to see them clearly. If you feel confused about which two loops are the ones of the sl st, look closely at where the loop on your hook comes out of your fabric – it’s in the centre of the last slip stitch made. Work a sc into the back loop of each slip stitch (at the arrow) to the end of the row.
Repeat the last two rows: you will be alternating sc rows and sl st rows, always working through the back loop only.
A notable difference between this fabric and those presented above is that it’s not reversible.

(Right side at left, wrong side at right).
It’s very firm – if you need a really stretchy ribbing, this might not be your pick. You need quite a few rows to get to a specific height since the slip stitch row doesn’t really add much. It biases quite a lot. (This is something that often happens with stitch patterns composed of solid rows of stitches of different heights.) But it’s pretty!
Since this kind of ribbing uses slip stitches, I wanted to try a slip-stitch-only ribbing.

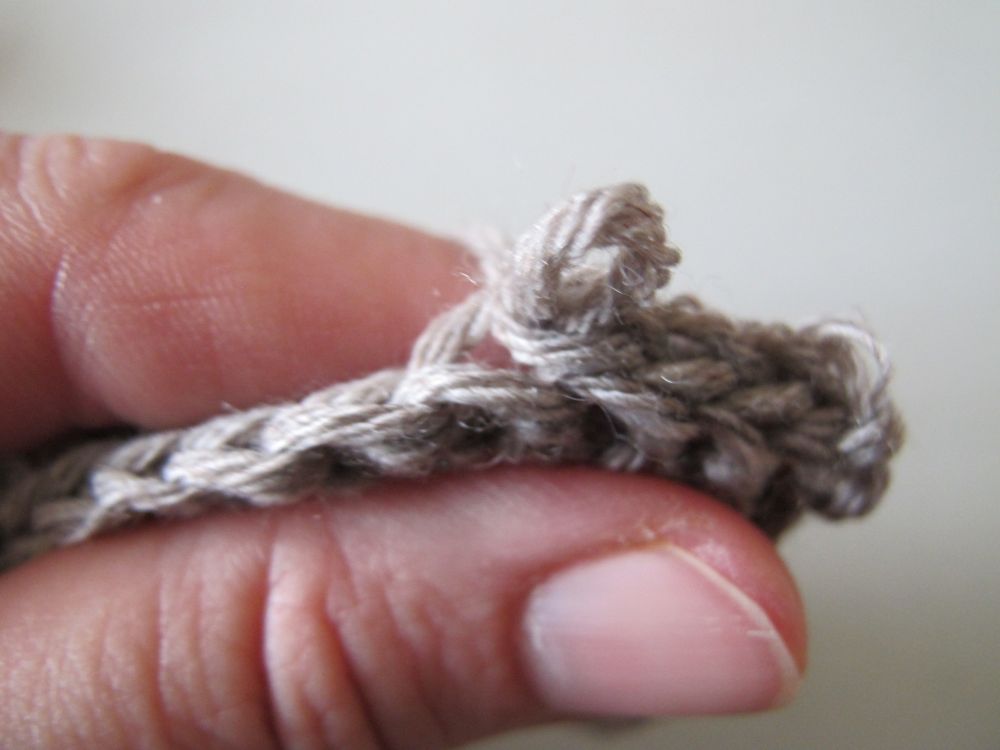
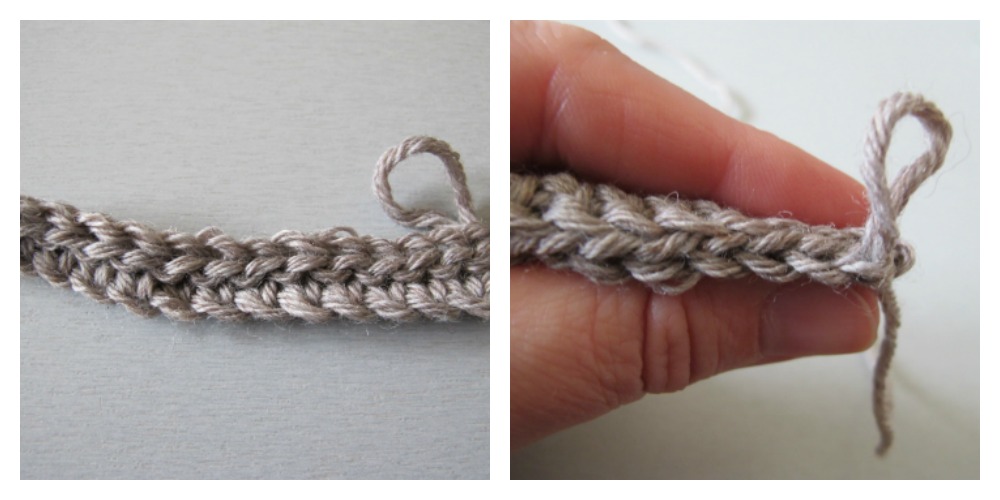
Work a base row in sl sts – it will only be slightly higher than your base chain!

Turn and work back in sl st blo. If in doubt about where to insert your hook, do as before and have a good look at the spot where your live loop exits the fabric when you’ve just turned – it’s between the front and the back loop of the sl st.

This is a very interesting, thick and cushy fabric. It is also quite firm, as can be expected when using only slip stitches. I realised that I probably hadn’t done this ribbing justice by working it with the same size hook as the other swatches. In general, when making a fabric with only slip stitches, you use a larger hook than normal.
So instead of my 4.5 mm (US 7) hook, I used a 5.5 mm (US I-9) hook to make this second swatch.
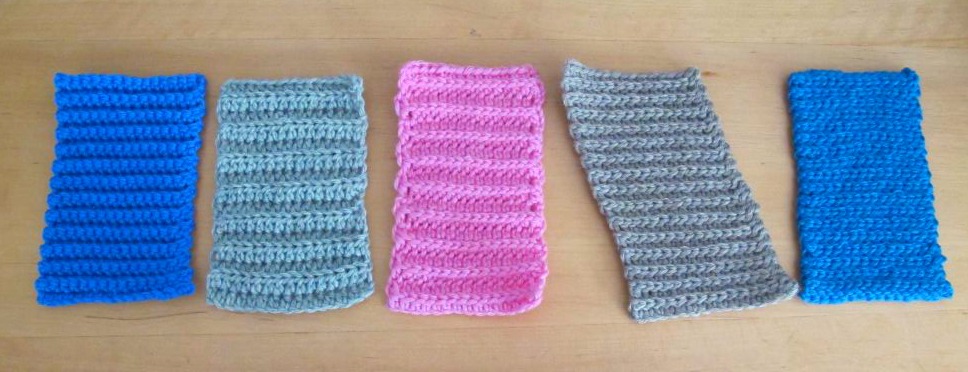
So, there we have at least five different types of crocheted ribbing.
It was clear to me that these different ribbings varied in elasticity, but I wanted to know exactly how much.
To measure this, I used a technique that I have seen used by sewists. I crocheted a swatch approximately 12.5 cm (5″) long in each of the five techniques (the number of rows needed varied greatly, of course).
I used a ruler to measure 10 cm (4″) along the selvedge and marked this length with two pins.
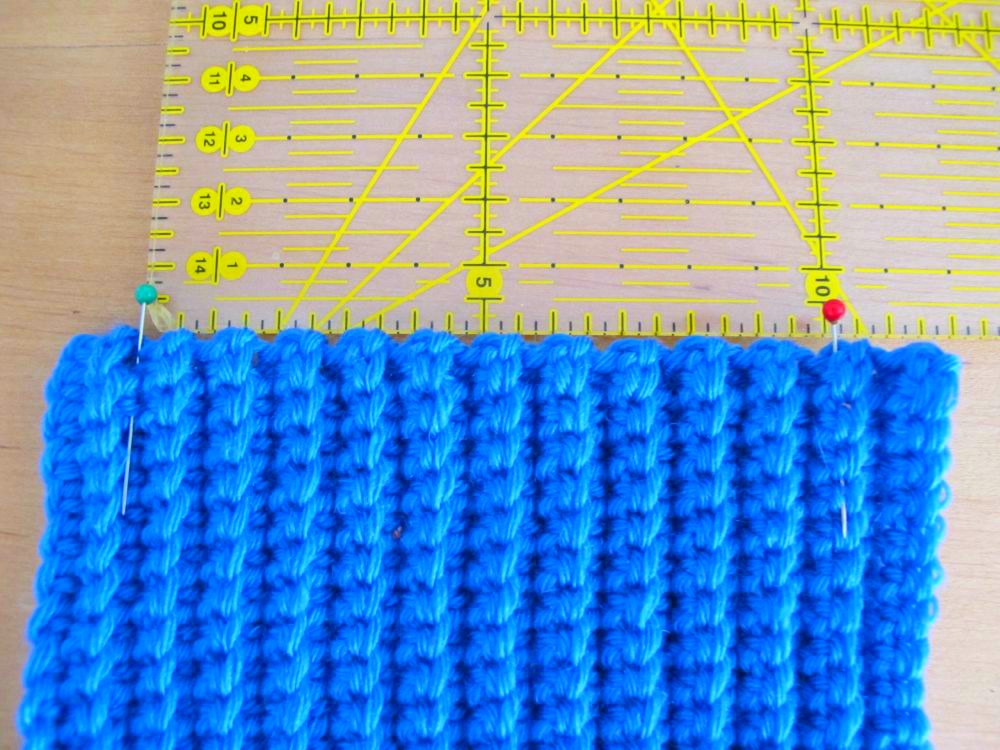
I held the first pin in place and stretched out the fabric as much as possible to see how long it could go. (I couldn’t take a picture of this because I needed both hands!)
The results of this simple test were really interesting.
The first swatch (sc blo) stretched to 15 cm = a 50% stretch. The second swatch (hdc blo) stretched to 16 cm = a 60% stretch. This was what I expected; the hdc swatch seemed suppler and stretchier.
The third swatch (hdc through « third loop ») stretched to 14 cm = a 40% stretch. Again, this was what I expected. This swatch seemed firmer and less stretchy than the previous two.
The fourth swatch (sc + sl st) stretched to 16 cm = a 60% stretch. This was rather more than I had thought since the fabric seemed pretty firm. However, I think that this stitch is less useful than the others since it biases so much.
And finally, the fifth swatch (sl st blo) stretched to 22 cm = a 120% stretch. This seemed to be one of the firmest fabrics tested, and yet it proved to be the stretchiest one. Appearances can be deceptive!
So now you know a lot about different ways to make crocheted ribbing. If you have other favourite types of ribbing, please let us know in the comments below!
Next month, we are going to discuss how to attach these ribbings to your work.
See you soon!
