
October 2007: Short rows in crochet
In the news

The Crochet Me book is here! It was released on the 14th of October in the US, and once again I’m jumping up and down, impatient to get my copy! Let’s get on with the crochet revolution!
 Here in France, a special issue of the magazine 1000mailles, published by Les Editions de Saxe, is out in the stores. I designed all the featured patterns.
Short rows in crochet
Short rows? Why short rows? Well, not only because they’re faster than long rows…
Short rows can be used for a million things. They’re a very efficient way to add internal shaping to a piece of crochet – one more aspect of the incredible flexibility of crochet!
So, what is a short row? Well, it’s a row in a piece of crochet that ends before the other rows.
I think we need to get a bit more visual here…
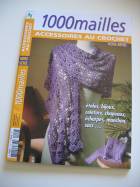
This is a not-very-sophisticated diagram of a crocheted piece worked back and forth. The arrows on the right indicate the direction in which each row is crocheted. Rows 1-4 are indicated with numbers – those are the « ordinary » rows. Row number 5 is the « short row » – it stops before the others.
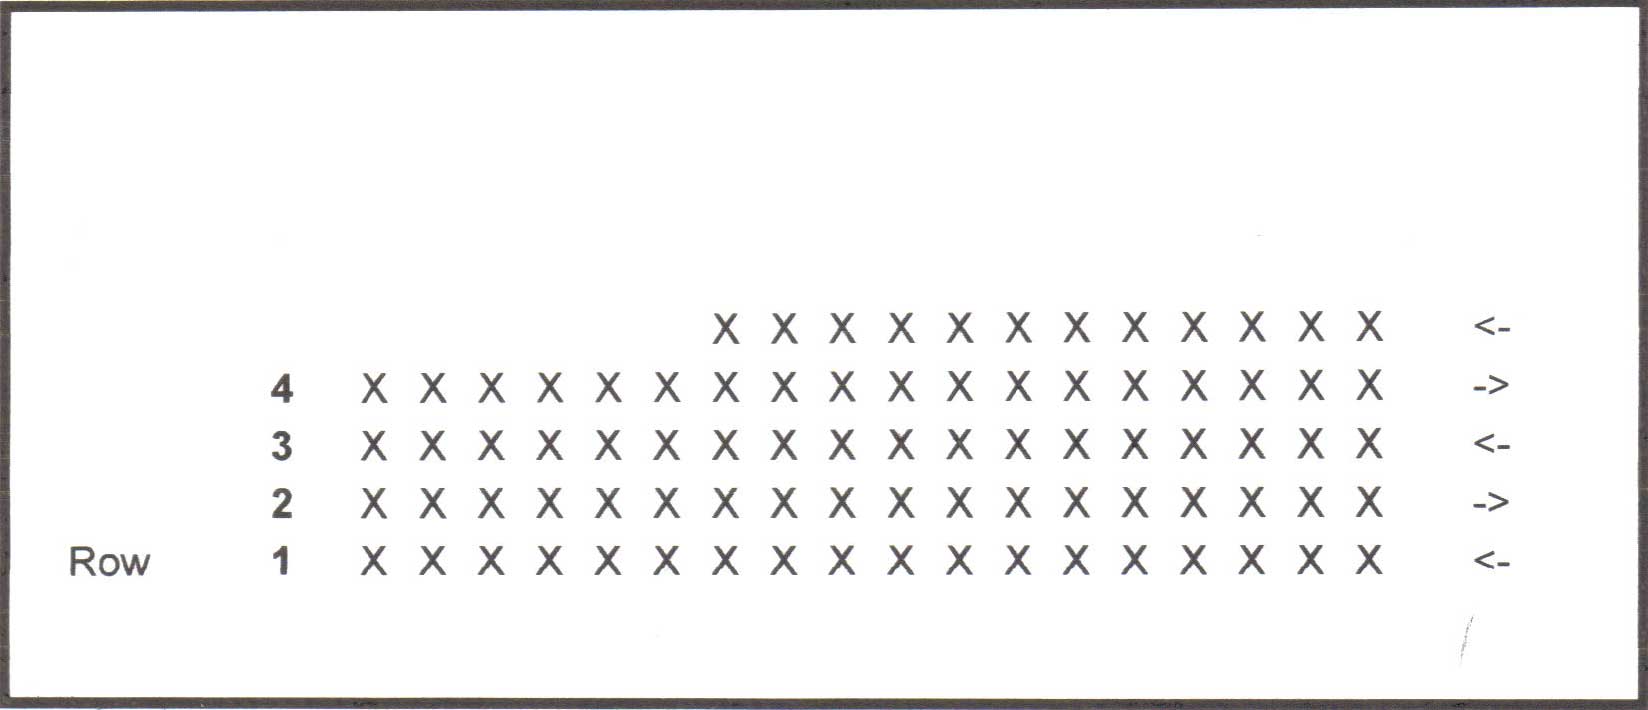
Here, we see row number 6, too, going back. It is now very clear that when we speak of « a short row », this is actually two rows (it took me some time to understand that).
Look once more at the diagram above, and imagine how you would crochet row number 7 (which is not represented). All would be fine until you got to the end of the previous, shorter rows. Then – help! There is this steep cliff ahead! How do you get down there without jumping off creating an unsightly hole (and perhaps a bump) in your fabric?
If you don’t understand the problem, crochet a small swatch and try it out. It is quite a problem when you’re working in single crochet. If you work with taller stitches (hdc, dc, tr…) the problem only gets bigger and bigger.
There are, of course, many ways you can work around this. I will explain the solution I’ve come up with.
First step: Taper!
I will use a swatch in dc as my example. With this kind of stitch, two rows make a huge difference! In order to get a nice, pointy finish on the short rows, we will taper the stitch height, working progressively lower stitches until we reach the point where we want our short row to finish.

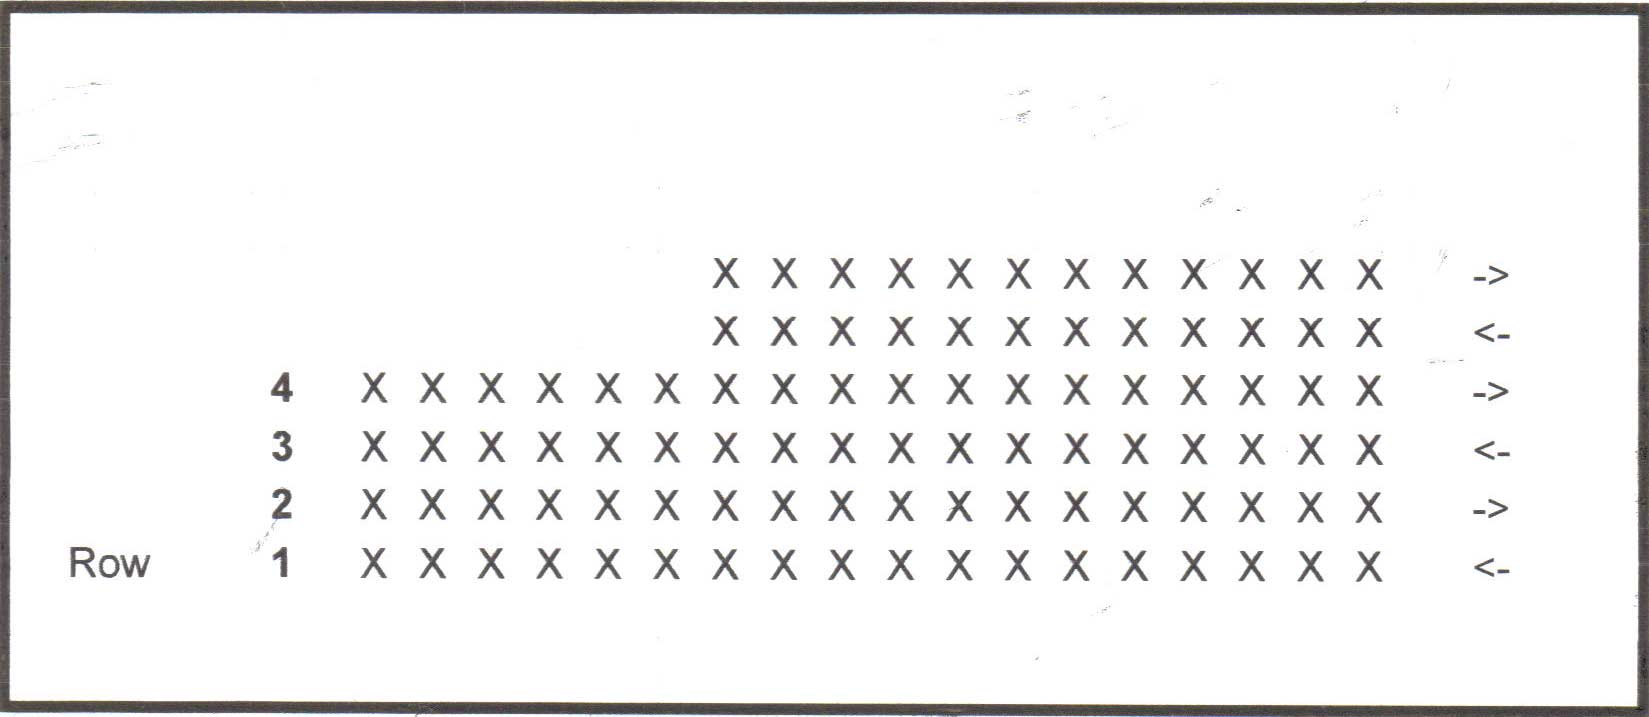
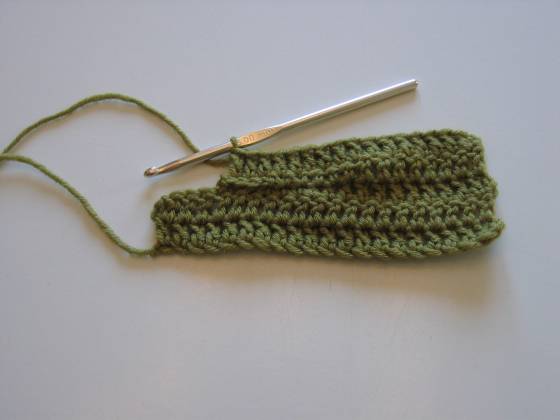
Here, I have just worked my last dc. There are 9 stitches left before I want my short row to end.
I have worked 3 hdc, 3 sc, and 3 slip stitches. The row tapers nicely, ending not so much higher than the previous row.

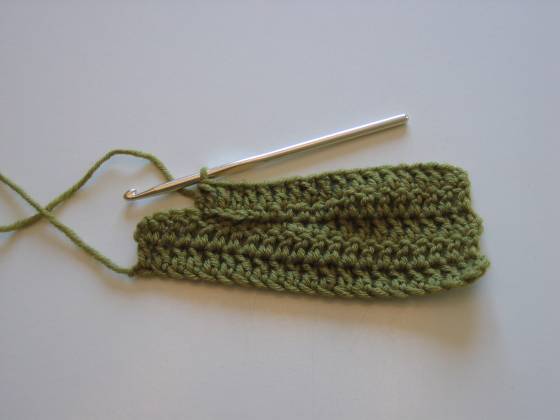
Here, I have turned the work, chained 1 (turning chain) and worked back, slip stitch in slip stitch, sc in sc, hdc in hdc, and finally, dc in dc. The point of the short row is much, much narrower than if I had simply worked in dc back and forth.
Second step: An extra stitch
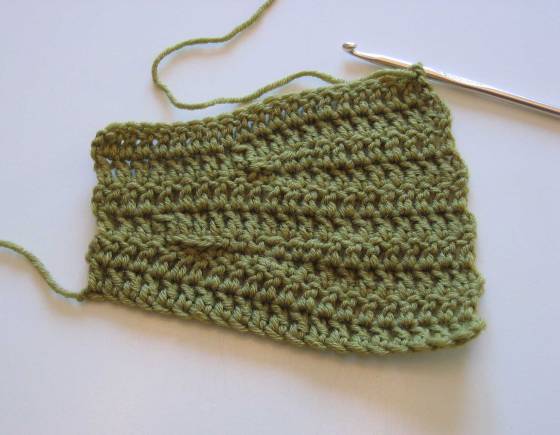
Now I’m going to work my first « ordinary » row after the short rows:
This is a row worked entirely in dc. But I have to do something special at the tip of my short row, or I will end up with a hole in the fabric. Not a very big hole, but still a hole. I work in dc until there is only one stitch left in the short row below.
Then I make a dc2tog, putting the hook through the fabric first in the top of the stitch (as usual), and second in the side of the tip of the short row.

Then I continue to work in dc to the end of the row. Voilà, no hole! The « extra » dc worked into the side of the short row tip fills up the space that could have resulted in a hole. And since this extra dc is part of a dc2tog, no extra stitches are added (it is decreased immediately, right in the making).
You can, of course, taper your stitches over any number of stitches – the minimum in this case is 3, to be able to work one hdc, one sc and one slip stitch. Make sure your slip stitch is not too tight – it could be difficult working into it again.
Here, I have added another short row. I stopped working my dc at the same place, but then worked only 2 hdc, 1 sc and 1 slip stitch before turning the work.
The possibilities are, of course, endless, and I encourage you to try out a few. I am sure you can already see how you can use this technique for different kinds of shaping. Add colour, perhaps in a self-striping yarn, and the potential gets mind-boggling! If working in multiple colours and directions, you might want to experiment with omitting the turning chain at the end of the first short row. It is easier to work with a turning chain, but I find the finish on the back side is neater when I skip it. Experiment and see!
See you soon!


