Newsletter June 2012: Post stitches, part 1News:New in the shop: another lovely pattern from EclatDuSoleil! This time around, it is not a shawl, but an accessories set. I am proud to present The Luxurious Duet.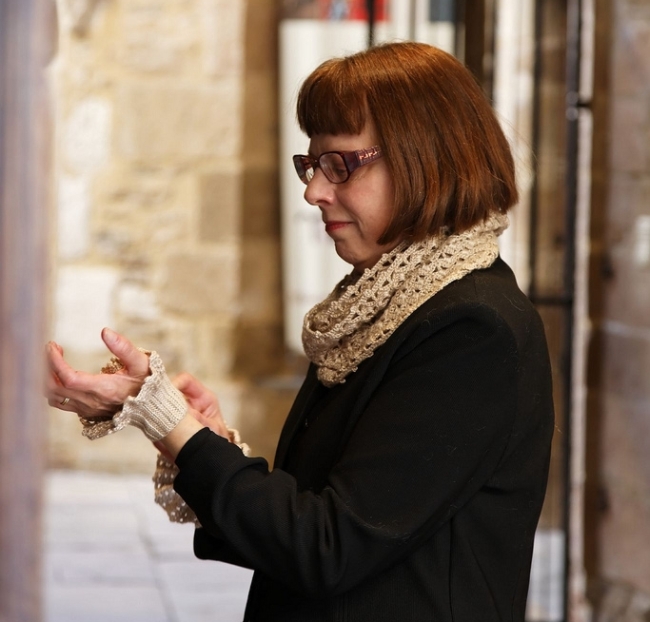 Worked in the delicious silk and baby camel yarn, this set is composed of a moebius cowl and little wristlets.The moebius cowl can be worn wrapped around your neck or as a long « infinity » scarf. The wristlets will peek out under a long-sleeved jacket this autumn, to add a touch of elegance to any outfit.More information in the shop.I am also very happy to present two new yarns in the shop:London is a laceweight silk/wool blend from the French brand Les Soies de Marie.
 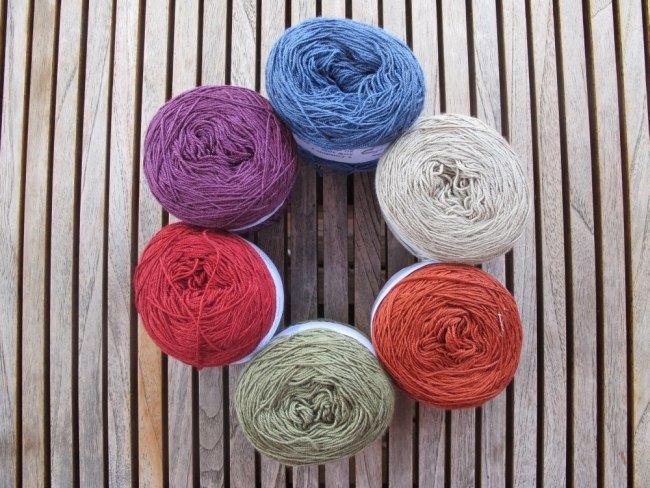 This yarn is wonderfully soft, and is available in six different colours. Each 50 g ball contains 400 m (440 yds).More information in the shop.The Maco Merino yarn is unique. It comes from the sheep bred on a small farm in the French Alps.
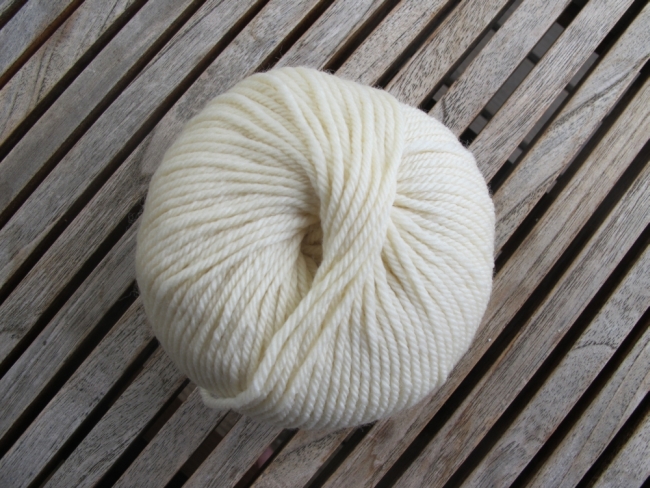 This is an incredibly soft wool yarn. Each 50 g ball of this worsted weight yarn contains 100 m (110 yds).More information in the shop.Post stitches, part 1Several years ago I wrote an article for the Crochet Me site about post stitches. I think the time has come to revisit the subject and perhaps take it a little bit further. This month we will look at the basics for working post stitches, and next month we will try a few simple applications.Post stitches are a way to create a textured crocheted fabric. They are also sometimes called raised stitches, since the stitches will be « raised » from the surface of the fabric. So, how do you work a post stitch? To understand this, let’s have a look at the anatomy of a crochet stitch (here: a double crochet) and our options when it comes to inserting the hook.
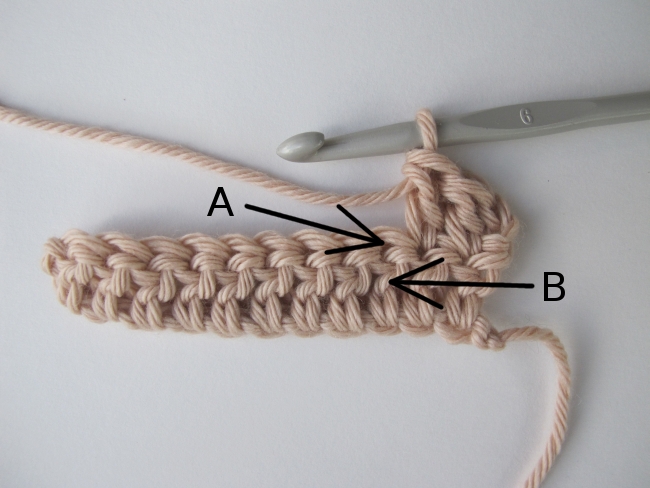 Here we are, working in dc. To work the next stitch, we have two options when it comes to inserting the hook.The most common one is to insert the hook in the top of the stitch, at A. However, to work post stitches, we will work around the post, or body of the stitch, at B.This can be done in an infinite number of ways, using different stitch combinations. However, all stitches have a top and a post (except perhaps slip stitches, which do have a top but not much of a post to speak of).There are two ways of inserting your hook around the body of a stitch: front post or back post. Let me show you this in a swatch.
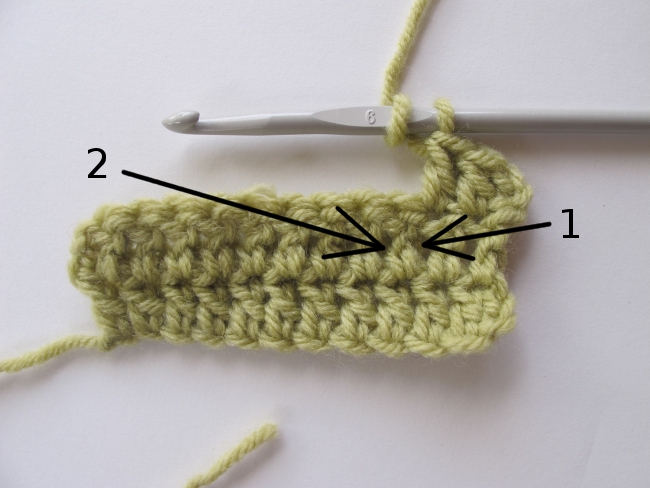 Up to now, I have been working in ordinary dc. For my next stitch, I’m going to work a front post stitch. This means I’m going to insert my hook at 1 from the front of the work, and out again at 2. The hook will pass behind the stitch.
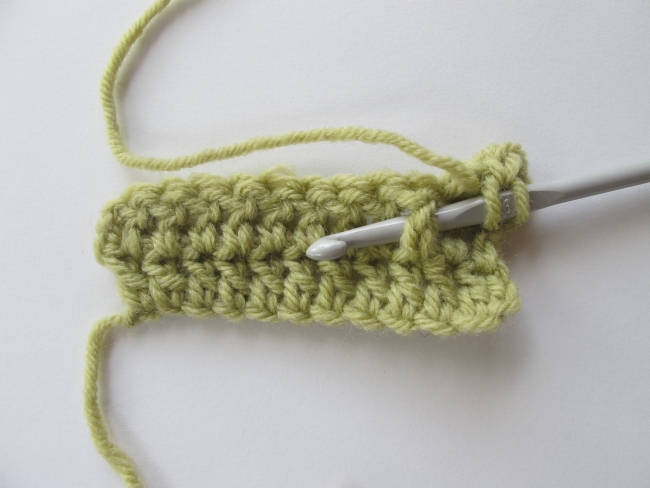 Like this. Now, draw up a loop so you have three loops on the hook.
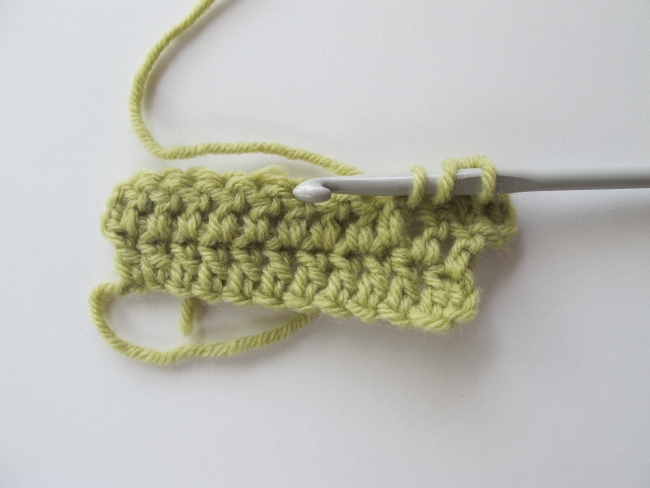 From this point on, you work the stitch like any dc. The only difference is the place where you’ve inserted your hook to start the stitch.
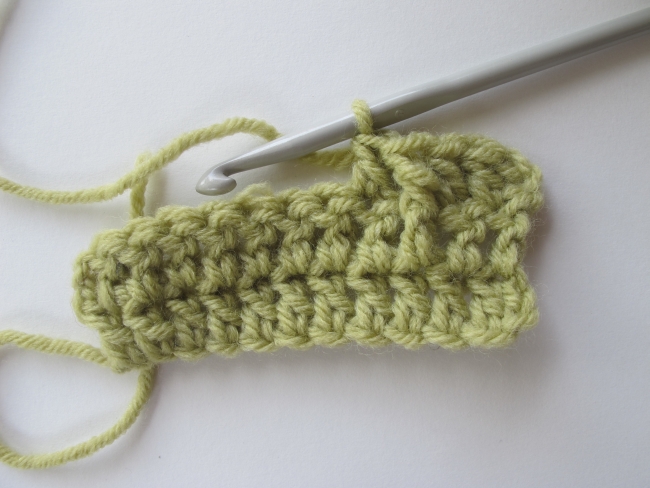 Here, the front post double crochet (FPdc) is finished, and the next stitch has been worked as a normal dc. Be careful not to work into the top of the stitch where you’ve placed the FPdc. You don’t want to increase the number of stitches in the row, only to create texture.Can you see how working around the post « lifts up » the stitch so it stands out from the background?
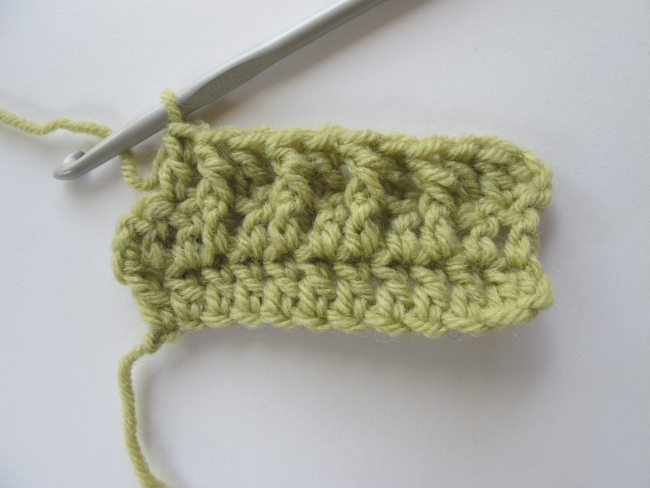 Here, I’ve worked a row alternating FPdc and dc. You can clearly see how the post stitches stand out.When you turn the work around, it looks like this:
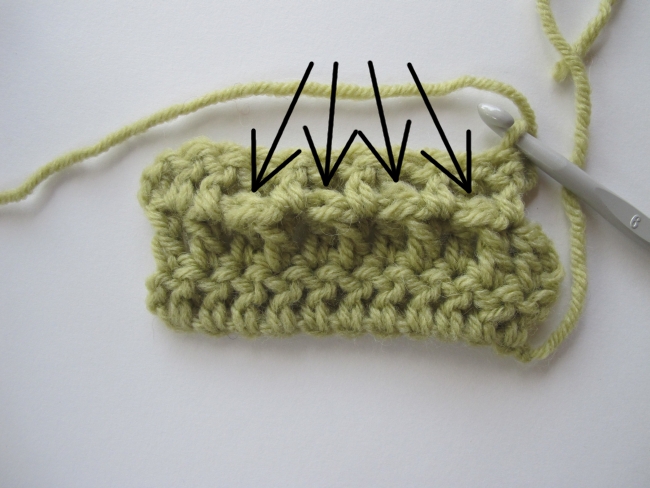 Note how working around the post from the front makes the unused top of the stitch flip to the back of the work. The arrows point to these stitch tops.Now let’s look at the back post stitch. Once again, I’m going to put my hook around the post of the stitch but this time I’m going to do this from the back of the work.
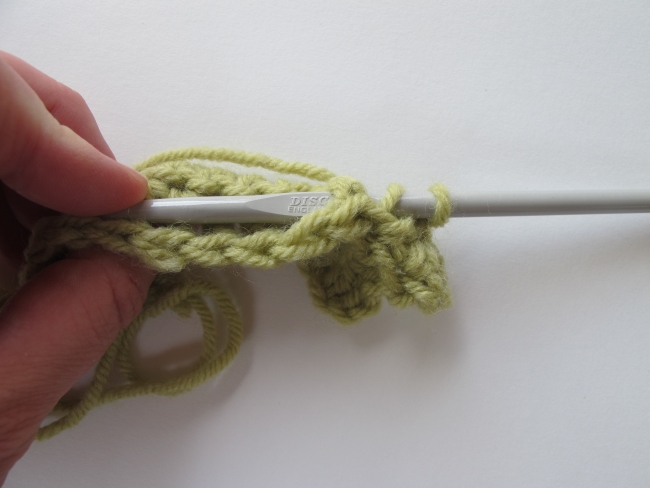 It looks like this if you flip your work so you can see it from the top.
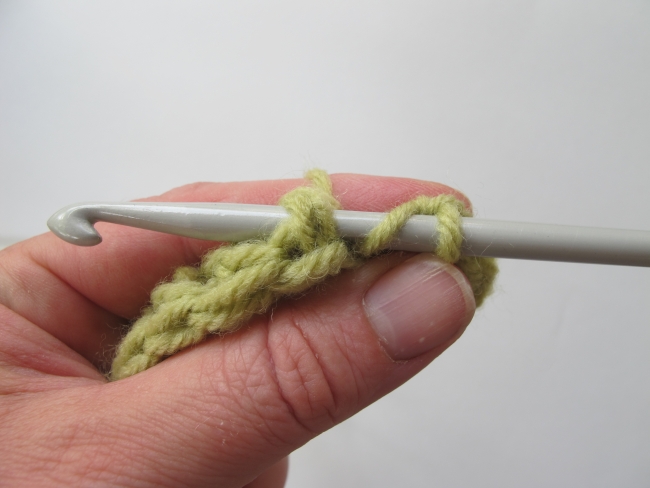 Since you are actually working at the back of your work, I find it easier to hold the work as in the picture (folding it over and grabbing it firmly so it stays put). As before, once you have drawn up the loop and have three loops on the hook, you finish your dc in the usual way.
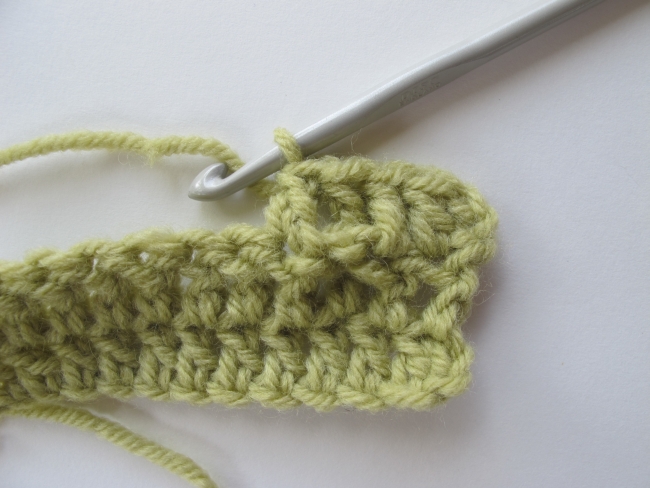 Here, the back post double crochet (BPdc) is finished, and I have worked an ordinary dc after it. The effect is a little less apparent, but you can still see that the stitch is receding and actually lying behind the rest of the work. Also note the top of the stitch in the row below, visible as a horizontal line at the bottom of the BPdc.
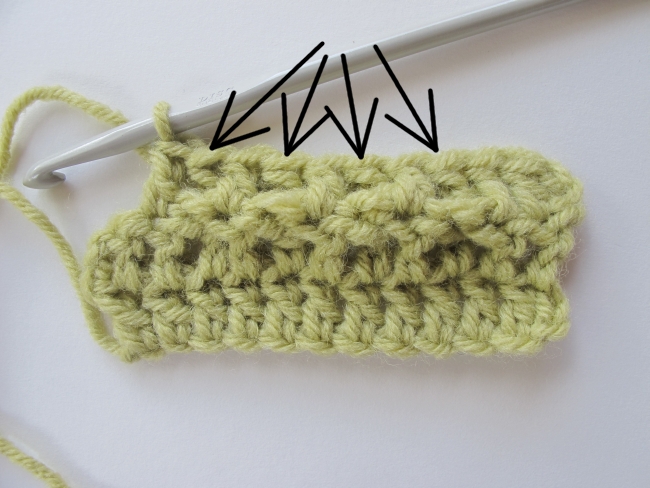 In this picture, I’ve continued the row, alternating BPdc’s and normal dc’s. The arrows point to the BPdc’s, almost hidden behind the work.
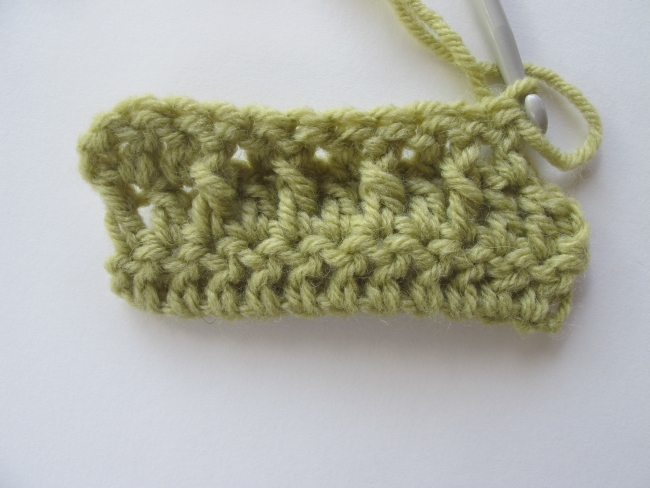 Here I’ve turned the work to the other side. You can see very clearly that BPdc’s and FPdc’s are mirror images of one another – a BPdc on the right side of the work will look like an FPdc on the wrong side of the work, and vice versa.This is important to understand. It is also important to practice « reading » your work, so you can distinguish the post stitches from other stitches. This is crucial when you start using these stitches – once you « read » your work clearly, it gets much easier!So I suggest you try out the post stitches (if you don’t already know them). Next month, we’ll see what we can do with them!See you soon!