Flat circles:
I am currently working on projects for an upcoming class that I will teach locally here in Lyon: « Dress up your home in crochet ». This class will teach participants how to make small decorative or gift items for the home, transforming a simple glass into a candle holder or turning an empty jar into a whimsical gift container by adding a crocheted cover for the lid. The idea behind the class is to teach people not only how to make the specific projects I offer as examples, but also to think about how to add crochet to familiar items.
One of the basic skills required to do this is to work a flat circle in crochet. This circle can then become the base of the candle holder, the top of the lid cover, or why not the bottom of a bag or the top of a hat?
I don’t think I’ve previously explained the simple rules for making solid crocheted circles that lie flat, so here they come!
Let’s start with the example of a circle in double crochet:
Ch 4, close to a ring with a slip st in first ch.
Round 1: Ch 3 (counts as a dc), 11 dc into ring. Close the round with a slip stitch in 3rd ch at beg of round – there are 12 sts.
Round 2: Ch 3 (counts as a dc), 1 dc in same st as the sl st that closed the previous round, 2 dc in each st to end of round. Close with a slip stitch in 3rd ch at beg of round – there are 24 sts.
Round 3: Ch 3 (counts as a dc), 1 dc in same st as the sl st that closed the previous round, 1 dc in next st. *2 dc in next st, 1 dc in next st*. Repeat from * to * to end of round. Close with a slip stitch in 3rd ch at beg of round – there are 36 sts.
Round 4: Ch 3 (counts as a dc), 1 dc in next st, 2 dc in next st. *1 dc in each of next 2 sts, 2 dc in next st*. Repeat from * to * to end of round. Close with a slip stitch in 3rd ch at beg of round – there are 48 sts.

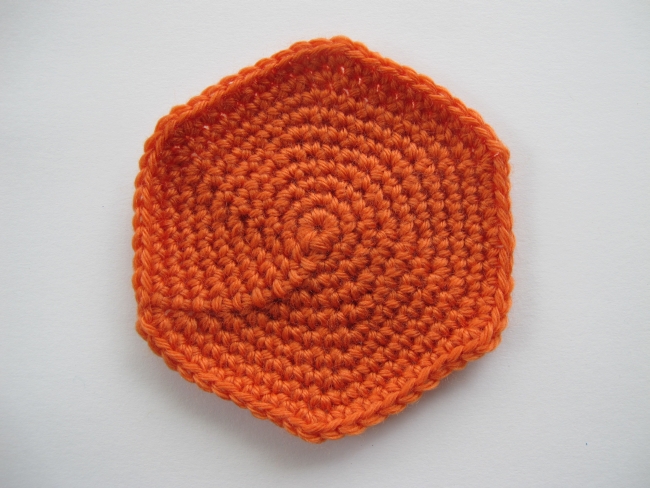
Are you starting to see a pattern here? For each round, the increases (2 dc in same stitch) are spaced one stitch farther apart. This is because you add the same number of stitches to every round – when working in double crochet, the number is 12. However large you work your circle in double crochet, the number of increases on any given round should always be 12.
The number of increases to be added on every round depends on the stitch height.
Here are the numbers for the most common stitches:
single crochet: add 6 sts on every round
half double crochet: add 8 sts on every round
double crochet: add 12 sts on every round
treble: add 24 sts on every round
Some tips and tricks:
Make sure not to work into the slip stitch that closes the round! So many supposedly flat circles turn out wonky and wavy because the slip stitch was mistaken for a « real » stitch. The slip stitch does not enter the stitch count of the row. If you find it hard to distinguish the slip stitch, use a safety pin to mark it.
Stagger your increases. If you always work your increases at the same place, you will obtain an angular shape instead of a circle. This tendency will be more and more marked as your circle grows, containing more rounds.
If you prefer, you can start your circle with an adjustable loop (see the newsletter for June 2010) to minimize the hole in the middle of the circle. I find this particularly practical and useful for circles in single crochet, where an adjustable loop enables you to suppress the hole in the middle entirely.
Conversely, if you find it difficult to work into a ring of only four chains, try with five (or even six, if working in trebles).
The most common way to work circles is to join your rounds with a slip stitch, as described above. However, in the case of a circle in single crochet, since the stitch is quite short, you have a choice – you can either join the rounds with a slip stitch or work in a spiral. In the latter case, you need to mark the first stitch in the round and move your marker up round by round as you go, in order to know where the round starts and ends.
In a single-coloured circle worked in a spiral, the join becomes almost invisible.
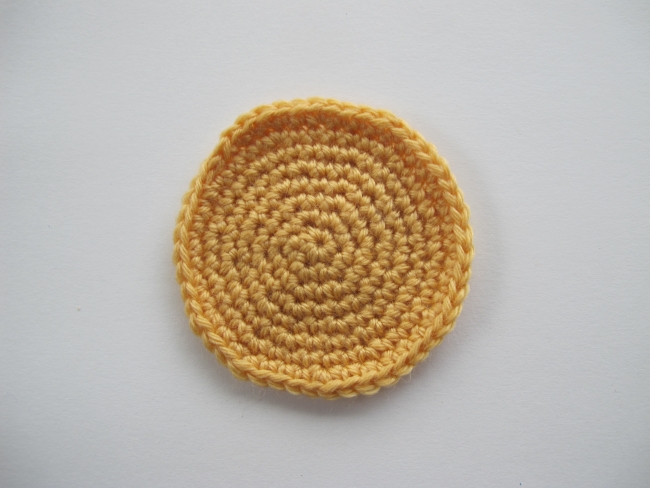
However, if you work in stripes, the « jog » at the join when changing colours will be even more visible if working in a spiral. In the pictures below, the circle to the left is worked by joining rounds with a slip stitch, and the circle to the right is worked in a spiral.

For a clean finish on a single crochet circle worked in a spiral, I suggest working to the end of the last round and then working 1 slip stitch into each of the first two stitches in the round before fastening off.
So there you have it, the basics on flat circles!
As stated above, flat circles can be the start of many different kinds of projects. Understanding how to work a circle, and how the increase rate shifts depending on the stitch height used, can also be the start of many other explorations. Perhaps you will want to make a circular shawl, or experiment with making up your own circular motifs? Grab a hook, try, and let me know what you come up with!
See you soon!