
News:
May I introduce Clementine, my latest pattern:
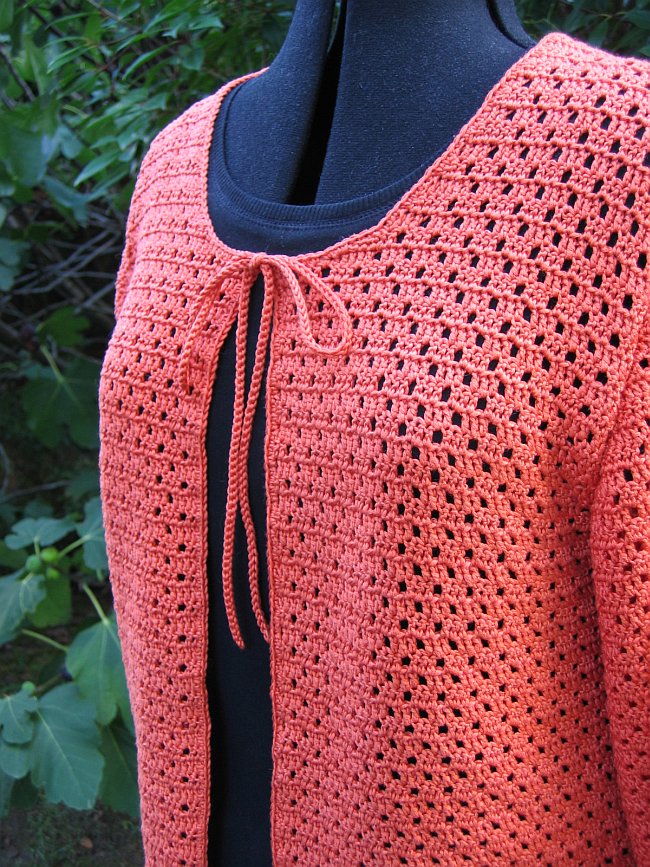
Crocheted in a beautiful mercerized cotton, this little jacket will take you from summer through fall and then into winter. The pattern is available in the shop.
Issue no 4 of the British magazine Inside Crochet is out, and it features a design of mine, Elvira:

Here, it’s modeled by my daughter, before I sent off the sample (the garment sized to fit a model fits perfectly on my 12 1/2-year-old). The photos in the magazine are lovely, too. The stitch pattern is a combination of lace and raised trebles – I really must make time to play a little more with this concept.
Spike stitches:
As many of you already know, I love the possibilities crochet offers in terms of colourwork. There are so many options, so much to explore.
This month I want to take a closer look at one of these possibilities – spike stitches.
Spike stitches are a variation on the good old single crochet. The basic principle is very simple: instead of putting your hook through a stitch in the previous row, you will put it through one in a row farther below. And as so often in crochet, the principle is simple, but the variations are endless!
The stitch pattern in my Chubby Bag (pattern available in the shop) is a simple application of spike stitches:
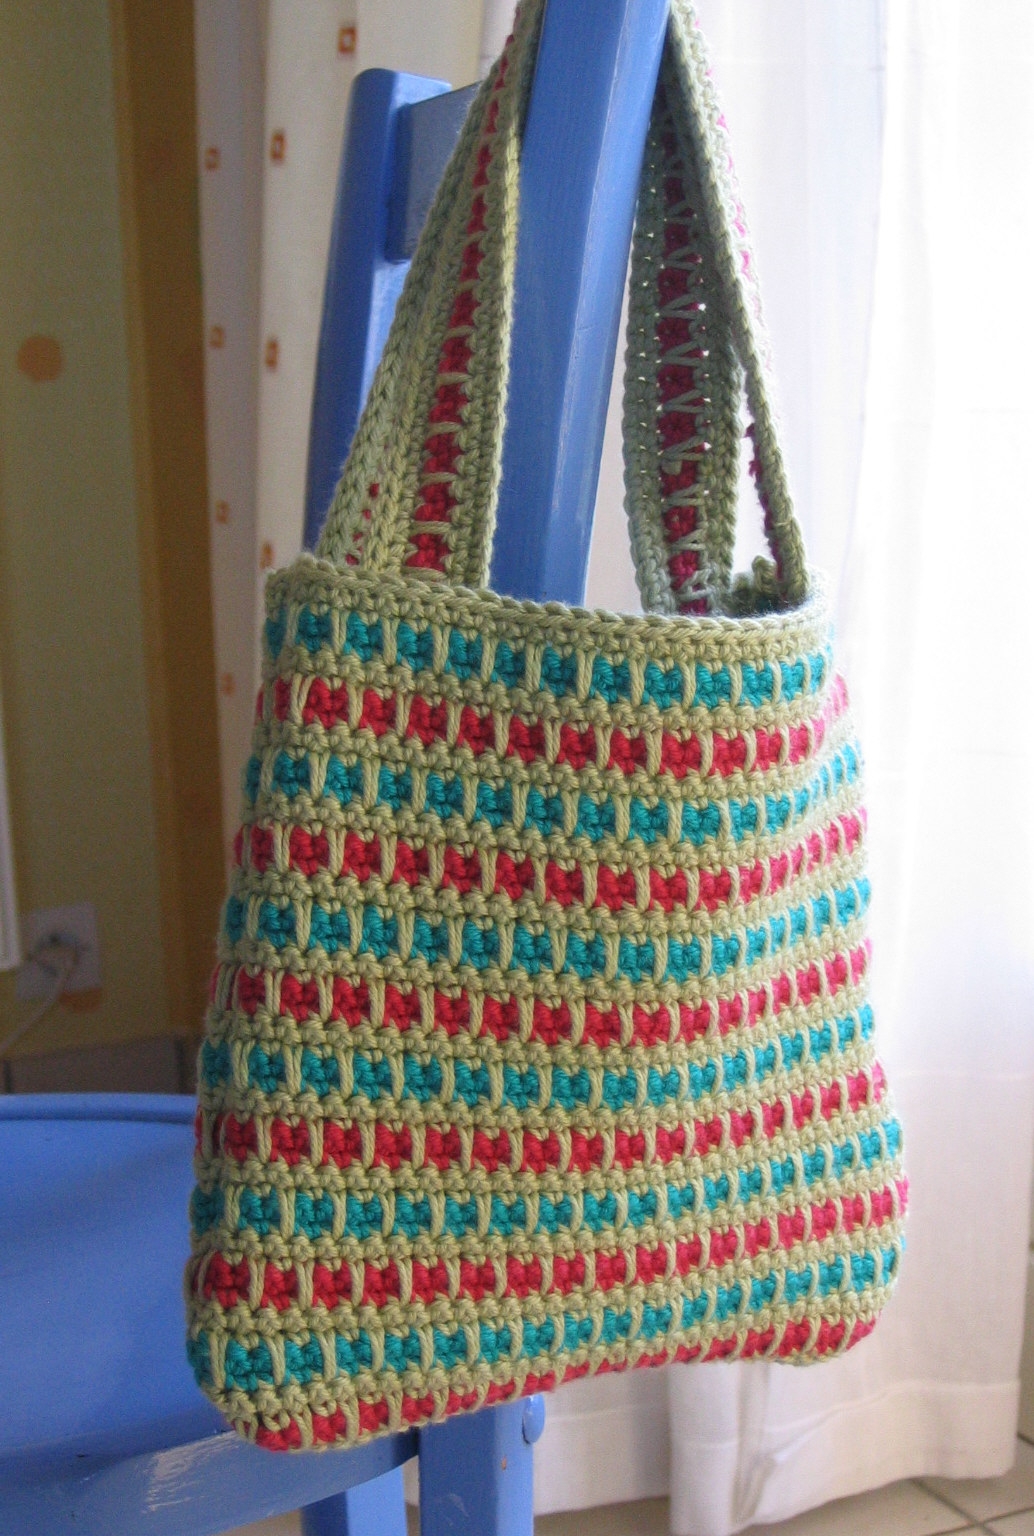
The vertical green « spikes », which give the bag its woven look, are simply single crochets worked through a stitch several rows below.
If you look closely at the handle to the right in the picture, you can see how a spike stitch looks on the « wrong » side of the fabric. While the side facing you has a narrow stitch, the back side will show a wider « V » – you might prefer the « wrong » side!
So, how do you do this?
The basic instruction is simple: Work your sc into the corresponding stitch X rows below. However, since crochet stitches are not symmetrical, it can sometimes be difficult to see exactly where you should put your hook through the fabric.
The trick is to clearly identify the stitch in the previous row (where you would « normally » work your sc) and count down the column of stitches beneath it.
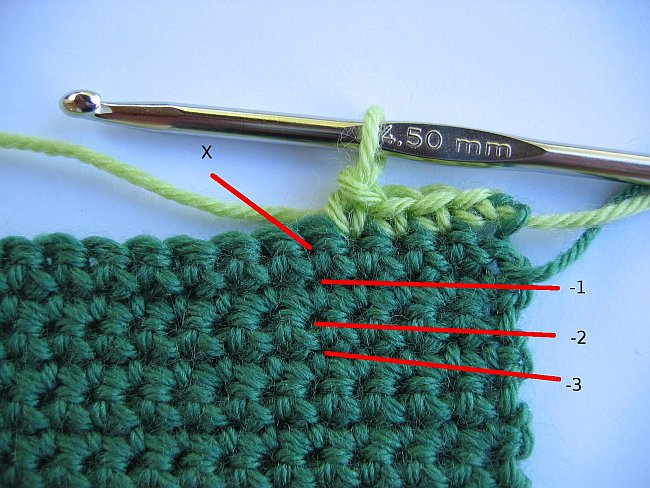
X is the stitch where you would have worked a traditional sc. -1 is the corresponding stitch 1 row below, -2 the corresponding stitch 2 rows below, etc.
The spike stitch will « cover » the X stitch. Your next stitch (spike stitch or not) should be placed in the stitch immediately after X.

Above, I’ve worked a spike stitch one row below X.

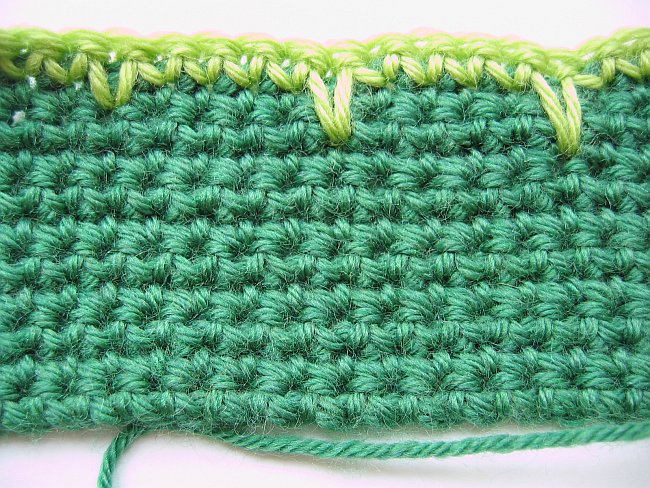
Here, the same row has been completed, with a spike two rows below in the middle, and a spike three rows below to the left.
Let’s turn the swatch over to see how it looks on the back of the work:
See how the stitches are larger and more open?
To make sure you don’t accidentally skip stitches when you first try this technique, it’s a very, very good idea to count the number of stitches before and after working a row of spikes. With a little practice, the placement of the stitches will quickly become almost intuitive.
Now, let’s take a look at a pattern using spike stitches that is a little more complex than the one in the Chubby Bag.
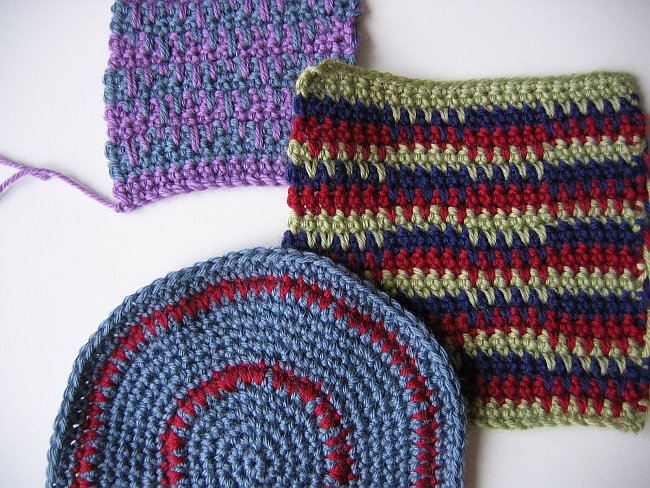
This is a pattern commonly found in stitch dictionaries – a kind of wave, set off by half a repeat to create almost a tiled effect.
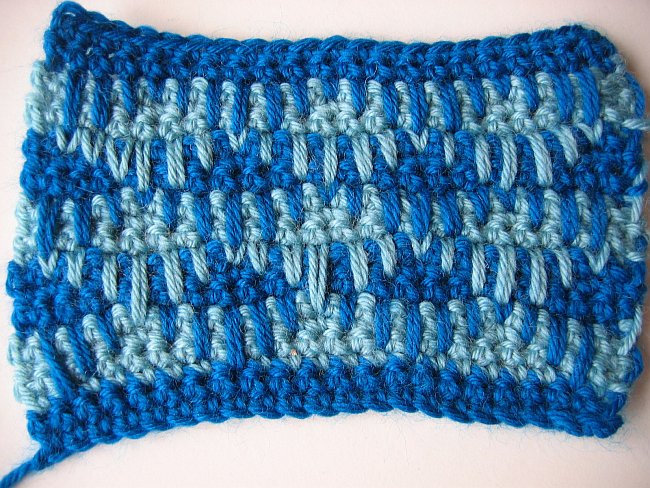
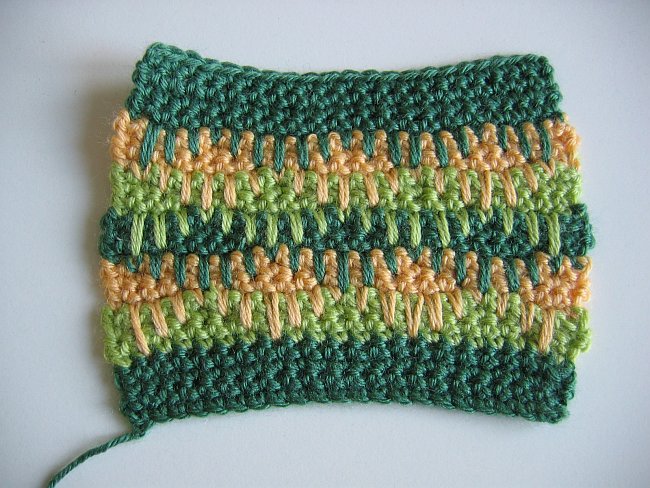
I worked this swatch relatively loosely – at a tighter gauge, the pattern will be slightly more defined. However, I like this look in which geometry mixes with mottled colours. Here is how it looks in three colours instead of two:
You could almost work the pattern from the picture – I think it is clearer than written instructions for this type of stitch. The clearest way of describing these stitch patterns, however, is, in my opinion, a chart.
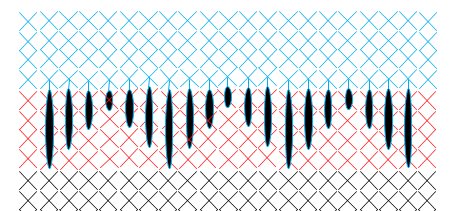
The chart below, where the symbol ![]() indicates a spike stitch, shows the first step in this pattern:
indicates a spike stitch, shows the first step in this pattern:
And the following step is added in the second chart:
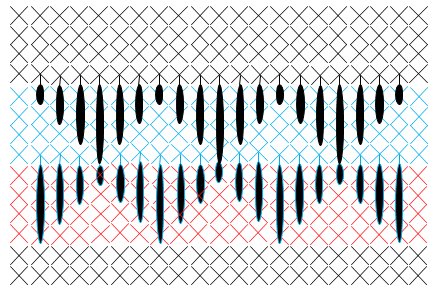
You can see quite clearly how the spike stitches are worked over a background fabric of sc in stripes (here, every stripe consists of 4 rows). The spike stitches are added on the first row after a colour change.
I’m sure you already see how easily you can experiment with your own variations.
No discussion of a stitch pattern is complete without some notes on potential problems and limitations, so here we go:
Have you noticed the shape of the swatches shown above? They tend to widen quite considerably over the rows where spike stitches are worked. This is because a spike stitch has a strong tendency to compress the fabric vertically. Since the fabric has to go somewhere, it spreads out horizontally instead. This also means that the fabric produced tends to be relatively dense and sturdy – which can be an advantage or an inconvenience, depending on the project in which you want to use the stitch pattern.
You can limit this tendency in two ways:
1. When making each spike, take special care to lift your hook to the height of your current row, pulling and lengthening the loops making the spike. If there is enough yarn in each spike to let the fabric lie flat, the result will not be as dense as when the spike makes the fabric curl up.
2. Try a pattern that uses shorter spikes. The three-colour pattern in the picture below uses spike stitches over only one row, and it has no less drape than any solid sc fabric worked with the same yarn and hook.
If, however, you are making, for example, a hot pad, a dense and sturdy fabric might be just what you’re looking for! It all depends on the project.
So now, go have a look in your pile of leftover yarns, and start playing. Spike stitches are a fantastic stashbuster – and I can guarantee that you will have lots of fun!
See you soon!
