Newsletter June 2013: Tapestry crochet basicsNews:The pattern for my design Antonia is now available in the shop : 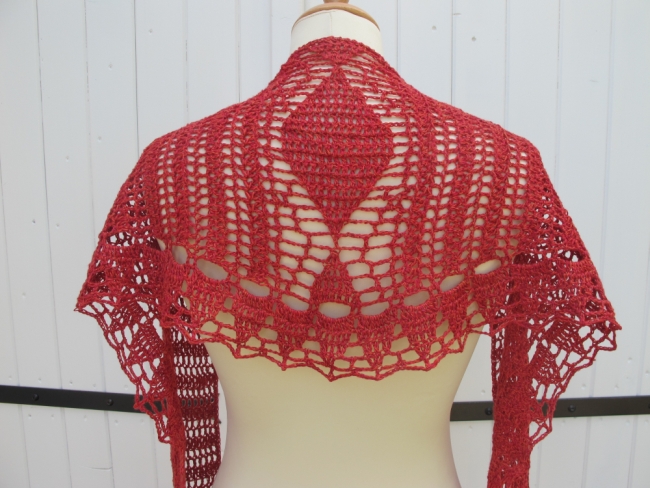 The pattern includes instructions for both a shawlette (above) and a little pouch (below).
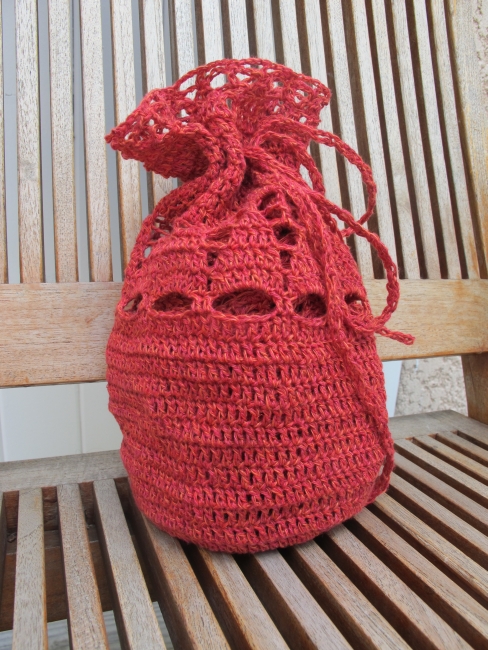 The pouch can be used for storing the shawlette, or why not use it as a gift wrap if you’re making the shawl for someone else !More information in the shop.Tapestry crochet basicsInspiration for the newsletter can come from many places – this time it was a direct request from a reader via e-mail. She wanted to know more about tapestry crochet.Tapestry crochet is a technique in which you mix two (or more) colours, working stitches in the same row in different colours. Very often, tapestry crochet is done in the round using single crochet.When I think « tapestry crochet », I also immediately think of Carol Ventura, a true authority on the topic. Carol has written a lot about tapestry crochet in South America, but the technique is also traditional in the Nordic countries. For example, there are old Swedish belts using this technique, and in the traditional sweaters from Korsnäs (Finland), knitting and tapestry crochet are mixed.There is a lot to say about this technique, but the information is not always easily available for everyone, in every language. And of course, I wanted to add my two cents.So the request was an opportunity for me to rediscover my love of tapestry crochet. When I first started crocheting « seriously », one of the things that made me fall in love again with crochet was the ease with which you could do colourwork. I found it much easier in crochet than in knitting. However, in those days, I knew a lot less about crochet than I do now, and many of my attempts at the time were rather disappointing. It was a lot of fun to come back to tapestry crochet now, with much more knowledge under my belt.But let’s have a look at how tapestry crochet is done. I will show this on a swatch worked in the round – in many areas of the world, tapestry crochet is worked exclusively this way. Also, in the swatches in this newsletter I’ve used single crochet exclusively. As said above, this is the traditional way (but there is nothing that says you can’t use other stitches).
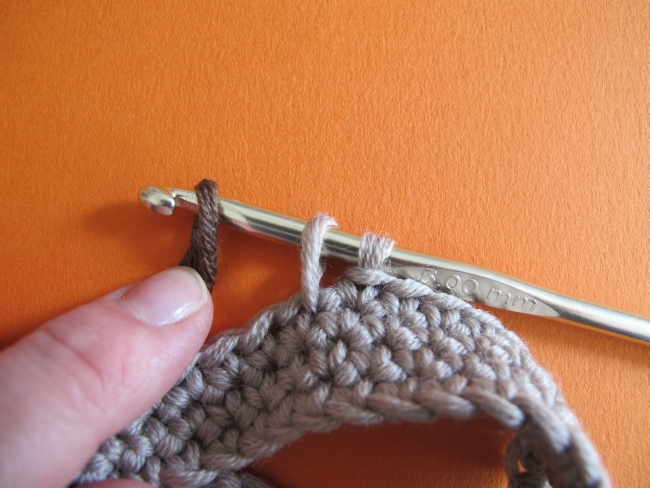 When changing from colour A (beige) to colour B (brown), make sure to do the last « yo and pull through » of the last stitch with colour B. (I wrote a newsletter way back in September 2008 about this technique for neat colour changes.)
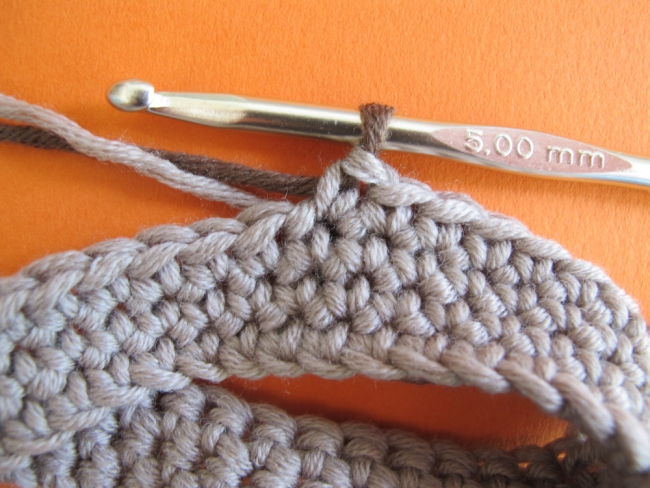 The last stitch in colour A has been completed, and we have a loop in colour B on the hook. We are now going to continue working in colour B. While doing this, we are going to trap colour A inside each stitch of colour B.
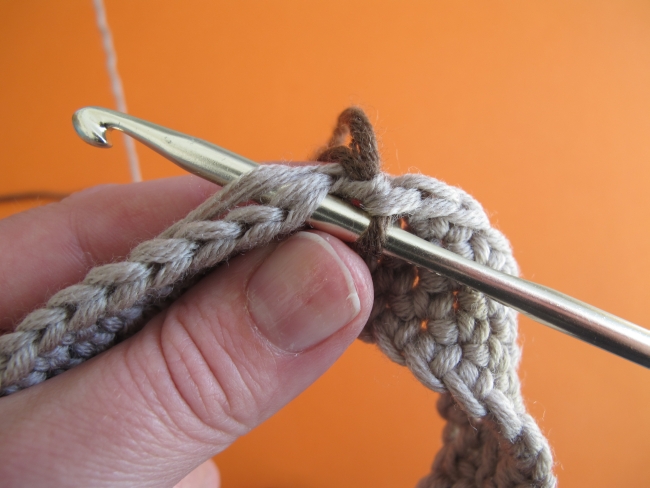 To do this, place the yarn in colour A on top of the unworked stitches in the row below or, as I’ve done here, slightly to the back of the work. If your yarn is placed towards the back of the work, less of colour A will peek through the stitches in colour B. However, if you have difficulty doing this without splitting or catching the colour A yarn, place it on top of the stitches to work more easily.
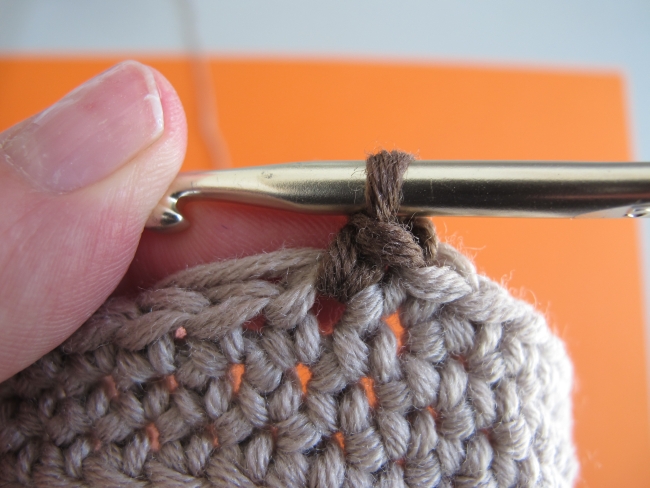 Continue working in colour B, trapping the yarn in colour A in every stitch until you need or want to switch colours again. Then do the same operation as described above, simply inverting the colours.And that’s all there is to it! Almost…To avoid tangling when working with two colours, I try to be consistent when crossing the yarns at colour changes. If you always cross your lighter yarn over your darker yarn, the two will not tangle.Even with very slight variations of this simple technique, you can get different effects. Just look:
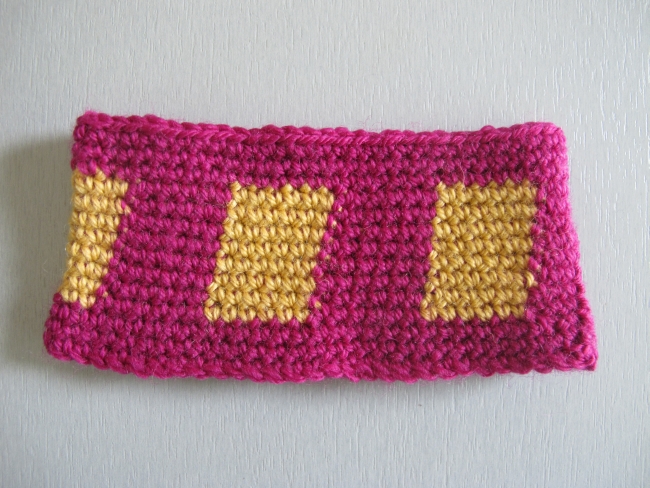 Here, I worked single crochet in the round in both loops. After setting up a simple pattern alternating 6 sts in pink and 6 sts in yellow, I worked pink into pink and yellow into yellow. You can immediately see that even though I’ve worked the stitches in each colour on top of one another, the « squares » slant very clearly to the right.This is natural, since crochet stitches are asymmetrical. The loop on the top of the stitch sits slightly to the right of the body of the stitch. When working in the round without turning your work, nothing offsets this asymmetry, and the result is that the columns of stitches slant to the right.Also, even if this swatch has been blocked, you can see that it tends to curve inward on the rows worked in two colours. This is because tapestry crochet can yield (and does yield, at least when it’s I doing the crocheting) a tighter gauge than single crochet in only one colour. A way to compensate for this and even out the gauge between rows with and without pattern is to work over the other colour also on the single-coloured rows. You trap the second colour in your stitches even if you don’t need it on that row.
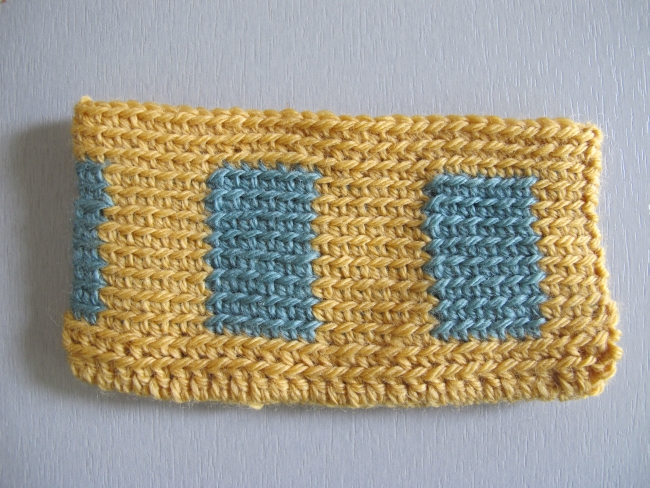 In this swatch, technically, the only difference is that I worked single crochet through the back loop only.(The bottom looks different too, but that’s just because I was also trying out a simple way to start a flattened shape in the round).Here, the stitch columns are straight and the squares actually look like squares. I believe this is because the « connection » between the new stitch and the stitch in the row below is more supple, and the body of the stitch above thus has enough flexibility to position itself vertically over the body of the stitch below. Working with straight vertical stitch columns has evident advantages when it comes to colourwork design. Note that the surface of the work is different, though. Working through the back loop only in the round creates a small horizontal bar (corresponding to the unworked front loop) on each round. You may or may not like this look. I find it very nice, perhaps because this is very similar to how tapestry crochet is traditionally done in the Nordic countries, or because this is how my friend Danielle Kassner works her beautiful tapestry crochet designs.
 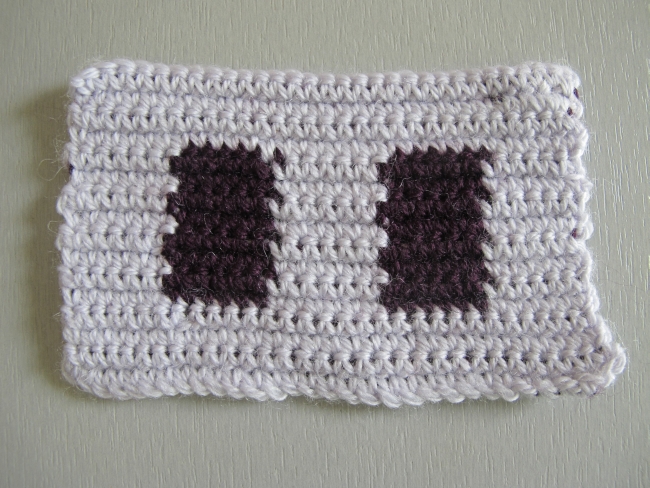 And of course, I had to see what my 6 stitch by 8 row squares would look like if worked in single crochet flat, back and forth.The alternating back and front stitches make the surface less even, and that really shows at the edges of the squares. They’re not as neat as in the other swatches. Personally, I’m not spontaneously attracted to this look. However, I think it has potential if you’re looking for blurred lines, perhaps to work an ikat-like design.Now you know enough to start your own experiments. However, I believe that the crochet technique geek in me isn’t finished with the topic yet, and it might well come back in another newsletter. So stay tuned…
See you soon!