
Newsletter September 2014: Borders, turning the corner – 1After discussing different ways of attaching a border to fabric (in July and August), let’s talk about corners for a while.Very often, a crocheted border will be used around a crocheted or knitted project. If this is for example a blanket, a pillow or anything else with a squared, rectangular or otherwise angular shape – well, you will have to turn these corners with your border.Here, I am going to limit myself to the most common corner, the 90-degree turn – otherwise, this will not be a newsletter but an encyclopedia.This month, we are going to discuss very simple borders in single or double crochet. The basic knowledge about how to turn corners with these simple stitches will often come in handy, and can also serve as a foundation when you are tackling a more complex border that needs to turn a corner.But of course, before we can turn the corner, we need to identify it correctly. This is not as easy as it may seem, especially for a beginning crocheter. If the item has a chain space in the corner (this is the case for many square motifs), it is easy enough to find, but if it is worked in solid stitches, it can be a little harder. For an item worked in rows (here, in solid dc’s), these are the spots where you should insert your hook when working your corners: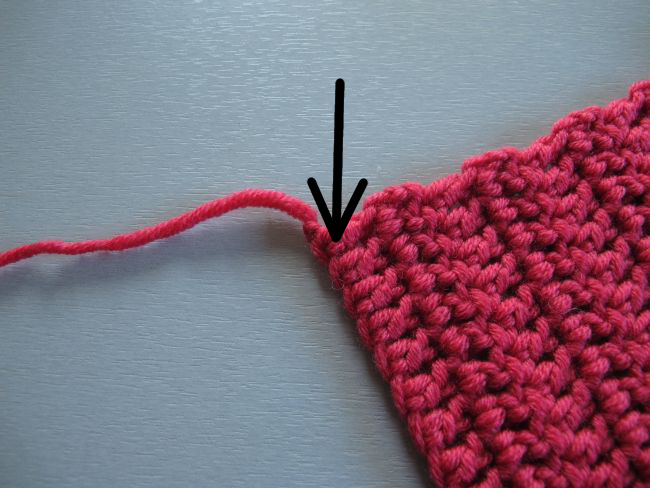 At the bottom left corner, which is the end of the first row (and the start of your base chain), work into the bottom of the last stitch in the row. Inserting your hook between the two « legs » of the stitch rather than in the loop of chain at its bottom will make a snugger finish, without too big a hole.
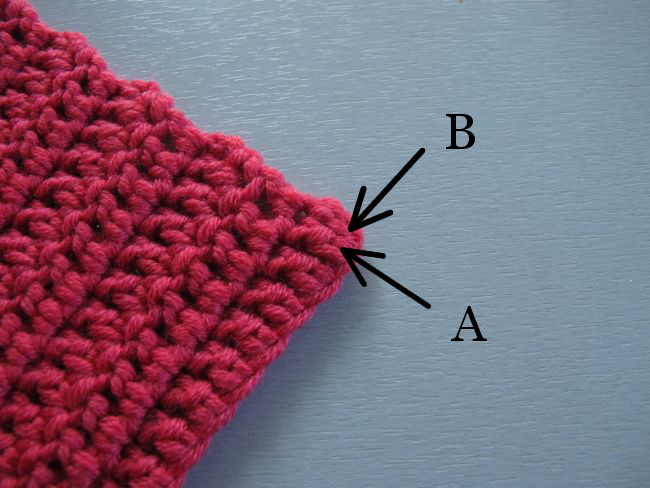 At the beginning of the first row, which is the spot where you transition from the base chain to the first stitch in the row, you have two possibilities. If you do as I almost always do and work a turning chain that does not count as a stitch, insert your hook in spot A. If your turning chain counts as a stitch, your « corner spot » is at the bottom of this chain, in spot B.
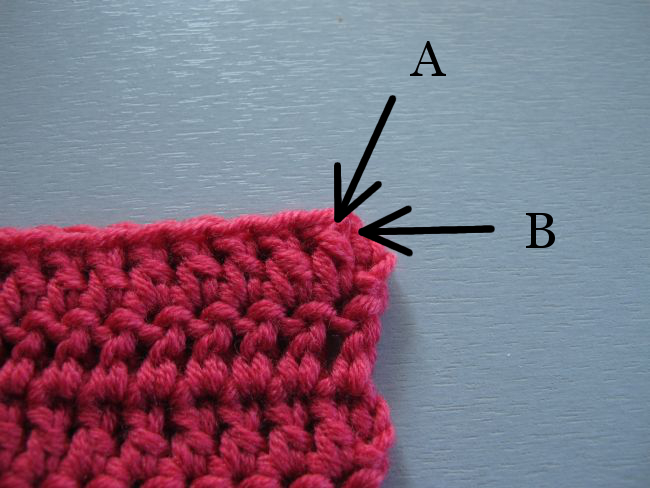 At the beginning of the last row, we have the same situation. If you don’t count the turning chain as a stitch, insert your hook in the top of the first « real » stitch in the row (at A). In the other case, insert your hook in the top of the turning chain (at B).
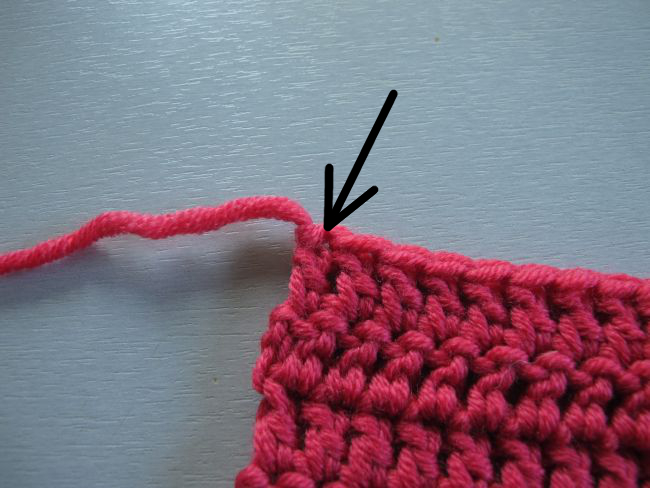 At the end of the last row, it’s pretty straightforward: your « corner spot » is at the top of the last stitch. Please note, however, that it is better to fasten the end that’s dangling from this stitch before you work your corner. If not, the stitch will open up when you work into it and create a large hole. For an item worked in the round, a corner in solid stitches will look something like this:
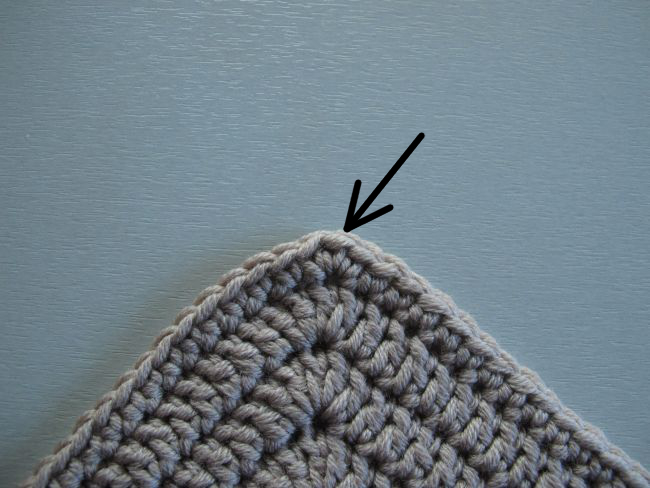 If you find it difficult to determine which stitch is the corner stitch, look at the whole group of stitches in the corner. Typically these stitches will all be worked into the same stitch or chain space in the round below. Count the stitches in this group to determine which is the center one. And don’t forget that the top of the crochet stitch will sit very slightly to the right of the body of the stitch. Work into the top of the center stitch, even if this doesn’t look to be the exact center of the corner – it will all look much straighter when it’s finished!Now, on to the simple borders.The number of stitches to work in each corner depends on the height of the stitch used. For a border in single crochet, you typically work 3 stitches to turn the 90-degree corner.
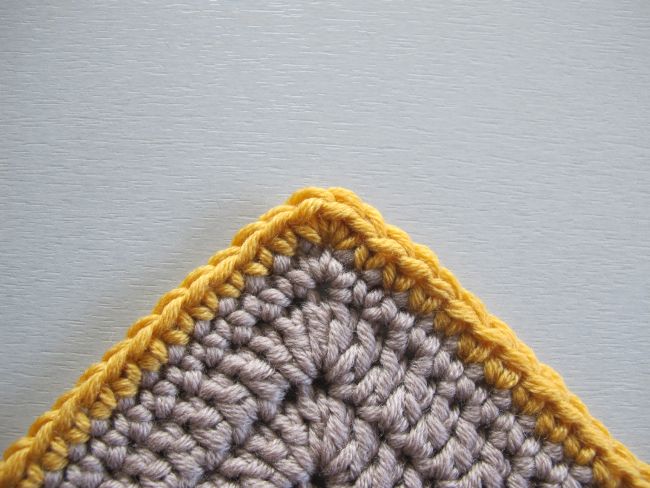 This is valid for any number of rounds in the edging. The corner will always be made up of 3 single crochets. Note that this means that the number of stitches along the straight edges increases. The corner stitch will always be the corner, but you are adding 1 stitch on each side of the corner. If you are working around a square, the stitch count for each straight edge will increase by 2 for every round (1 stitch for each corner, at the beginning and the end of the straight edge).
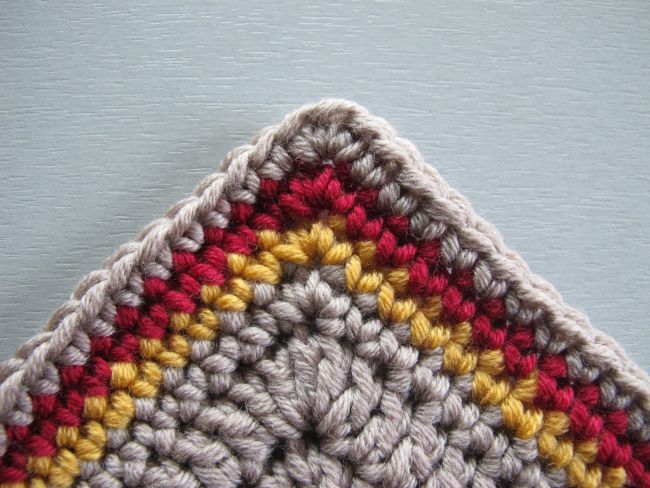 When working in double crochet, the added round is taller than when using single crochet, which means that we need to work more stitches in each corner to make our 90-degree turn.
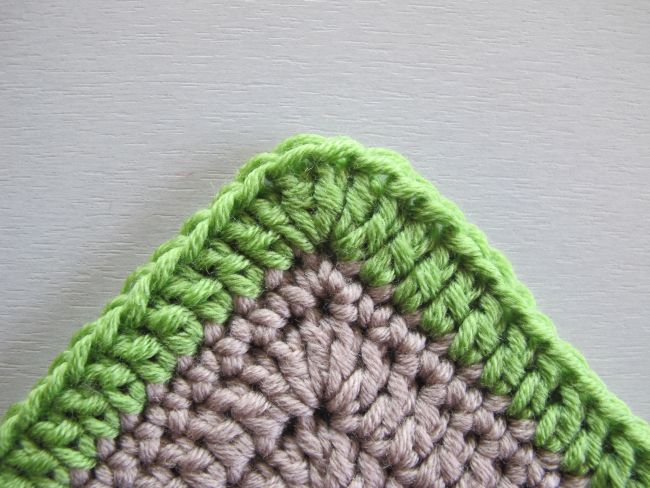 The basic number for a double crochet corner is 5 stitches. Note that this means you are adding 2 stitches to the straight edges on each side of the corner. The stitch count for a straight edge in dc that starts and ends with a corner will increase with 4 stitches for every round. You can play around a bit with the double crochet corner.
 Here, I replaced the corner stitch (the center stitch of the 5) with 2 ch. This creates a chain arch that you can use to attach other motifs (or whatever you like). With a bit of blocking (the swatch in the picture is unblocked), this also creates a crisper angle.
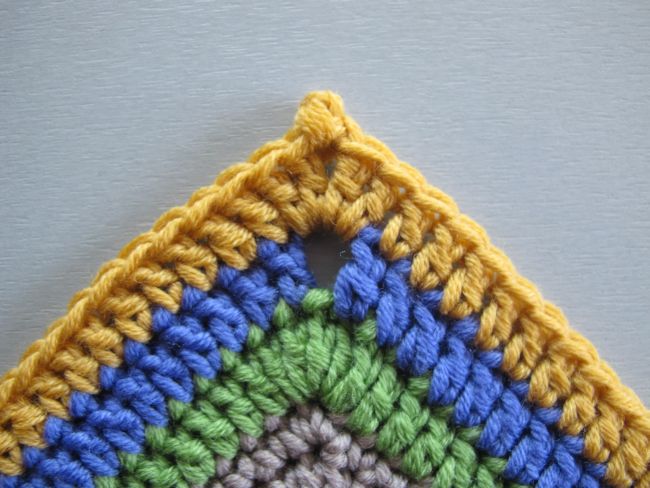 Or you might try replacing the corner stitch with a picot, as I did here!You can continue playing around with this simple double crochet corner. I’m sure you will come up with plenty of variations.Doing this, you will already be going down the path of more complex border corners – let’s get back to that subject next month! See you soon!
 Newsletter index