
Newsletter August 2014: Attaching a border with blanket stitchIn the shop:Let’s kick off the new season with some special offers! First up is an offer on a 100% wool from Plassard, at a very attractive price.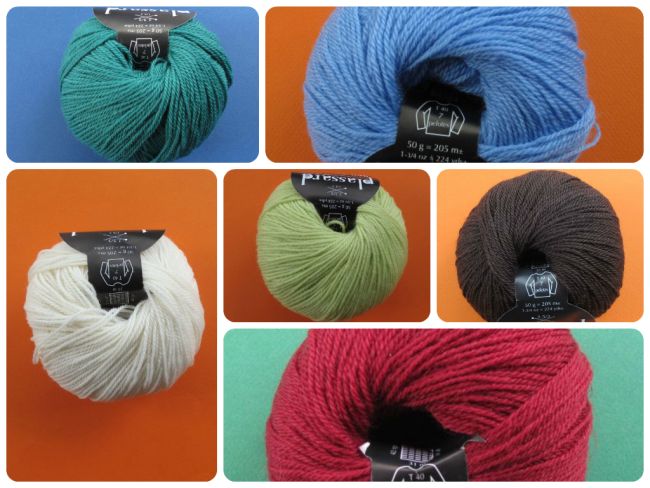 Don’t forget to check the shop during the month of September for other offers.More information in the « Special offers » section of the shop.Attaching a border with blanket stitchLast month I described how I worked a border lengthwise and sewed it onto a fabric picture.Another way to attach a border to something in solid fabric (such as a bag, a blanket, or a garment) is to use a very simple embroidery stitch, the blanket stitch, as a foundation. If you’re not used to embroidery, don’t worry. This is very easy to work, and I find that it quickly becomes addictive. You will need a needle with a sharp tip and a relatively large eye, so you don’t have to struggle to pull your thread through it. The thread used to do the blanket stitch will depend on what you have on hand and on the fabric to which you are going to attach your edging. If the fabric is loosely woven and your chosen edging yarn is fine, you might even be able to use the yarn in your blanket stitch foundation. I, however, worked my edging onto an accessory in tightly woven cotton fabric, so I needed something rather thin, but still strong. I used three strands of embroidery floss, and a thimble to push my needle through.So here’s how to do it, working into the existing hem. Of course, do not hesitate to try this out on scrap fabric first – that’s what I did before starting to take photos.
 First, attach your thread to the back of the work, using a knot or small stitches. Then, pull the needle through so that your thread emerges at the bottom left corner of the fabric.Insert the needle again, more or less vertically above the spot where the thread just went through, and out again very close to this same spot.Very important: as seen in the bottom photo above, your needle should go over your thread at the base of the work.
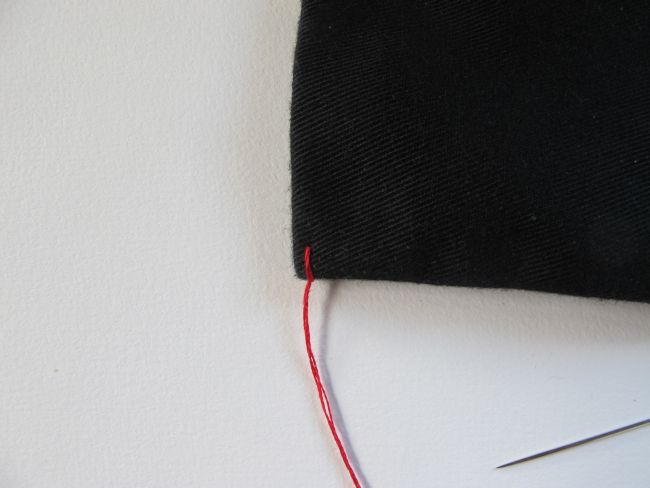 Congratulations! You just made your first blanket stitch. When stitching, don’t try to go through all the layers of fabric in the hem – the top layer is quite enough.Now, we are going to space out the stitches, to create loops to work our crocheted edging into.
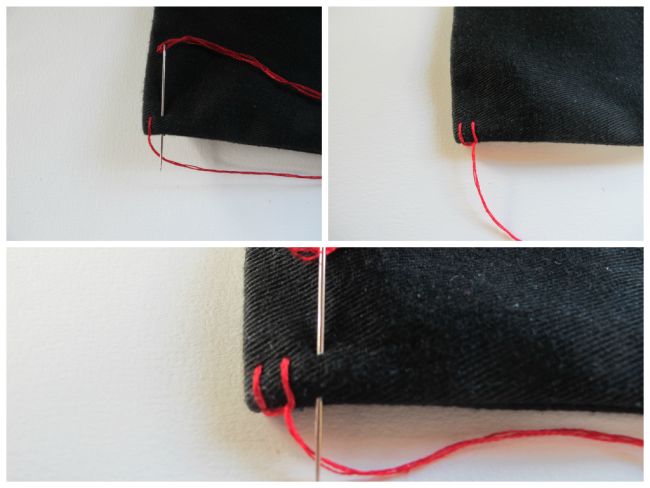 For your next stitch, insert the needle at the same height as the previous stitch, but a little bit to the right. The spacing here will depend on what yarn and crochet hook you will use for the border. We will test the spacing later, so don’t worry too much about it right now. Just think that you will need to be able to insert your crochet hook comfortably in the space between the two stitches. They shouldn’t be too tight, but not too far apart, either.Your needle should emerge from the fabric directly below the point where you inserted it. Again, it is very important for the needle to go over the thread from the previous stitch. In the bottom picture, you can see how this anchors the thread at the very edge of the fabric. These horizontal strands are what we’re after – they will work as loops where we will crochet the first row of our edging.
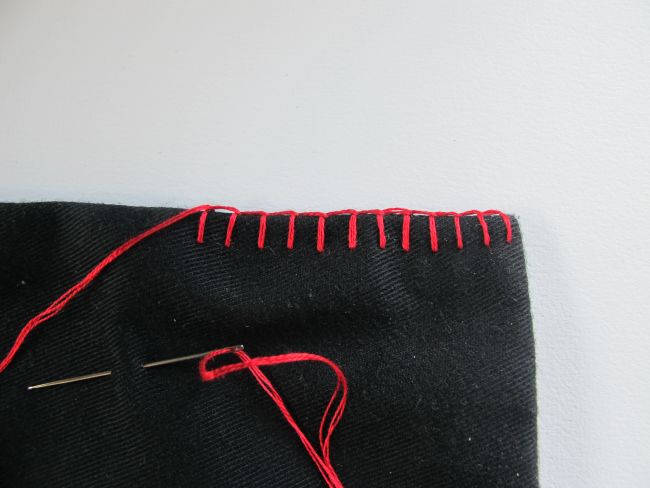 Work blanket stitch for a couple of inches, then rotate your work so that the stitching is at the top. It is time for a little test, to see if the spacing of the stitches will work with the yarn and hook used for the actual crocheted edging. Pick up your hook, and start working at the left end of the blanket stitches.
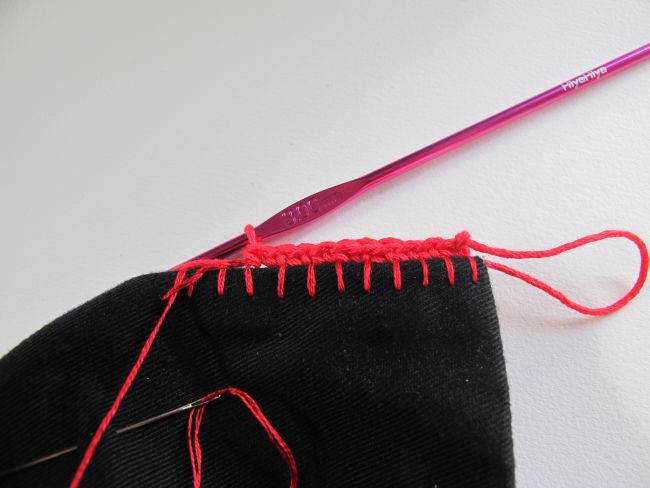 It looks like this will work! I have crocheted one, sometimes two sc’s in each loop between the stitches. The occasional use of two sc’s instead of one allows for the crocheted edge to adapt better to the length of the hem without stretching too much.As you can see, there is no need to be terribly precise with the spacing of the blanket stitches, since you can adapt the number of crocheted stitches worked into each loop. However, as said before, your crochet hook needs to be able to pass through the loop comfortably – if it doesn’t, you need to space out your stitches more. On the other hand, if you are consistently working three or more stitches into each loop, you might get gaps between your edging and the fabric. It’s up to you to decide whether you like this effect or if you prefer working your blanket stitches closer to each other.
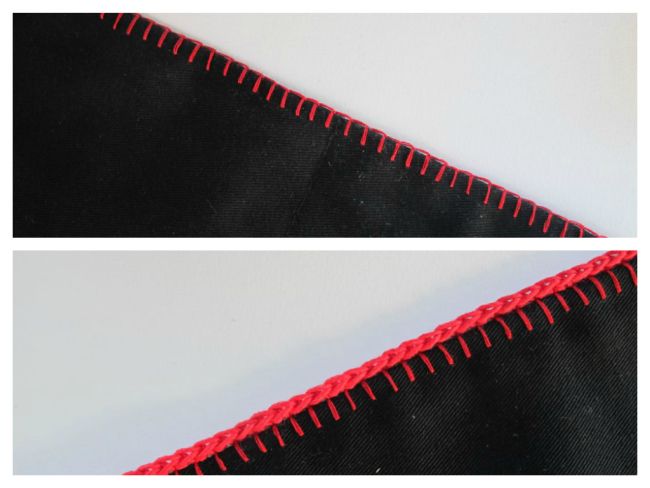 Undo the crocheted test stitches, and continue to work blanket stitch along the entire edge. When you are finished, fasten your thread and work the first row of crochet stitches into the loops created by the blanket stitch. Here, I have used sc’s, but you can, of course, choose another stitch, depending on the effect you want.Now, and only now, will we count our stitches! If there are many of them, don’t hesitate to put a marker (such as a safety pin) into every 10th, 25th or 50th stitch. Choose any number that makes sense to you – the idea is not to have to count again from the beginning every time you lose track!I had 115 stitches along my edge, so that’s the number we’re going to base the following ideas on. Now, it’s time to start considering your options.Perhaps you already know what edging you would like to use. I had a vague idea of the general shape I was looking for, so I pulled out a couple of stitch dictionaries and had a look. I settled for an edging with rounded shapes from Edie Eckman’s fabulous book Around the Corner Crochet Borders.
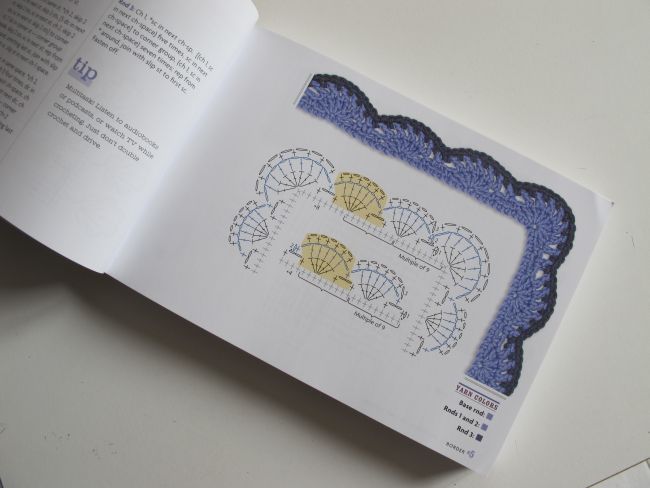 This edging, when worked back and forth, is a multiple of 9 sts + 4. I had 115 stitches. Time to pull out the calculator!To know how to adapt the edging to my work, I first subtract 4 sts from my total: 115 – 4 = 111. Is 111 a multiple of 9? No, since 111/9 = 12.333333… I’m going to find the closest multiple of 9 to my 111 stitches.12*9 = 10813*9 = 117Now, I can choose. I’m going to work another row of sc’s. During this row I can either decrease 3 stitches (111 – 108 = 3) or increase 6 stitches (117 – 111 = 6).For this project, I decide that it’s preferable to add stitches rather than subtract them. So I place 6 markers regularly spaced along the row.
 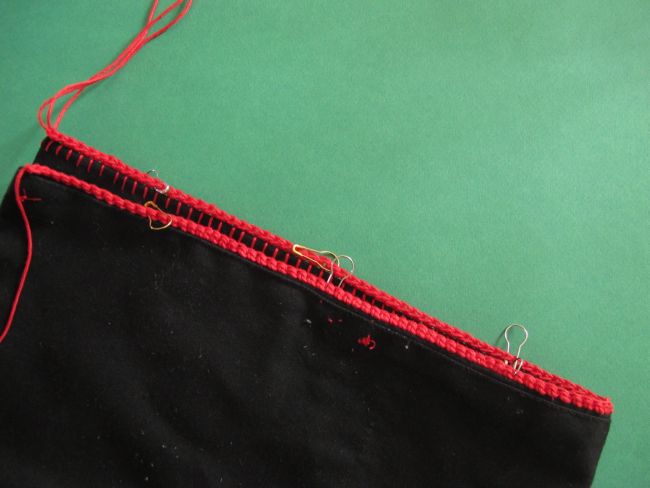 I tend to fold my work whenever I do this kind of operation and line up the markers on each half so that they are more or less symmetrically placed. However, I find that there is no need to be ultra-precise and count stitches between markers.I simply work my way back in sc. At every marker, I work 2 sc in the stitch below, rather than one. This way, I end up with a total of 115 + 6 = 121 stitches.I check my math:121 – 4 = 117117/9 = 13All my numbers are whole and nice, so I can simply start working my border.Here’s the result!
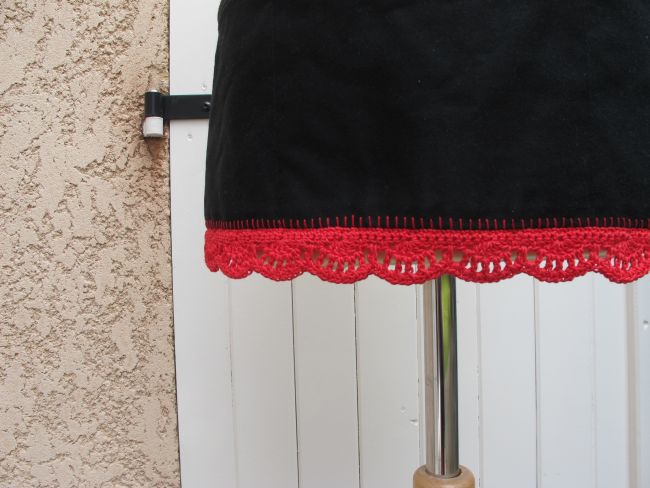 This is the end of this tutorial, but not the end of the customizing of my accessory. If you want to see the finished work and find out what it is and when I use it, check in on my blog during September!I will continue to discuss crocheted borders next month, so if you have questions or suggestions, do let me know. See you soon!
 Newsletter index