Newsletter October 2011: Flat hook slip stitch crochet tutorialNews:I have the great pleasure to welcome a new designer: French knit and crochet blogger Barjolaine (Véronique Chermette). Her first pattern published in my shop is the knitted shawl Mamelie.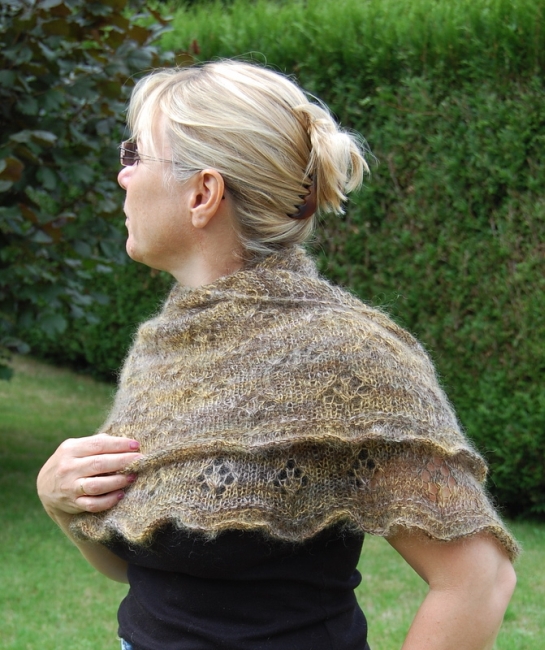 Mamelie is a shawl with an interesting shape, incorporating three triangular sections. Thanks to the shape, this shawl will stay put on your shoulders to wrap you in softness and warmth. It’s worked on large needles with two laceweight yarns held together. More information in the shop.The scarf Ava is the republication of a pattern of mine that was first published in the Fall 2010 issue of Interweave Crochet (called Cabled Lacy Scarf in the magazine).
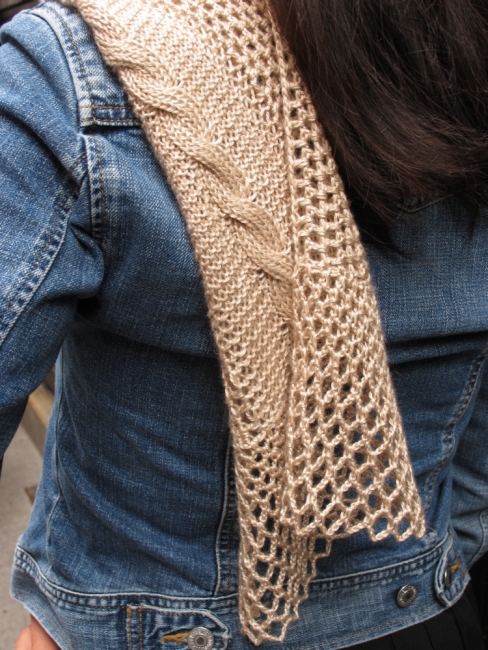 This time around I worked Ava in my new silk/baby camel blend. So soft and luxurious! The center of the scarf is a knitted reversible cable on a garter stitch background, surrounded by a simple crocheted lace edging. More information in the shop.EclatDuSoleil’s new pattern is all in crochet: the blanket Colourful Hug, just the right thing to wrap you or your child in softness and brighten up dull autumn days.
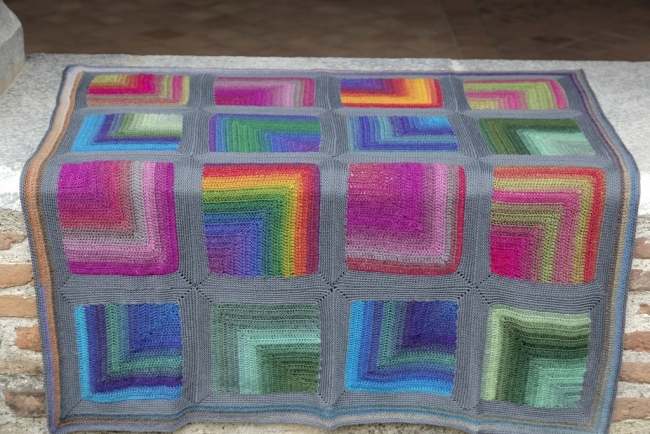 The blanket in the photo was worked with 6 balls (300 g) of Mini Mochi and 200 g of fingering weight merino. The construction is very clever. It will allow you to maximize the use of the yarn and avoid weaving in ends (except for one or two). The pattern is free with the purchase of the yarn as specified. More information in the shop.As you might have noticed when reading about the designs above, there are two new yarns in the shop.The first one is a wonderful blend of 65% silk and 35% baby camel, available only in the natural colour obtained by the two fibers.
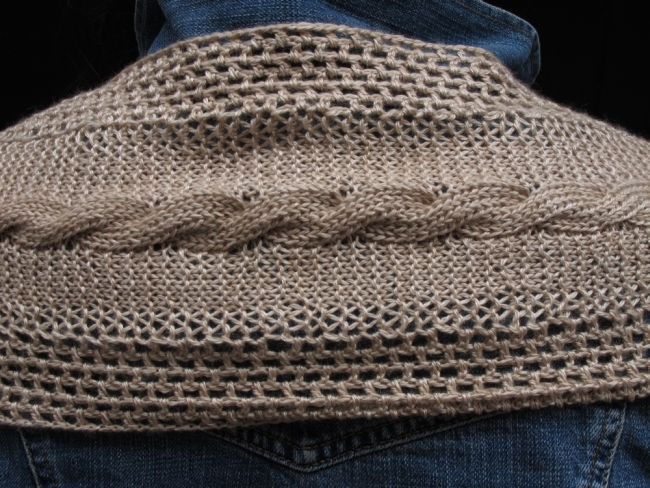 In the other yarn, a lovely and soft fingering weight merino, the choice of colours is definitely larger. There are currently 13, but I think I will need a couple more soon…
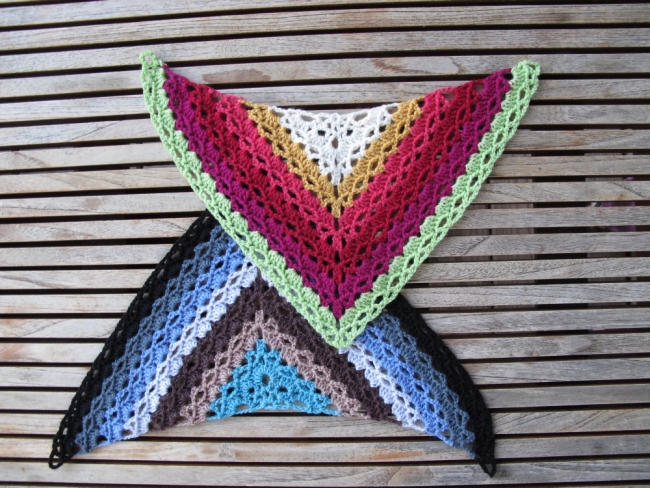 Also in yarn news, several colours of the very popular laceweight bamboo are now available again.
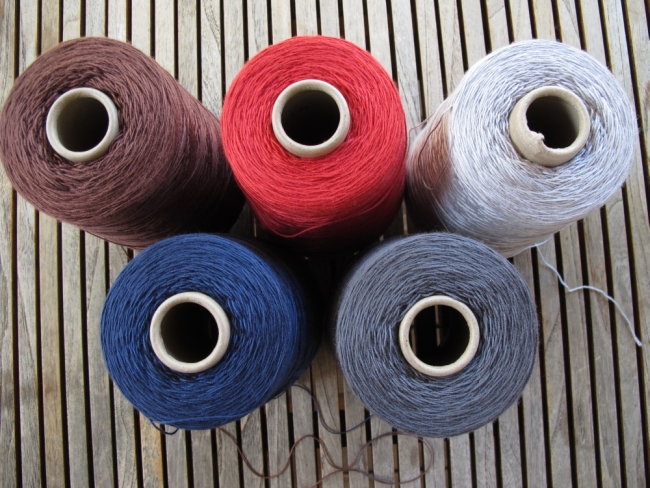 And besides of the news in the shop, I have a design in the current issue of Interweave Crochet, Caramel.
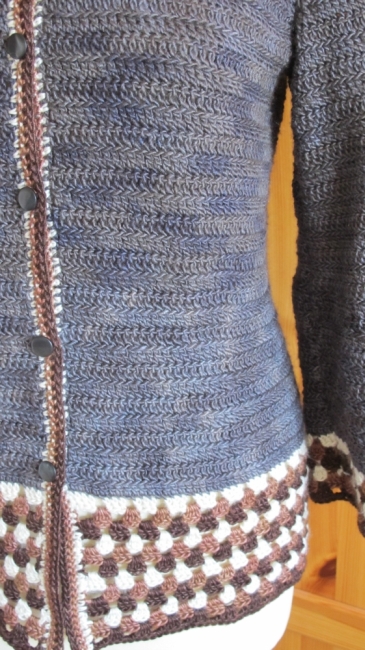 This is a grown-up version of a child’s cardigan named Zoé that was published in the spring issue. I kept the basic concept of the design, with a granny stitch border at the bottom of the body and sleeves and a single colour for the main part of the garment. However, the cardigan was redesigned with, among other things, waist shaping and set-in sleeves. A very fun experience!Flat hook slip stitch tutorial:Here it is at last: the much demanded tutorial for using the flat hook presented in the August newsletter on slip stitch crochet. For those of you who are not interested at all in this technique, I promise that this is the last newsletter this year on the subject – it’s the third one! However, so many people were intrigued by this tool and wanted to know more about its use, that it’s a good reason for me to indulge my interest in it once more. And I certainly haven’t finished my adventures in slip stitch crochet…As related in the August newsletter, this summer in Sweden I visited Kerstin Jönsson who has researched the traditional slip stitch technique and taught it for many years. This really spiked my interest in this technique, which had intrigued me for some time already.However, wanting to learn and actually learning are two different things. This technique isn’t difficult, but it was only when I decided to set aside 20 – 30 minutes per day to learn it that I really got the hang of it – in less than a week. The motions are quite different from those in common crochet, but I think they are worthwhile to learn. The flat and pointy hook really makes it much easier to work into the stitches, and the result is a very stable fabric with intriguing texture.So, here we go!To start, you will as always need to work a starting chain. It’s important to work it quite loosely. I don’t know why, but when working the starting chain with the flat hook, I was constantly turning it on itself. My solution was to use a normal 6 mm (US J-10) hook for this step.
 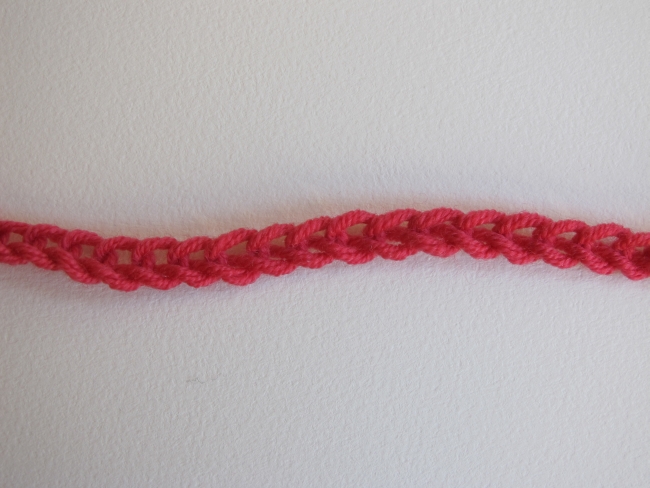 It’s important to note that, when you count the number of stitches in this chain, you should count the loop on the hook (contrary to what you do in common crochet).I worked the sample here over a slightly smaller number of stitches, but it’s interesting to use the number Kerstin recommends for a small or large mitten for adult (48 or 56 stitches, respectively). This way, you can judge if the yarn and your way of forming the stitches yield the right gauge.But let’s get back to our starting chain. You can of course work into this chain as usual. However, Kerstin has found that this makes for a rather fragile edge of the work. Instead, she advises turning the chain over and working into the back of it.
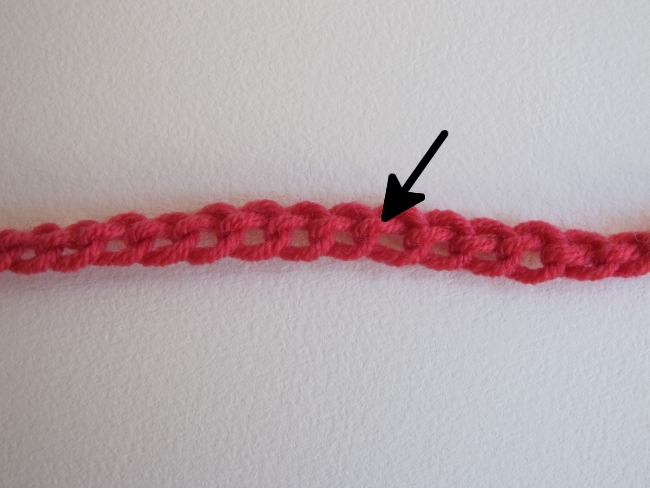 At the back of the chain, in each stitch, you will find a bump (at the arrow). To create a pretty and stable edge, it is preferable to work into this bump.
 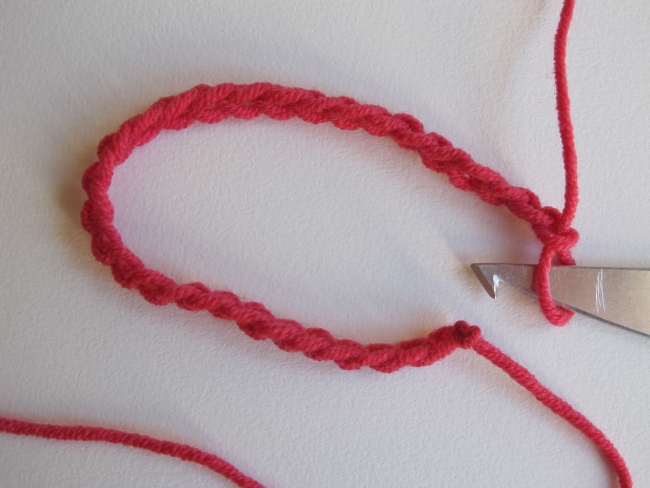 Form a circle with the chain, right side of the chain facing inwards.
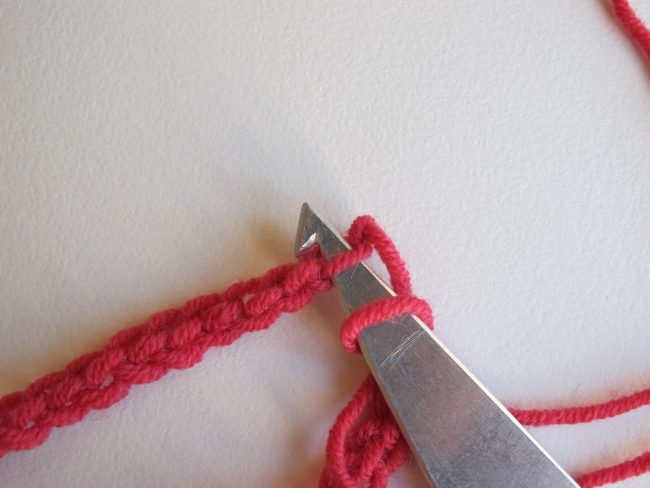 Put the flat hook through the first bump in the chain and start working the first stitch.
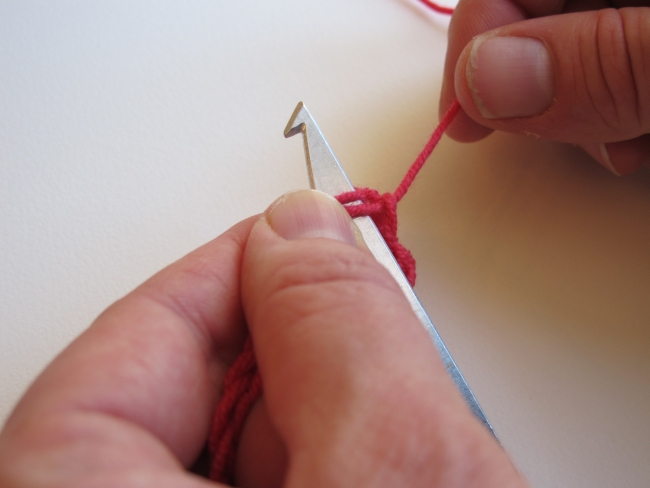 The left hand holds the work and the right hand holds the yarn. Pinch the loop on the hook and the stitch you work into with your left thumb to keep them together.
 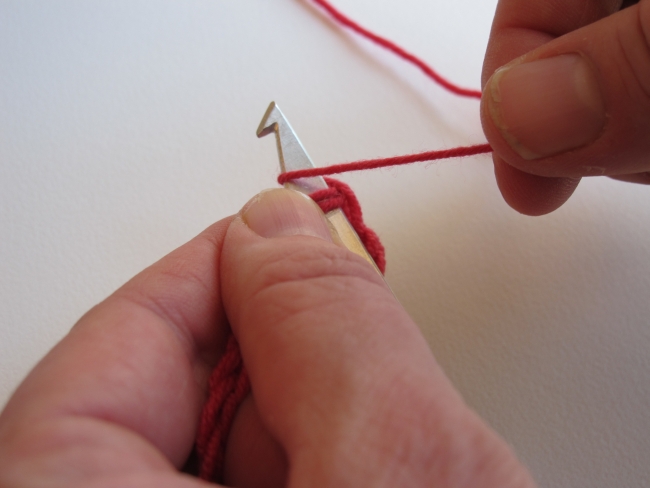 Use your right hand to throw the yarn around the hook.
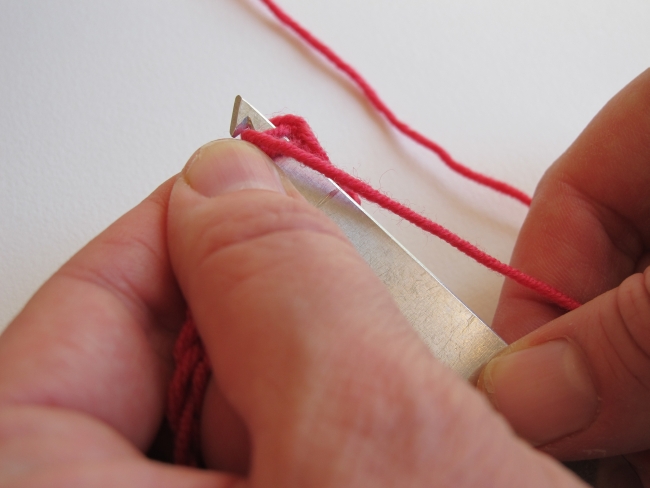 While holding the yarn loosely in your right hand, hold the hook between your right thumb and index finger, and pull downwards to pull the yarn through.
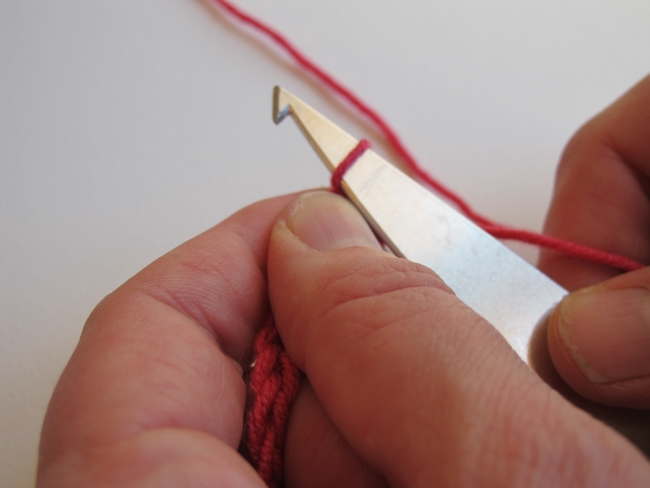 When you have pulled through the new loop, push the hook upwards, to enlarg the loop. This is where you decide on the size of the following stitch. The further you push the loop towards the large end of the hook, the looser your stitch will be. If you work very close to the tip, your stitches will be very tight and almost impossible to work into on the next round. If the stitch is too loose, your work will be uneven and floppy. Only testing can show you how large you need to make the stitch with a given yarn.Continue working one stitch into each bump of the starting chain. Don’t forget to mark the first stitch in the round with for example a safety pin – it will be very hard to identify the beginning of each round without a marker.
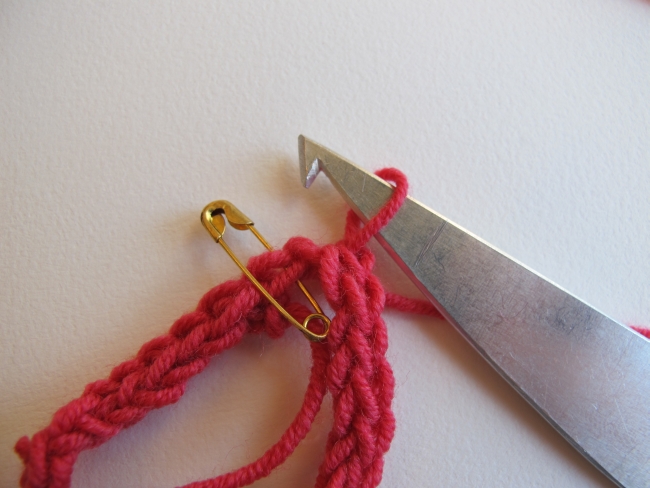 I have finished the first round. The safety pin marks the first stitch in the round.
 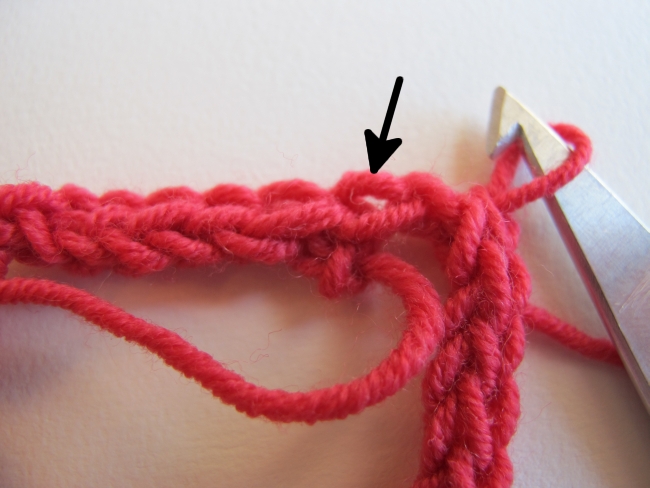 I’ve removed the marker to work my first stitch in the next round. I am now going to work into the back loop, at the arrow, in order to create an edge that will not roll. It’s important to identify the stitch in the first round that lies on top of the starting chain.
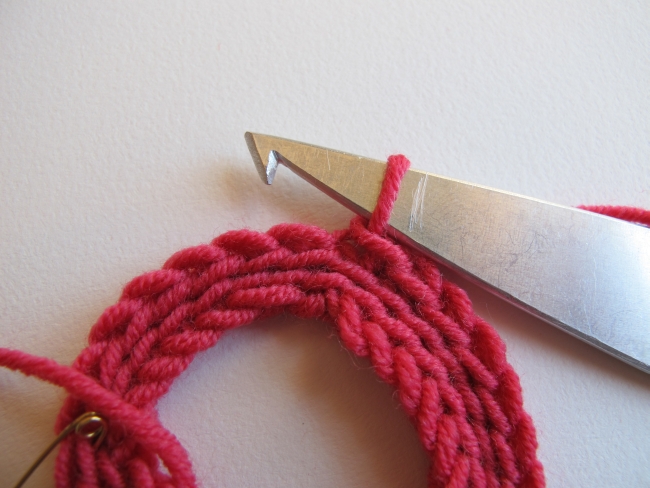 Here, I’m working the third round. It’s now easier to distinguish the previous rounds from the starting chain. The stitches lie facing you. You can count the horizontal ridges to count the rounds.
 I’m at the end of the round and am going to switch from back loop to front loop. The front loop is at the arrow.
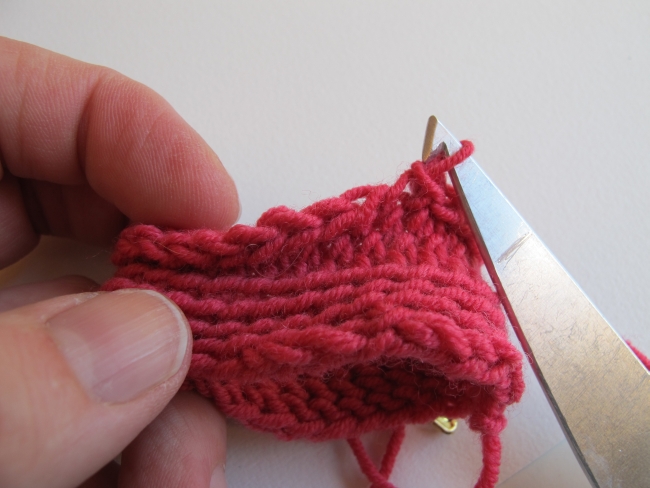 Here, I have worked a few rounds through the front loop. You can see how the work has a tendency to roll outwards.
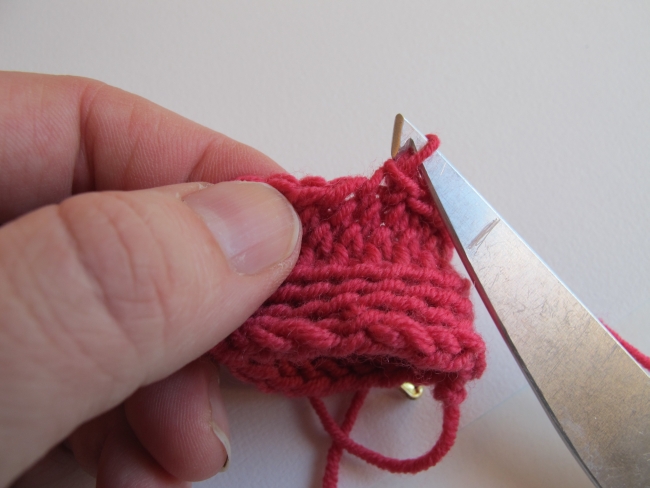 In order to work easily through the front loop, I straigthen the work with my left thumb so that the front loop is facing me.
 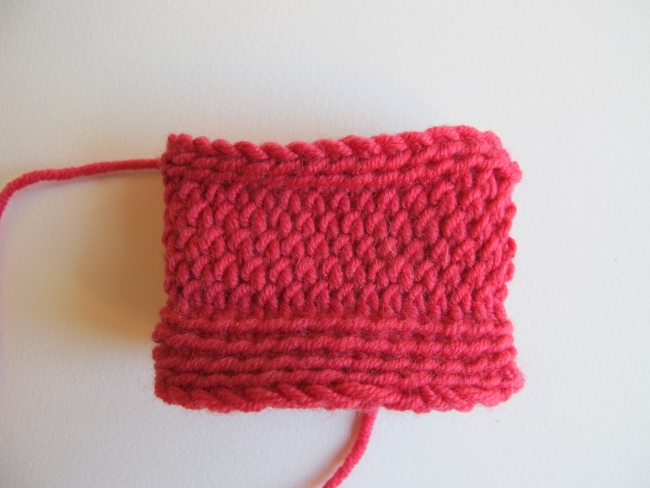 Here is my little swatch, starting and finishing with work through the back loop, and with the part worked through the front loop in between. I never cease to be amazed by the difference in texture!As you might understand, mastering gauge with this technique can be a bit tricky. In addition to pushing the loop up or down on the hook to modify its size, try working with different types of yarn. Kerstin uses a light worsted wool yarn (100 m /110 yds per 50 g) in her work. I get a similar gauge with a DK weight yarn (125 m /137 yds per 50 g).It can be useful to mark the shaft of the hook by scratching it with something pointy – you can see the horizontal mark I’ve made on my hook. I don’t necessarily push the loop to this mark every time or with every yarn – but it’s a point of reference.If you prefer a video to still pictures, you can watch one here: http://www.youtube.com/watch?v=5I2cz2FtackThe flat hook is available in the shop, and the first pattern by Kerstin Jönsson translated into English is coming very soon!See you soon!