The « Japanese » puff
Oh, crochet terminology. What might seem evident and clear at first glance, gets more and more complicated as you plow through different sources. Add a couple of other languages, and the complexity increases even more.
There is this stitch I want to talk about this month. It’s a textured stitch. Its symbol used to puzzle me when I came across it, particularly in Japanese stitch dictionaries and crochet books.
It looks like this: 
But as you might know, Japanese stitch dictionaries contain very clear instructions on how to make the stitches. So I sat down and proceeded to decipher how this stitch was made.
When I looked for an English-language equivalent, Donna Kooler’s Encyclopedia of Crochet said this was a puff stitch. However, both in this book and in other English-language sources I’ve looked at, there is a difference compared to the Japanese puff. See that little oval at the top of the symbol? That’s an extra step in the finishing of the stitch that makes it puffier and more refined – at least in my opinion.
So, how do we make a Japanese puff?
The shorthand for a puff like the one above would be:
(Yo, insert hook in designated st and draw up a loop) 3 times. There are 7 loops on the hook. Yo and pull through 6 loops, yo and pull through 2 remaining loops.
And if we take it a little easier, step by step, it looks like this:
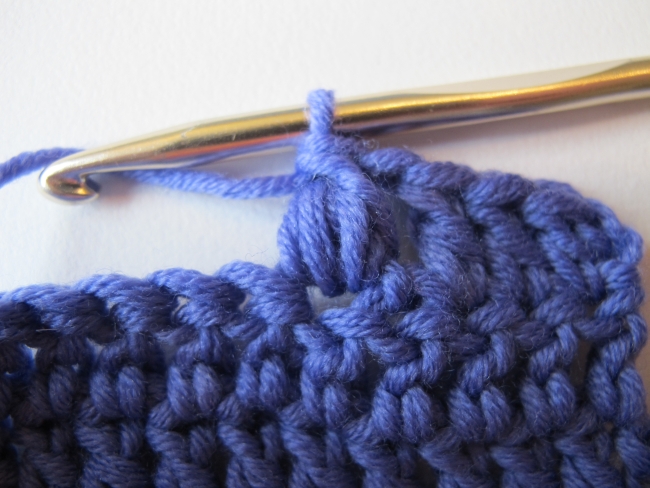
First (yo, insert hook in indicated st, draw up a loop) done. Note that I’m skipping a stitch before and after the puff, working a ch to compensate for the skipped st. This is in no way compulsory – I did this on my swatch so you would be able to see the puff more clearly.
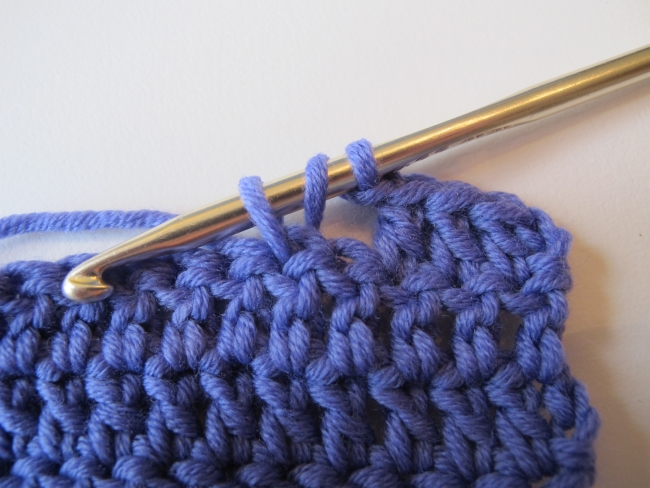
All three repeats of (yo, insert hook in indicated st, draw up a loop) are done. The loops bunch up on the hook, so it’s a bit difficult to see, but there are seven of them: the initial loop that was on the hook before starting the stitch, plus 2 loops for every repeat as indicated above.
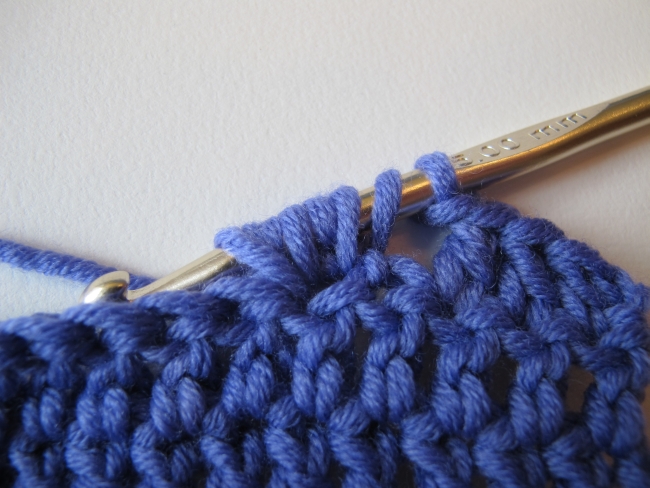
Here, I’ve done a yarnover and pulled through all the loops on the hook except the last one.
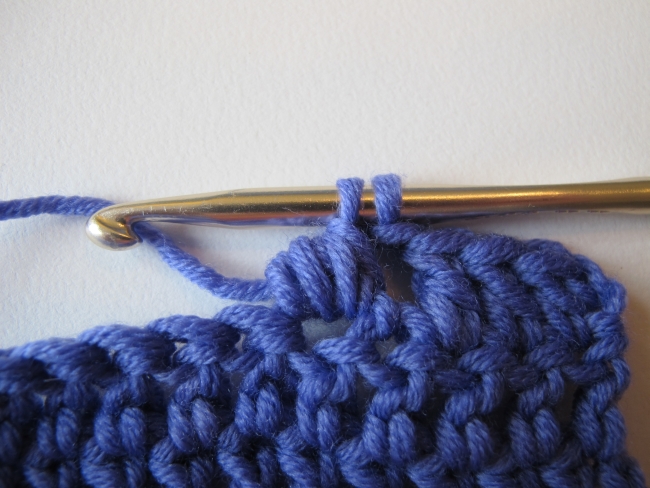
And the remaining step: yo and pull through both loops on hook. This last step gives the stitch a little extra « poof », and finishes it really well.
The pretty little puff sits nicely in the fabric!
Now, there are of course several ways of playing around with this stitch.
You can vary the number of repeats in the stitch, making it more or less puffy. Here is an example in which I worked 5 repeats in each puff, and placed them on a filet bottom:
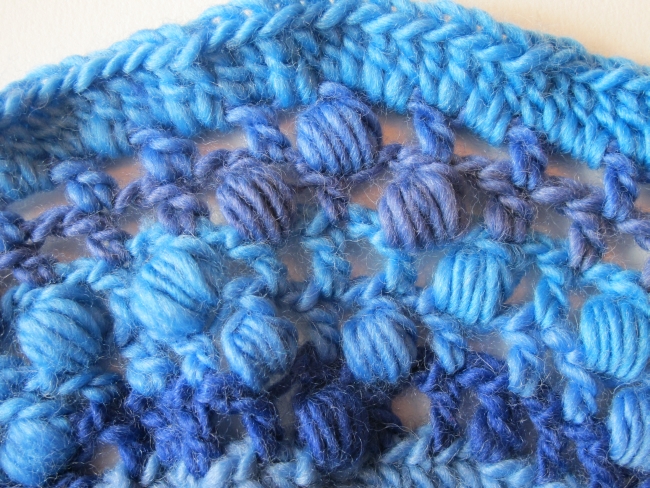 The puffs themselves are larger – and, admittedly, a little harder to work. The symbol for this puff stitch would look like this:
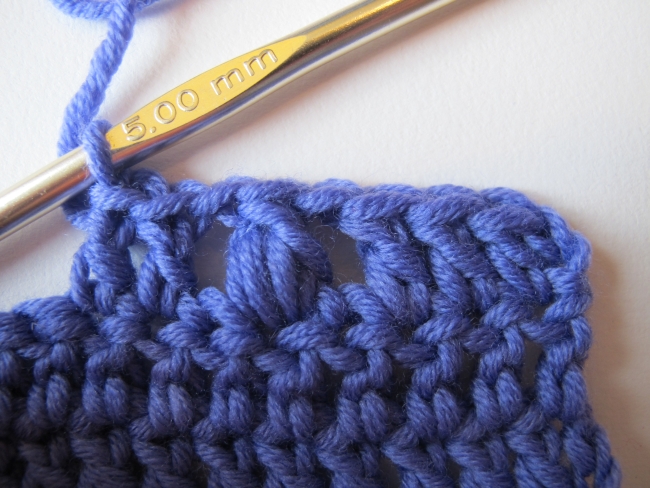
You can also try with only 2 repeats in the puff, which makes for a small, elegant puff:
Another way to play with these puff stitches is to vary a stitch pattern with them. A puff can easily replace a dc.
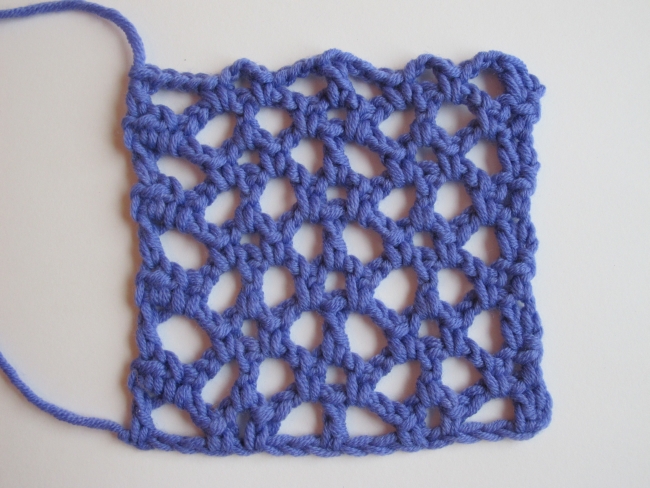
Take a look at this stitch pattern:
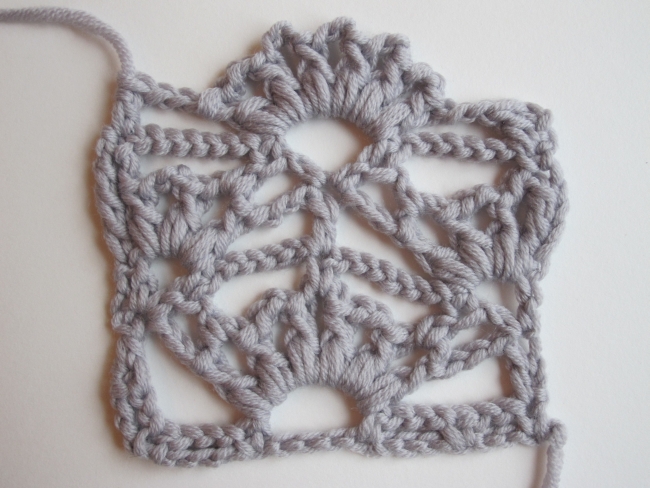
This is the very same pattern, but all the dc’s have been replaced by 3-repeat Japanese puffs:
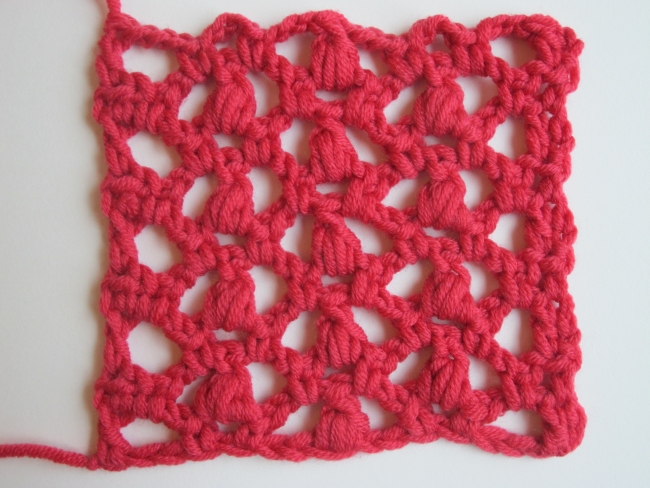
Quite a change of character!
I’m sure you can come up with many more uses for this pretty stitch!
(All swatches in this newsletter were worked with my worsted weight merino yarn and a 5 mm [US H-8] hook, except the blue swatch with 5-repeat puffs, worked in Mochi Plus col. Jenny Lake).
See you soon!