
In the shop
Please note that because of a technical problem, the Paypal payment option doesn’t appear in the shop. To purchase and pay via Paypal, please send me an email with your order.
In May, a new crochet pattern in the shop: Broceliande, a versatile accessory designed by Nathalie Mainsant.
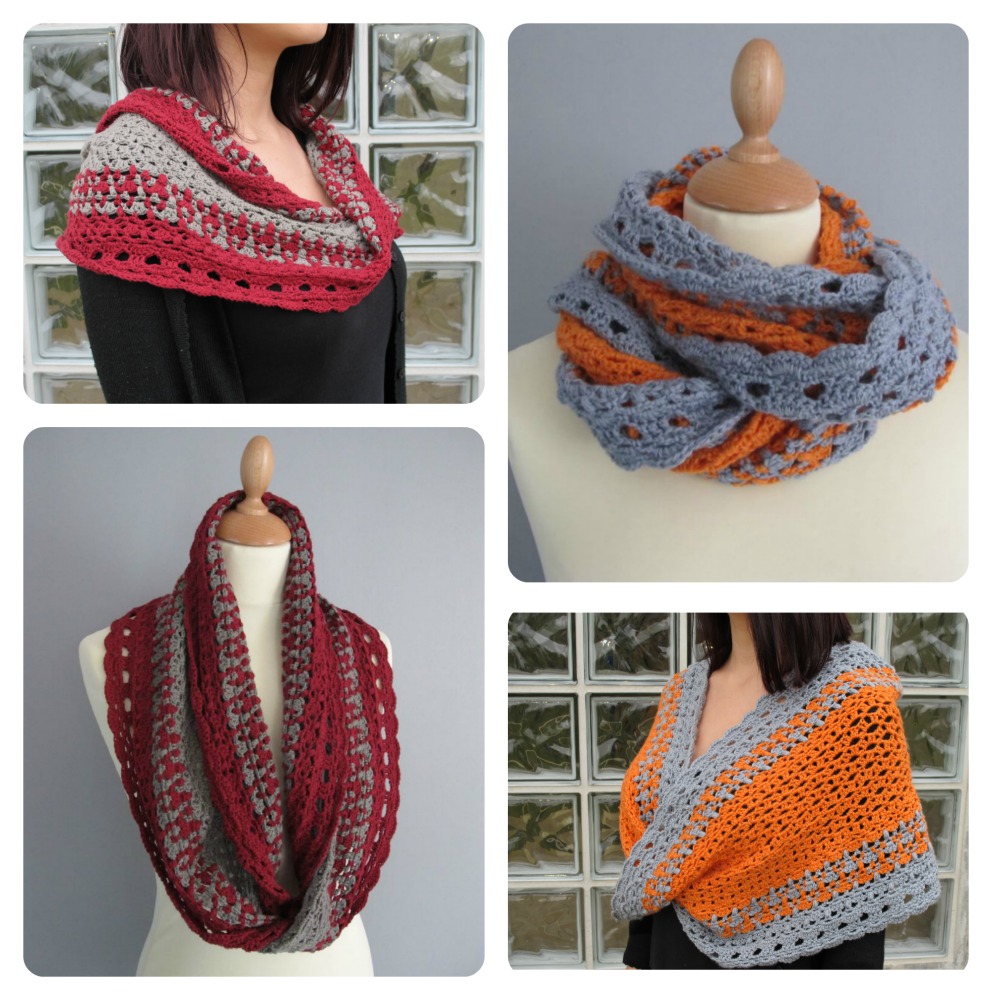
Shaped as a Möbius strip, Broceliande can be worn around your neck or on your shoulders, all year round. Choose your yarn according to your own preferences or the season – the two versions in the pattern are worked in organic cotton and fingering weight merino respectively.
Pattern for Broceliande – make it in organic cotton or in fingering weight merino.
If you wish to make Broceliande in merino, your choice of colours just became larger. I have added six more colours to this range (because 17 weren’t enough).
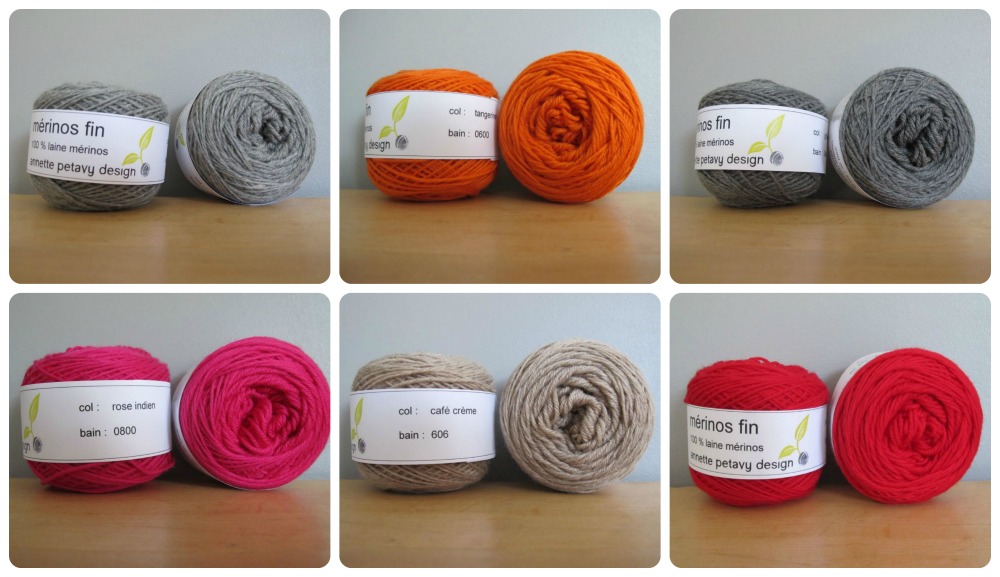
You can check out these new colours on the blog, and, of course, find them in the shop.
More news on my yarn shelves: the multicoloured version of the organic cotton.
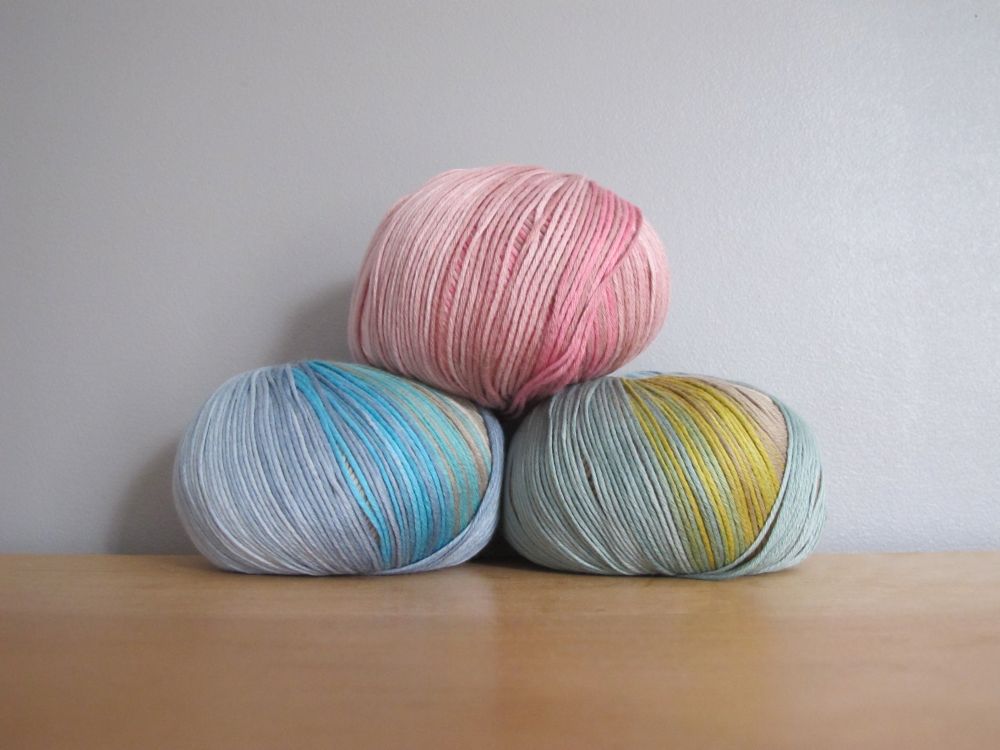
As I’m writing this newsletter, some colourways are out of stock but on their way back. As soon as they are available, you will find them on the page for multicoloured organic cotton in the shop. I don’t want to press you into buying, but if you would like to order some of this fabulous yarn, don’t wait too long – it has a clear tendency to fly off my shelves…
On the blog
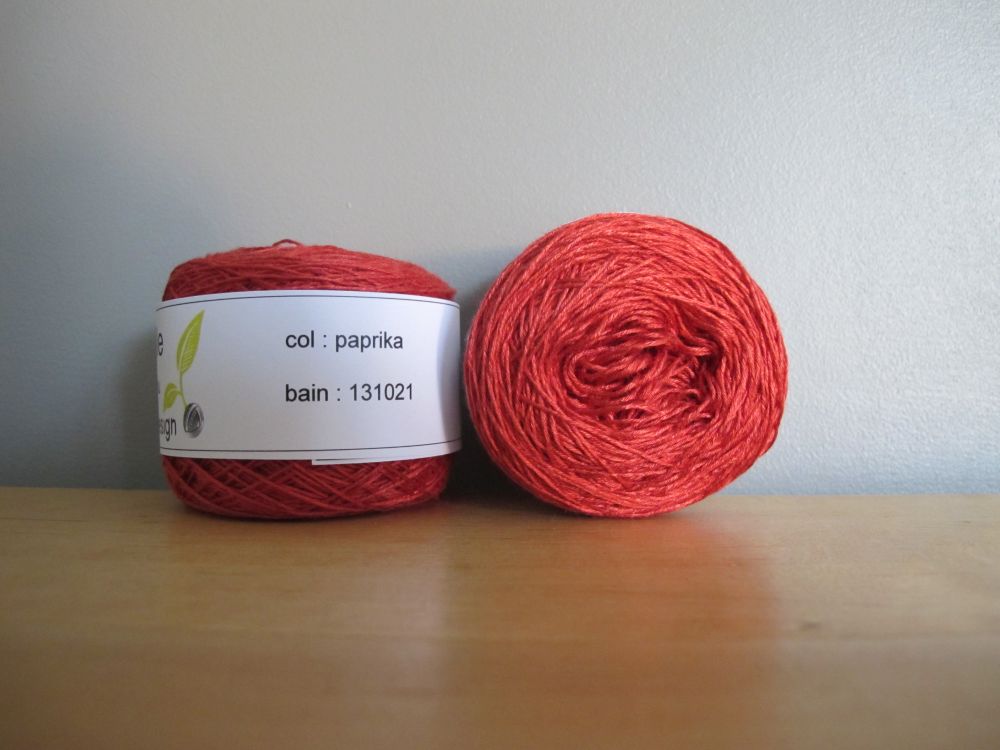 A note on the blog to announce the return of the very popular chilli colour in laceweight bamboo. The available quantity is limited.
Laceweight bamboo in the shop.
 An interesting swatch that showed that the Lune Rouge shawl, designed by EclatDuSoleil, would be lovely worked in organic cotton.
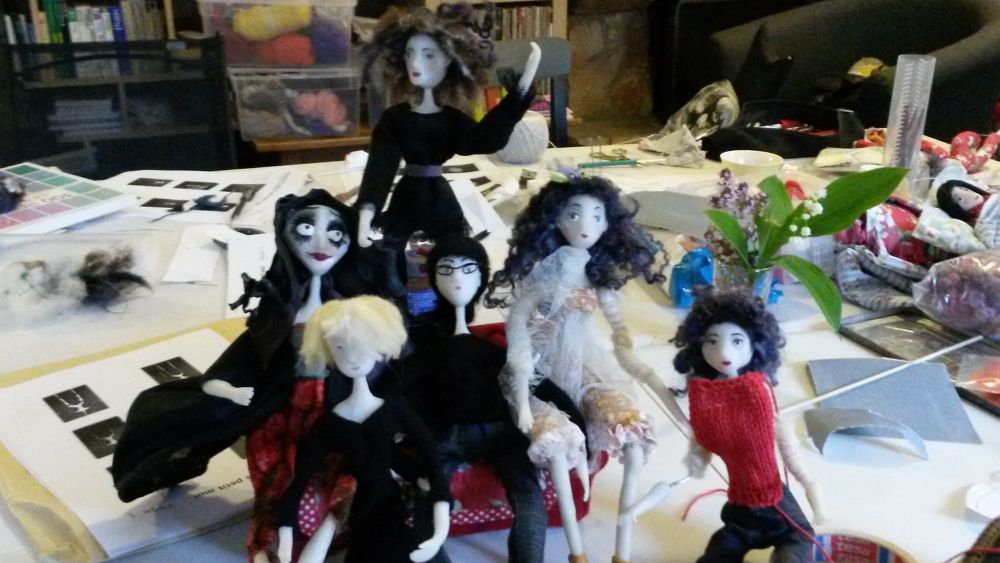 Off topic, but a wonderful creative adventure: the class « Petit moi » (Little Me) with Cathy Vagnon.
Hairpin lace: first steps
Would you like to embark on a new adventure with me?
I have been fascinated by hairpin lace for a long time. It is time to take a closer look at this technique.
I spent some time studying the topic almost two years ago, when I gave a class on hairpin lace, but ever since, my loom has stayed at the bottom of my tool bag… So I’m leading the expedition into this unknown land not as an expert, but as an explorer.
Let’s go!
If you don’t know hairpin lace at all, follow this link to see pictures and get an idea about what it is.
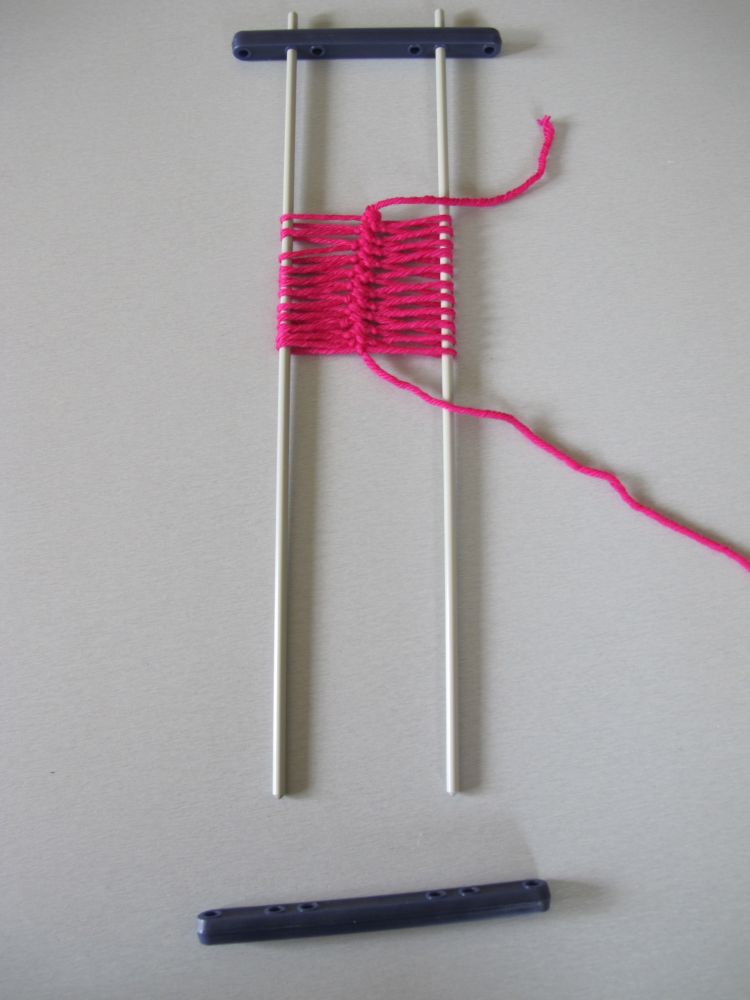
Hairpin lace is a crochet technique, but it requires an additional tool: the hairpin lace loom (also called the hairpin lace frame).
There are several types of looms, but the most common ones look like a frame that can be dismantled.
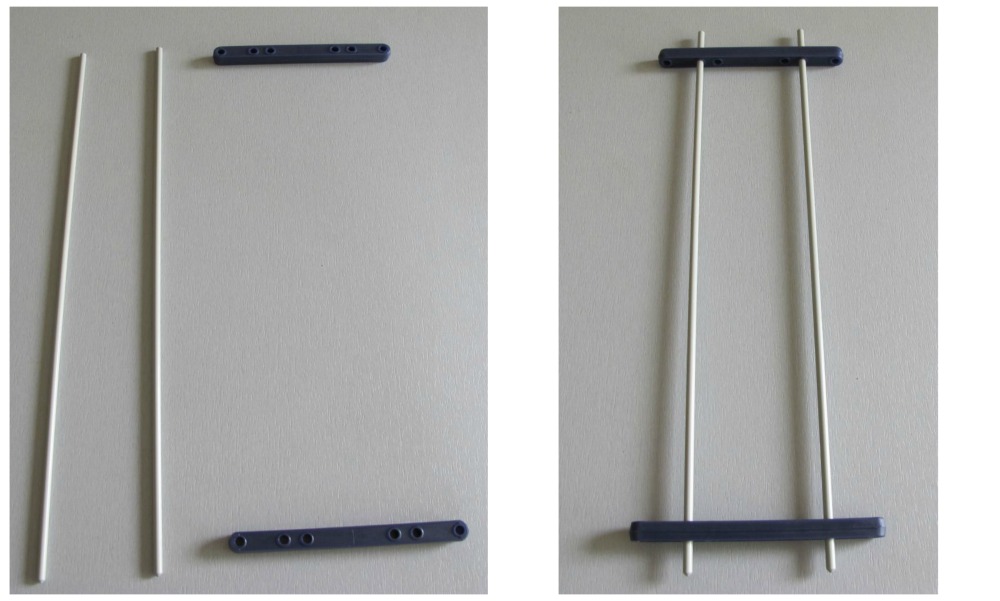
The long rods form the sides of the frame, with two horizontal bars that can be mounted on the rods.
If you look closely at one of these horizontal bars, you will find several holes where the rods can be inserted.

By varying the placement of the rods (which are simply inserted into the holes) you can change the space between them, which will change the width of the strip made. With the type of loom shown here, you can achieve various widths between 2 cm and 10 cm.
There are a few looms of this type in my shop, but you can also find them in stores or online. If your local store doesn’t have them, ask – they might be able to order one for you.
It is also quite possible that your mom or grandma has an older one stashed away in a drawer!
I talked about a « strip » because we are going to make strips that will be attached to one another. The width of each strip depends on the width of the loom. This is why it’s interesting to use an adaptable loom with several holes. The length of the strip is not limited by the length of the loom.
All this will became clearer as we go. Since this technique requires you to manipulate a new tool (the loom), we will proceed step by step.
This time, we will simply make our first strip. You will need some leftover yarn (not too light or too heavy to start with), a hook in a size appropriate for your yarn and your loom.
Below, many instructions refer to left and right. These instructions are valid for anyone who crochets right-handed. If you are a left-handed crocheter, please reverse as needed.
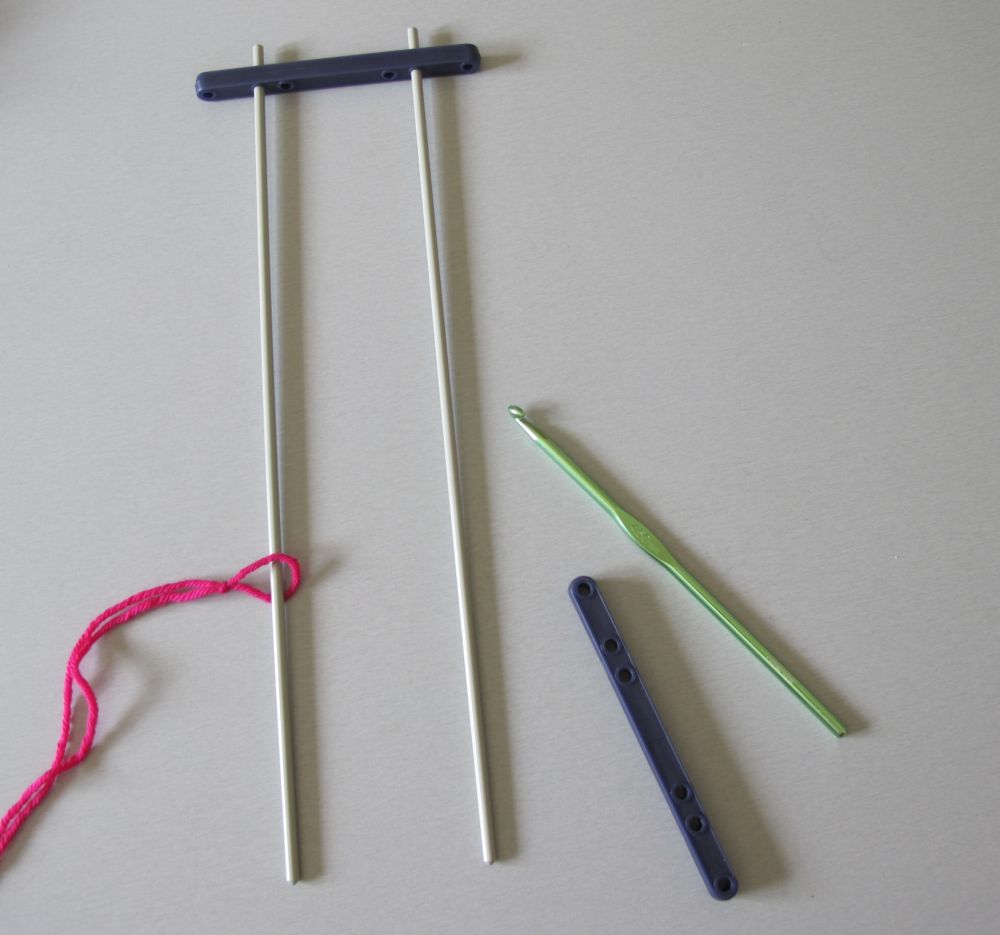
Mount a bar, which will be the top bar, on the rods. The precise width between the bars is not important for learning purposes; simply avoid placing the rods very close together or very far apart.
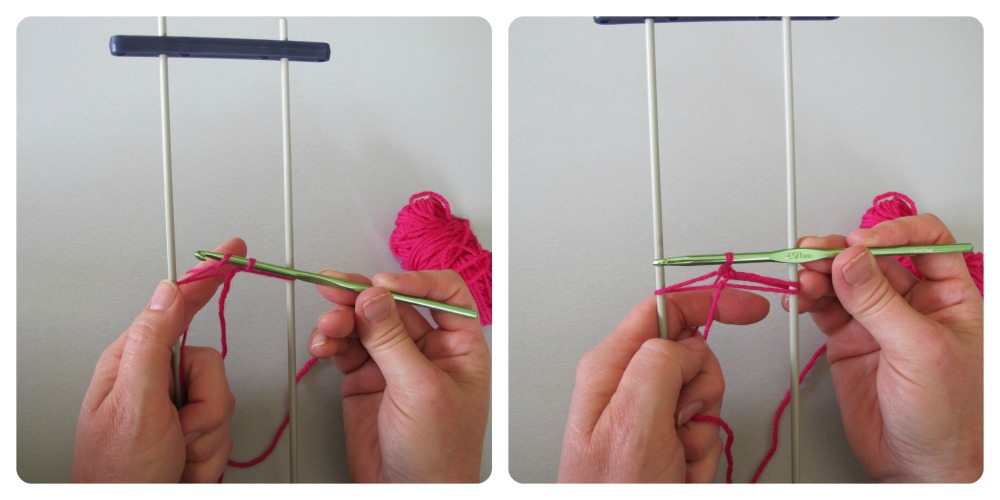
Make a slip knot (the same type of knot that you use to start any crochet project), and insert the left rod through this first loop. For now, leave the yarn ball and the yarn tail to the left of the loom.
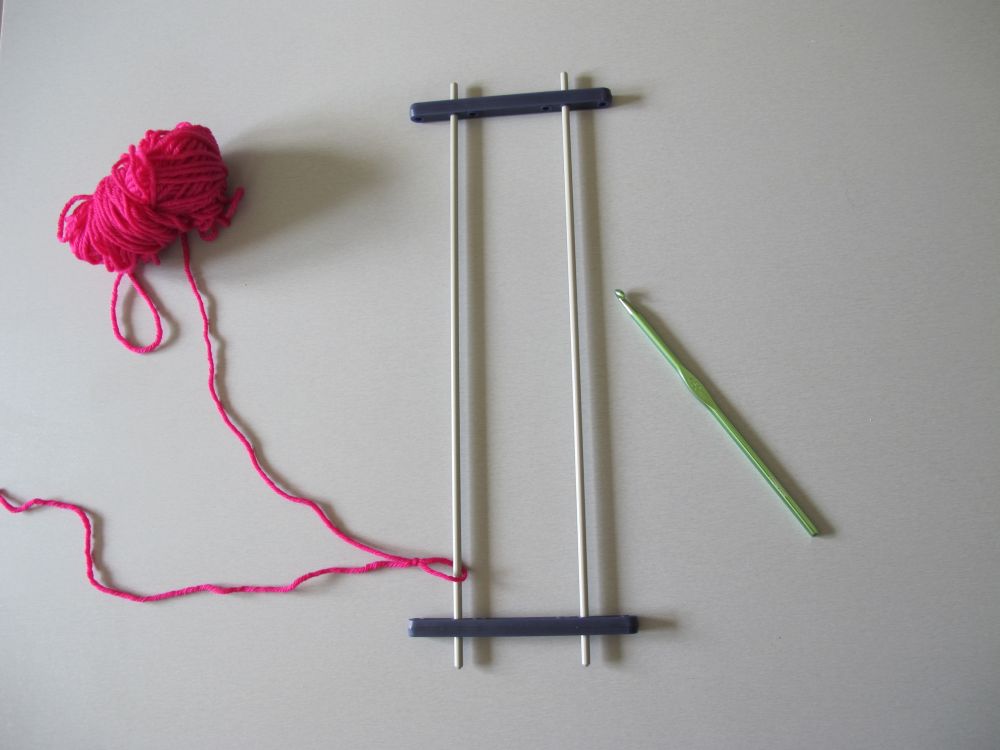
Mount the bottom bar on the rods (in the corresponding holes so that the rods are parallell) to close the loom.

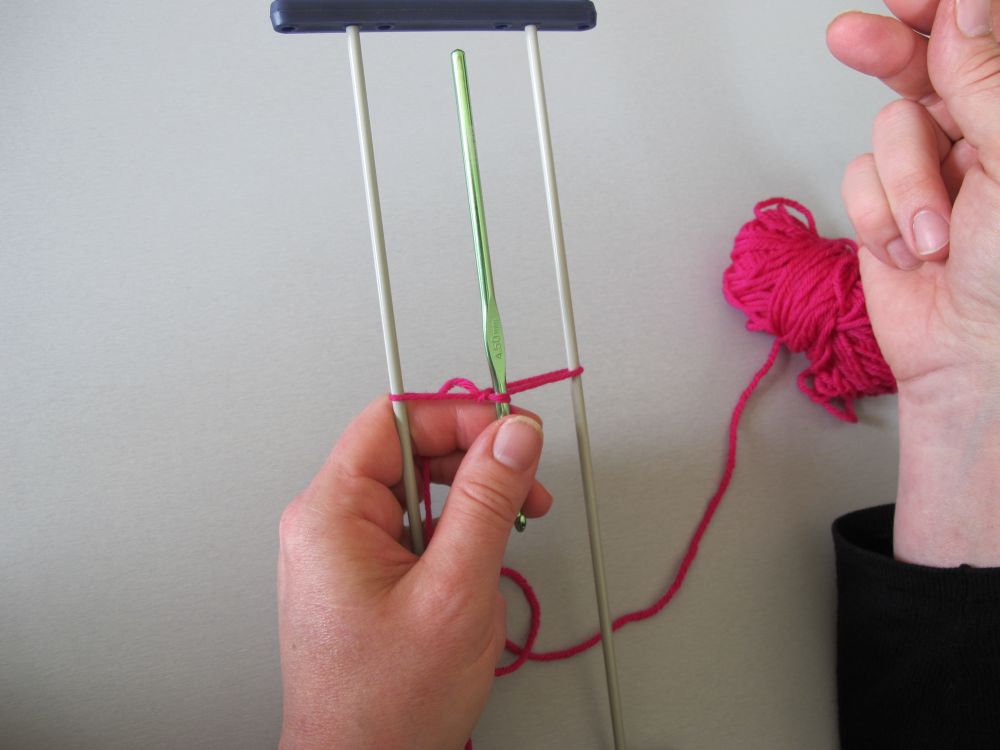
Move your yarn ball to the right of the loom. Take the loom in your left hand, and pinch the yarn tail with this hand. Pull on the working yarn with your right hand. Adjust the loop so that the knot is centered between the rods.
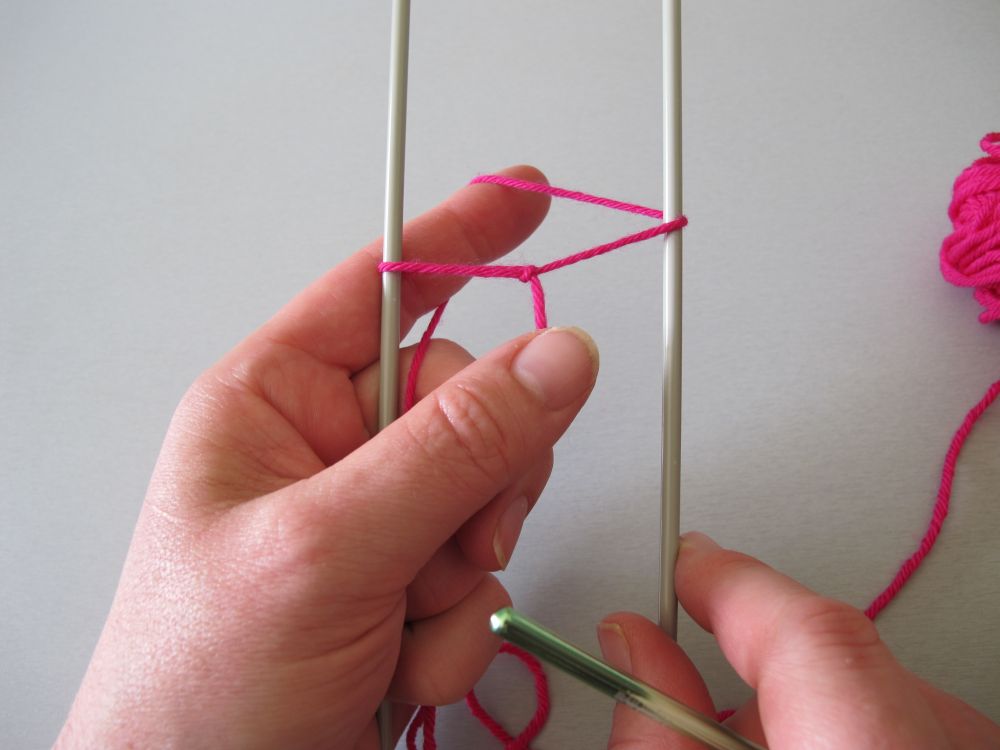
Draw your working yarn behind the loom and over your left index finger. Place it on your finger as you would for any crochet project.
Please note how the working yarn wraps around the loom: from front to back, around the right rod. It will be wrapped this way around the loom throughout the strip.
Now, we are going to work the first stitch.
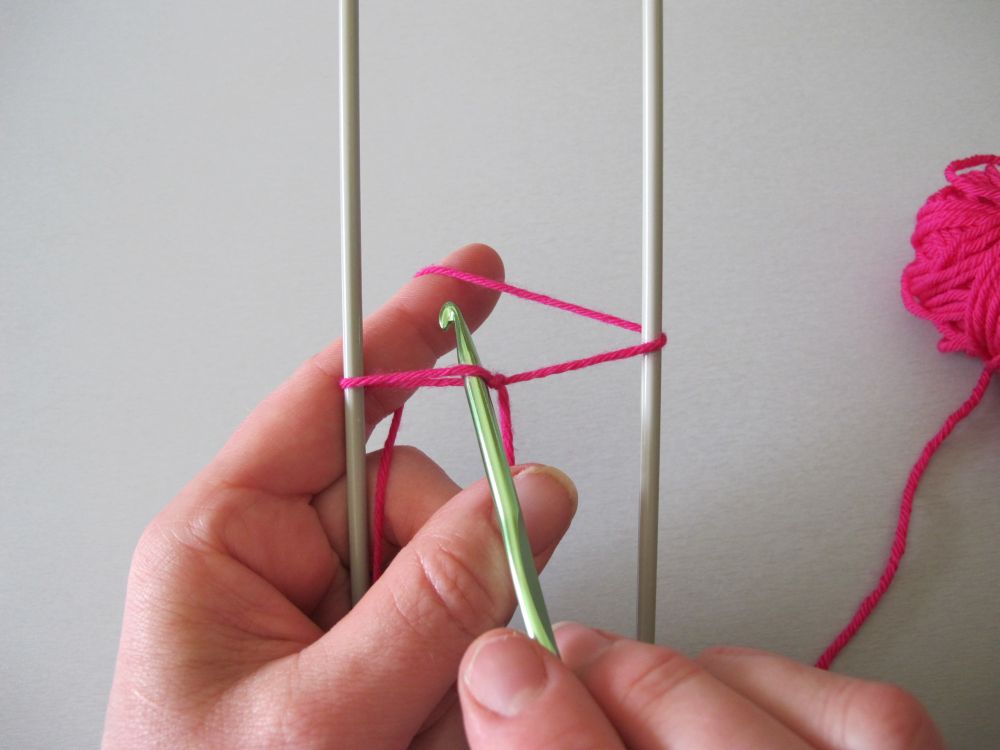
Insert your hook in the loop formed by the slip knot. This loop is on the left rod. The hook goes upwards through the loop.
Catch the working yarn and pull through.

Chain 1.
This first stitch is different from the others. Before making our first « normal » stitch, we need to learn how to turn the loom. This is always done in the same way.
When you try this for the first time, you might think it’s complicated and you can feel clumsy. Don’t give up – very soon, you will be doing this without thinking!
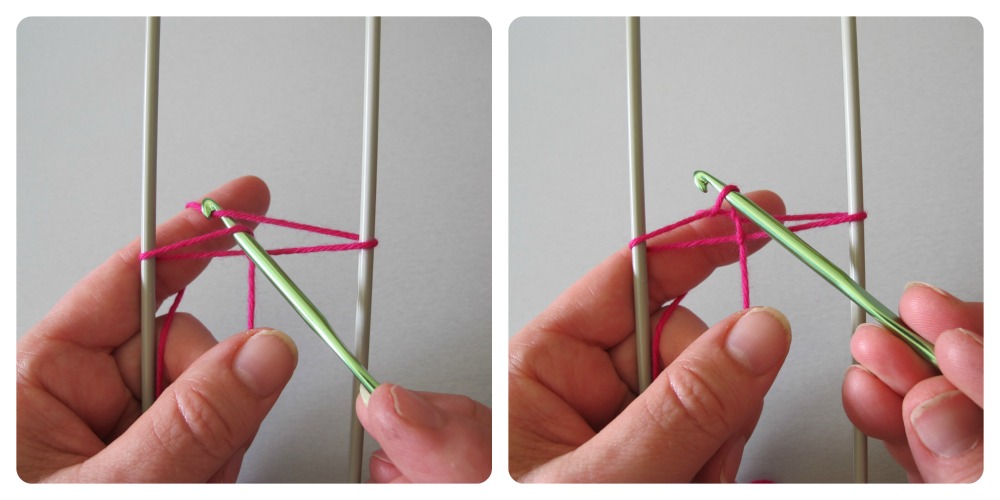
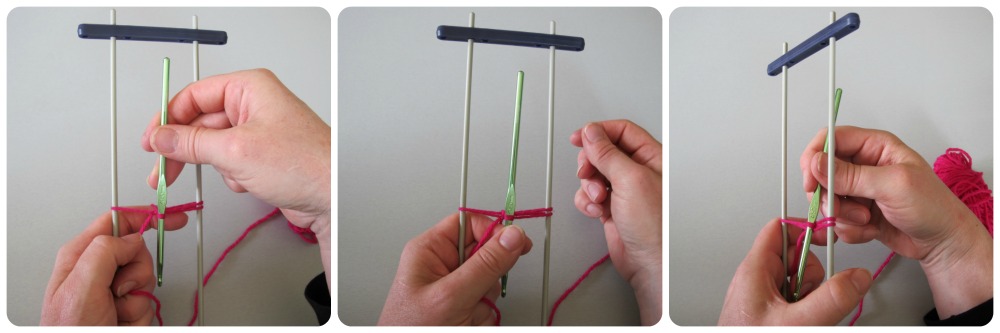
With your right hand, flip the hook so it’s vertical, pointing down. The loop on the hook stays on the hook.
Pinch the hook with your left thumb and let go with your right hand.
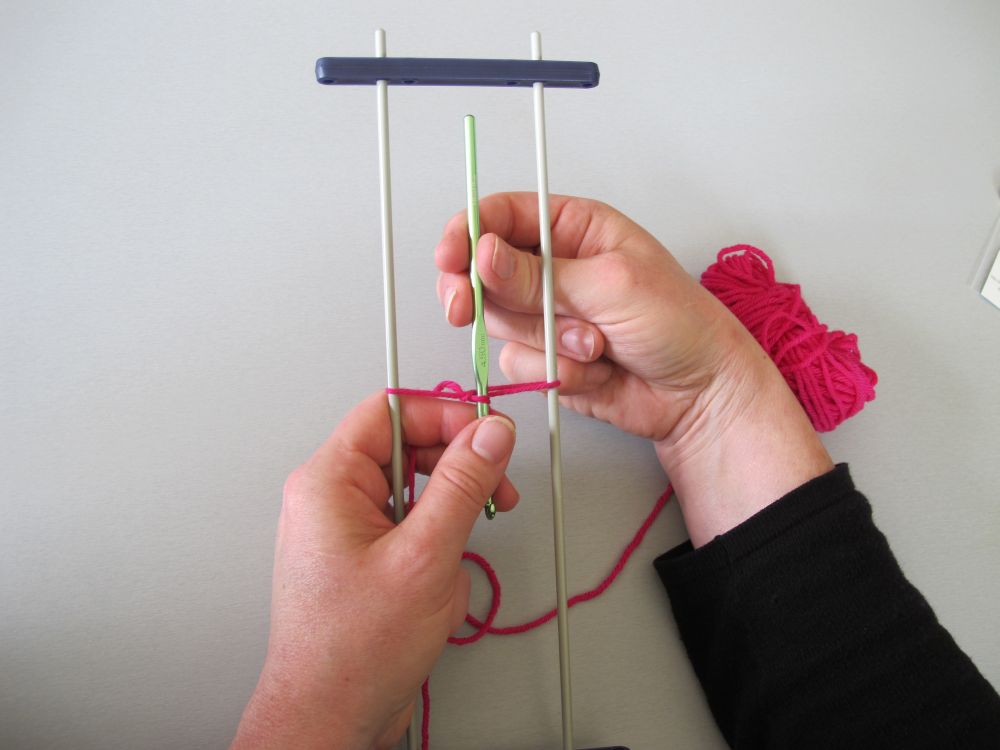
Move your right hand behind the loom and catch the hook with it.
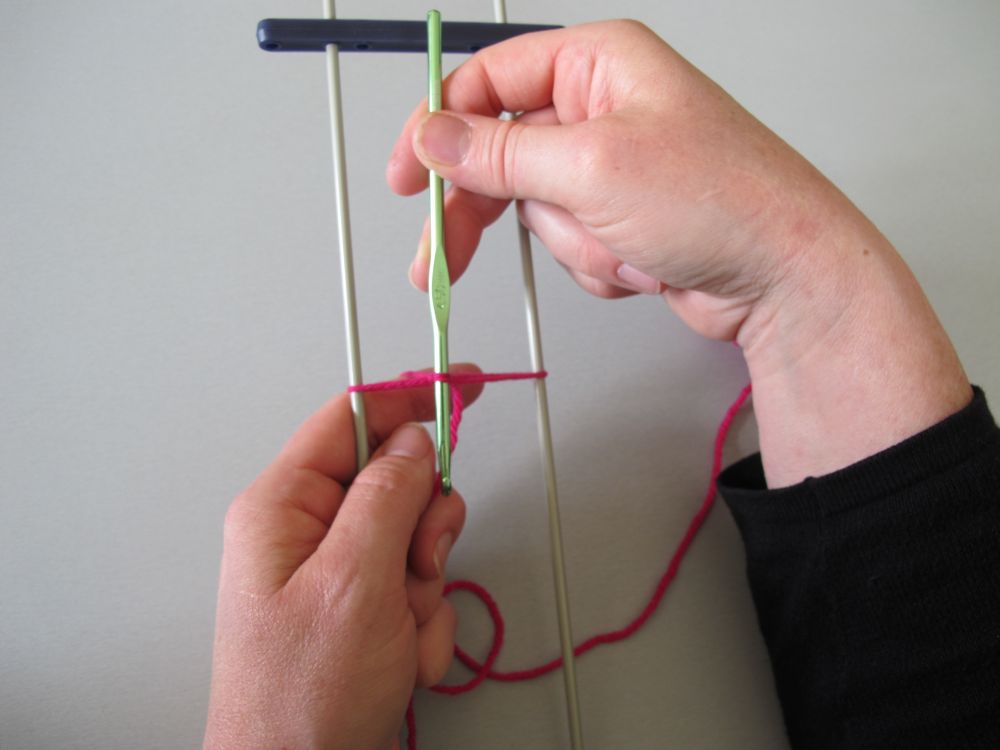
Watch out, we’re going to turn the loom!

I put my left thumb on the right rod and my right middle finger under the left rod. This is not a rule. Try my way, and if something else feels more comfortable, trust your hands! Just make sure that your working yarn stays on your left index finger and your hook stays in your right hand while you turn the loom. The right rod moves toward you, and the left rod moves away from you.
Phew, we’ve turned! The hook is in front of the loom and the working yarn wraps around the right rod, from front to back.
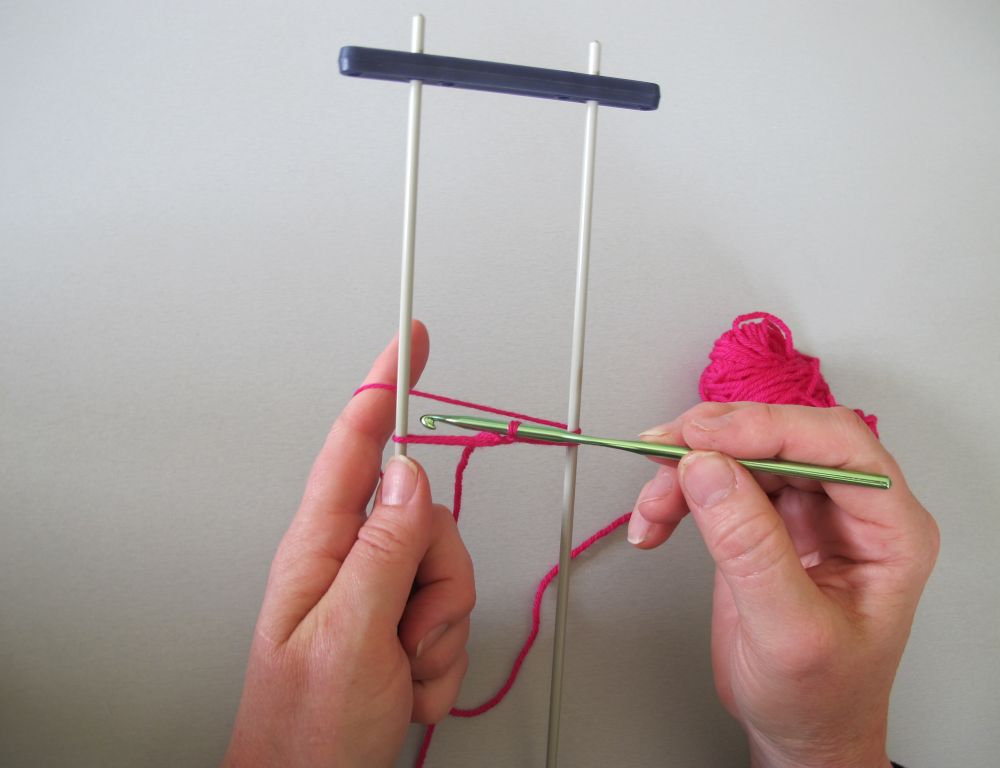
The following stitch is the one that will be repeated throughout the making of the strip. It’s simply a normal single crochet.
Insert your hook upwards through the loop on the left rod.
Make your single crochet as usual: pull up a loop, yo, pull through both loops on the hook.
Turn the loom.
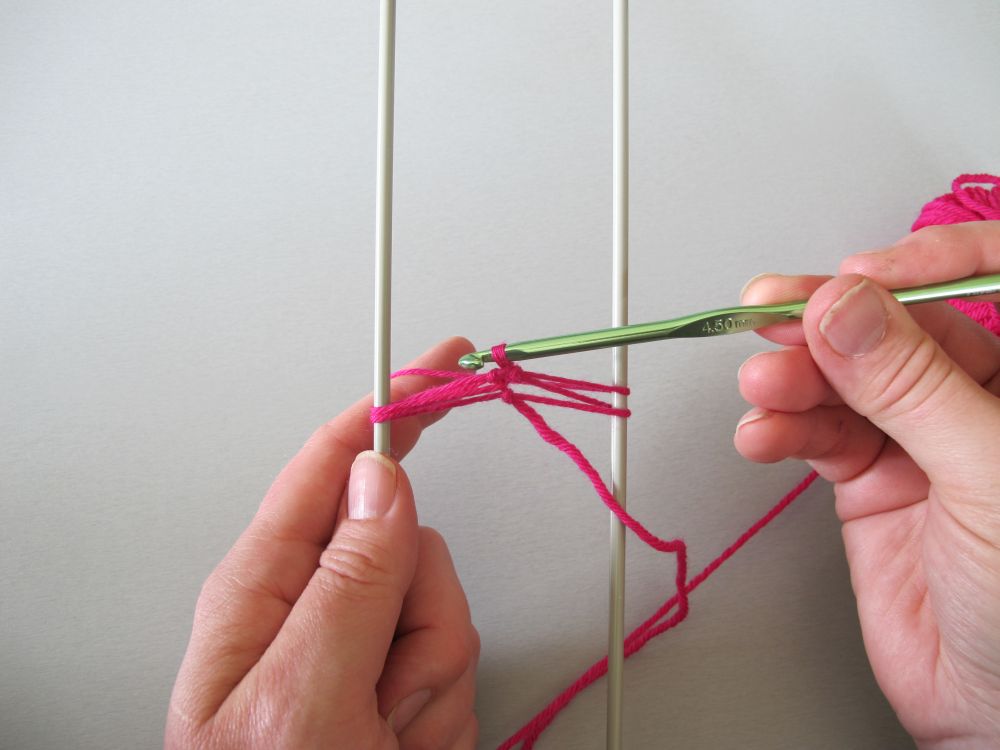
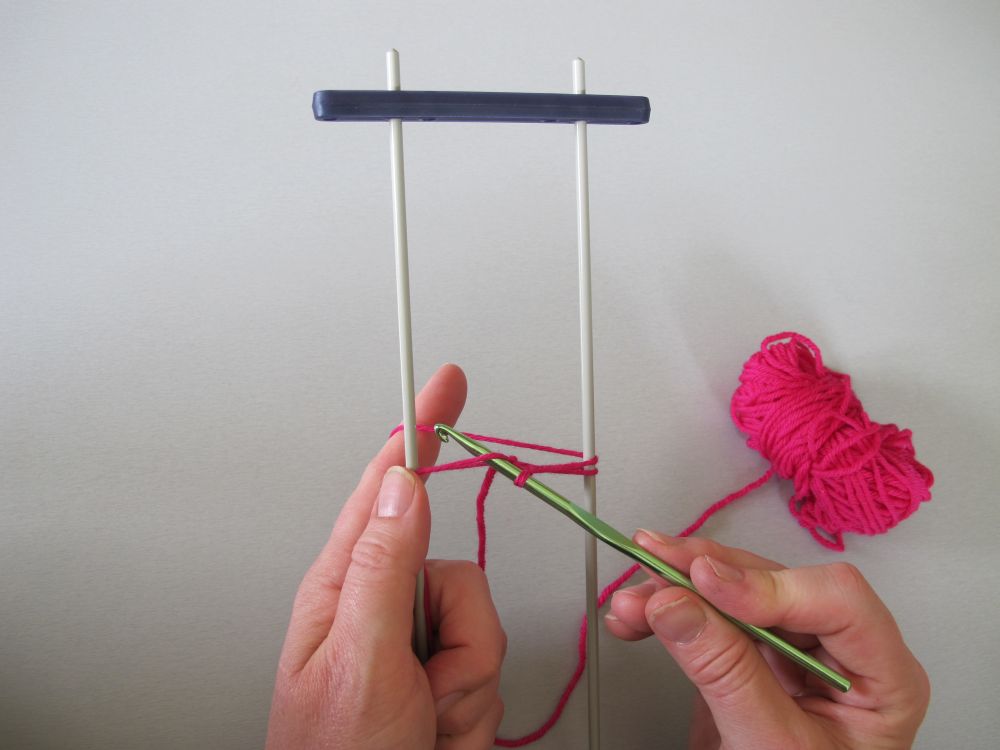
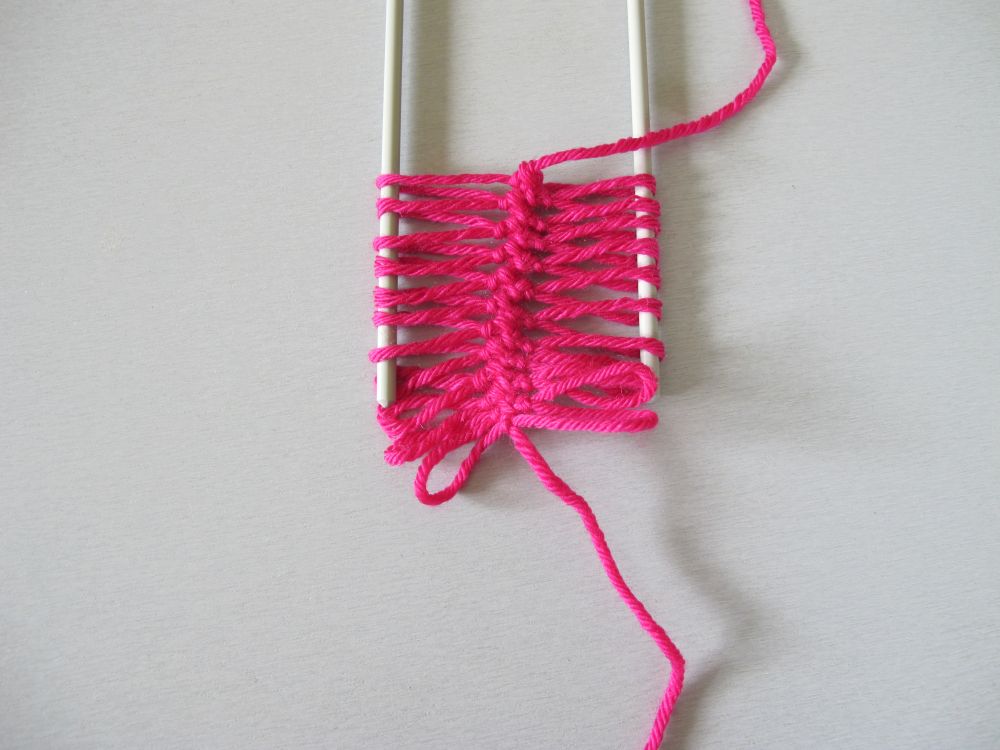
You are ready for the next single crochet. If, as in this picture, your loops on the left rod are a little bunched up, go ahead and spread them out with your thumb so you can clearly identify the top one. You always insert your hook from bottom to top through the top loop on the left rod.
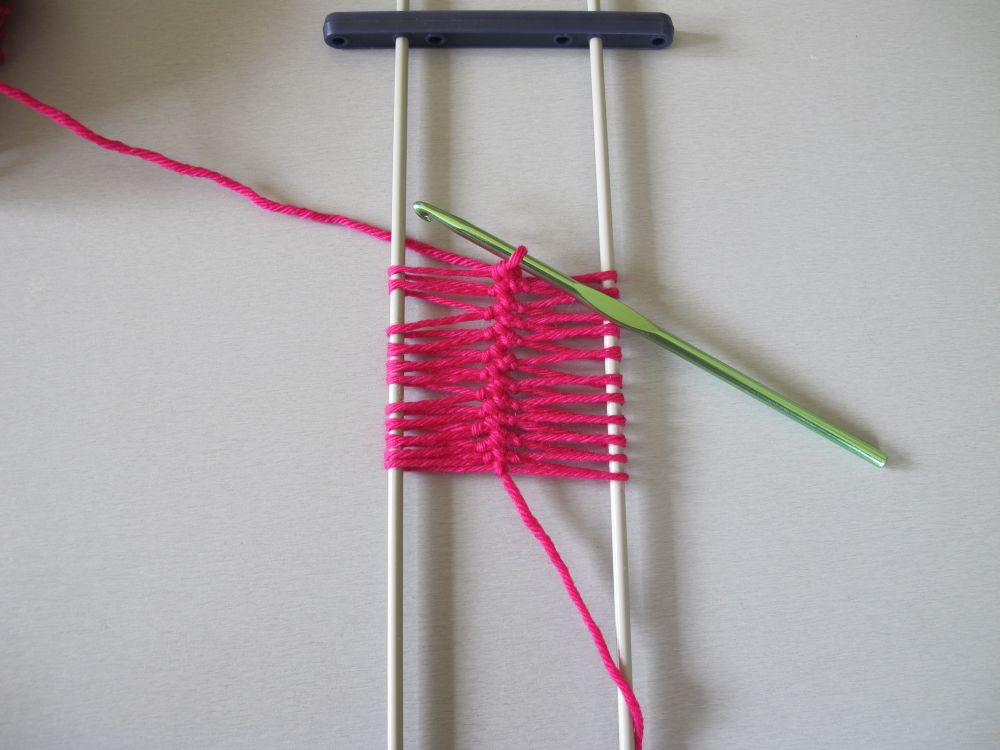
After repeating this a few times, you will start to see your strip form. If you are a beginner, you don’t need to make long strips. I think it’s best to make several short strips while you are getting used to handling the loom. When you feel comfortable with it, you can have fun playing around with different yarns and different widths.
The loops work in pairs. When you want to finish off your strip, you should have the same number of loops on both rods.

Fasten off as for any crochet project. (I cut my yarn end a bit too short here. I trust you to do this better than I did!)
Remove the bottom bar.
Slip the strip downwards and off the loom.
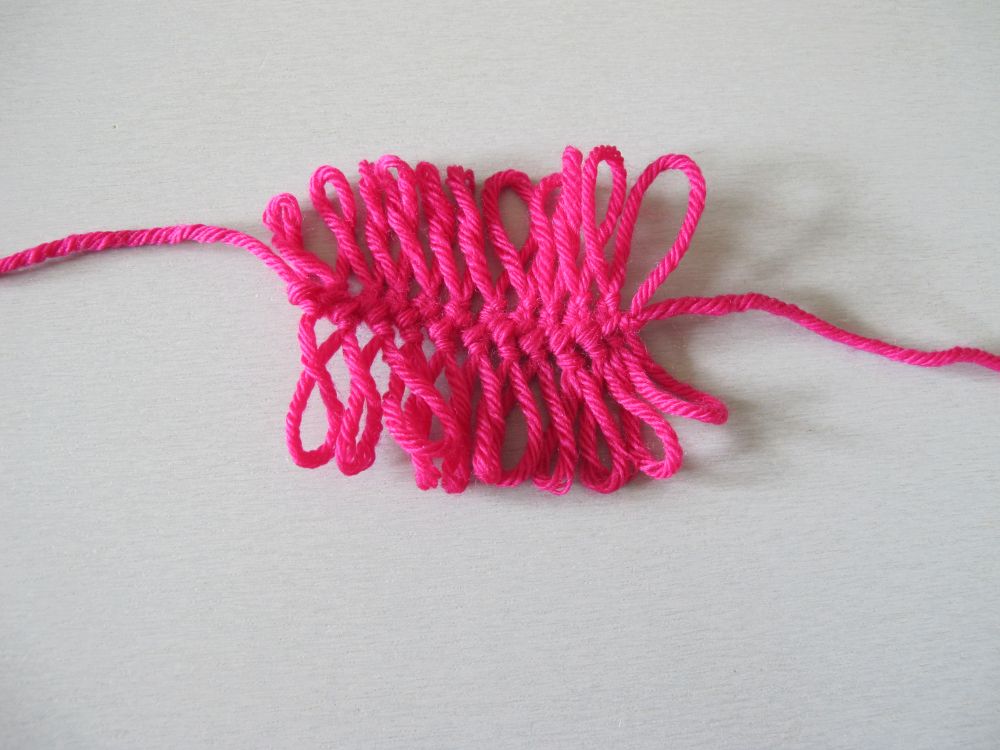
Voilà!
That’s enough new things to learn for now – we’ll continue next time.
I’m looking forward to reading your comments below!
See you soon!
