Foundation stitches
So, when you intend to work in rows, you have to begin with a starting chain, right? Actually, no.
A starting chain is often convenient, but it has its limits. One of those is lack of stretch. Many, many crocheters have experienced how their work is pulled in at the bottom because of a tight starting chain. Even if you adapt the tension of the starting chain (by going up a hook size or chaining more loosely) so that it matches the rest of the fabric, you are likely to have a problem if the item needs to stretch. The stitches will stretch comfortably, but the starting chain will not. Suddenly you realize, for example, that the lovingly crafted mitten will never go over your hand (which is really a pity if you want to wear it).
It doesn’t have to be this way. Instead of a starting chain, you can start your work with foundation stitches.I’m going to demonstrate the technique here with single crochet. It will work just as well with any other stitch.
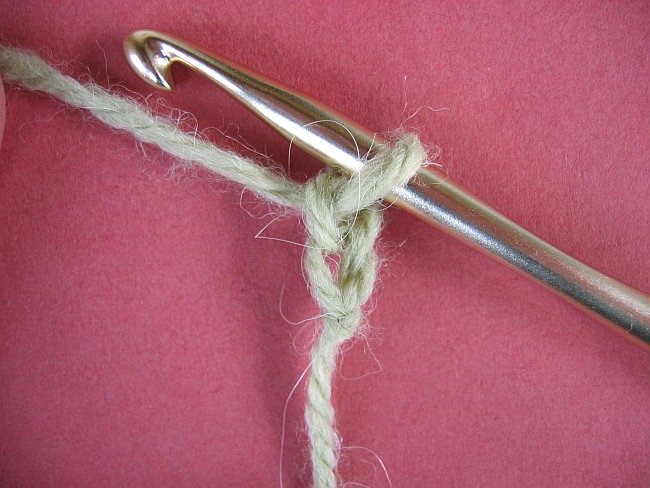
We’ll begin with 2 chain stitches. Either just accept that we make two, follow the directions and don’t worry; or, if you’re like me and you tend to overthink a little, see this as a mini-starting chain (1 ch) plus a turning chain for sc (1 ch). This will also help you to understand how to adapt the technique to other stitches – just increase the number of chains in the turning chain for any taller stitch.
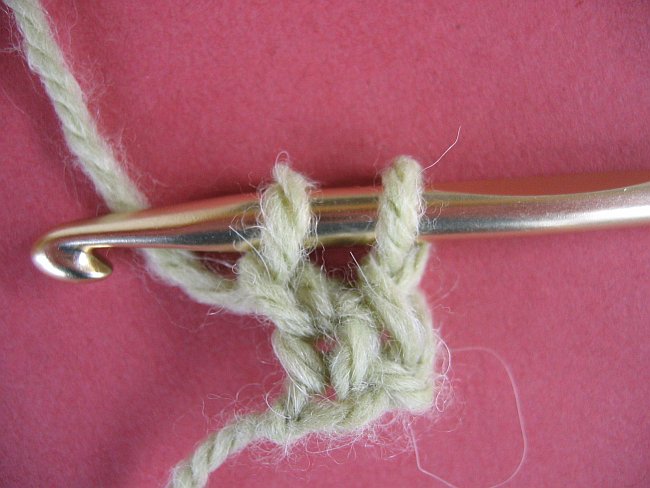
Whatever your mindset, we are going to work into the first chain worked. Don’t count from your hook, just stick the hook into the very first chain, just after the slip knot.
Yarn over and pull through, just as you would for any single crochet. But don’t go further!
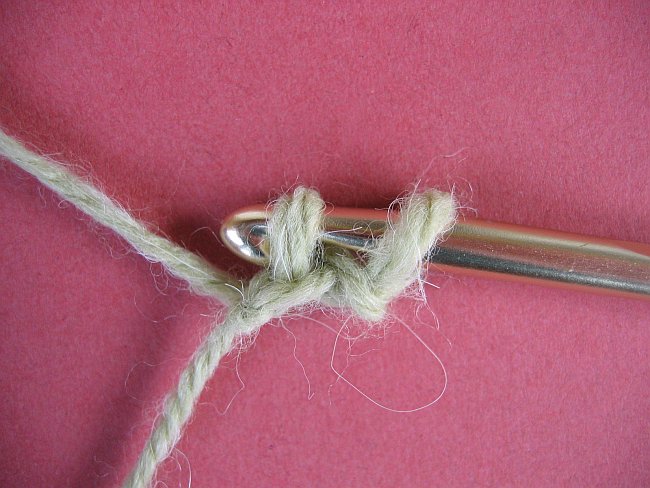
This is the point where things get interesting. You are now going to yarn over and pull through the first loop on the hook.
Even if it’s a bit hard to see right now, what you just made was a chain. This chain is going to sit at the bottom of the stitch you work next. You have started building your row of foundation stitches.
Yarn over and pull through both loops on the hook, as for any single crochet.
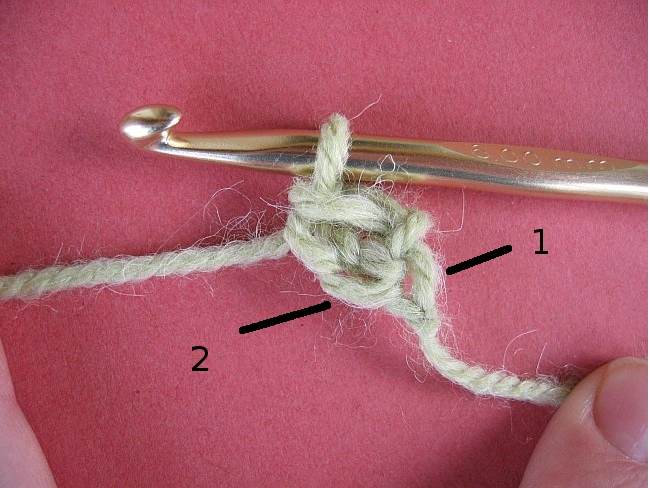
1 = The very first ch just after the slip knot2 = The ch just made, at the bottom of the first stitch.
It is important to identify the chain « 2 ». This is where we’re going to put our hook to work the next stitch.
So put your hook through the chain at the bottom of the stitch previously worked. Be careful to pass your hook under two strands of yarn – one of them tends to try to hide, but it’s important to use both loops here.
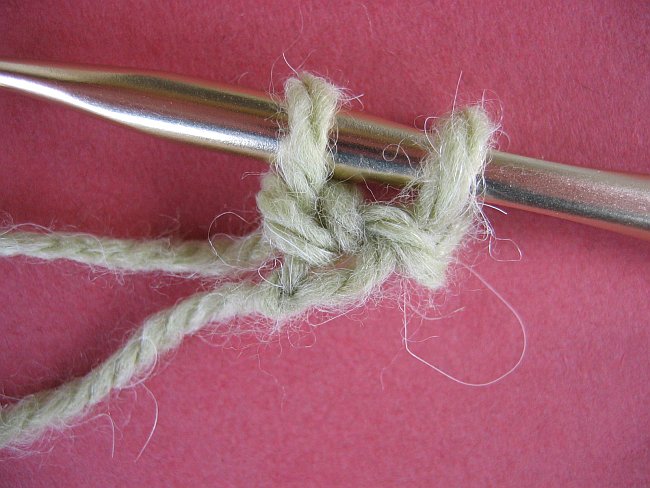
Yarn over and pull through – you have two loops on the hook. Yarn over and pull through the first loop to create the chain at the bottom of the next stitch.
Finish working the second fsc (foundation single crochet) – yarn over and pull through both loops on the hook.
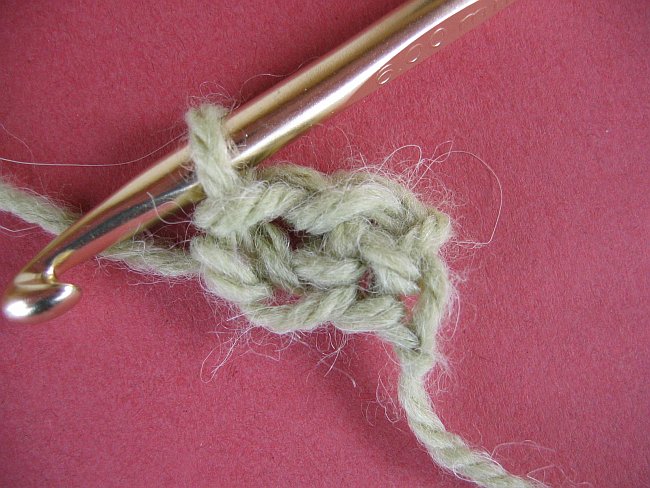
Even if the first stitch seems a bit shy in this picture, you can clearly see the top of both stitches, as well as the two chains at the bottom. To continue this foundation chain, repeat the steps for the second stitch, working into the chain at the bottom of the previous stitch. Don’t forget to work a new « foundation chain » before completing each stitch.
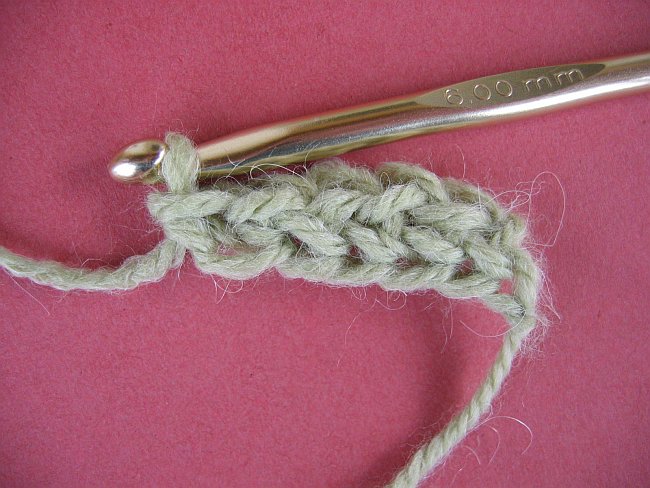
I need to practice this a little more to achieve a more even tension, but I think you can see how it’s supposed to look.
So, this way of working makes the first row as stretchy as the rest of the fabric. But there’s more to it than that.
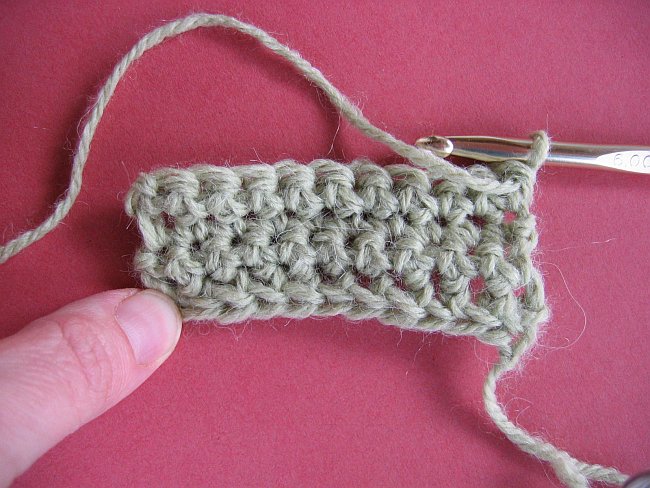
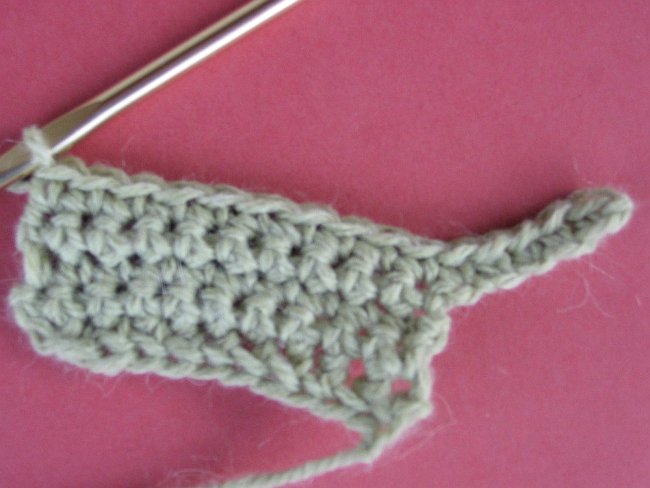
Here, I have continued working on my piece. Now I want to increase several stitches at each side, at the same level.
At the beginning of the row, it’s not very difficult. I just need to chain the appropriate number of stitches, plus one (for the turning chain), and work back over this new starting chain.
Works like a charm.
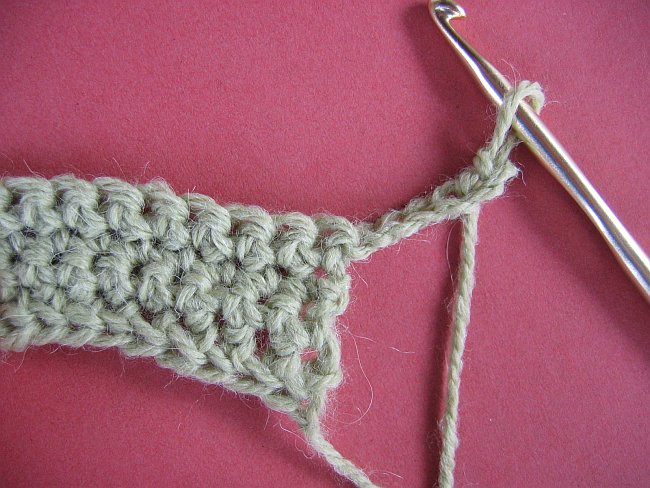
But what am I to do at the end of the row? I could turn the piece over, add a chain as before and be happy. However, this will offset the increase by one row. Perhaps that’s not a big problem when working in single crochet in a not-too-thick yarn. But imagine that you are working in double crochet or an even taller stitch. The increase would be offset in a quite noticeable way.
You don’t have to worry about this though – you now know how to work foundation single crochet!
Start by putting your hook through the fabric at the base of the last stitch in the row. (This spot acts as the very first chain in the beginning.) Yarn over, pull through, make the extra chain and complete your stitch. Repeat as many times as needed.
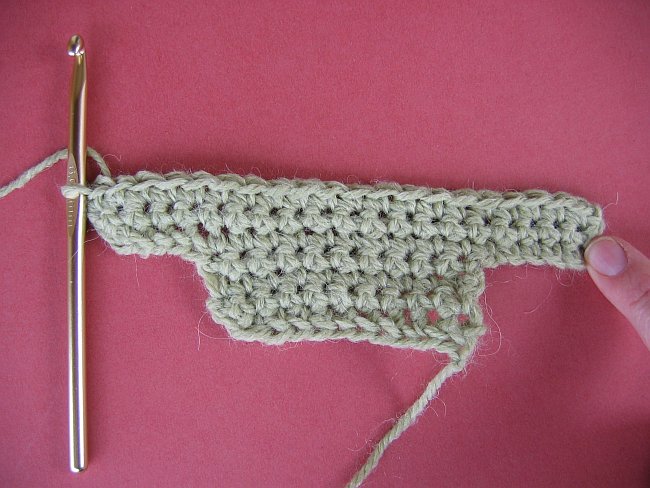
Symmetry! A couple of rows later, we can really see how the increases match on both sides. I definitely need to practice more for a perfectly even result, but I’ll get there!
Of course, there are limits to this technique. The most important one seems to be that it requires you to start your work with a row of solid stitches. I haven’t found a convenient way to skip a stitch in this type of foundation row.
But now you know how to make sure that mitten stretches out over your hand so you can put it on and wear it!
See you soon!