Newsletter October 2014: Borders, turning the corner – 2In the shop:Two new patterns this month – one in crochet, the other in knitting !In knitting, I am welcoming a new designer in my shop, Heike Madeleine, and her beautiful beaded shawl Summer Rain: This pattern can be worked in any laceweight yarn in the shop – the sample is knitted in laceweight wool.More information in the shop.The crochet pattern is from a designer you already know very well: EclatDuSoleil. This time, she has designed a set: Felted (or unfelted) Cabas and Pouch.
 The basket and pouch have been crocheted and slightly felted in the washing machine, for a beautiful look and added sturdiness.You can, of course, also work this pattern without felting the items – you will just need to adapt your hook size to the yarn used.More details in the shop – and a post with yarn information on the blog.And just to celebrate Halloween in my own way – on October 31st, there will be a special one-day-only sale on yarns in orangey colours (-20% on every purchase of at least 2 balls). Check out my blog for more details !On the blog :
  A modular shawl in Mini Mochi knitted by a customer.A funny video.
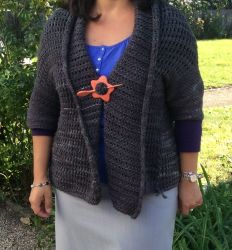 A very nice version of the OXIXO jacket.Borders, turning the corner 2Last month, we discussed corners for simple borders. This time, we are going to have a look at a couple of strategies for more complex borders that need to turn a corner.Strategy no 1: Skip the corner!This is a strategy that is particularly valid when your border isn’t too large and doesn’t have too many rows, and when the lowest part of the final row in the border is close to the edge to which it is applied.Example of a large border – the utterly gorgeous edging on EclatDuSoleil’s shawl Over the Clouds:
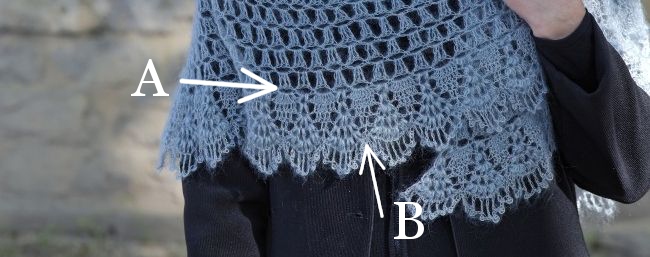 The arrow A points to the start of the border at the edge of the shawl – we can see that the border includes several rows. The arrow B points to the lowest spot of the last row of the border. It is far from the edge to which it is applied.We can assume that if we want to turn a corner with this border, skipping the corner will not be the best strategy.Example of a narrow border, where the lowest part of the final row is close to the edge – the simple border on the Cirkel stole:
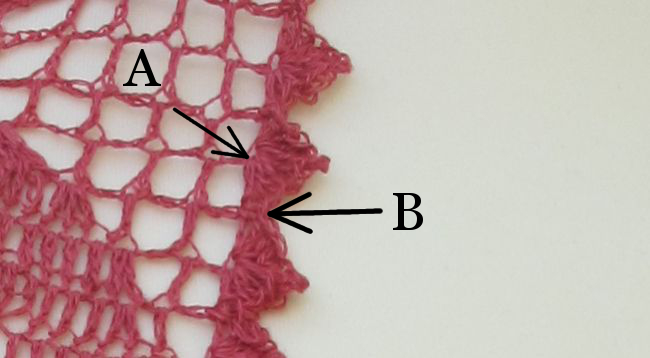 The border starts at A, and is actually made up of a single row of shells. The anchoring stitch for these shells is a simple sc, shown at B, that is close to the edge of the shawl. An example:
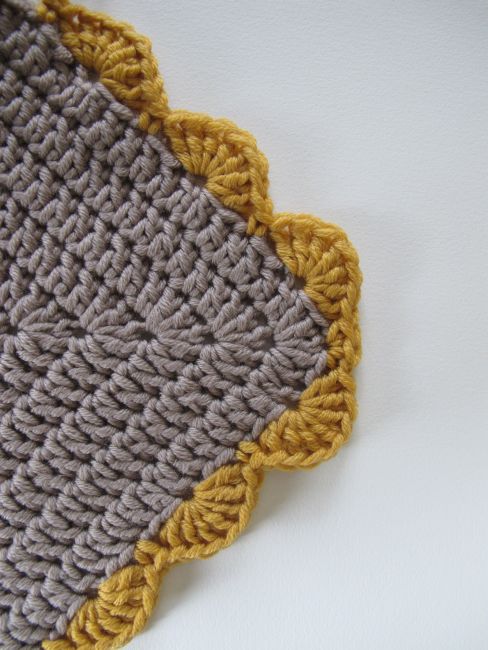 In this simple shell border, the corner is placed right between two shells. Between the shells in the border there is always 1 sc. In the corner, I have simply worked 3 sc to turn the corner, without any other modification of the border.You can do it even simpler than that:
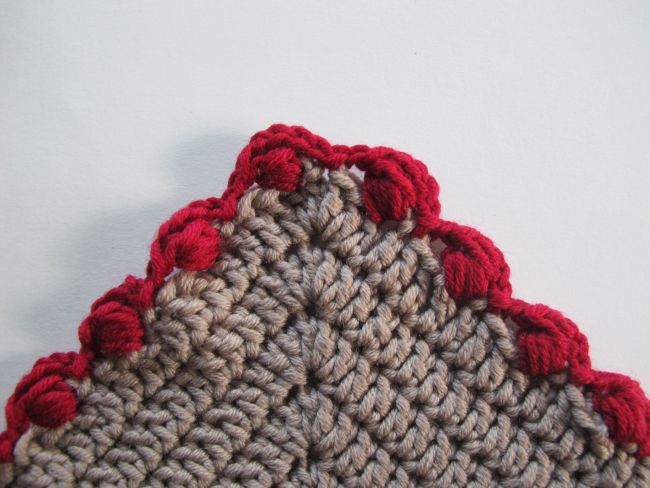 This small border is basically made up from tilted nupps that are anchored into the edge with slip stitches. Here, I didn’t even add stitches at the corner. I just calculated my stitch repeat so that the slip stitch was to be placed in the corner stitch, pivoted my work and continued along the edge after the corner.Strategy no 2: Add stitches to turn the corner.This is really what we did last month with the simple sc and dc borders.Here is another fairly simple example:
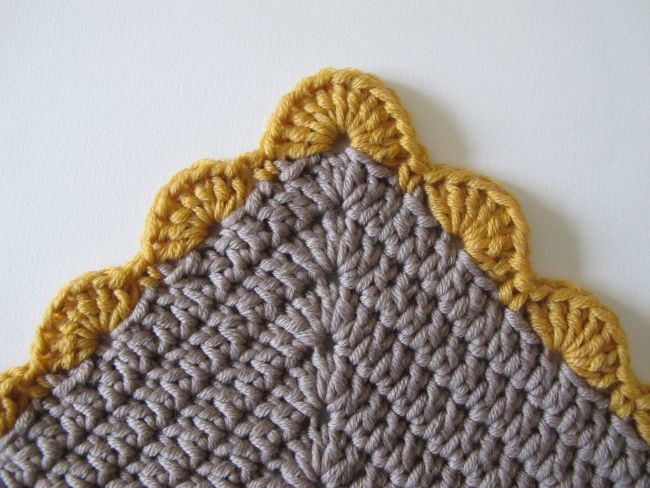 This is the same basic shell border as seen above. Instead of making the corner fall between two shells, I have worked the edging so that it is in the middle of a shell. This means I need to add the stitches required to round the corner to the shell.The shell is worked in dc’s, and I know that I need 5 dc to turn a corner. The shell in the edging is made with 7 dc. I will replace the center stitch of the shell with the dc’s required for my turn:7 dc – 1 dc (the center stitch) = 6 dc + 5 dc to turn the corner = 11 dc.I need to work 11 dc in the corner stitch – and it works out quite nicely!
Strategy no 3: Subtract and addClear as mud? Let’s show an example from Edie Eckman’s great book Around the Corner Crochet Borders (border #38 in the book):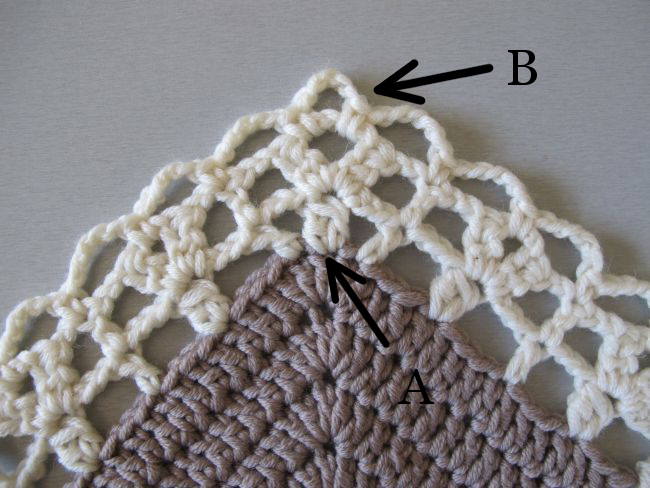 Look at the first row in the border. Along the straight edges, the clusters and the single dc’s are spaced out: you skip 3 stitches in between. But at A, in the corner, the single dc’s are worked in the stitches just before and after the cluster. This is what I mean by subtracting stitches. At the base of the motif in the corner, the stitch repeat is worked over a much smaller number of stitches.This means that the next row can be worked more or less with the same number of stitches as the motifs along the edges – there are just a couple of chains added in the very center of the corner motif.In the last row, at B, more stitches are added in the form of an extra chain arch in the middle of the motif. This creates a well-balanced corner. Since the motif is made much narrower at the bottom, a moderate amount of stitches can be added on following rows, creating a motif that is very similar to the ones along the straight lines but still makes for a functional and pretty corner.So, there we are – skip the corner, add stitches or subtract and add.As you may have noted, I don’t call these three methods « rules », but rather « strategies ». There are no hard-and-fast rules for turning corners with complex borders. However, I hope that keeping these strategies in mind when you work your borders will enable you to spot which one is used when following a pattern, and help you work out a good solution when you need to adapt a border yourself. This closes my musings on borders, at least for now. Next month, we’ll talk about something else! The swatches in this newsletter were crocheted inAnnette Petavy Design worsted weight merinowith a 5 mm hook . See you soon!
 Newsletter index
