In the shop :
Let’s kick off the new season with this gorgeous knitted cardigan, designed by Sarah Mombert: Louise Labé.
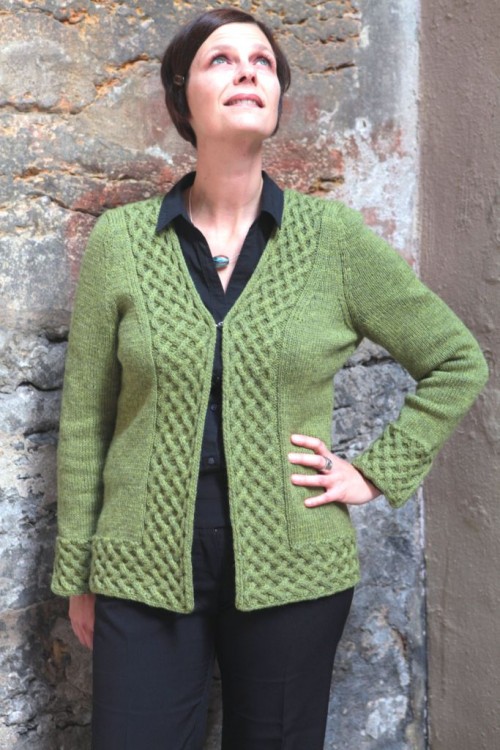
This jacket and its beautiful cabled borders are truly worthy to be named after The Beautiful Ropemaker.
During the summer, I published two other knitting patterns, both for kids, and both worked in lovely organic cotton (if you would like to adapt them for fall and winter, the fingering weight merino is a great alternative).
The first is a lovely little tunic top for babies designed by Laurence Bertolle: Claire Fontaine.
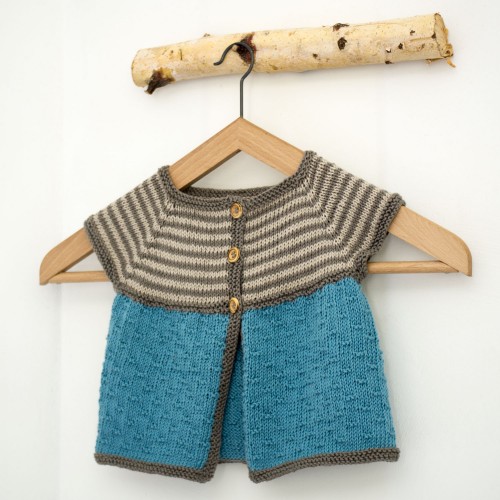
The tunic is worked top-down in three colours. The pattern is written in three sizes: 3 (6/9, 12/18) months.
The second pattern in organic cotton is my own design: the knitted blanket Stina.
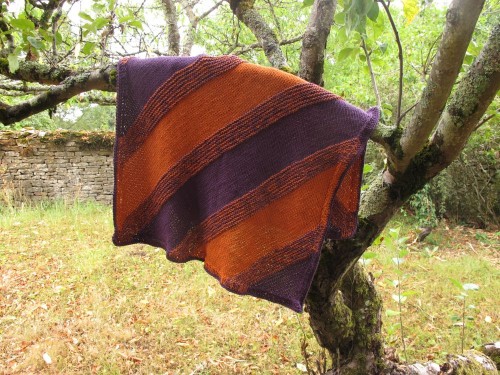
Worked on the bias with two strands of yarn, it’s a soft, cozy blanket that’s both simple and interesting to knit.
On the blog
Summer Knitting Camp went on until the 31st of August. You can see some great contributions from different participants here, here and here.
Nicole won the prize drawing – you can check out her prize here.

I published a new episode of my podcast in French. All the information is here on the blog – and you can also watch an illustrated version on YouTube.
The Jämtland Stitch
A couple of years ago I was intrigued by a pair of mittens shown on the Ullcentrum blog. Ullcentrum is a Swedish yarn manufacturer (among other yarns, they make the Linea yarn I carry in my shop), and their blog (only in Swedish) often discusses interesting information and techniques.
The mittens were made in a technique called crocheted nalbinding. Nalbinding (in Swedish: nålbindning – the English term is spelled in various ways) is an old textile technique, predating both knitting and crochet. It is done with a large, flat wooden needle constructed like a sewing needle. You can find a beginner’s video tutorial in English here: https://youtu.be/O8PXk5lTIZo
The story of these mittens started with another, very old mitten, found in the collections of the regional museum of Jämtland, in the north of Sweden. The museum staff thought it was made in nalbinding, but it looked a little bit different. Elsie-Britt Sondell Wärnersson, a lifelong lover of textile crafts, saw the mitten and thought she could figure out how it was made. She was allowed to take home the mitten for the night, with strict instructions to bring it back first thing in the morning, and not to alter the object in any way.
Elsie-Britt didn’t sleep that night, but in the morning she had finished analyzing the mitten and knew that it was not made in nalbinding, but crocheted. She could return the unharmed old mitten to the museum and start to make new ones. She showed the technique to her friend Ulrika Andersson, who has since published several patterns in English on Ravelry.
When Ullcentrum started to publish patterns and show the technique at different craft shows in Sweden, it became clear that it wasn’t completely forgotten. A visitor at a craft show, Elsa Hällberg from Arbrå (a little south of Jämtland) explained that she had learned a variation of the technique from her mother, and had made more than five hundred (!) mittens using it.
If you want to see examples of this technique, you can search the Internet for « crocheted nalbinding » or the Swedish term virkad nålbindning. That’s what I did when I researched the technique. However, I don’t agree with this name – simply because it isn’t nalbinding, but a crochet stitch. I suggest calling it the Jämtland stitch, after the Swedish region where it was first rediscovered.
The sources for this stitch are mainly in Swedish, and thus difficult to access for most of the readers of this newsletter. I hope to spread the knowledge about it a little further – so let’s see how to work the Jämtland stitch!
Chain the desired number of stitches plus 2. (Note that this stitch is worked in the round – you need to work a starting chain that’s long enough to close to a round and continue working comfortably.)
The first stitch is a little bit different from the others, to reduce somewhat the bulk created at the beginning of the work (you will see further down what I mean).
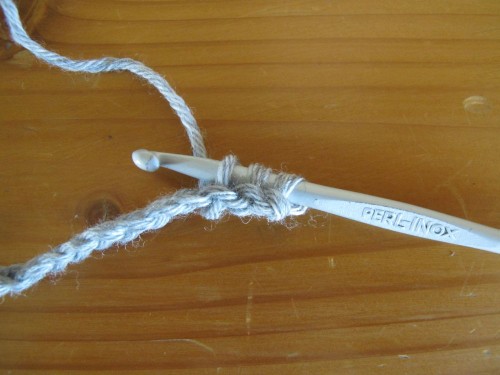
The first stitch: Insert the hook in the 2nd chain from the hook, pull up a loop, insert the hook in the next chain, pull up a loop. There are 3 loops on the hook. Yo, pull through all 3 loops.
Look closely at the vertical loops in the stitch you just made:
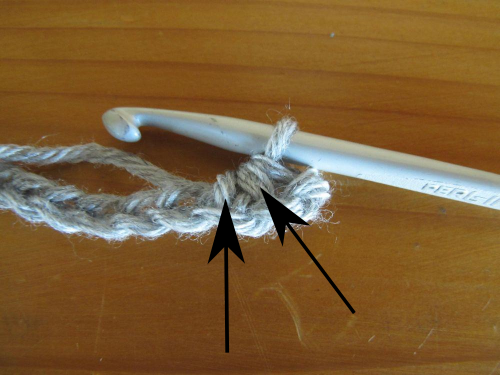
The two vertical loops to the left (the last two vertical loops) are the foundation for the next stitch.
Second and all following stitches: Insert hook from right to left under the last two vertical loops in the previous stitch, insert hook in next ch, pull up a rather loose loop. There are 4 loops on the hook. Yo and pull through the first 3 loops, yo and pull through remaining two loops.
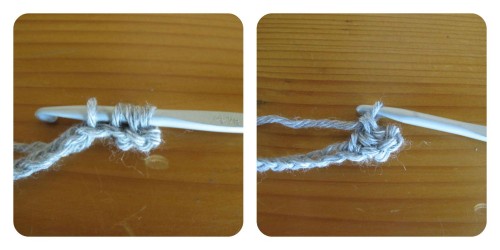
Repeat this stitch to the end of the starting chain. Pulling up relatively loose loops makes the stitch easier to work. I simply lift my hook a little higher from the work than I usually do when pulling up the new loop.
We are going to close the work in the round to crochet in a spiral.
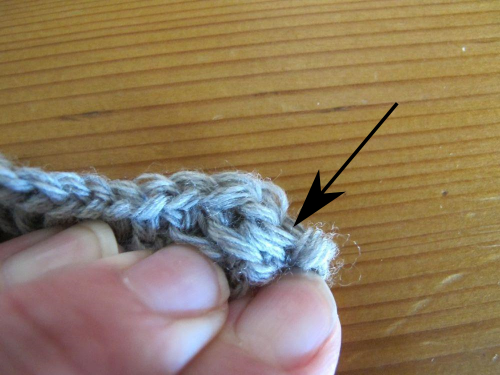
Bring around the beginning of the row to form a round, making sure not to twist it. The first stitch is the one at the arrow.
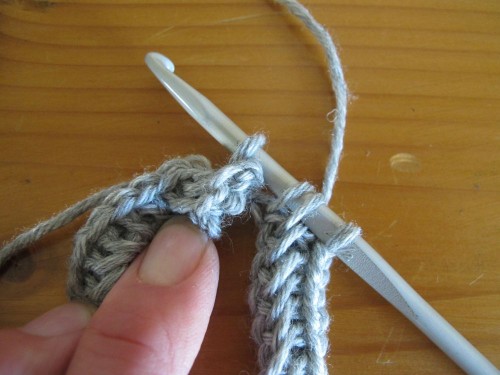
Use this first stitch as your next stitch where you pull up a loop.
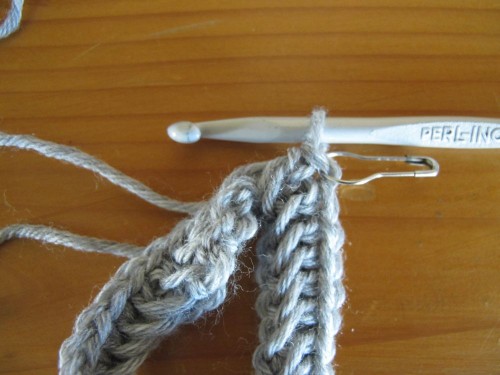
Mark the stitch you just made – this is the first stitch in the round.
Continue working in the round in a spiral. Move up the marker as you go.
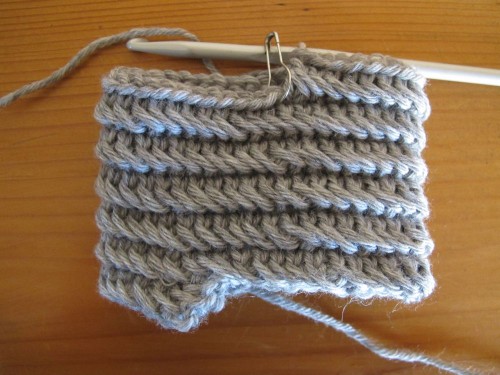
After a few rounds your work will look like this. The fabric is very textured and quite thick. Since the rounds are rather high (at least compared to single crochet), there is a very clear « bump » at the beginning of the first round. Making the first stitch as described above reduces it a little compared to making a normal stitch, but it’s still quite visible.
Next month, I will discuss how to handle this bump, and show you a few simple projects that can be worked using this stitch.
As always, do not hesitate to e-mail me with your feedback!
See you soon,
The swatch in this newsletter was worked in Annette Petavy Design’s DK weight merino, with a quite battered 4.5 mm hook that used to belong to my mom.



I love it, Annette, thank you so much!
Hey Annette, thanks so much for this. Always interested in learning new techniques. I do have a question. After you’ve completed the first stitch, it’s hard to tell which two loops to put the hook through before putting it through the next chain. I can see the three loops you first pulled through at the base of the stitch and the last two loops you pulled through. Can you clarify which loops the hook goes through to start the next stitch please? Thanks in advance.
Hi Patrice,
To start the next stitch, you insert your hook from right to left in the two leftmost loops at the base of the stitch.
The loops at the base of the stitch are the ones I call « vertical » loops.
The very last two loops you pull through when completing the second and all other stitches do not create vertical loops – they actually create a sc sitting on top of the three vertical loops at the base.
If it’s not clear, please write back so I can explain again!
Thanks a lot Annette!
🙂
Aaaaargh! So many techniques, so little time! This one is fascinating! Can’t wait to read your follow up on this technique.
Hello, i am researching the origins and the evolution of ancestral techniques that founded crochet. If you have any resources on the Jämtland stitch could you please email them to me? Even if they are not in English i would love to look into them.