
Aujourd’hui, on va de nouveau travailler derrière les pétales du tour précédent – un peu comme pour la fleur précédente, mais pas exactement de la même manière.
Today, we are going to work behind the petals made in the previous round – a bit like the previous flower, but not exactly in the same way.
Idag virkar vi bakom blombladen som gjordes på förra varvet – litetgrann som med den förra blomman, men inte exakt på samma sätt.
Les pieds des mailles, c’est ici :
The bottom of the stitches is here:
Maskornas « fötter » är här:

Tour 4 : 1 ml, basculer l’ouvrage vers l’avant pour voir l’arrière des mailles, faire des mc en piquant le crochet sous les pieds des mailles du premier pétale …
Round 4: Ch 1, flip work towards you to see the back, work sl sts inserting the hook under the bottom of the stitchs in the first petal…
Varv 4 : 1 lm, vrid arbetet mot dig så att du ser baksidan, virka smygmaskor genom att sticka virknålen under « fötterna » på maskorna i första blombladet…

… jusqu’au milieu du pétale. Le milieu est assez facilement repérable avec l’espace créé entre les brides centrales par le picot.
… to the middle of the petal. You can rather easily spot the middle thanks to the space created between the center dc’s by the picot.
… till mitten av blombladet. Det är ganska lätt att hitta mitten med hjälp av öppningen mellan mittstolparna som bildats av picoten.

C’est dans cet espace qu’on va piquer le crochet maintenant.
… 1 ml, faire 1 ms autour de l’arceau du tour 2 en piquant le crochet entre les 2 brides centrales du pétale …
We are going to insert our hook in that space now.
… ch 1, make 1 sc around the ch arch in round 2 by inserting your hook between the 2 center dc’s in the petal…
Det är i den öppningen vi ska sticka virknålen nu.
… 1 lm, virka 1 fm runt luftmaskbågen i varv 2 genom att sticka virknålen mellan de 2 mittstolparna i blombladet…

C’est plus facile en pliant le pétale vers l’avant.
It’s easier if you fold the petal towards the front.
Det går lättare om man viker blombladet framåt.
… en continuant à travailler derrière les pétales du tour 3, faire * 4 ml, 1 ms autour de l’arceau du tour 2 au centre du pétale suivant *, répéter de * à * encore 4 fois, 4 ml, 1 mc dans la première ms du tour (faire attention à bien piquer dans la ms et pas dans l’une des mc au début du tour). On a 6 arceaux de 4 ml, placés derrière les pétales du tour 3.
… continuing to work behind the petals in round 3, work * ch 4, 1 sc around ch-arch in round 2 at the center of next petal *, repeat from * to * 4 times more, ch 4, 1 sc in first sc in round (take care to work into the sc and not in one of the slip stitches at the beginning of the round). There are 6 4-ch spaces behind the petals in round 3.
… fortsätt att arbeta bakom blombladen i varv 3, *4 lm, 1 fm runt lmb i varv 2 i mitten av nästa blomblad*, upprepa från * till * 4 ggr till, 4 lm, 1 sm i första fm i varvet (var noga med att virka i fm och inte i någon av sm i början av varvet). Det blir 6 4-lmb bakom blombladen i varv 3.
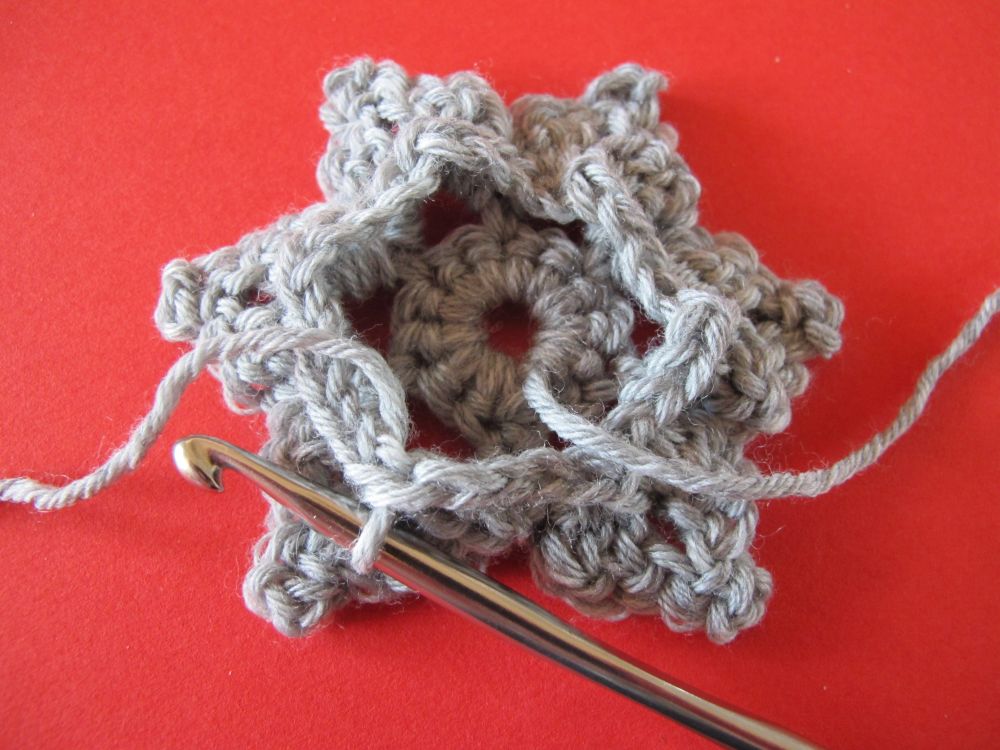
Voici comment cela se présente au dos de l’ouvrage.
Here is how it looks at the back of the work.
Så här ser det ut på baksidan.
ooohhh ooohh oui il faut etre concentre…mais que cela rend bien…