
In the shop
I’m happy to present my new design – the crocheted fingerless mittens Naadam.
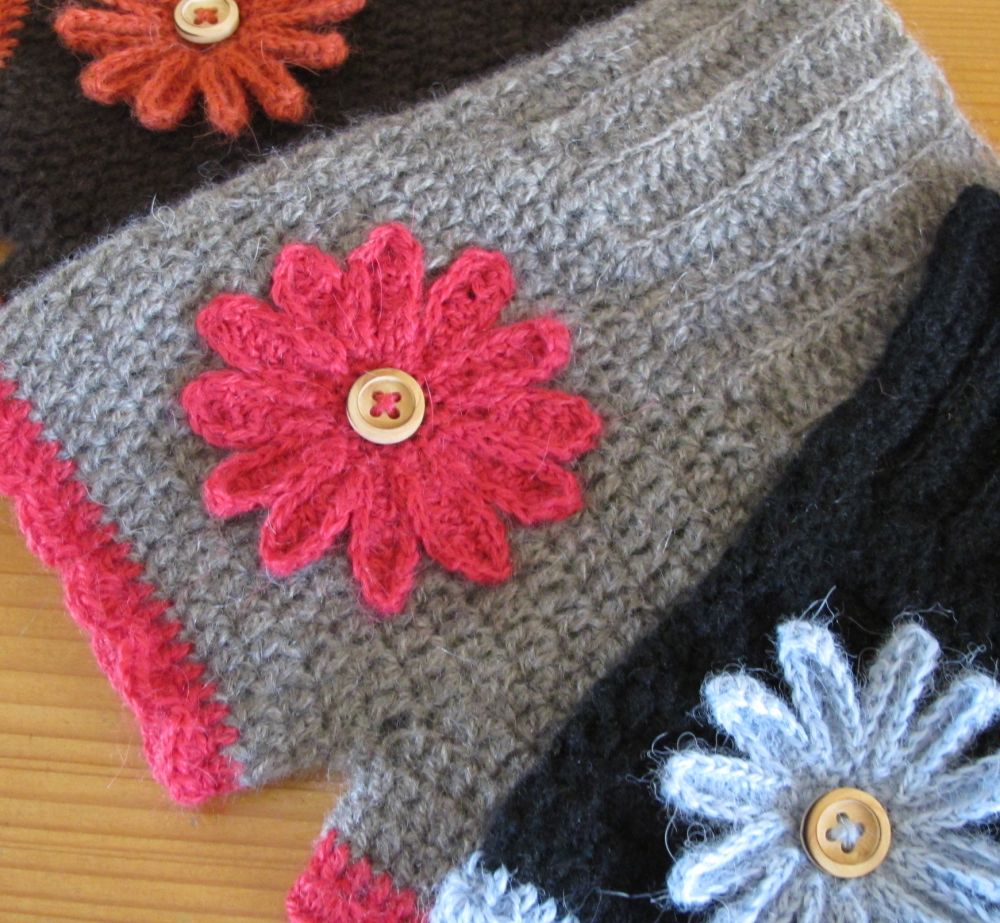
These little mittens in yak down (the mitten itself) and alpaca (the borders and flowers) are small treasures of softness and warmth.
You will find the Naadam pattern in the shop.
In yarny news, I now offer a yarn with a very special story – Swedish singlespun wool.
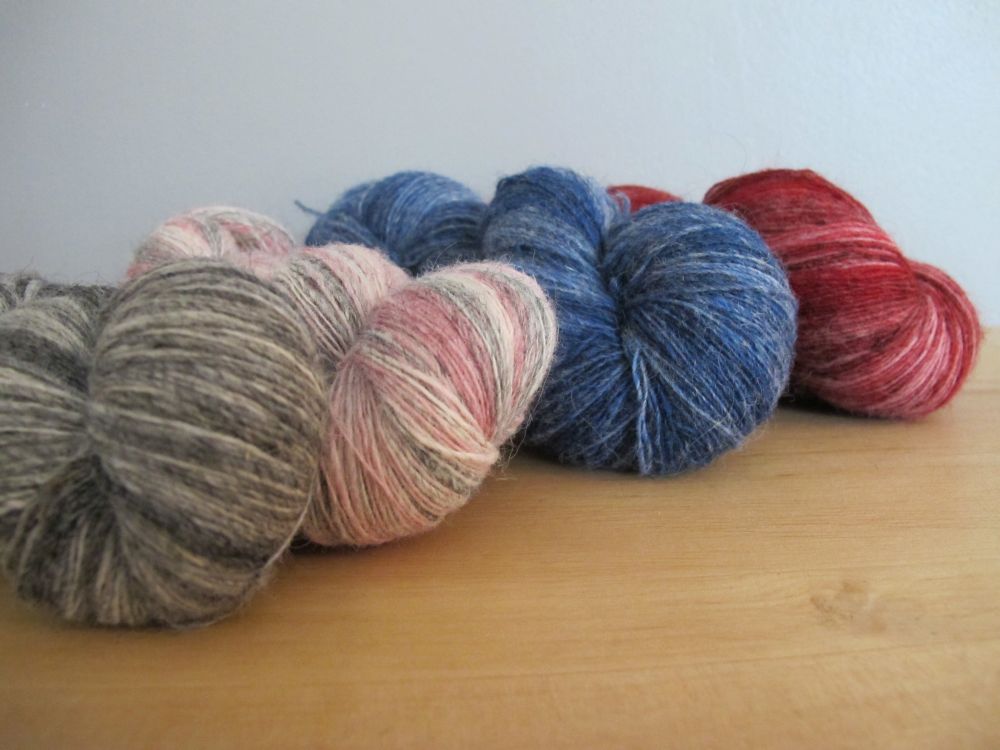
This is a yarn with a rustic touch but with beautiful colours. You can read more about the yarn and its story in this article on the blog.
Swedish singlespun wool in the shop.
On the blog
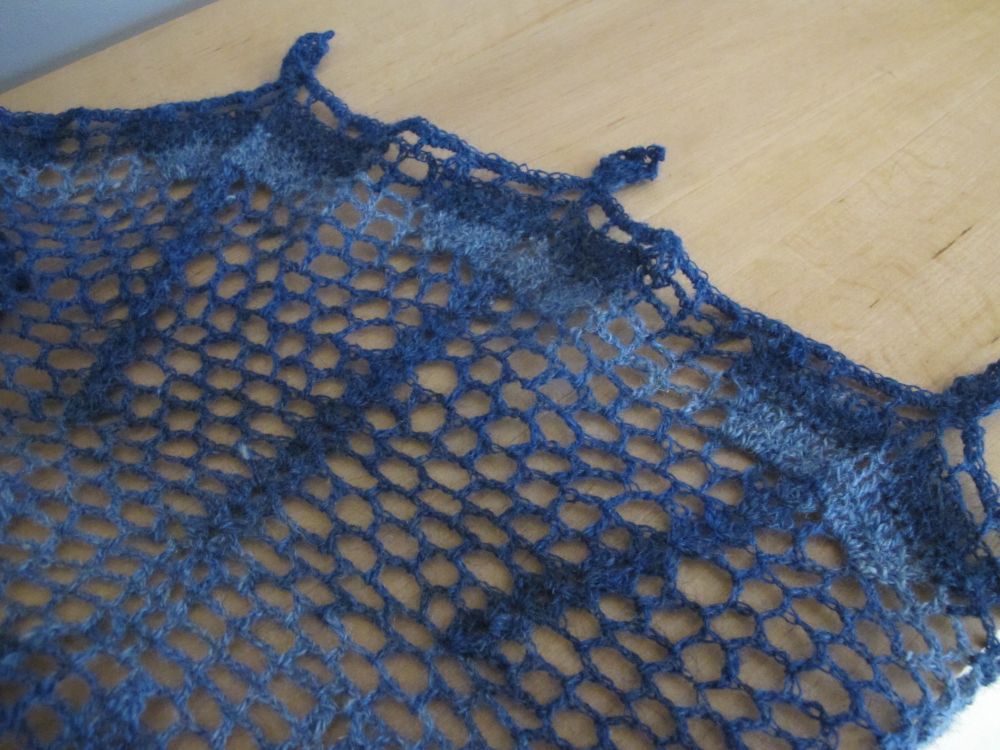 How can you use the Swedish singlespun wool? One way is to crochet the pattern Euphorbia, using a single skein. Details in this article on the blog.
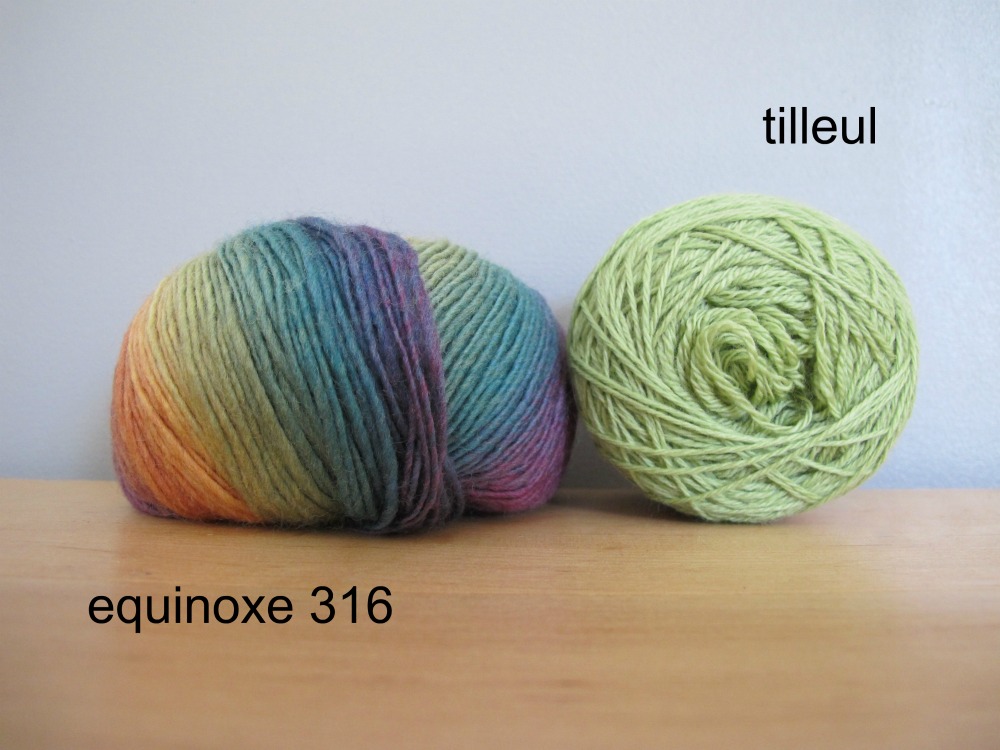
In two blog posts (the first one here, the second one here) Hélène Marcy showed her preferred colour combinations between the Mini Mochi yarn and the fingering weight merino. A good source of inspiration for all those who want to combine these yarns in their projects!
Upcoming
I will be travelling to Sweden from May 17 to May 27. During this time, shipping will continue as a joint venture between my daughter and my husband, but delays may occur. Also, I will of course be reading my emails regularly, but it might take me longer than usual to get back to you. Thank you in advance for understanding.
C2C : borders
For this final newsletter on the C2C technique, I would like to discuss how to finish your project with a border.
Very often, you will want to add a border around your work to frame it and make it keep its shape. A first round of single crochet works very well. After the first round you can, of course, add more and create the border of your liking.
For a neat finish, I recommend working the first round of the border in the project’s background colour – if there is a single background colour!
But where should you insert your hook to make the first round of sc in the border?
If you take a close look at a C2C swatch, you will notice that any of the four sides of the blocks can occur at the edge of the work.
This means that there are 4 situations:
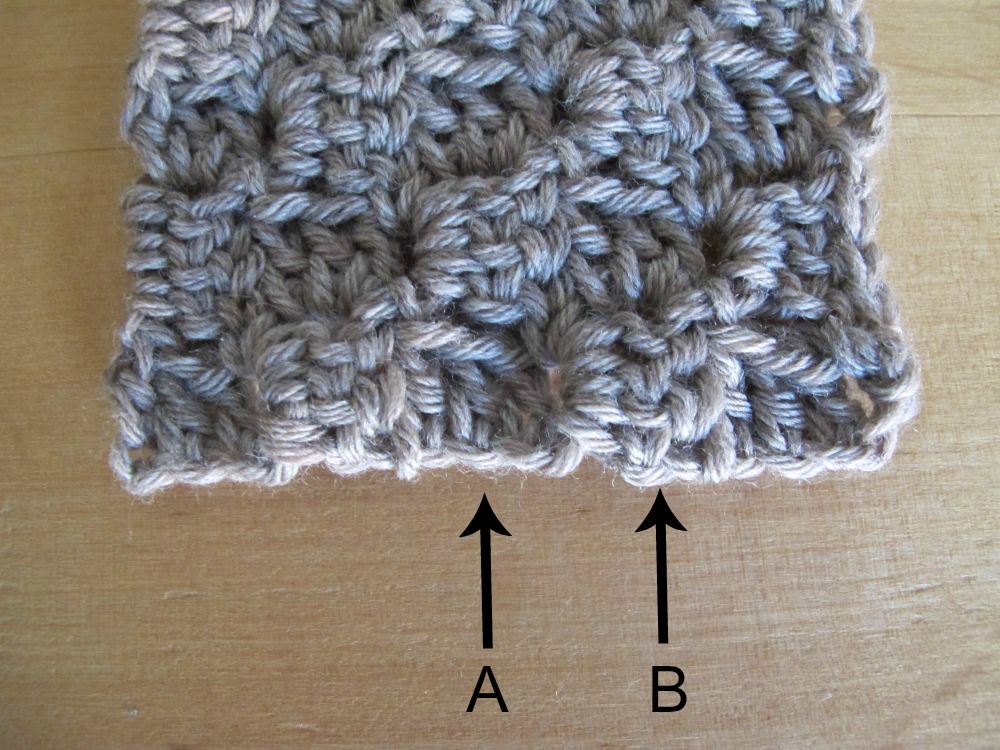
A : The bottoms of the stitches are along the edge, underlined by the remaining loop of the starting chain.
B : A horizontal dc runs along the edge.

C : The tops of the stitches are at the edge of the work, with a sl st in each dc (the result of a decrease row).
D : A 3-ch space runs along the edge.
To make a border that will be as neat as possible, I suggest the following solutions for each of the 4 situations:
A : When working into the bottoms of stitches I insert my hook between the two vertical strands at the « foot » of each stitch. I find this more stable than working under the loop of the starting chain, and it also makes for a more even border.
B : When working into a horizontal dc I make my sc around the dc (inserting the hook under the dc). You can try 2 or 3 sc for each horizontal dc – when testing, I chose to make only 2.
C : When working into the tops of dc’s with sl sts, I insert the hook in the dc (at the spot where the sl st was made). This means that the sc of the border is worked around the sl st in the edge and covers it. This will be easier, and the result will be neater, if you have taken care to work your sl sts rather loosely.
D : When working into 3-ch spaces I treat them as horizontal dc’s. Try with 2 or 3 sc in the ch space – 2 works best for me.
To clearly see the result in the photo below I did the exact opposite of what I said: I worked the first round of the border in a contrasting colour.
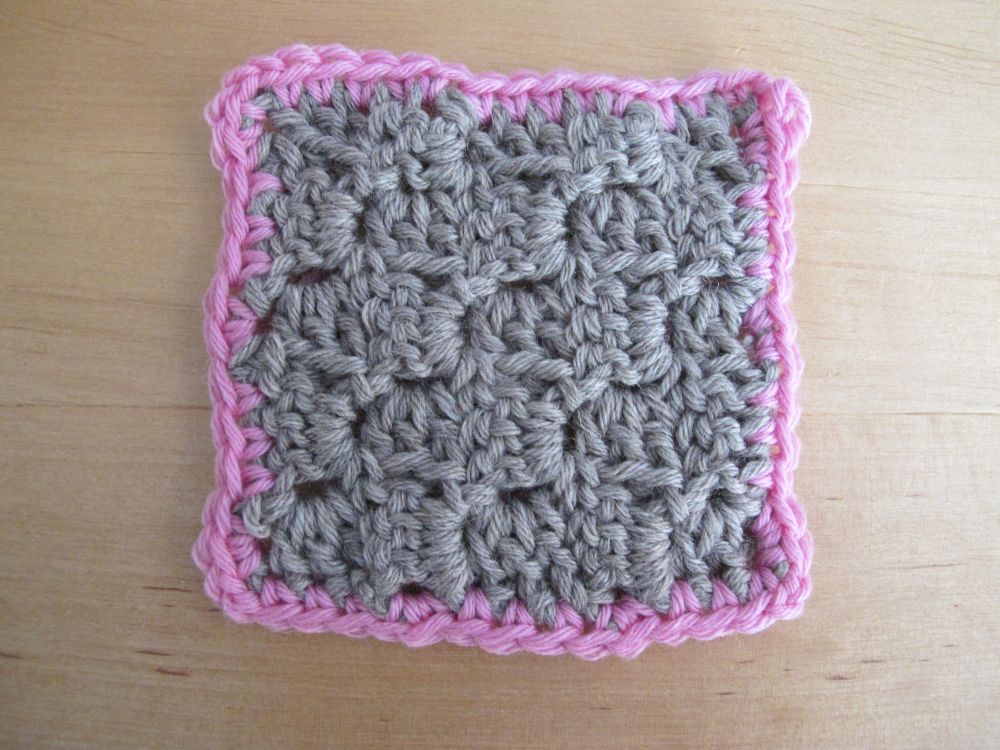
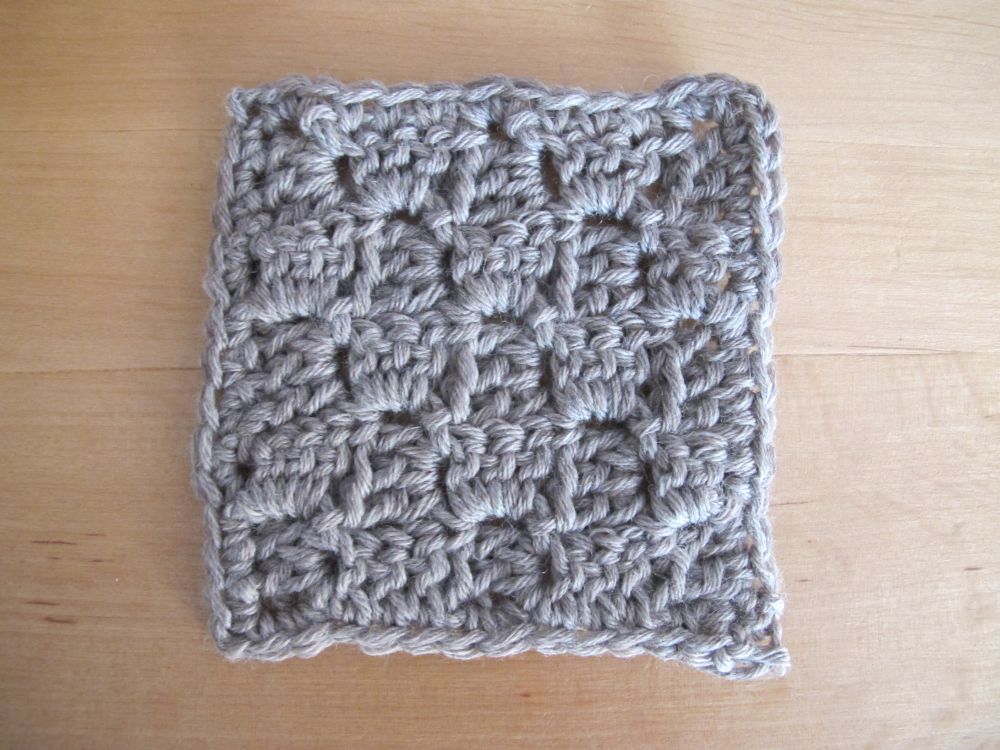
Using the background colour (and blocking a little more), I think the result is pretty good.
You can, of course, add other colours for subsequent rounds of the border. And if you have other ideas or techniques that you use when working this kind of border around a C2C project, please explain them in the comments below.
For a very different style, you can also imagine using chain arches all around you project, attached with 1 sc between blocks and at the corners.
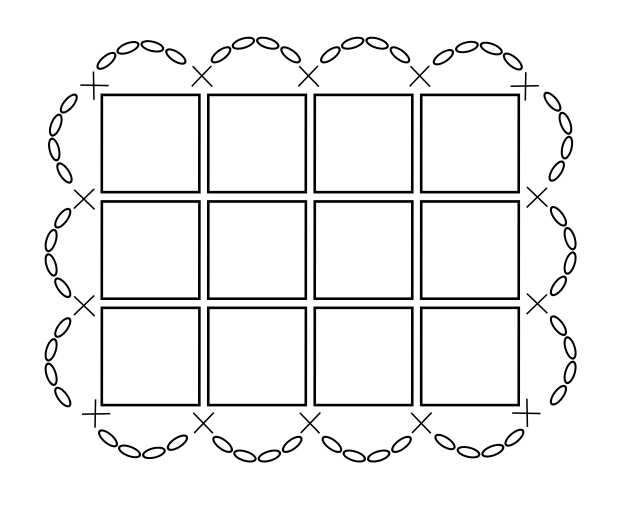 In the sketch above, I used 4 ch in each ch arch. The size of the ch arches can be adapted depending on how you want to use them in your border.
And if you want to try out this type of border, I have an example for you: a free pattern to finish the newsletter series about C2C.
Let me present the Entre-deux-Mers scarf.
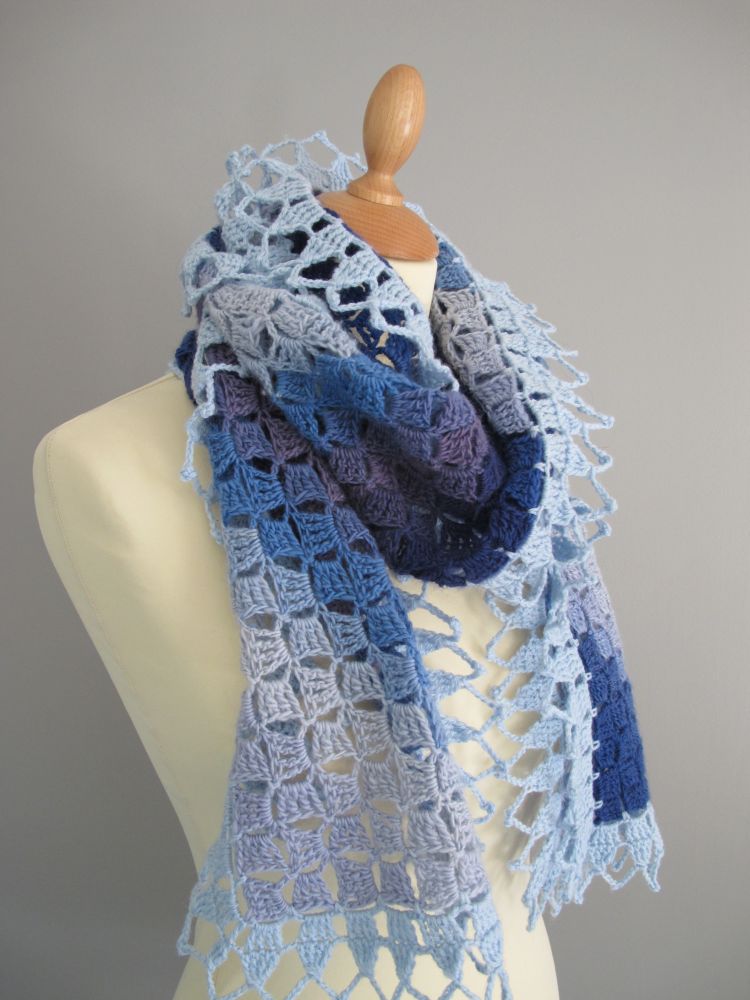
Entre-deux-Mers is a generous scarf that measures approx 220 cm x 25 cm (86.5″ x 10″) with the border – almost a little stole.
You can find the pattern here.
My version of Entre-deux-Mers is made with 3 balls of Mini Mochi for the center and 75 g of fingering weight merino for the border.
As usual, I’m happy to read your comments below!
See you soon!
