
Chevrons: decreases
Last time, I suggested a method for increasing at the selvedge when working chevrons. This time, very logically, I follow up with decreases!
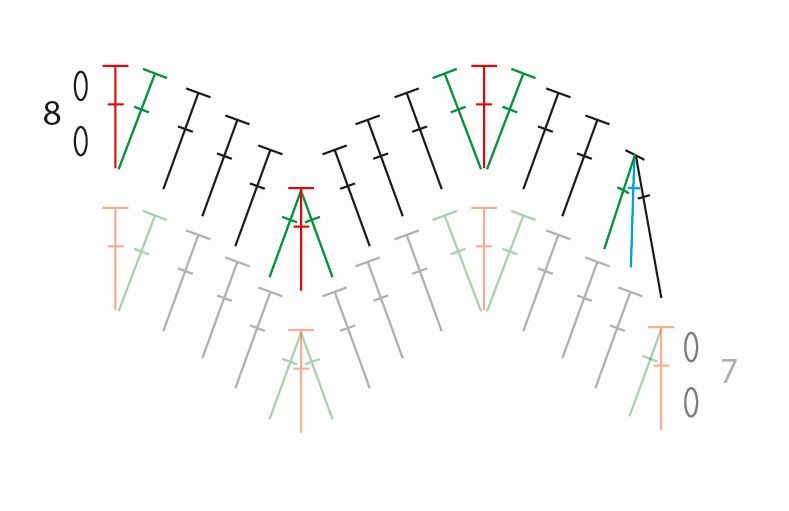
A short recap of the meaning of the colours used in the charts below:
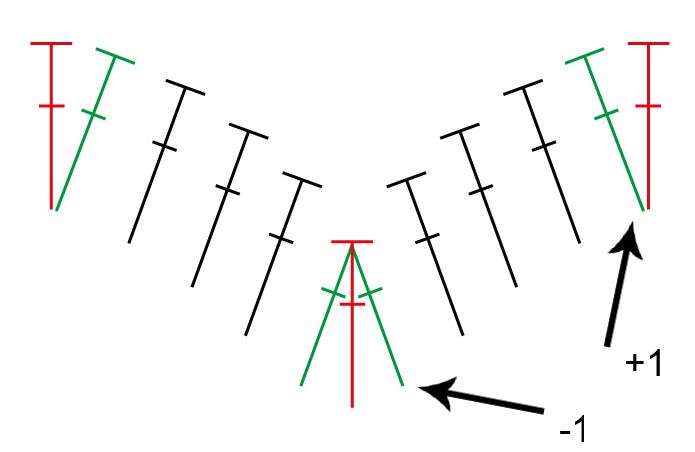
In red, the « backbone stitches ». The vertical lines of backbone stitches structure the stitch pattern. A backbone stitch has the potential to become a selvedge stitch when working decreases. On both sides of the backbone stitches are the compensation stitches, in green. They have the double function of creating the zig-zag pattern and maintaining the stitch count. For each added compensation stitch, there is another that subtracts a stitch. Decrease stitches will be noted in blue.
A general note:
Turning chains do not count as stitches in the instructions below.
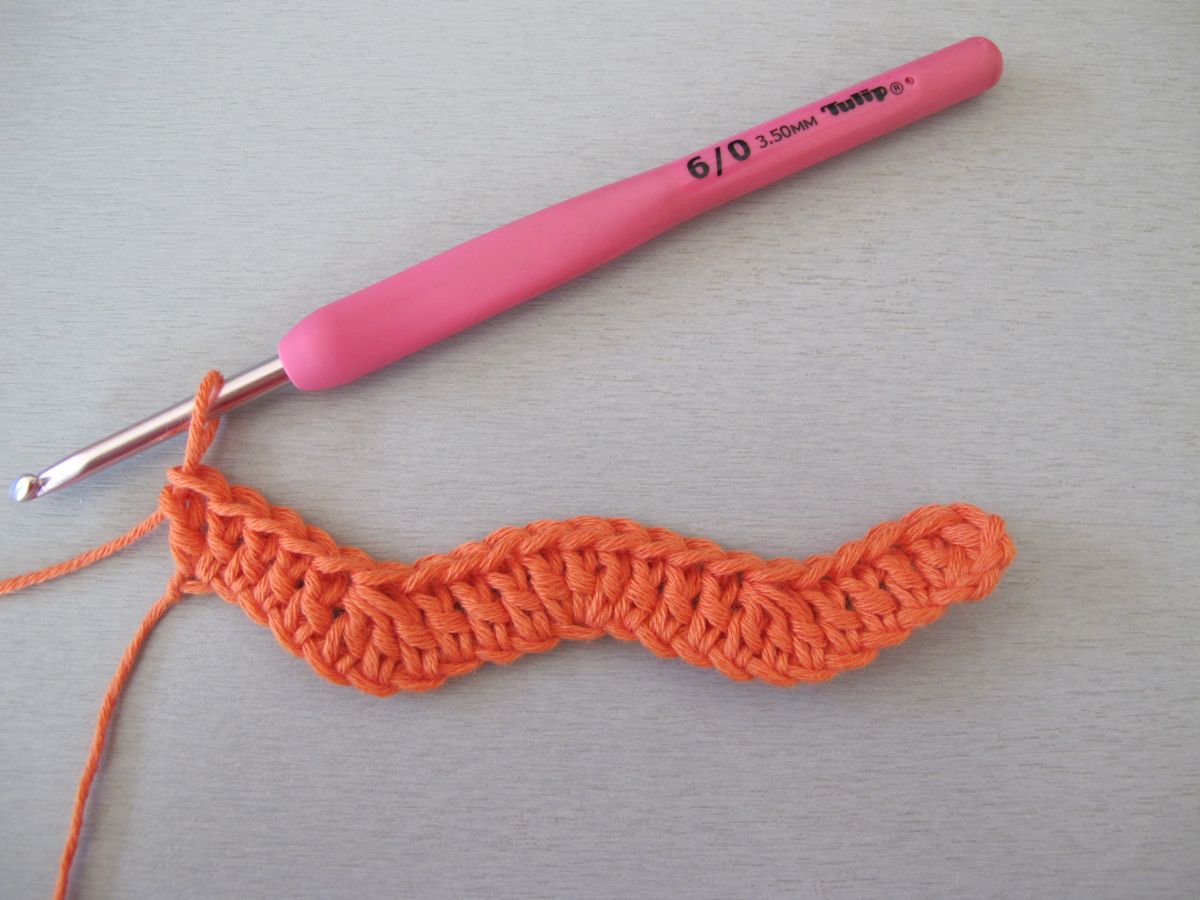
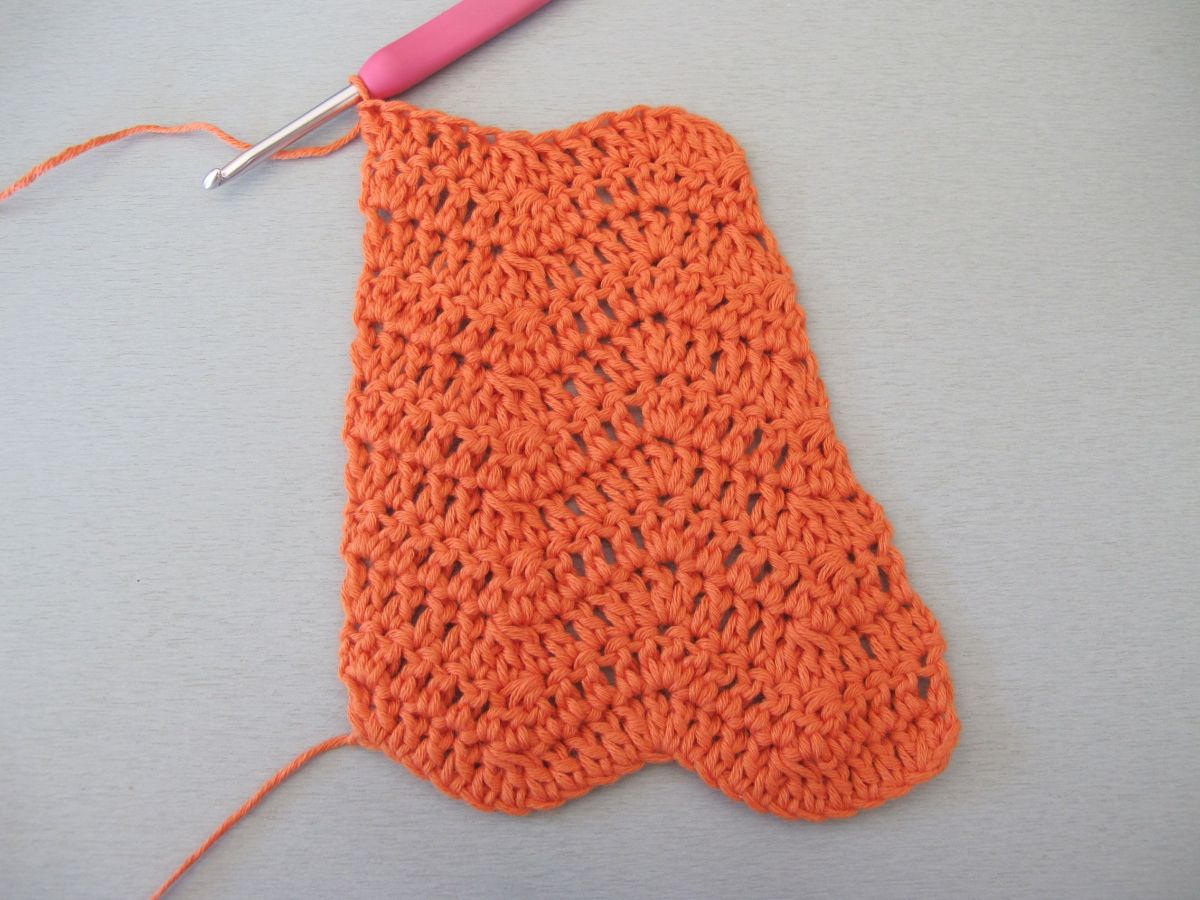
Grab a hook and let’s go!
Ch 21 + 2 = 23.
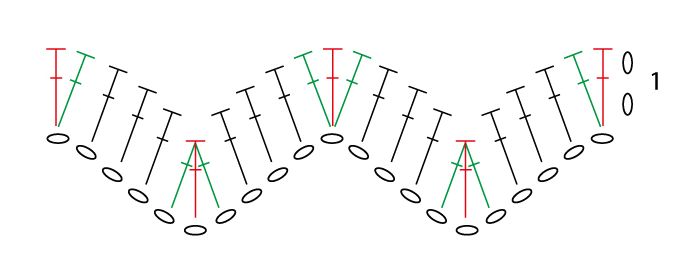
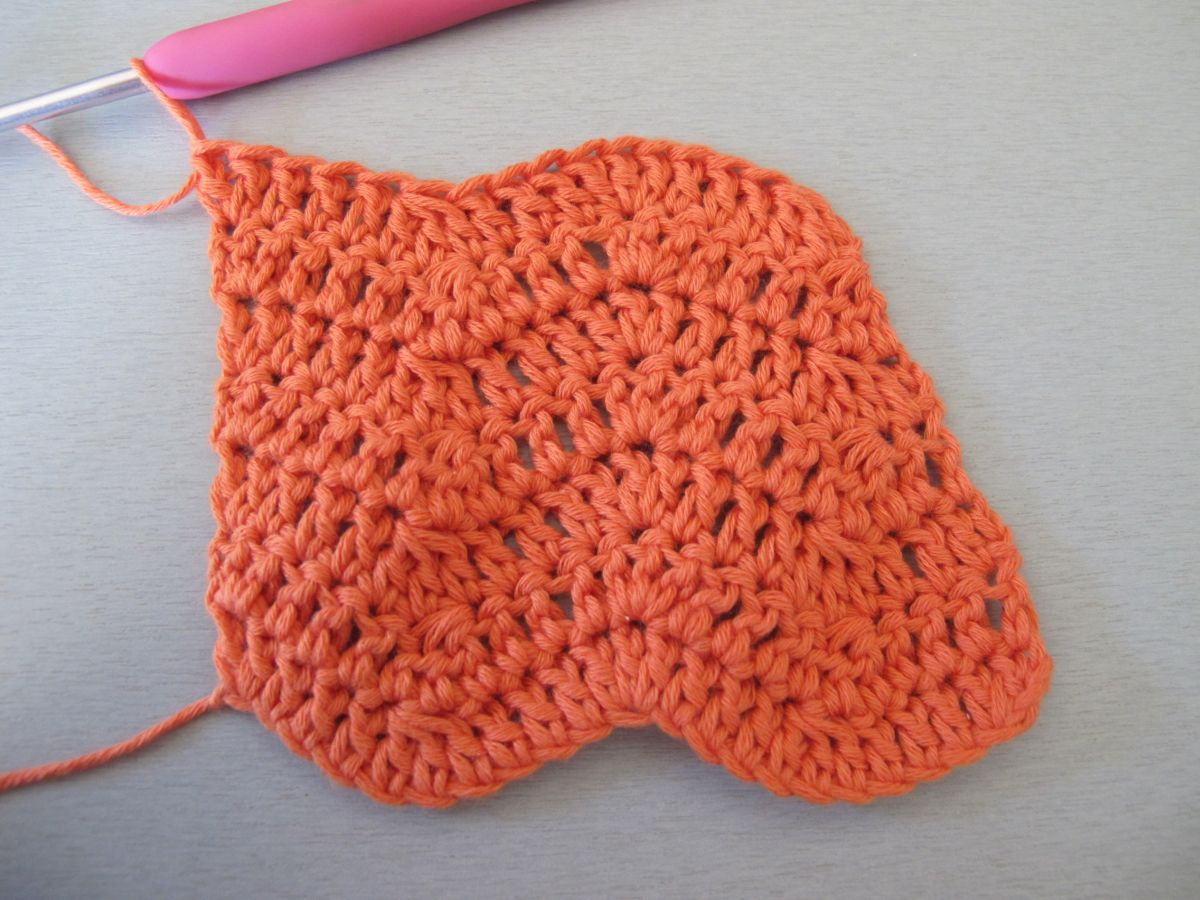
Row 1: 2 dc in the 3rd ch from the hook, 1 dc in each of next 3 ch, dc3tog in next 3 ch, 1 dc in each of next 3 ch, 3 dc in next ch, 1 dc in each of next 3 ch, dc3tog in next 3 ch, 1 dc in each of next 3 ch, 2 dc in last ch.
We are going to work the decreases at the selvedge on the right-hand side of the chart. This means that we will decrease at the end of even-numbered rows and at the beginning of odd-numbered rows. The first decrease will be worked at the end of row 2.
Row 2: Ch 2, 2 dc in first st, 1 dc in each of next 3 sts, dc3tog in next 3 sts, 1 dc in each of next 3 sts, 3 dc in next st, 1 dc in each of next 3 sts, dc3tog in next 3 sts, 1 dc in each of last 4 sts.
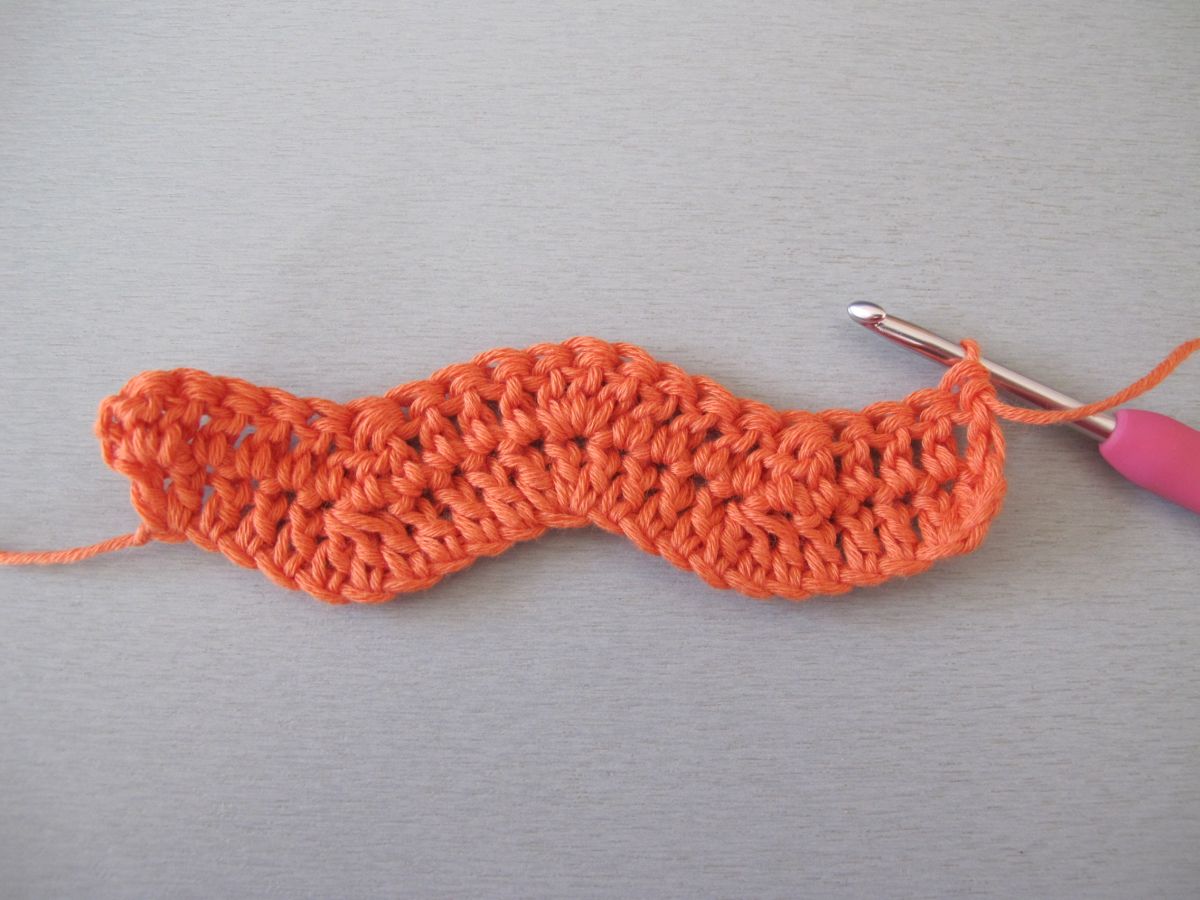
If you look closely at the chart, you will see that the third dc in the last dc3tog before the decrease is no longer green but blue. This stitch is no longer a compensation stitch because there is no increase to balance it. It becomes a true decrease, blue in my chart.
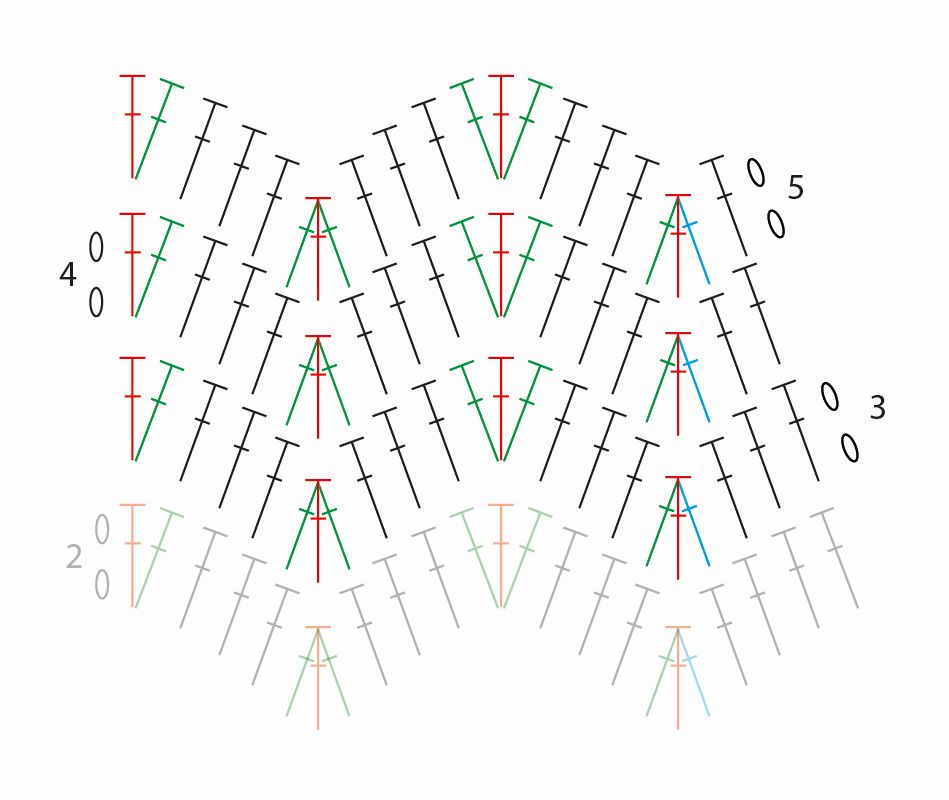
Row 3: Ch 2, 1 dc in each of first 3 sts, dc3tog in next 3 sts, 1 dc in each of next 3 sts, 3 dc in next st, 1 dc in each of next 3 sts, dc3tog in next 3 sts, 1 dc in each of next 3 sts, 2 dc in last st.
Row 4 : Ch 2, 2 dc in first st, 1 dc in each of next 3 sts, dc3tog in next 3 sts, 1 dc in each of next 3 sts, 3 dc in next st, 1 dc in each of next 3 sts, dc3tog in next 3 sts, 1 dc in each of last 2 sts.
Row 5: Ch 2, 1 dc in first st, dc3tog in next 3 sts, 1 dc in each of next 3 sts, 3 dc in next st, 1 dc in each of next 3 sts, dc3tog in next 3 sts, 1 dc in each of next 3 sts, 2 dc in last st.
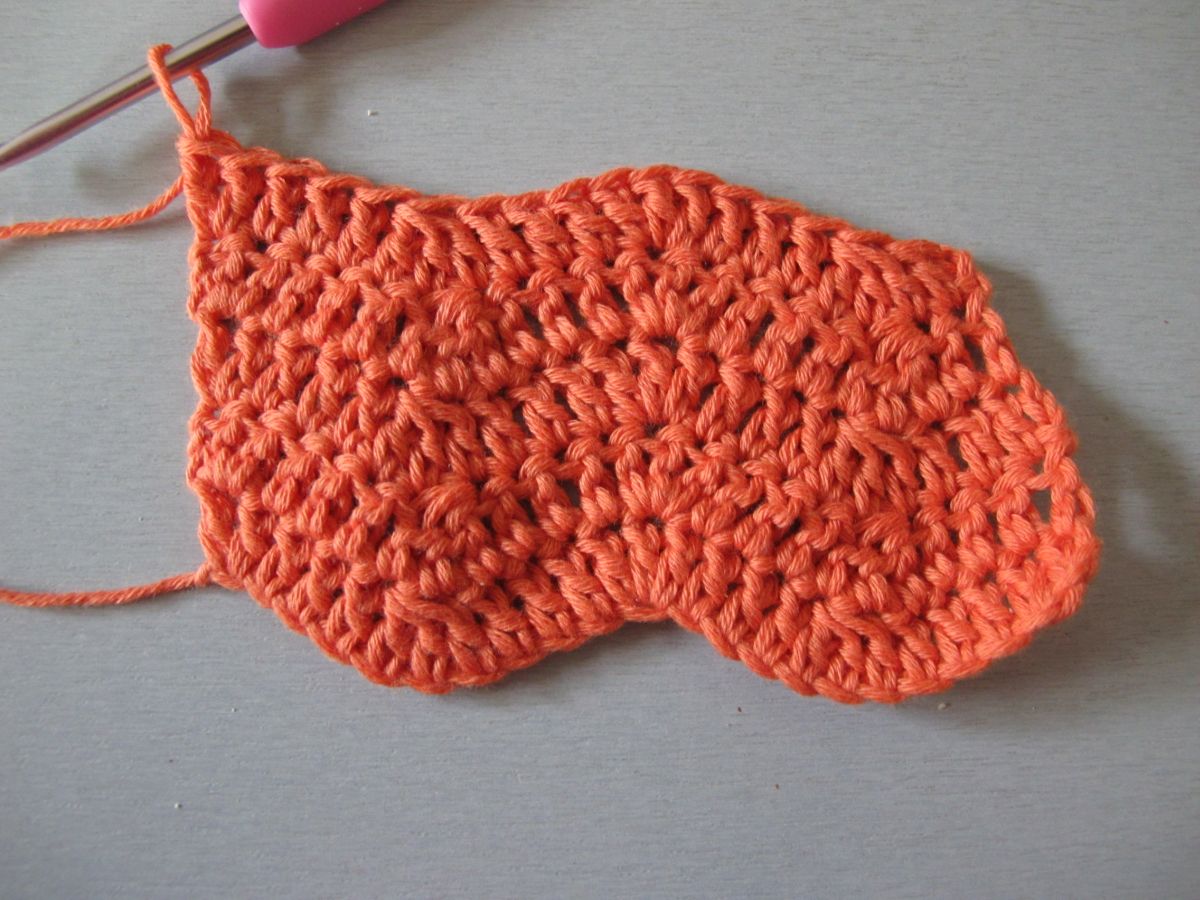
The stitch pattern is decreasing by itself! Let’s see how things work out as we near the backbone stitch.
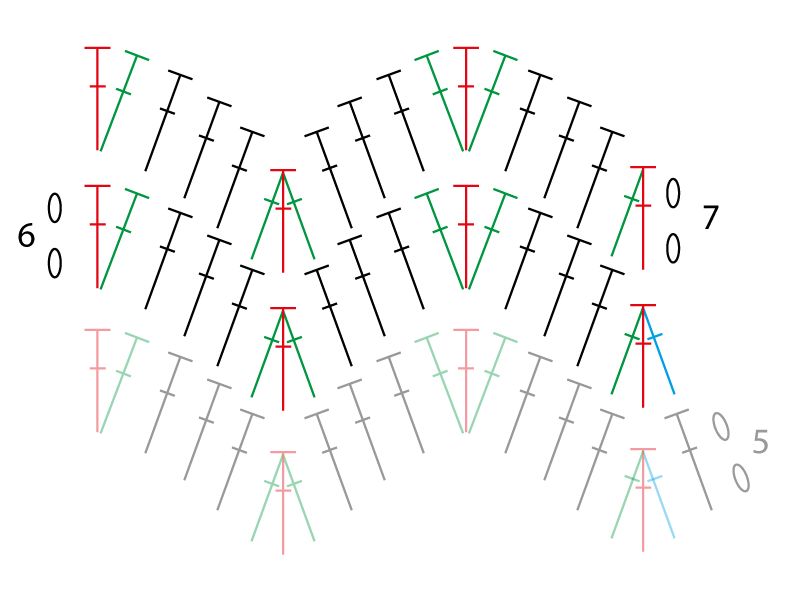
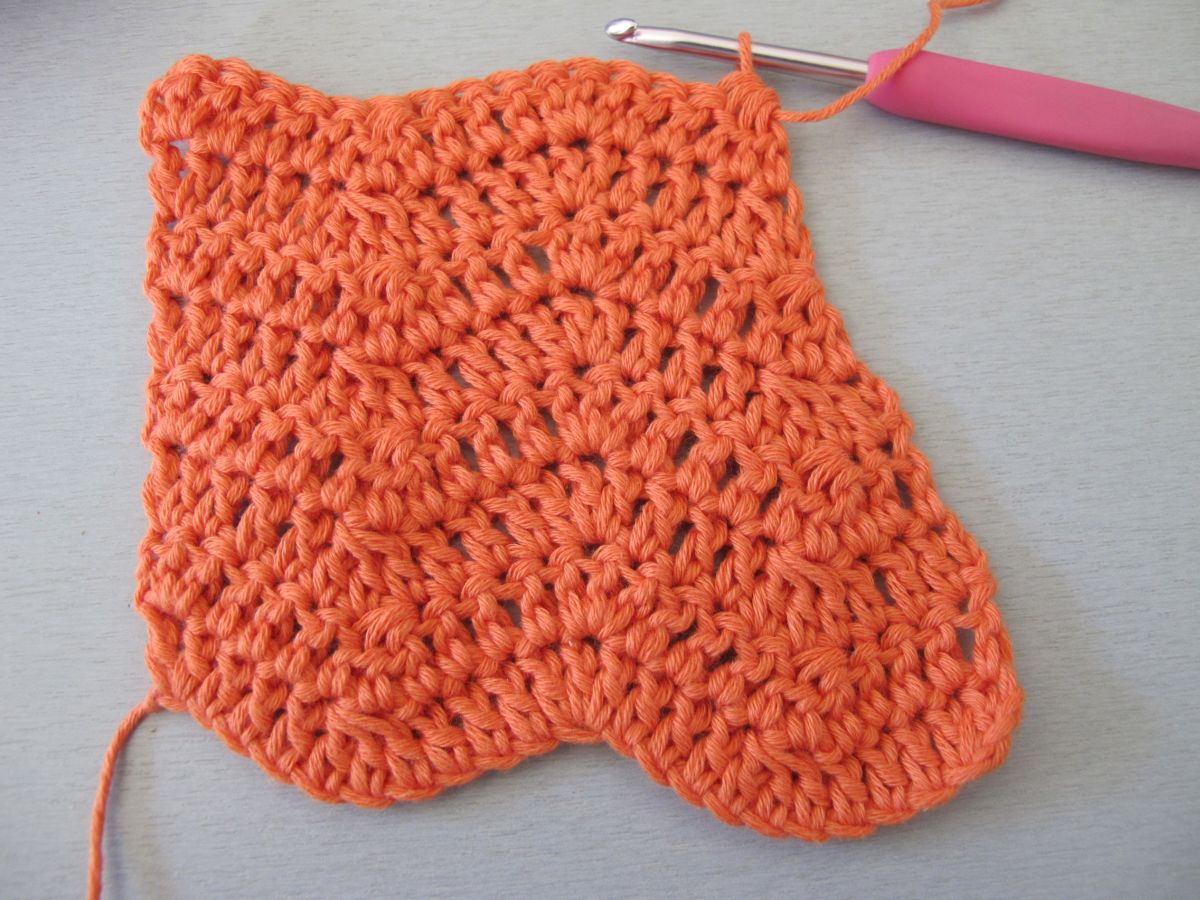
Row 6: Ch 2, 2 dc in first st, 1 dc in each of next 3 sts, dc3tog in next 3 sts, 1 dc in each of next 3 sts, 3 dc in next st, 1 dc in each of next 3 sts, dc3tog in last 3 sts.
Row 7: Ch 2, dc2tog in first 2 sts, 1 dc in each of next 3 sts, 3 dc in next st, 1 dc in each of next 3 sts, dc3tog in next 3 sts, 1 dc in each of next 3 sts, 2 dc in last st.
We now have a backbone stitch at the selvedge. This means that we can continue working straight from this point if that’s what we want. However, if we want to continue decreasing, we will need to adopt a slightly different strategy, since we now start our decreases from a backbone stitch at the bottom of the valley rather than at the top of the hill. Feel free to compare this to my last newsletter on chevron increases. The reasoning is inverted, but follows the same logic!
 Row 8: Ch 2, 2 dc in first st, 1 dc in each of next 3 sts, dc3tog in next 3 sts, 1 dc in each of next 3 sts, 3 dc in next st, 1 dc in each of next 2 sts, dc3tog in last 3 sts.
We need to work a dc3tog to decrease one stitch. You can, of course, look at the 3 stitches in the dc3tog in different ways. I chose to view them as follows: The stitch at the selvedge (black) is the remaining stitch (worked in the selvedge stitch below), the middle stitch (blue) is the decrease stitch, and the stitch closest to the hilltop (green) is the compensation stitch that evens out the compensation stitch at the top.
We will continue in the same way:
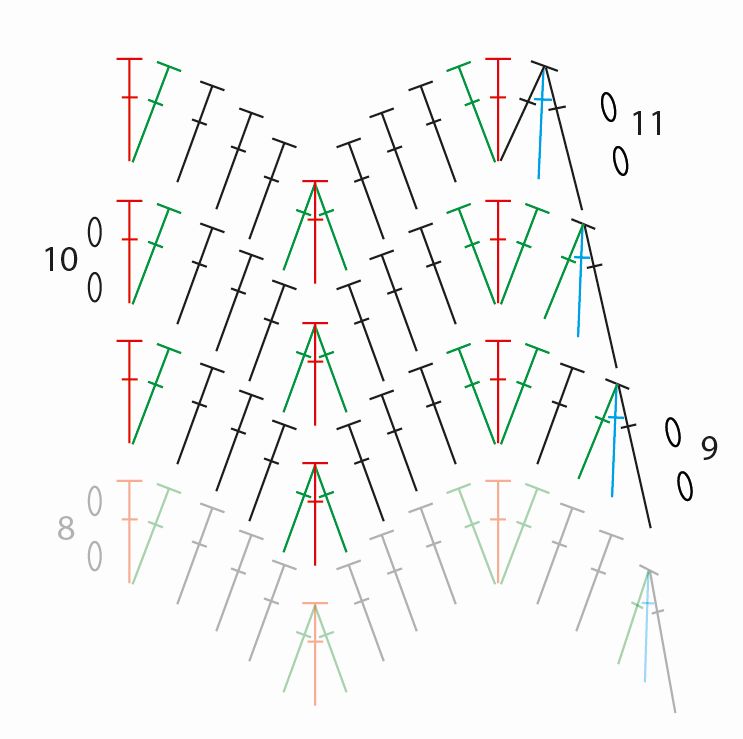 Row 9: Ch 2, dc3tog in first 3 sts, 1 dc in next st, 3 dc in next st, 1 dc in each of next 3 sts, dc3tog in next 3 sts, 1 dc in each of next 3 sts, 2 dc in last st.
Row 10: Ch 2, 2 dc in first st, 1 dc in each of next 3 sts, dc3tog in next 3 sts, 1 dc in each of next 3 sts, 3 dc in next st, dc3tog in last 3 sts.
Row 11: Ch 2, dc3tog in first 3 sts, 2 dc in same st as the last st in the dc3tog, 1 dc in each of next 3 sts, dc3tog in next 3 sts, 1 dc in each of next 3 sts, 2 dc in last st.
We’re close to our goal, which is to reestablish the selvedge at the backbone stitch at the top. I suggest finishing as follows:
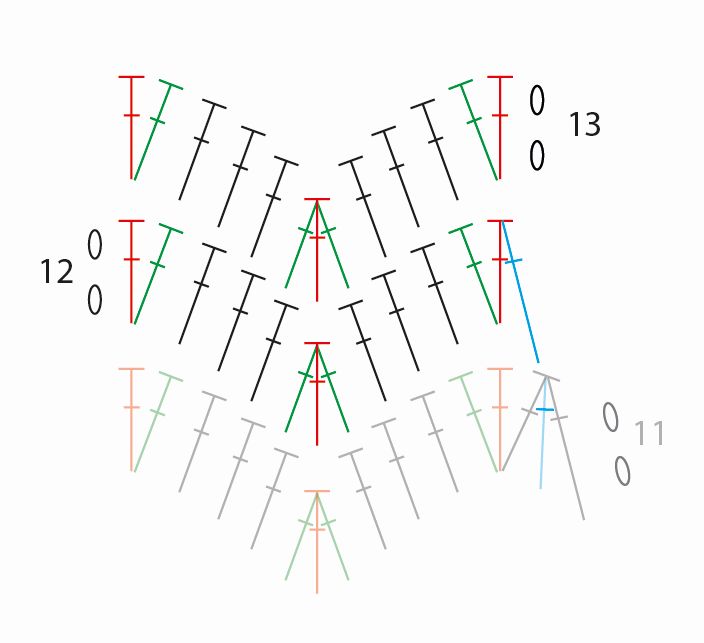 Row 12: Ch 2, 2 dc in first st, 1 dc in each of next 3 sts, dc3tog in next 3 sts, 1 dc in each of next 4 sts (the last of these stitches is worked in the next-to-last stitch in the row), dc2tog in last 2 sts.
Row 13: Ch 2, 2 dc in first st, 1 dc in each of next 3 sts, dc3tog in next 3 sts, 1 dc in each of next 3 sts, 2 dc in last st.
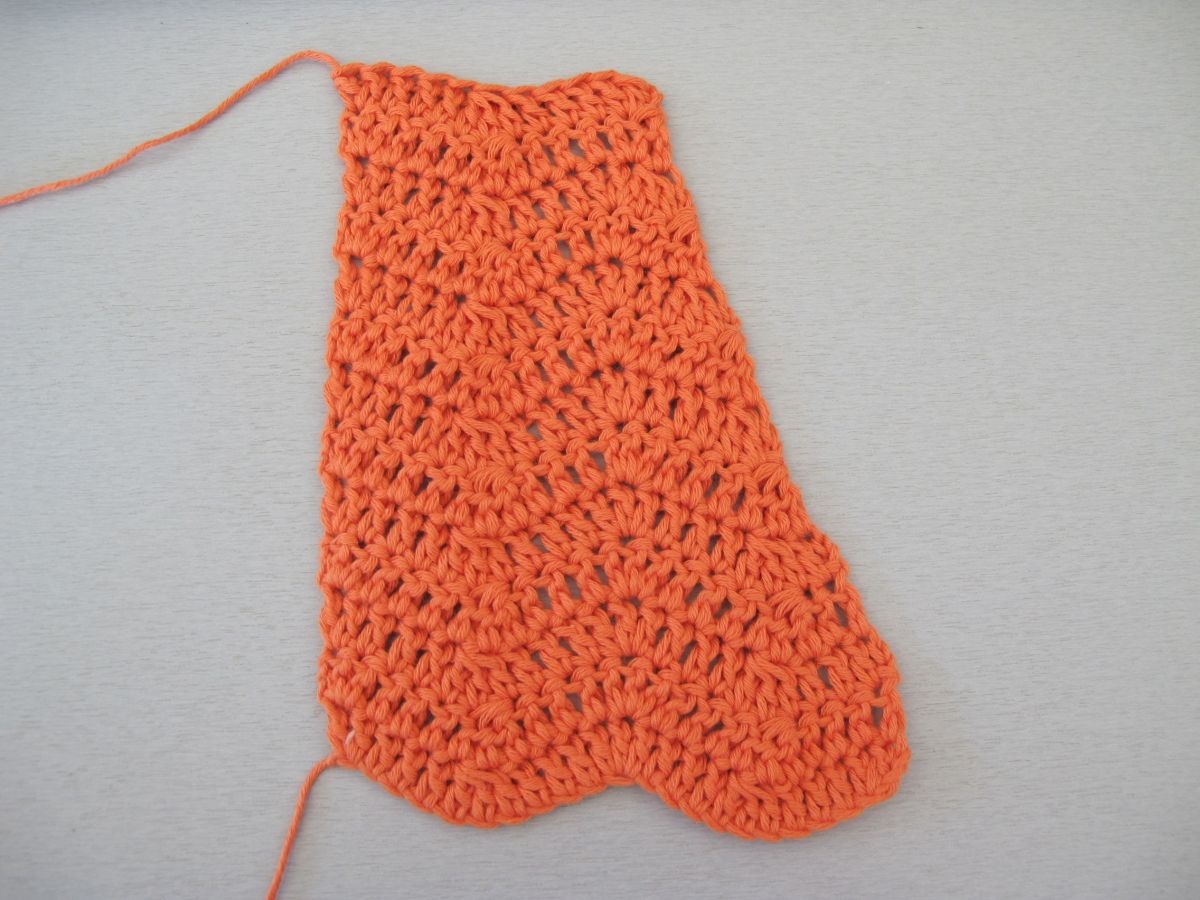
We have decreased a complete stitch repeat!
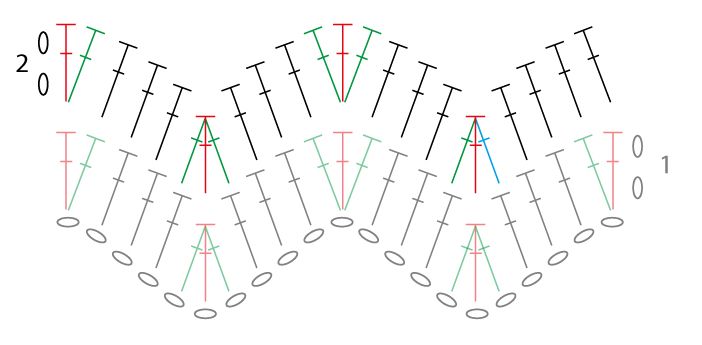
Here is the complete chart:
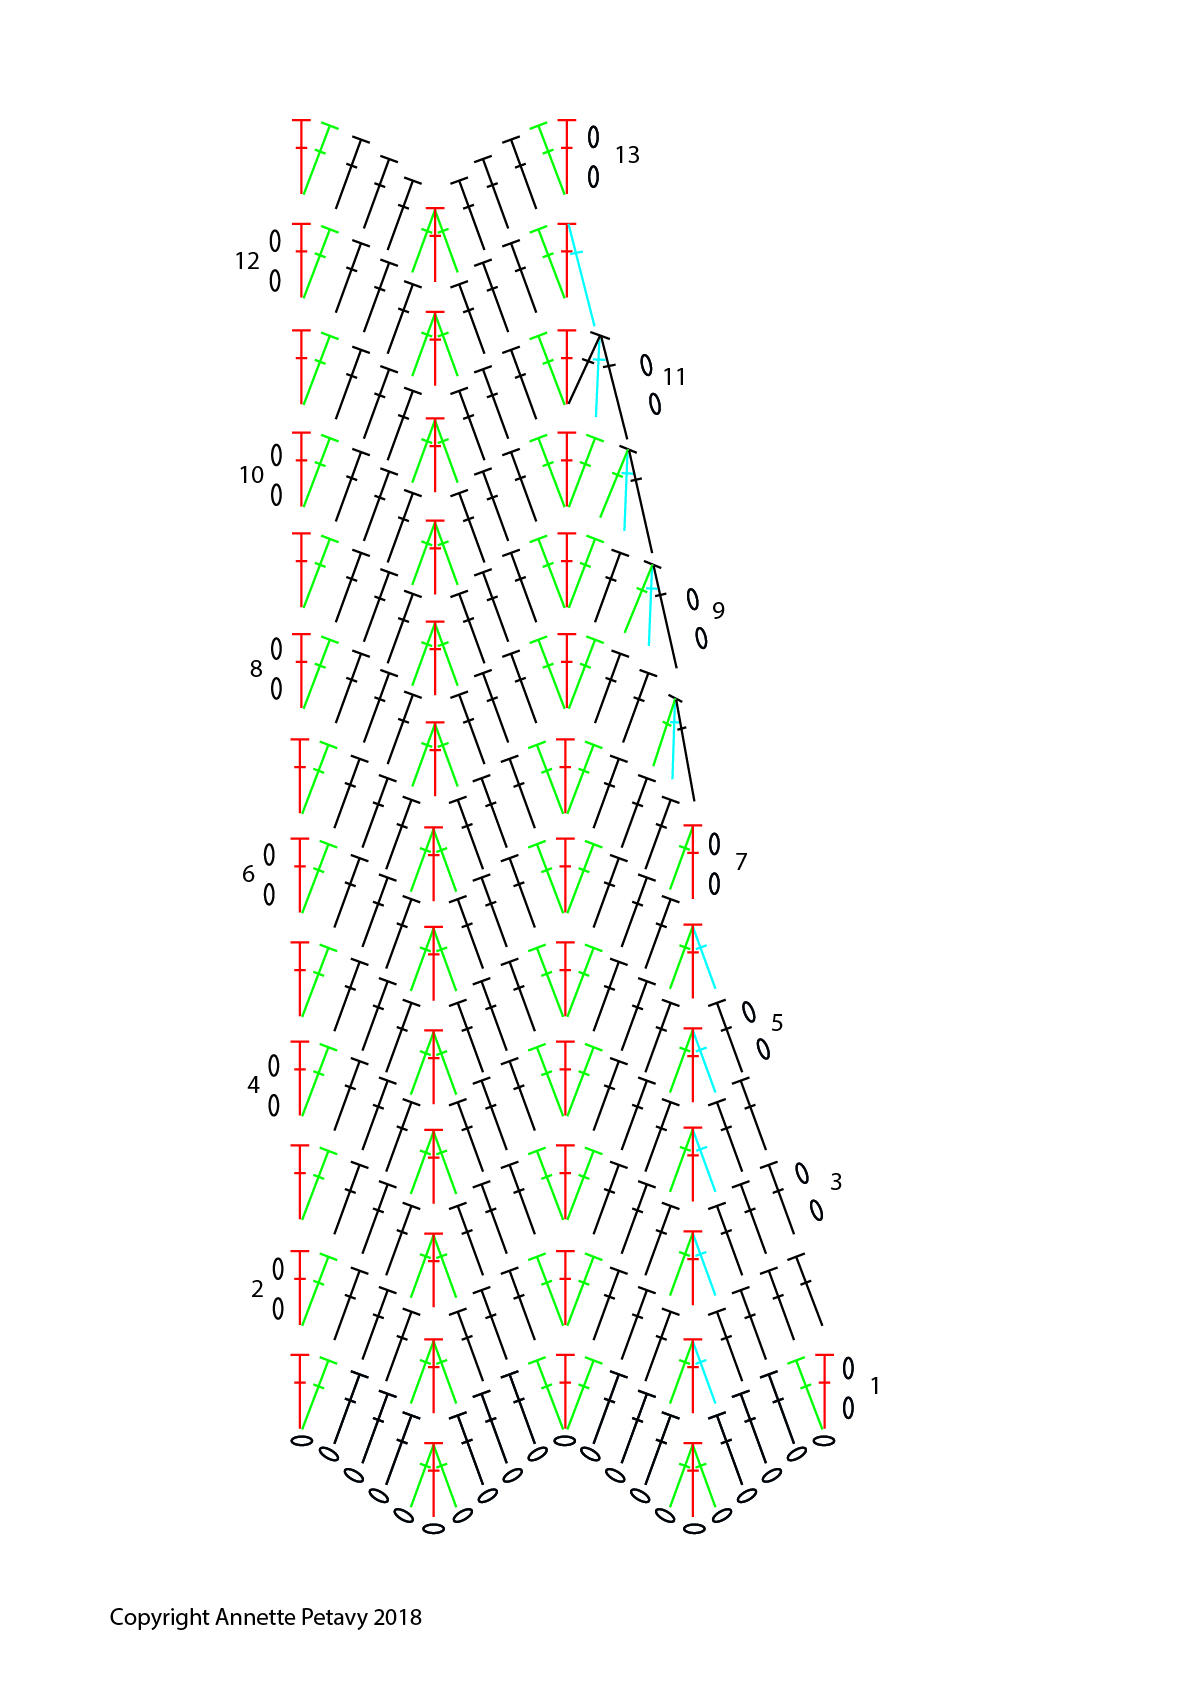
If you find it more practical, you can download the full chart as a pdf here: Chevron decreases
Thank you for following me in these explorations! Feel free to share your comments and suggestions below.
See you soon!
