In the shop
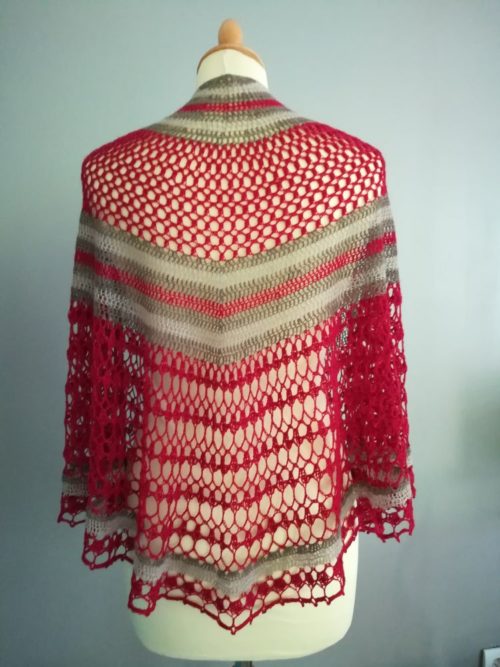
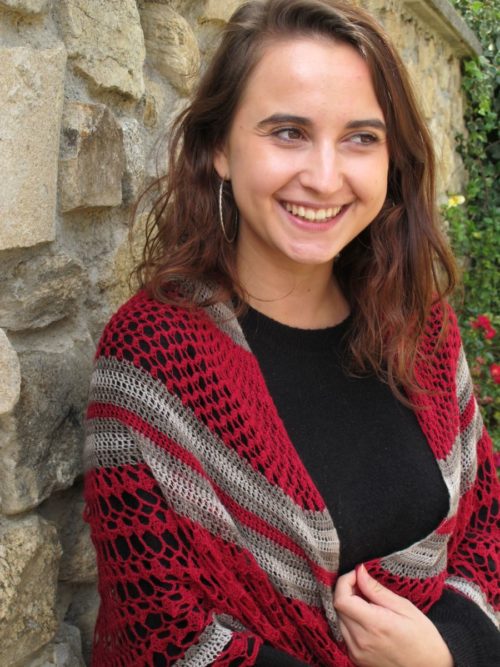
I’m happy to introduce my new crochet shawl design: Lady in Red!
This pattern has been designed in partnership with the fabulous natural dyer Andie of Renaissance Dyeing and worked up in her superb laceweight wool.
You can find the pattern for Lady in Red in my shop and on Ravelry. The kit is available directly from Renaissance Dyeing (they ship worldwide).
Yet another kind of stripe
We have discussed linear stripes and chevrons. However, one of the characteristics of crochet is the ease with which you can combine stitches of different heights in the same row. And this is how you can obtain another kind of stripe!
In this newsletter I will show you three stitch patterns to exemplify this type of stripes – and I’m sure you can make up others based on these!
On the topic of changing colours and carrying your yarn along the selvedge, please refer to the newsletters from April 2018 and May 2018.
Turning chains do not count as stitches in the instructions below. Also, the turning chain at the beginning of the first row is not included in the starting chain.
Stitch pattern 1:
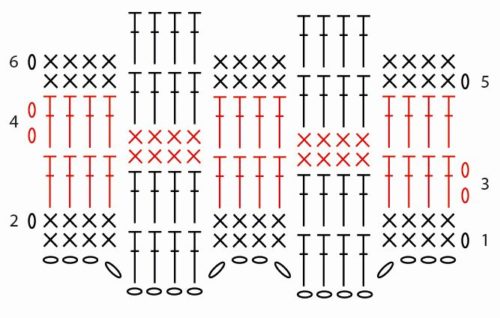
In this pattern groups of 4 sc alternate with groups of 4 dc in one row. In the next row, sc are worked in sc and dc in dc. Changing colours, you then shift the pattern by working sc in dc and dc in sc. It’s simple two-row stripes, but the overall effect looks more like mosaic.
Chain a multiple of 8 + 4 with colour A.
Row 1 (colour A): Ch 1, 1 sc in each of first 4 ch, * 1 dc in each of next 4 ch, 1 sc in each of next 4 ch; repeat from * to end of row.
Row 2: Ch 1, 1 sc in each of first 4 sc, * 1 dc in each of next 4 dc, 1 sc in each of next 4 sc; repeat from * to end of row.
Row 3 (colour B): Ch 2, 1 dc in each of first 4 sc, * 1 sc in each of next 4 dc, 1 dc in each of next 4 sc; repeat from * to end of row.
Row 4: Ch 2, 1 dc in each of first 4 dc, * 1 sc in each of next 4 sc, 1 dc in each of next 4 dc; repeat from * to end of row.
Row 5 (colour A): Ch 1, 1 sc in each of first 4 dc * 1 dc in each of next 4 sc, 1 sc in each of next 4 dc; repeat from * to end of row.
Row 6: Ch 1, 1 sc in each of first 4 sc, * 1 dc in each of next 4 dc, 1 sc in each of next 4 sc; repeat from * to end of row.
Repeat rows 3 to 6.
Stitch pattern 2:
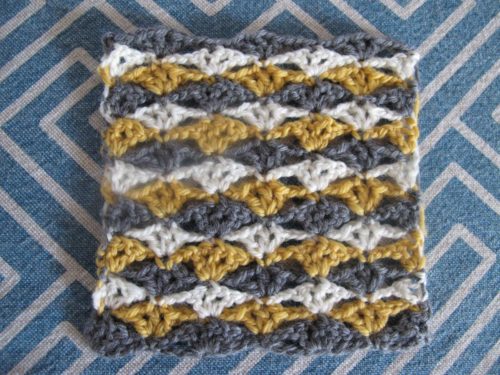
Here I have combined the undulations of an offset shell pattern with three colour stripes (described in the newsletter from April) to obtain a dotted effect. Another idea for this type of stitch pattern is to use two balls of the same colour and one of a contrasting one – you will get a very different result!
Shell: (1 dc, ch 1, 1 dc, ch 1, 1 dc) in the same stitch.
Chain a multiple of 8 + 1 with colour A.
Row 1 (colour A): Ch 2, (1 dc, ch 1, 1 dc) in 3rd ch from hook, * ch 2, skip 3 ch, 1 sc in next ch, ch 2, skip 3 ch, 1 shell in next ch; repeat from * to end of row replacing the last shell with (1 dc, ch 1, 1 dc) in the last ch.
Row 2 (colour B) : Ch 1, 1 sc in first dc, * ch 2, 1 shell in next sc, ch 2, 1 sc in center dc of next shell; repeat from * to end of row, working the last sc in last dc in row.
Row 3 (colour C) : Ch 2, (1 dc, ch 1, 1 dc) in first st, * ch 2, 1 sc in center dc of next shell, ch 2, 1 shell in next sc ; repeat from * to end of row, replacing the last shell with (1 dc, ch 1, 1 dc) in last st.
Row 4 (colour A): As row 2.
Row 5 (colour B): As row 3.
Row 6 (colour C): As row 2.
Row 7 (colour A): As row 3.
Repeat rows 2 to 7.
Stitch pattern 3:
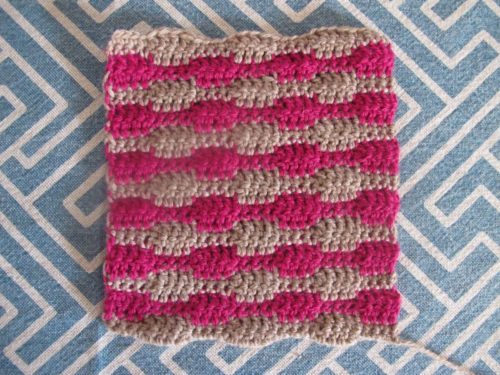
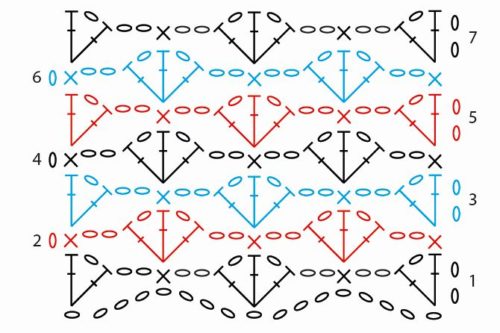
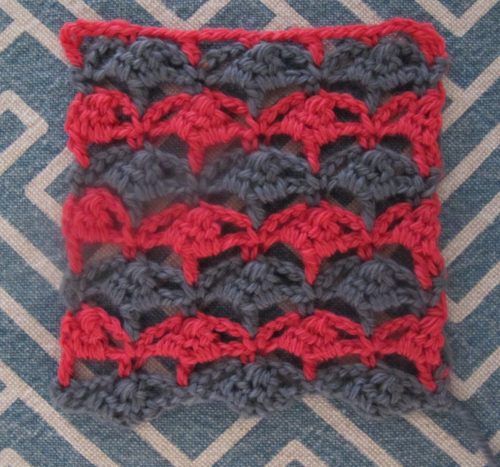
While researching stitch patterns for this newsletter, this original stitch pattern caught my eye. It’s a two-row stripe, but it looks very different from a simple linear stripe!
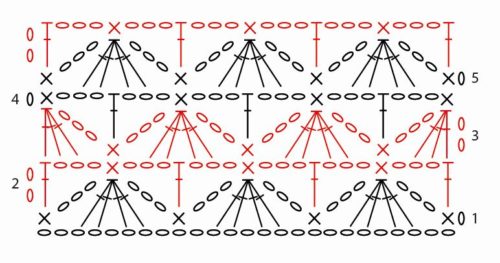 dc3tog: dc 3 stitches together {inserting the hook as specified for each dc}.
dc4tog: dc 4 stitches together {inserting the hook as specified for each dc}.
Chain a multiple of 8 + 1 with colour A.
Row 1 (colour A): Ch 1, 1 sc in 2nd ch from hook, * ch 3, skip 1 ch, dc4tog {inserting hook for 1st dc in next ch, for 2nd dc in next ch, skip 1 ch, inserting hook for 3rd dc in next ch and for 4th dc in next ch}, ch 3, skip 1 ch, 1 sc in next ch; repeat from * to end of row.
Row 2 (colour B): Ch 2, 1 dc in first sc, * ch 3, 1 sc in dc4tog, ch 3, 1 dc in next sc; repeat from * to end of row.
Row 3 : Ch 2, dc3tog {inserting hook for 1st dc in first st and for 2nd and 3rd dc in first ch space}, * ch 3, 1 sc in next sc, ch 3, dc4tog {inserting hook for 1st and 2nd dc in next ch space, skip dc, inserting hook for 3rd and 4th dc in next ch space}; repeat from * to end of row, finishing with dc3tog {inserting hook for 1st and 2nd dc in last ch space and for 3rd dc in last dc}.
Row 4 (colour A): Ch 1, 1 sc in dc3tog, * ch 3, 1 dc in next sc, ch 3, 1 sc in dc4tog; repeat from * to end of row, placing last sc in dc3tog at end of row.
Row 5: Ch 1, 1 sc in first st, * ch 3, dc4tog {inserting hook for 1st and 2nd dc in next ch space, skip dc, inserting hook for 3rd and 4th dc in next ch space} ch 3, skip 1 ch, 1 sc in next sc; repeat from * to end of row.
Repeat rows 2 to 5.
So there we have three examples of stripes that sometimes don’t resemble stripes at all! Do try them out, and why not invent some others!
Feel free to share comments, suggestions and ideas below.
Next time we’ll continue exploring colour in crochet!
See you soon!


Un commentaire pour “Yet another kind of stripe – Newsletter October 2018”