Newsletter October 2013: One-row stripesNews:I now stock the lovely Estonian book Knitted Shawls of Helga Rüütel. This book contains 75 original knitting stitch patterns, developed by Helga Rüütel. The stitch patterns are both innovative and firmly rooted in the Estonian tradition.More information in the shop.Interweave Crochet’s Accessories 2014 issue will soon hit the newsstands. I have contributed a design to this magazine, named Network Shawlette.
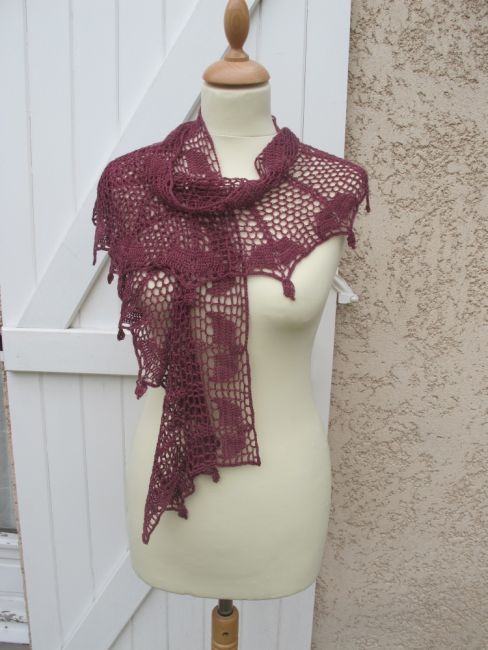 It’s worked in a laceweight bamboo yarn. My original name for the design was Euphorbia, since I developed the stitch pattern from a very inspiring photo sent to me by a friend, showing a flower of Euphorbia punicea. One-row stripesThis is actually a topic I have touched upon before, in the newsletter for July 2010. However, I think it’s worth getting back to. Many readers of the newsletter were not subscribers back then, and I have recently gotten several questions on the topic. This is the technique used by EclatDuSoleil to achieve the desired look in a number of interesting patterns, such as Colour Beams, A Striped Life or Sea and Sun. If you have been wondering how these one-row stripes are worked, this is the newsletter for you.Here is a solid dc swatch to which I want to add one-row stripes. I worked this swatch without counting the turning chains as stitches (see the newsletter for July 2009). Note that I have finished the last yellow row completely, without anticipating the colour change in the last stitch. I have chosen to turn the work.
 Place a marker or safety pin in the yellow loop on the hook – you will now need your hook to work the next colour. Use it to pull up a loop in colour B, inserting your hook in the top of the last stitch in the previous row.
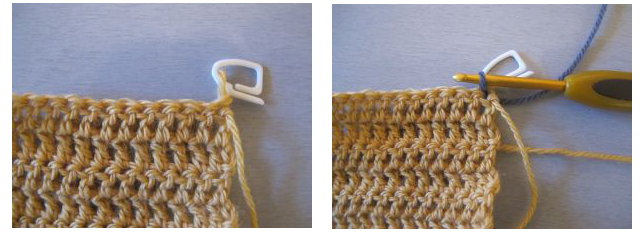 Work the row in colour B as you would any other row. When the row is finished, place a marker in the loop on the hook. Do not turn.
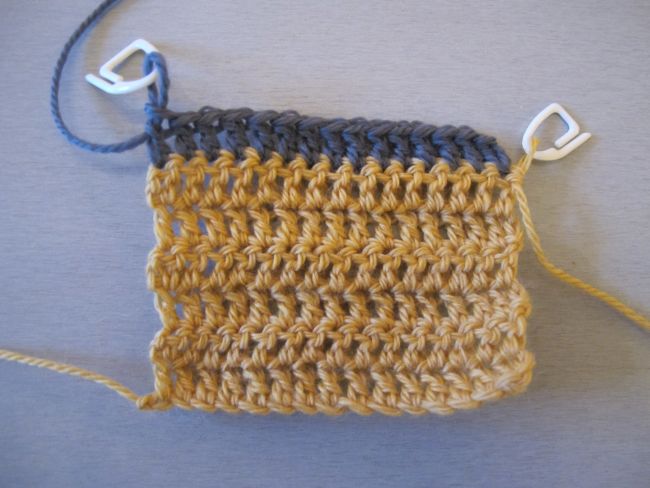 The reason why you don’t turn your work at this point is that you are now going to work in colour A (yellow), and the loop in this colour is already at the righthand edge of your work.Insert your hook in the colour A loop. Ch 2 to compensate for the height of the previous row and attach with a sl st to the top of the first stitch of the previous row or, if you have replaced the first stitch with a turning chain that counts as a stitch, in the top of that turning chain. These 2 « compensation » chains do not count as a stitch, they are only there to place the yarn where you need it to be.
 Work the row like any other row. If you want to switch colours again, as I do here, place a marker in the colour A loop. Since both loops are at the left edge of the work, turn.
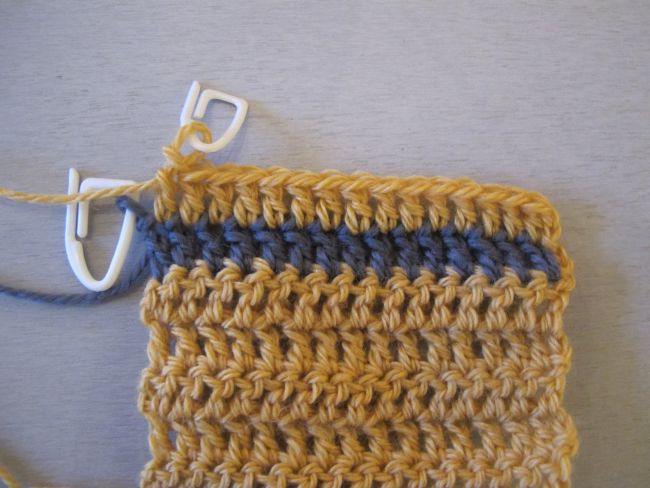 Just as previously, ch 2 to compensate for the height of the previous row, attach with a slip stitch and work row as usual.
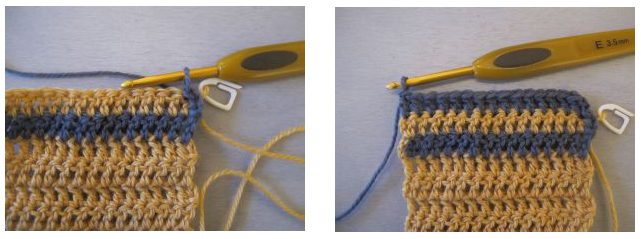 You can, of course, continue working in colour B, and pick up colour A several rows later. Just ch 2 to compensate for the height of each row, and attach with a slip stitch in the top of each row at the selvedge.This is one way of doing it. You can experiment with different ways of handling the two yarns. You could try changing colours in the turning chain, thus eliminating one of the loops needed to be marked and instead inserting your hook in the work to pull up a loop when needed. Depending on the stitch pattern and your way of crocheting, experiment with the number of chains to work to compensate for each row. You could also try to pull up a long loop instead of working these chains, to make the selvedge thinner.In the swatch above, I used solid dc’s. However, it can be very interesting to use this technique with other stitch patterns, to obtain various effects.Look how different the simple V-stitch looks in a solid colour and in one-row stripes.
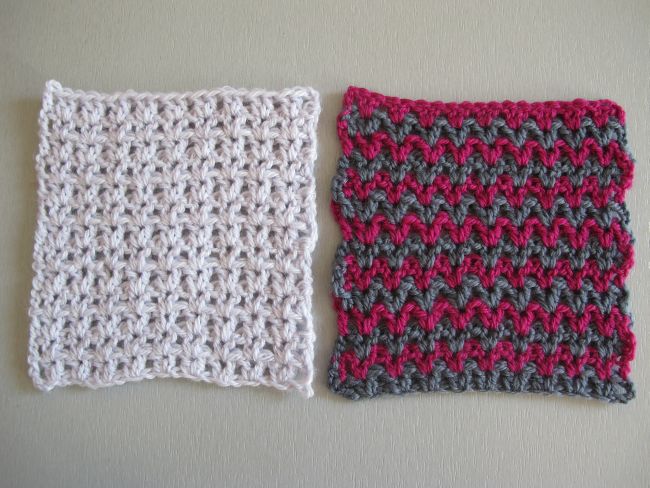 A really interesting zigzag pattern don’t you think? I can’t take credit for the idea – I found it on a blog via Pinterest and it stuck in my head. Unfortunately I haven’t been able to find the blog again, but I remember the author noting that she had a tremendous number of ends to weave in. With one-row stripes, you will only have four – two for each colour. Another way of using one-row stripes is to insert them a little more sparingly in a stitch pattern.
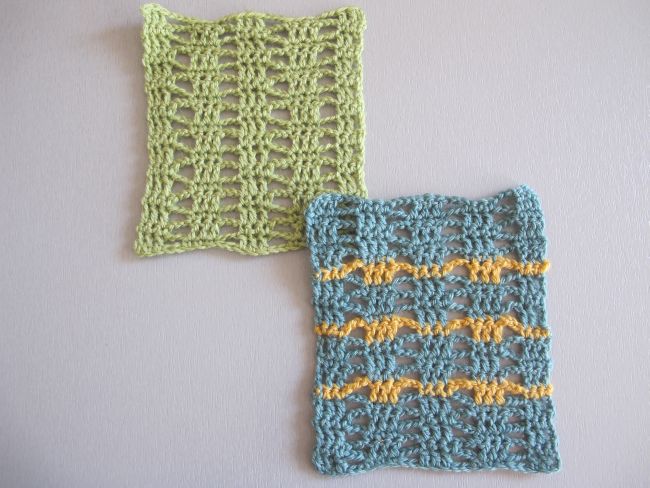 You can, of course, insert these one-row stripes anywhere – and perhaps even use only one, at the hem of a garment, for example. I think this is an interesting way of highlighting a feature in a stitch pattern. When working in a solid colour, you obtain an overall effect. Throwing in a one-row stripe here and there shows the construction of the row in a contrasting colour and « pushes it forward ».In this situation, where the one-row stripes are quite far between, I suggest cutting the contrast-colour yarn for every stripe. Note that I chose to work all stripes from the right side. With this technique, you are totally free to choose at which edge of the work to start your row.Many stitch patterns are constructed from two quite different, alternating rows, where one row contains the most striking feature of the stitch pattern, and the other one is used to « travel back » to the beginning and create the background.
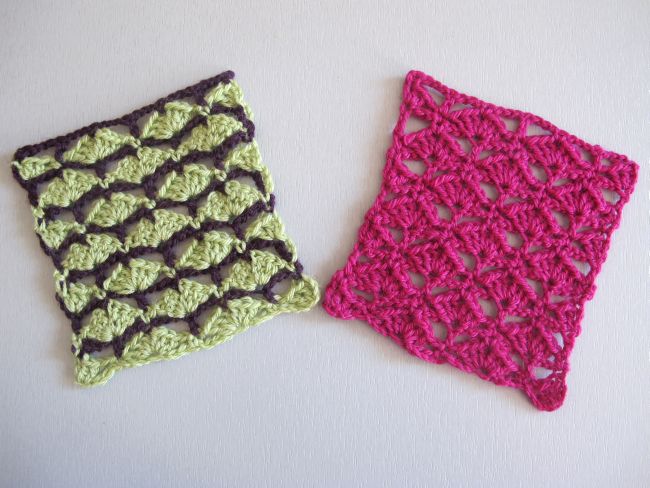 In the pattern used here, the « striking feature » is the shells. They alternate with simple rows for the background.In the striped swatch, I used a brighter yarn for the shells and a darker yarn for the « background rows ». This makes the shells stand out even more, in my opinion. It is interesting to note that the solid-coloured swatch has a distinctive right side, since all the shells are worked from the same side of the fabric. The striped swatch is reversible, since the shell rows are worked from alternating sides. This might be an advantage – or not.Complicated or simple, any stitch pattern can take on a different look worked in two or more colours, or perhaps in different kinds of yarn. Pull out your hook and play! If you find interesting ways to work with this idea, please let me know! All swatches in this newsletter were worked with
my fingering weight merino yarn and a 3.5 mm hookSee you soon!