
News:
As previously mentioned, you can subscribe to my podcast in French through iTunes (search for « Mon crochet et moi »). Show notes and mp3 files are posted in the podcast category on my blog.
This month, my pattern for the set Cannelle, a cowl with matching fingerless mittens, was published in Tension Magazine.
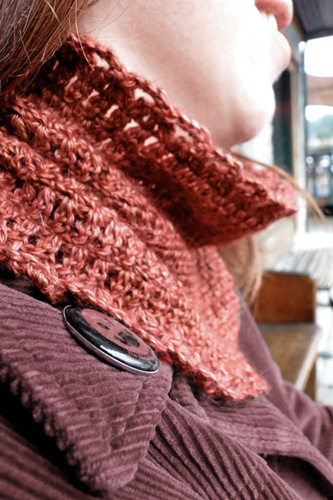
The pattern is available for purchase through the magazine. Tension is worth checking out – it contains not only patterns but also articles and recipes.
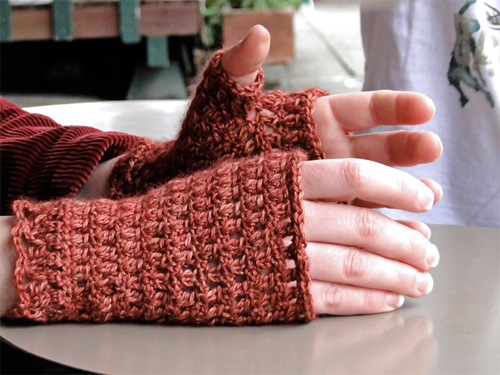
Photos of Cannelle cowl and mittens by Kathy Cadigan
Adding beads with a hook:
The subject of this month’s newsletter was inspired by the publication of my French translation of the Naïad stole (Ravelry link) by Jennifer Benson (Elizabeth Nicole Designs).
This pretty stole features beads added to the tip of the triangles on the edging.

Jennifer added these beads to her work with a crochet hook. I thought it could be interesting to show how it’s done.
There are two main methods for adding beads to your work that I know of: pre-stringing beads on the yarn or adding them with a crochet hook one by one. If you want to add many beads to your work, you might prefer to pre-string the beads. This means that you thread all the beads onto your yarn before you start crocheting. You can then pull up the beads close to the hook as you work, and incorporate them into the stitch you’re making. People who have practiced this (which is not my case) say that with some experience, it is a very quick and practical way to add the beads.
There are drawbacks to this technique, however. First of all, it requires meticulous pre-planning. If you don’t have enough beads on your yarn, you will have to cut it, fasten off, and restart the stringing procedure. Let’s not even think about how careful your planning must be if you want to use different-coloured beads in different areas of your work. It also means that all the yarn you use will have to run through the pre-strung beads before you crochet it. This can put considerable strain on your yarn, and you risk wearing down a fragile yarn to the breaking point.
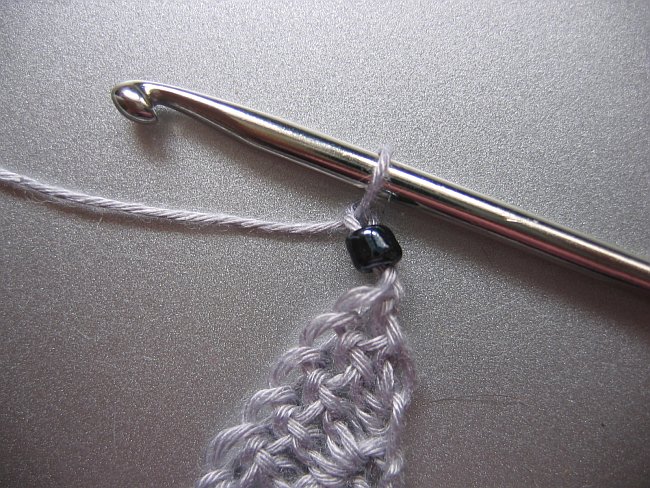
Luckily, there is an alternative: adding beads one by one as you need them, with the help of a second crochet hook. This method will put considerably less strain on your yarn. It also allows for total spontaneity, since you can decide to add a bead whenever you want. The extra hook has to be very small so it fits through the hole in the bead. In my example I worked a lace-weight bamboo yarn with a 3.5 mm (US E-4) hook and added a 3 mm (6/0) seed bead to the work; I used a 1.00 mm hook (US size 12 steel hook) to add the bead.
Here, we have arrived at the tip of the first edge triangle and are ready to add a bead.
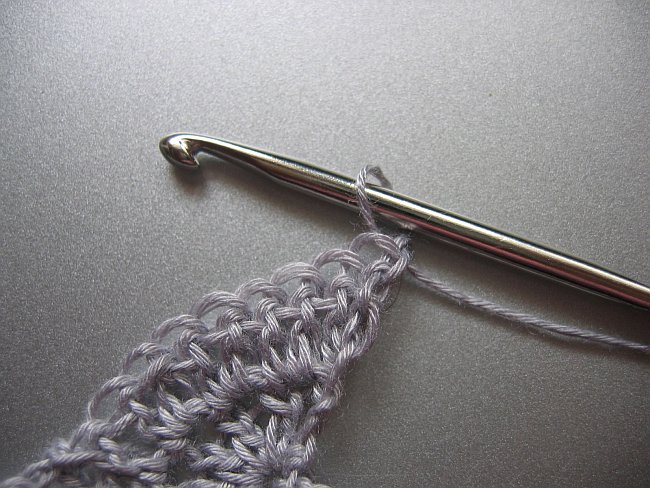
Insert the small hook through the bead and push the bead up the hook as far as it can go.
Then switch hooks, replacing the larger with the smaller one.

You are not going to actually crochet with the small hook, just use it to draw the loop through the bead.

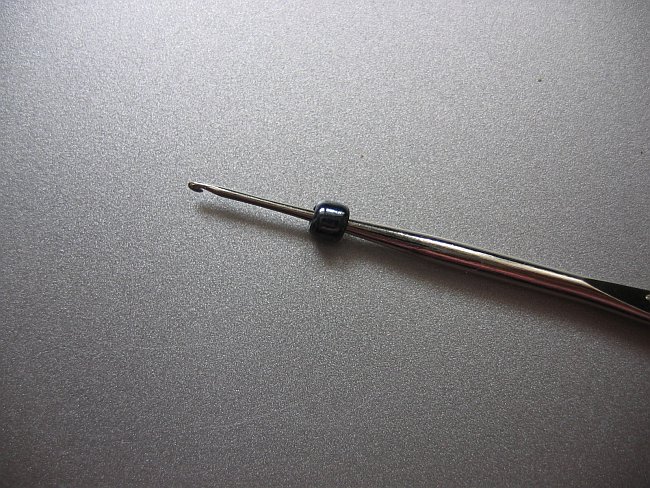
Now the bead is on the loop, and transferred to your work. As you can see, the bead hole has to be large enough to accommodate both a double strand of yarn and the tip of the crochet hook. This is why you want to use a very small hook. However, if the hook is too small, it will be very hard to catch all the strands in the loop to pull it through the bead correctly. The right combination of yarn weight, bead size and hook size is something you need to experiment with (at least if you’re not following a pattern).
Switch back to the larger hook and tighten up the loop.

Secure the bead by working a chain.
You’re ready to continue crocheting.
This is how the bead looks at the top of the edge triangle in the Naïad stole:
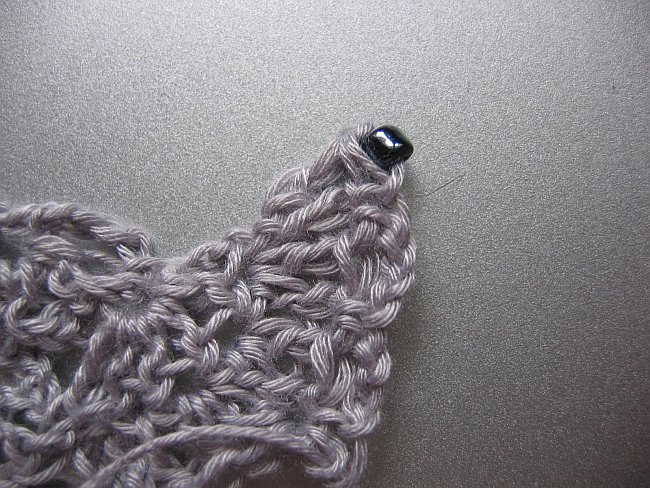
Generally, if the bead is not at the edge of the fabric, it will show better on the wrong side of the stitch. If you are working back and forth, you may want to add the beads on a wrong side row.
And I think that’s all you need to know to start experimenting!
See you soon!