
A flower brooch:

What better time of year for flowers than spring? Crochet lends itself beautifully to a number of things, and one of those is jewelry. Necklaces, bracelets and brooches. I love making these small accessories between larger projects. Even if you don’t have a lot of time, you can whip up a little something with a beautiful result.
This time around, I wanted to make a brooch in the shape of a multilayered flower. I have, of course, many books on crocheted flowers, but the one I always end up turning to is Crochet Bouquet by Suzann Thompson.
The starting point for this design came from there. Actually, the top flower (Flower 1 below) is exactly the same as in one of the multilayered flowers designed by Suzann. From there, I branched out with my own variation, all in pointy petals – I love crocheted flowers with pointy petals!
The flower here is crocheted in DMC Senso, a fingering weight cotton or cotton blend yarn (depending on the type of Senso used), with a 2.5 mm (US B-1 or C-2) hook.
This flower is also the occasion to learn a new stitch: the half treble (htr). It is worked as follows: Yo twice, put hook through work, yo and pull through – there are four loops on the hook. Yo and pull through two loops – there are three loops on the hook. Yo and pull through all three loops.
This stitch is right between the double crochet and the treble in height, and makes a beautiful transition between those stitches. It is not a common stitch (I had not seen it before I read Suzann’s book), and as far as I know, there is no standard symbol for charting it. I asked my charting designer friends for ideas and opinions, and Angela Best came up with this symbol:

So, now you’ve learned the half treble stitch.
You also need to know that a picot in this flower is worked as follows: Ch 3, 1 sc in first ch.
I suggest this symbol for the sc picot: 
Using a sc in the picot contributes to creating a small eyelet on top of every petal – a detail I quite like.
Now, shall we see how to use these stitches in the brooch flower?
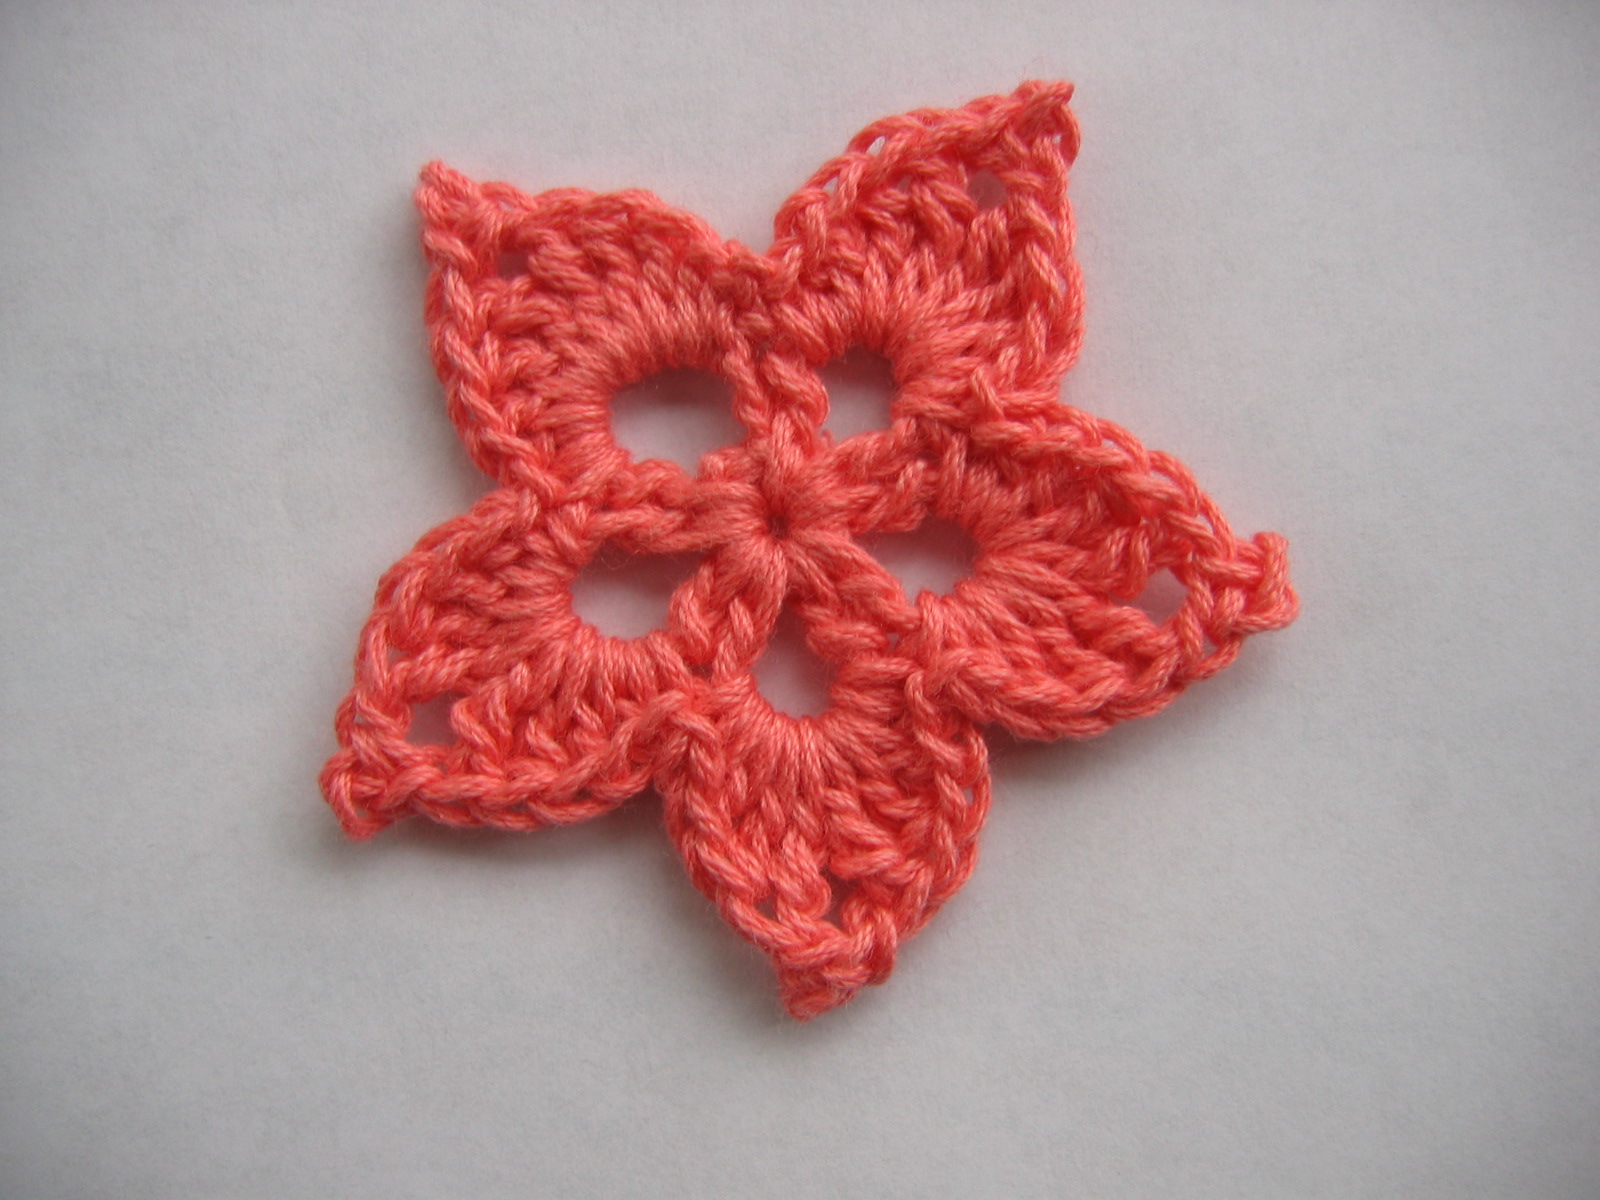
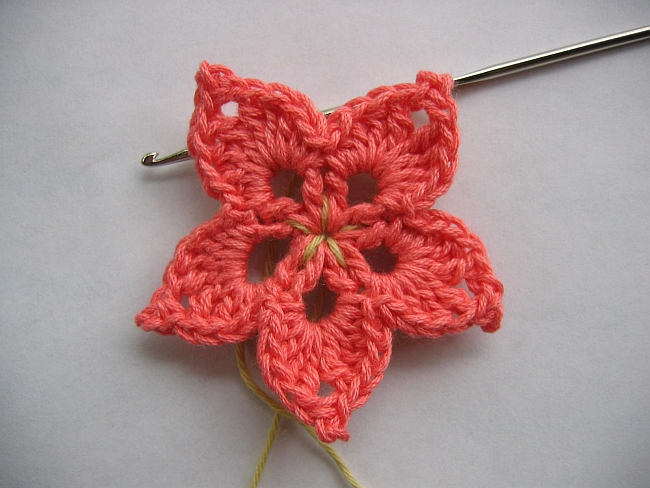
Flower 1:
This is the first flower to make; it sits on top of the finished brooch.
Ch 5, join to a ring with a sl st in the first ch.
Round 1: Ch 6 (count as 1 dc + 3 ch). *2 dc in ring, 3 ch*. Repeat from * to * 3 more times. 1 dc in ring, sl st in 3rd ch at beg of row. There are five 3-ch arches separated by 2 dc.
Round 2: (1 sc, 1 hdc, 1 dc, 1 htr, 1 tr, picot, 1 tr, 1 htr, 1 dc, 1 hdc, 1 sc) in each of the five ch arches. Join the round with a sl st in the first sc.
Fasten off. Flower 1 is finished.
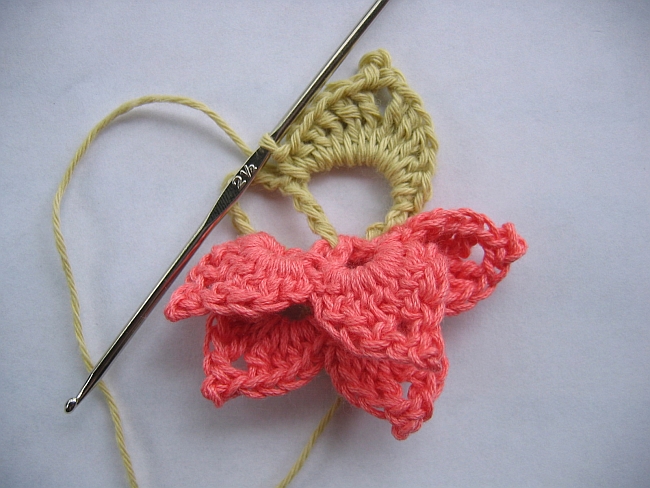
Flower 2:
Flower 2 is the middle layer of the finished flower – it will sit behind flower 1.
Round 1: Fold flower 1 with RS inwards, so that you can work into it from behind. You’re going to work 1 tr between any pair of dc’s putting your hook between the dc’s and through the ring.

When the first tr is finished, it looks like this:
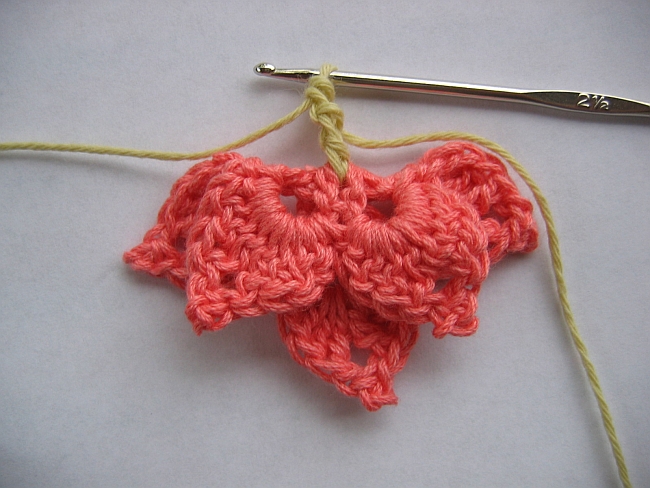
*Ch 6, work 1 tr between the next pair of dc’s.* Repeat from * to * until a total of 5 tr have been worked. Ch 6, join with a sl st in top of first tr.
From the right side of the work, it looks something like this:
Round 2: (1 sc, 1 hdc, 1 dc, 1 htr, 2 tr, picot, 2 tr, 1 htr, 1 dc, 1 hdc, 1 sc) in each 6-ch space. Join the round with a sl st in the first sc.
Fasten off – flower 2 is finished.
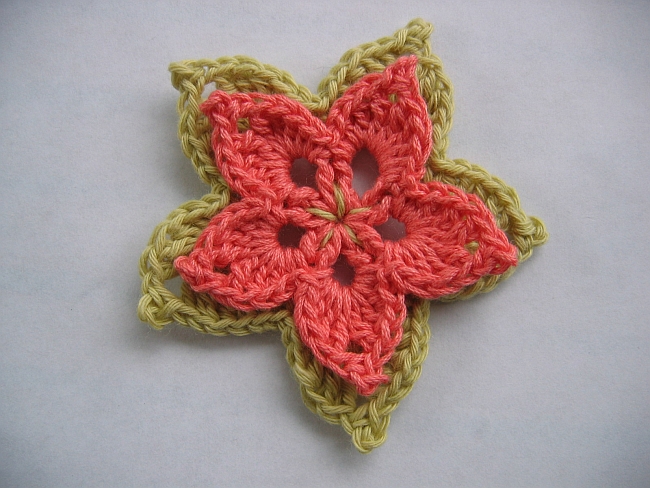
Back view:

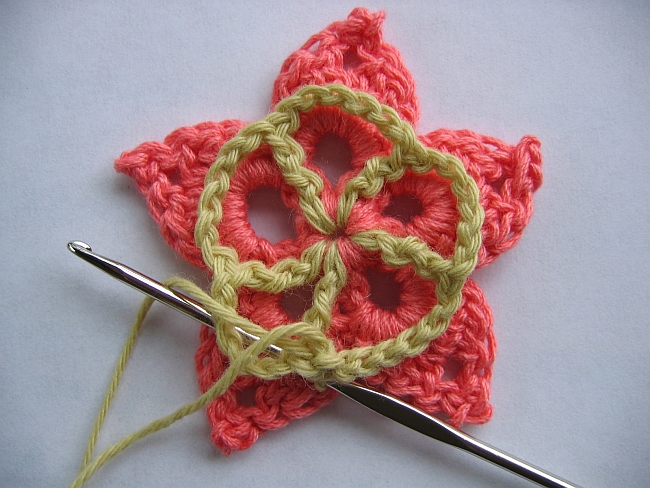
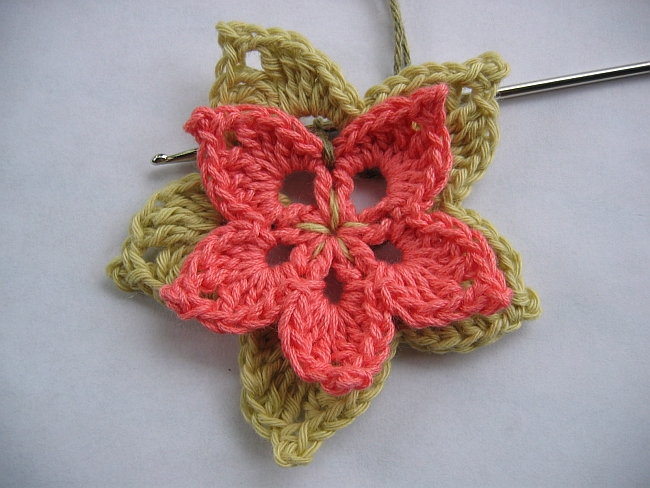
Flower 3:
Round 1: From behind flower 2, work 1 sc between any two sc’s in flower 2. (This is actually the same thing as working into the first sc of any petal, since there is no space between the stitches to work into.) Seen from the back:

And from the front:
*Ch 7, work 1 sc between the next pair of sc’s.* Repeat from * to * until a total of 5 sc have been worked. Ch 7, join with a sl st in top of first sc.
Round 2: (1 sc, 1 hdc, 1 dc, 1 htr, 3 tr, picot, 3 tr, 1 htr, 1 dc, 1 hdc, 1 sc) in each 7-ch space. Join the round with a sl st in the first sc.
Fasten off – flower 3 is finished.
Now we need a backing to finish off the brooch and to be able to sew on a pin.
Backing:
Make an adjustable loop, or ch 4 and join to a ring with a sl st in first ch.
Round 1: 6 sc into the loop or ring. If using a loop, tighten it. Place a marker in first st and move it up as you go – you will work in a spiral without joining the rounds.
Round 2: 2 sc in each st.
Round 3: (1 sc in next st, 2 sc in next st) around.
Round 4: (2 sc in next st, 1 sc in each of next 2 sts) around.
Round 5: (1 sc in each of next 2 sts, 2 sc in next st, 1 sc in next st) around.
Round 6: (1 sc in each of next 4 sts, 2 sc in next st) around. Sl st in first sc of round. Fasten off, leaving a long tail for sewing.
With tapestry needle and using the tail, sew the sc circle to the back of the flower, stitching it to the bottom of the petals in flower 3.
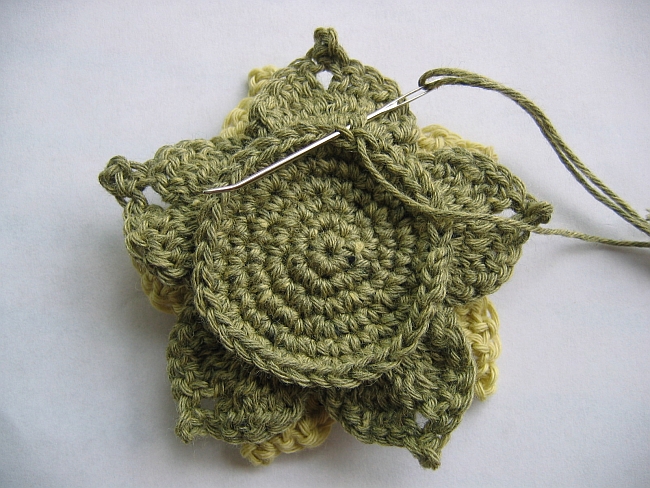
With sewing needle and matching sewing thread, sew a brooch pin to the sc circle.
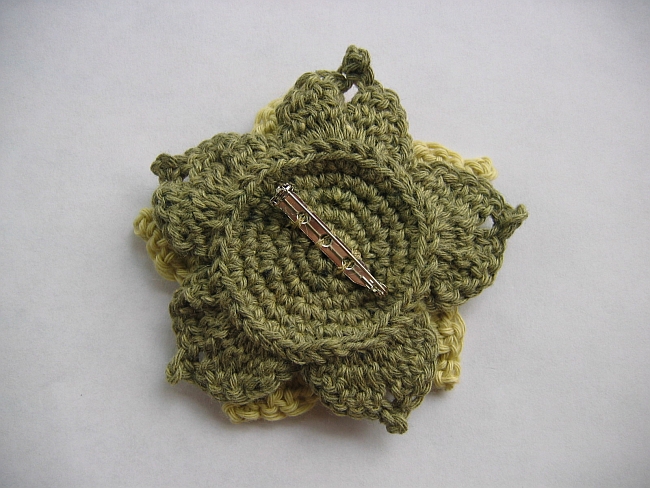
Repeat desired number of times to match all the colours in your wardrobe, and wear with pride!
See you soon!
