
Newsletter February 2014: Reading crochet charts (part 1)News:I’m very happy to present a new knitted shawl designed by EclatDuSoleil: Fraternal Twin.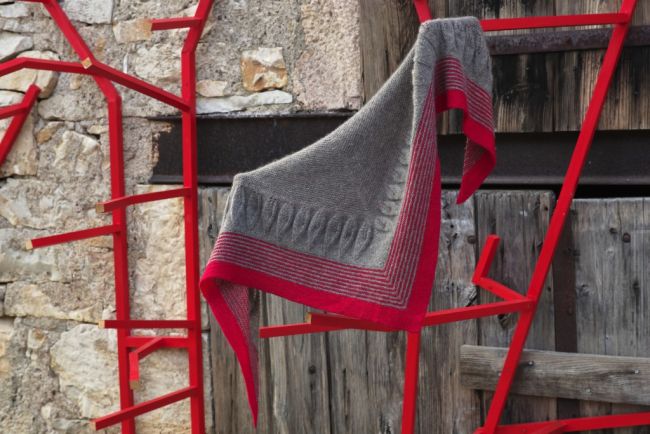 EclatDuSoleil worked her shawl in yak down and laceweight wool – laceweight alpaca is also a good option.More information in the shop.I have also added a new colourway to both the Mini Mochi and the Mochi Plus range – Grand Canyon.
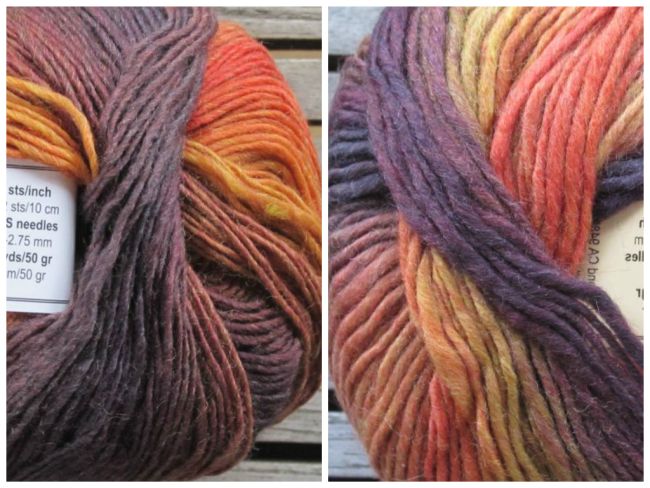 More information in the shop.Reading crochet charts (part 1)Last month I showed a few common symbols used in crochet charts. Now we’re going to see how these symbols can be combined into charts, and how to read them. This month, we will discuss charts for stitch patterns worked flat in rows.The charts are always made for right-handed crocheters, as will be my explanations here. If you are a left-handed crocheter who reverses the direction of the work (this is not the case for all left-handed crocheters), please flip the pictures over and substitute left for right and right for left as needed.Before diving into the heart of the matter, it is important to understand that a crochet chart is like a picture of the finished piece, seen from the right side. When you turn your work to work on the wrong side, the chart still shows the work seen from the right side.Looking at a complete crochet chart can be quite daunting and confusing. That’s why I’m going to show you how the chart is built up, row by row. This is the order in which you are going to work the different elements of the chart.At the bottom of the chart is the starting chain.
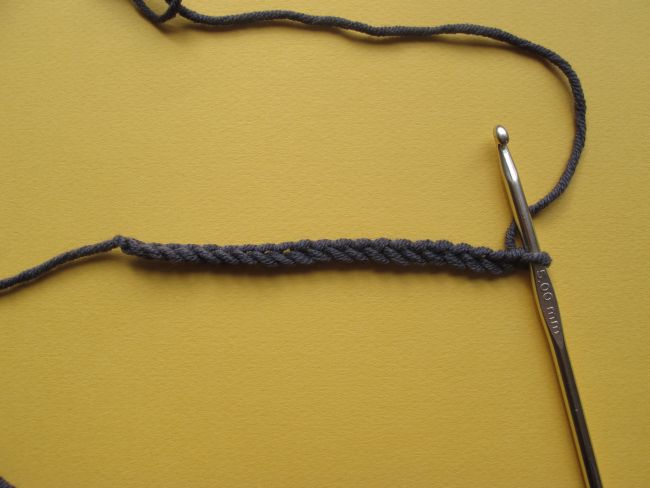
 Imagine that this is the chain you just worked. You put it down on the table. The yarn tail is at the left, the hook at the right.
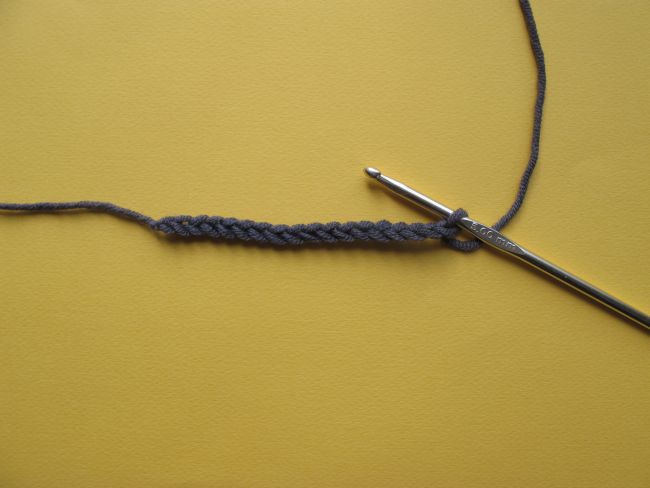 The turning chain for the first row is added.
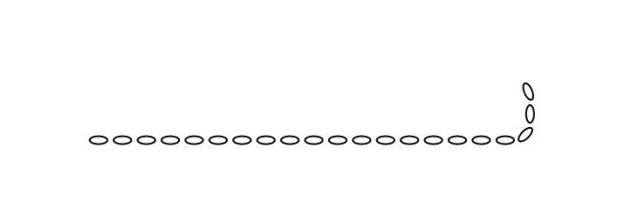
 Now we start row 1.
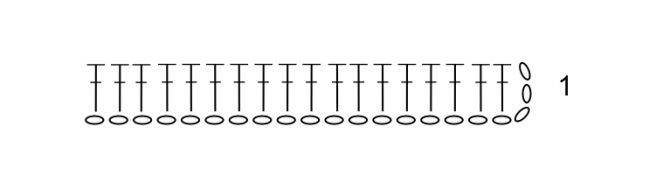 In this chart, 1 dc is worked in the 4th ch from the hook (do not count the loop on the hook!), and then in each ch to the end of the row. The row is read from right to left, just the way you work.
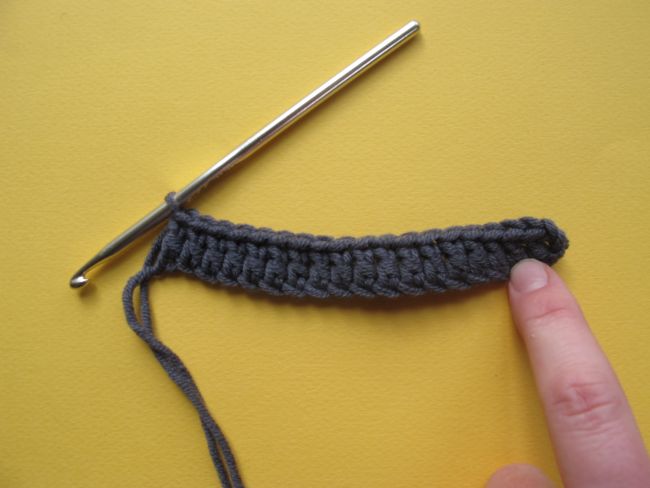 At this point, you will turn your work before starting the second row. However, the chart will not be flipped over. This means that you will need to read the second row from left to right.
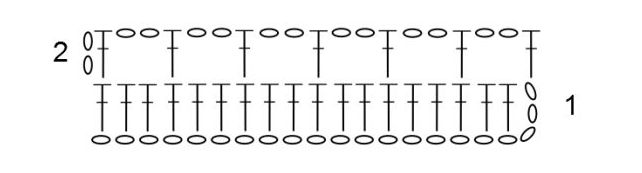 Note that on this second row, the turning chain does not count as a stitch. You see a dc symbol at the beginning of the row, pointing its bottom tip to the first stitch in the row below. For more information on this way of starting a row, please refer to my newsletter from July 2009.This is how you know which stitch you should work a new one into: the bottom tip of the stitch to work points toward the stitch or space where you should insert your hook.On row 2 in this chart, you start with 2 ch that don’t count as a stitch (just to the right of the figure 2), then 1 dc worked into the first dc in the row below. After this first dc, you work 2 ch – they are located at the top of the current row, just as your hook will be at the top of the finished stitch. The two stitches after the first one in row 1 have no symbol in row 2 pointing towards them. This means they should be skipped. So, after the 2 ch, you skip 2 sts and work a dc into the next one.Continue working like this to the end of the row, working the last dc into the top chain in the turning chain in row 1. You can see that this is where the stitch should be worked because the bottom of the symbol points towards this chain.Note that the row number is placed at the start of the row. Rows that are to be read from left to right, like row 2 in our example, are on the wrong side of the work.
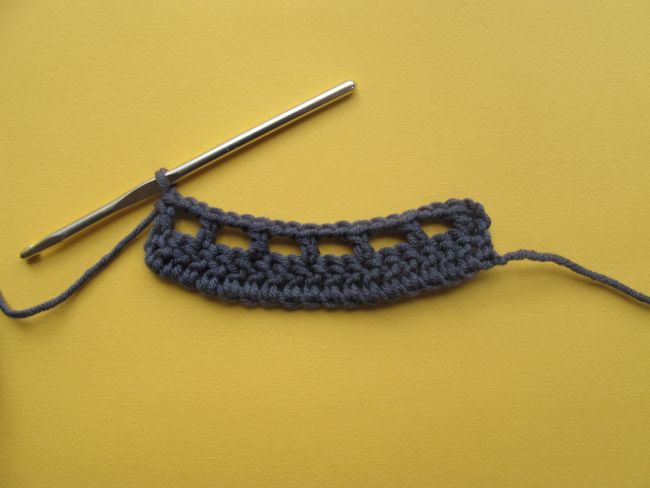 The photo shows the finished row, from the wrong side.
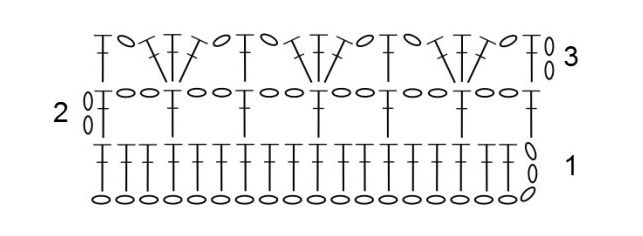 Now work row 3 from right to left. Just like row 2, it starts with a turning chain and a dc in the first stitch in the row below. Ch 1, and work 3 dc in the next dc. You can see that all three dc’s are to be worked into the same stitch, since they all point towards it.Continue the row to the end.
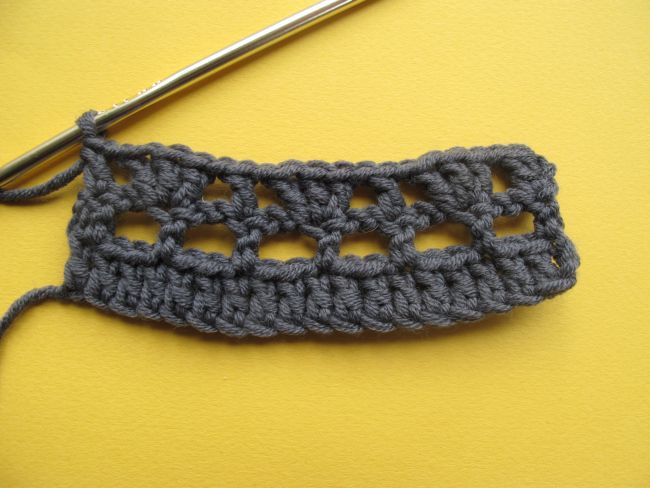 Row 4 is another wrong side row, to be read from left to right on the chart.
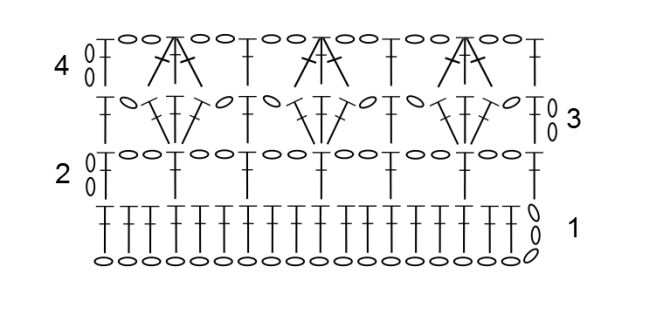 In this row, we have a new type of stitch. After the initial turning ch, 1 dc, ch 2, there is a dc3tog. We can see that these 3 dc’s are to be worked together, since the tops of all three stitches point towards only one horizontal top bar. However, each of these 3 dc’s is to be worked into a separate stitch in the row below, since the bottom of each symbol points toward a separate symbol below.
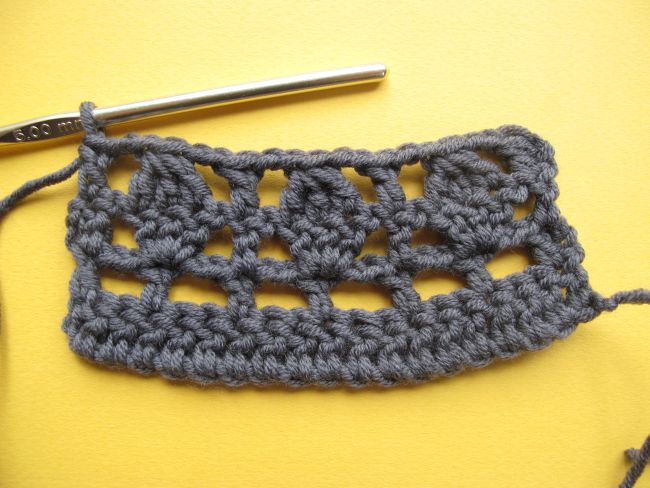
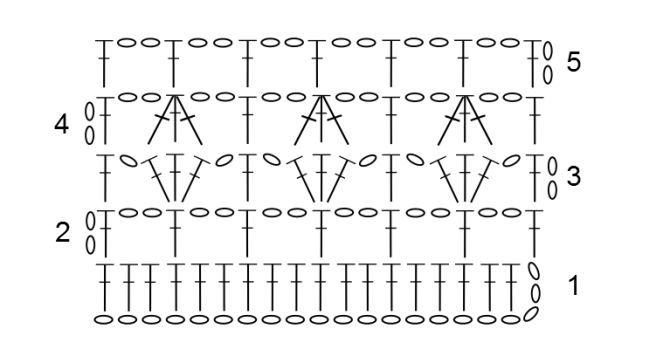 Row 5 is a row with simple stitches, dc’s separated by 2-ch spaces. Note that every second dc is worked into the top of the dc3tog in the row below.The top of the dc3tog is at the arrow in the photo below:
 You might decide to insert your hook somewhere else if you think it looks better – just try to be consistent! In this swatch, I first considered working into the chain stitch directly to the right of the dc3tog, since it looked like this would give the piece a better finish. However, after working row 6, I didn’t like the final look, so I ripped back and went for the technically accurate option.
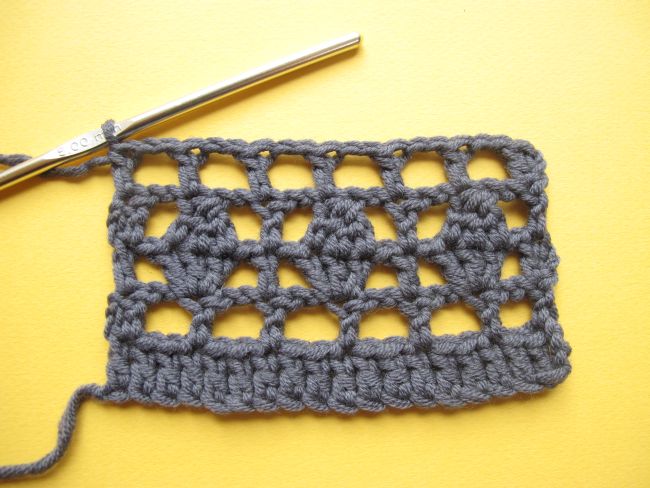 Row 6 is the last row in our chart.
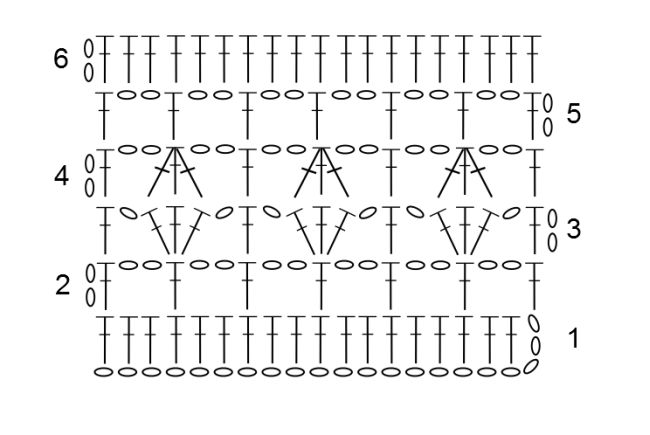 Here, it is important to note that stitches pointing towards chain spaces are always worked into the chain space, inserting the hook below the stitches, and not into the individual stitches (unless otherwise indicated, of course).Row 6 looks a lot like row 1, so we can easily imagine a vertical stitch repeat of rows 2 – 6. Since the number of rows in the repeat would be 5, an odd number, row 2 in the second repeat would be worked on the right side of the work. The stitch pattern would be truly reversible, with no definite wrong or right side.After a light blocking, my swatch looks like this:
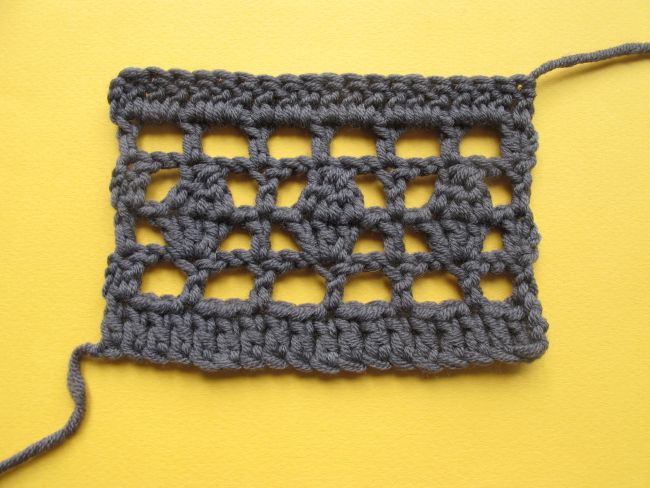 That’s all for now on charts of stitch patterns worked in rows. Next month, we will look at a chart in the round.If you have questions or remarks, please send me an e-mail.See you soon!
 Newsletter index