
Newsletter March 2015: The Russian joinIn the shop:I am happy to present my latest crochet design, Debussy.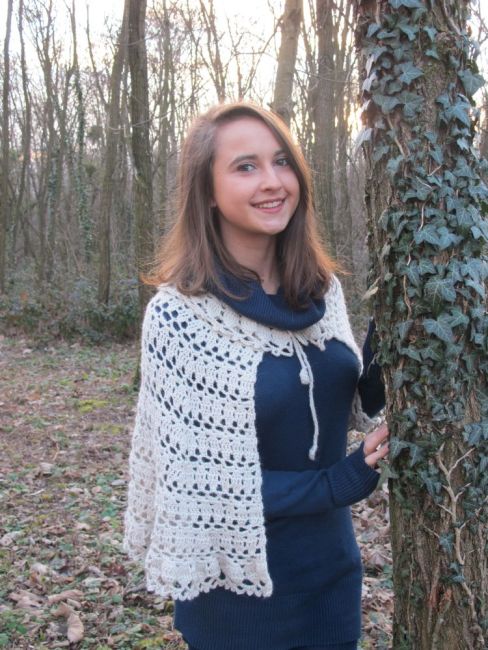 A little cape, to warm your shoulders and add a touch of romance to any outfit – my daughter wears it here with jeans and a sweater, but it would complement a dress as well. Can be crocheted in alpaca or merino.More information in the shop.Hot off the presses (or, well, the server): EclatDuSoleil’s latest, gorgeous knitted shawl: Yak Squares.
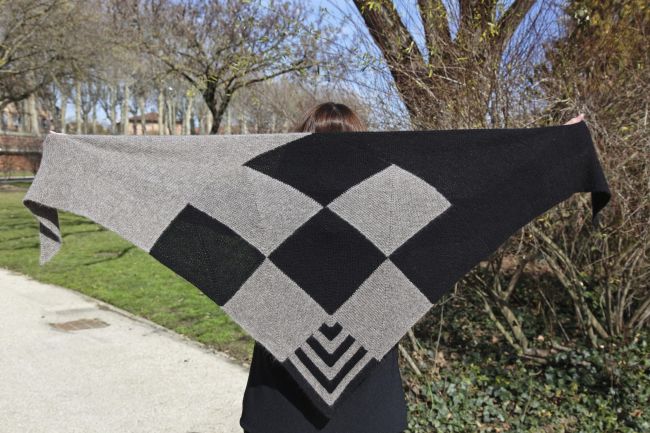 A modular construction for a graphic design, great to wear and fun to knit! If you choose the yak down to make it, you will have an exquisitely soft and warm shawl.More information in the shop.On the blog:
 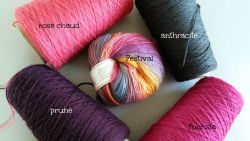 Yarn inspiration 1: I played with different pink (or almost pink) combinations for Geometry in blue.
  Yarn inspiration 2: I made a swatch in DK weight alpaca using the stitch pattern in Kirsten Kapur’s shawl Abingdon – and it turned out lovely.I also posted a new episode of my podcast in French: episode 38.The Russian joinWhether you knit, crochet or do anything else requiring uninterrupted strands of yarn, sooner or later you will confront the problem of adding a new yarn – either because you have used up your first ball of yarn and you want to add another one, or because you want to change colours. Or perhaps, like me, you are looking at a pile of leftovers and thinking about the beautiful project you could make with them all, in a riot of colours … and then you think again about all the ends you would have to weave in, and you decide that it might not be worth it.There is a tidy little trick for joining two strands of yarn one to another, called the Russian join. I’m going to show it to you here using two yarns of different colours, to make the explanation clearer.In addition to your yarn, you will need a sewing needle with an eye large enough to accommodate the yarn you want to join. I have looked at several different explanations of the Russian join. When it comes to the needle used, indications vary – some people advocate the use of a blunt-ended needle while others prefer a sharp needle. I have tried both types of needles and found that I personally prefer working with a sharp needle of the type sometimes called a darner. It is a relatively long, sharp needle with a large eye. I suggest you try a couple of different needles yourself, to find the type you prefer.
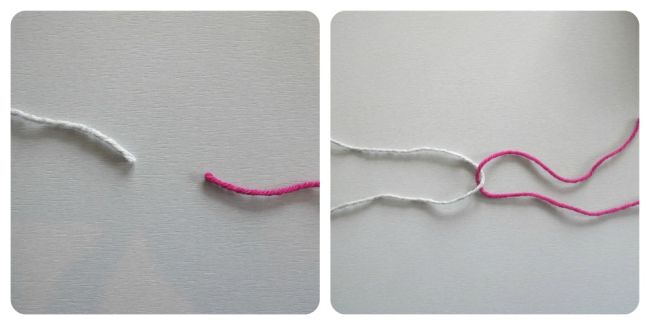 The two yarns, grey and pink, need to be joined together. We are going to cross them and secure each end back on itself. The first step is simply to cross them as we intend to join them, as in the picture to the right.
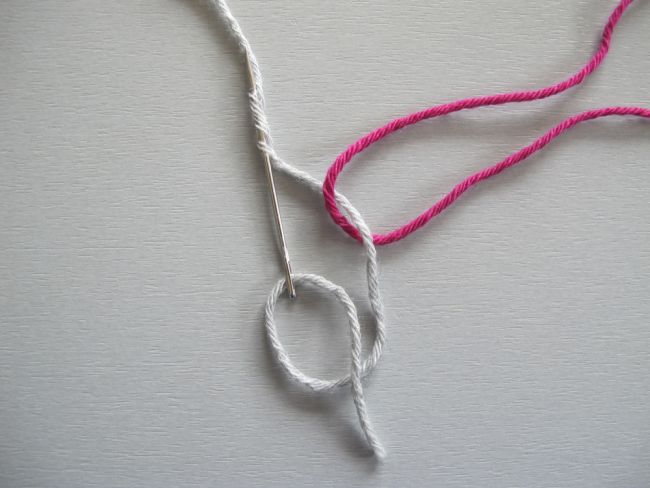 Thread one of the yarn ends onto the needle of your choice. Here, I started with the grey yarn. Work back into the same yarn, inserting the needle between the plies (the strands that make up the yarn).
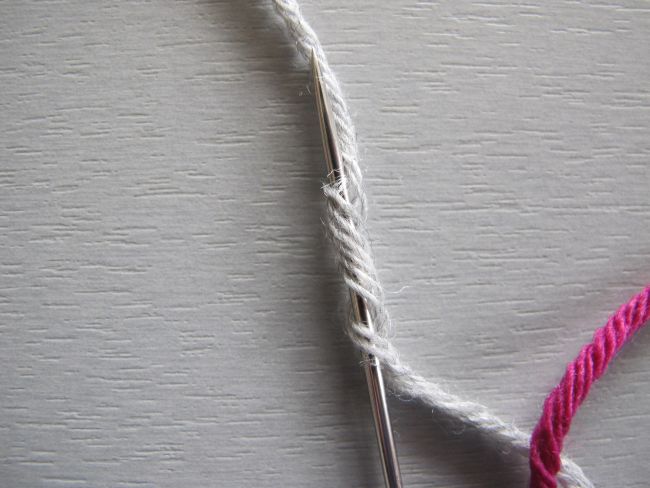 As in this close-up, try to run the needle inside the yarn, between the individual plies. This is what makes the Russian join so secure.
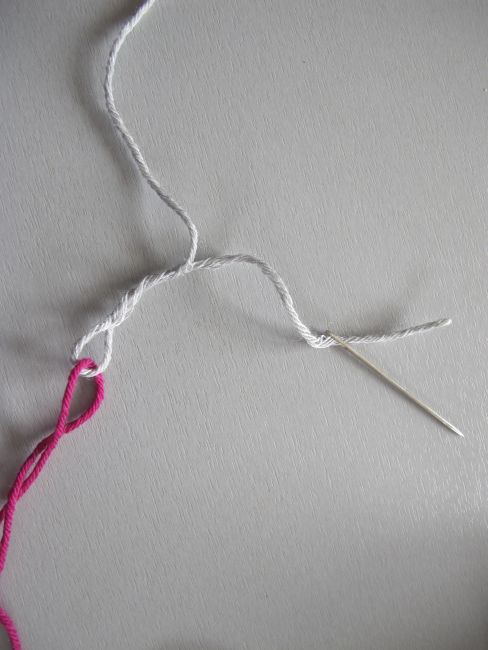 When you run your needle all the way through, a loop of the yarn forms where it overlaps the yarn that will be joined to it.
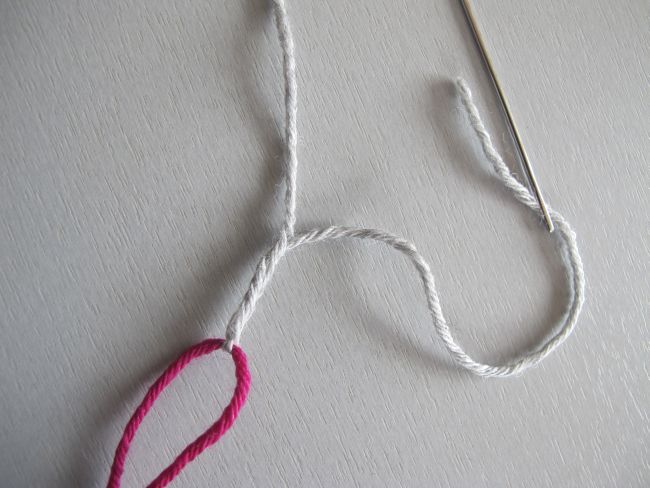 Pulling gently but firmly alternatively on each yarn end, close up this loop.
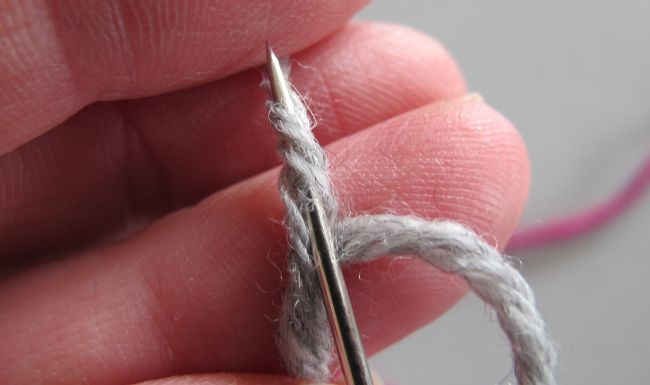 To make the join really secure, I like to work it over about 5 cm / 2 inches. If the join is shorter when you have tightened up your loop, just reinsert your needle between the plies of the yarn at the spot where you pulled it out before and work through the yarn a little farther.
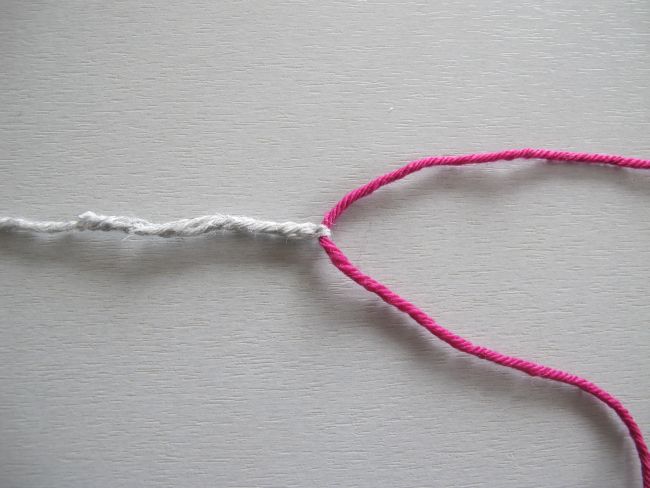 Cut the yarn end close to the yarn and start again with the second yarn to be joined (the pink one here).
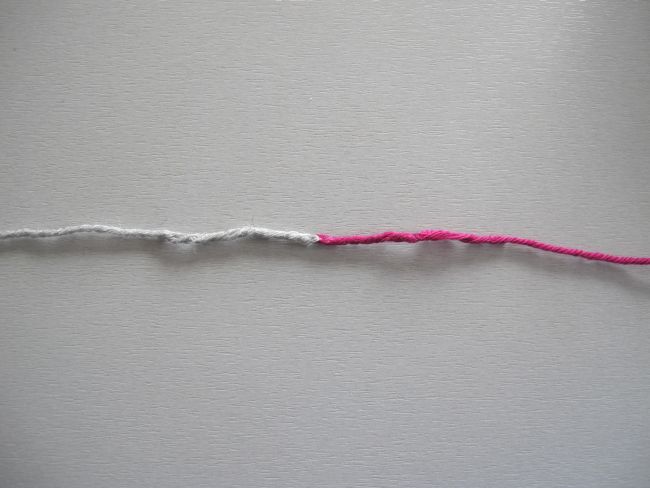 Here is the finished join. Since the yarn is doubled over on both sides of the join, it is thicker at this point than overall. However, this is barely noticeable when the yarn is worked into the project, especially since the end is worked through the yarn and not simply held double.Do not hesitate to experiment with the Russian join. You will find it useful in many situations, but perhaps not all. I find it works well with many traditionally plied yarns. If the construction of the yarn is different, such as a ribbon yarn, it might be difficult or impossible to join it this way. However, for a yarn with a plied structure, this can be a very good way to secure ends in yarns using slippery materials like rayon, mercerized cotton or other plant fibers.Also, you may, through your experimentations, find that some types of stitch patterns are more or less suited to this type of join.It is also a question of personal preference – do you prefer to work on, and deal with the ends later, or do you prefer to take the time to secure them like this and not have to think about them again?At least, now you have another trick in your yarn bag!See you soon!
 Newsletter index