
In the shop:
Inspired by the newsletter on half circle shawls, I have designed the shawl pattern Blueberry Pi(e):
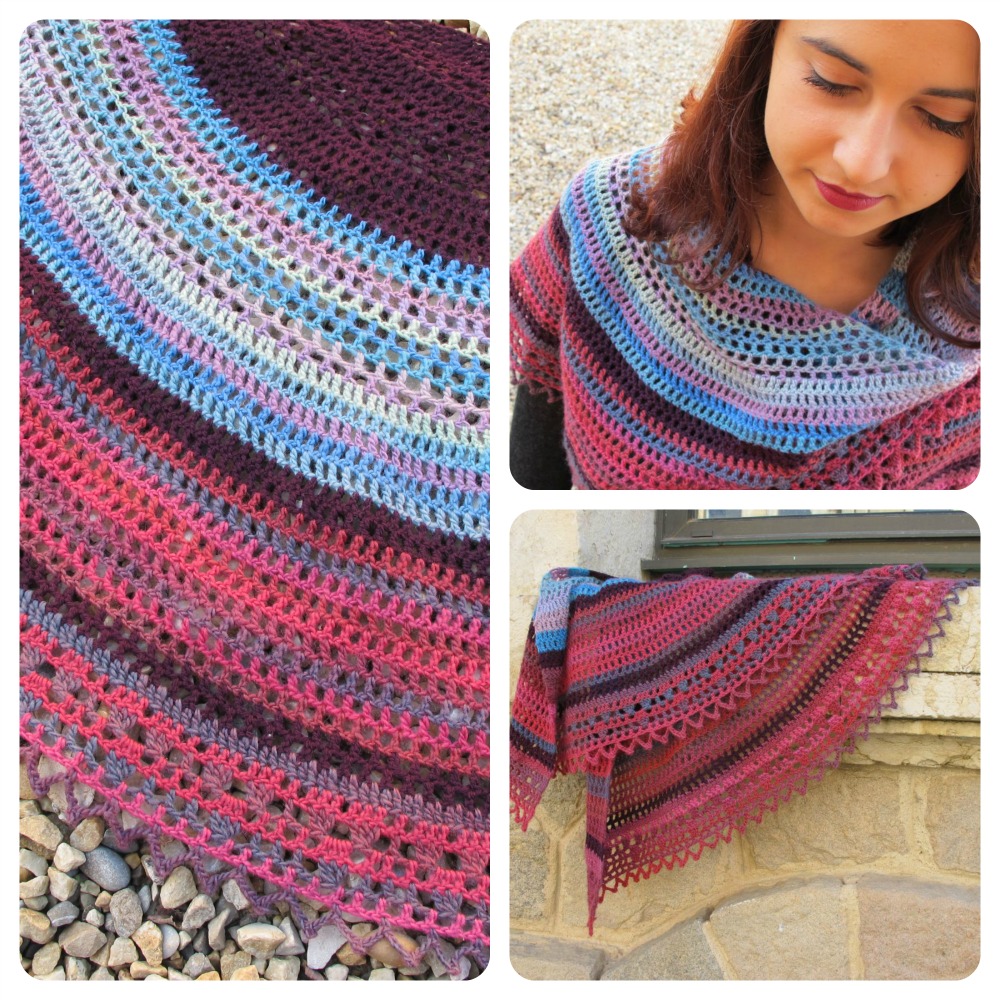 It’s available as a single pattern, but is free when you purchase the yarn needed for the design (1 ball of fingering weight merino, 1 ball of Mini Mochi for the first stripe and 2 balls of Mini Mochi for the second stripe and the border).
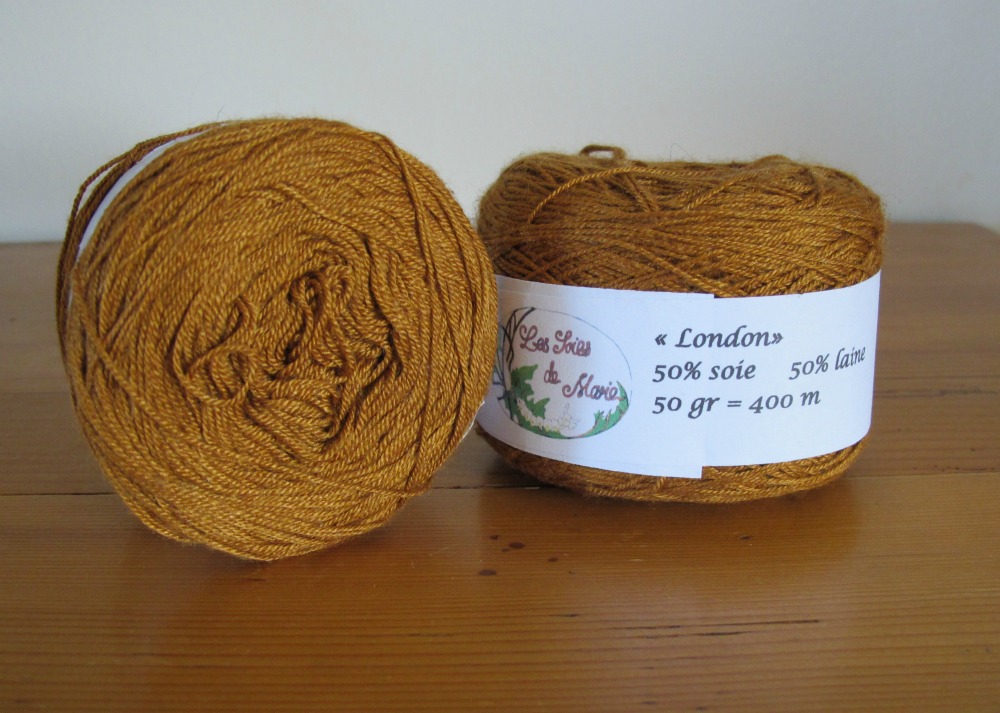
In the London (wool/silk) range, I have added a new colour, Sienne :
And some very pretty flower buttons, designed by Butterfly Couture:

An idea to use these flower buttons: the Capelette, crocheted in 3 balls of Mini Mochi:
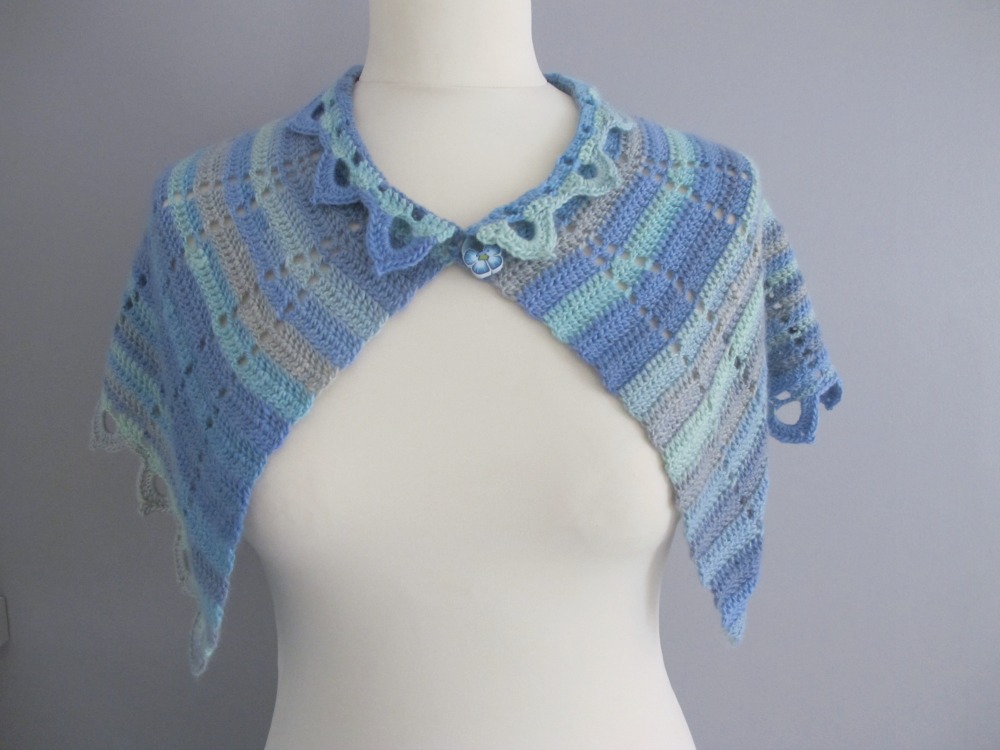
The pattern for the design has been updated to include this new version.
On the blog :
 An article about my tutorial in the latest issue of the French magazine Passion Tricot.
 Some more details about my Mini Mochi version of the Capelette pattern.
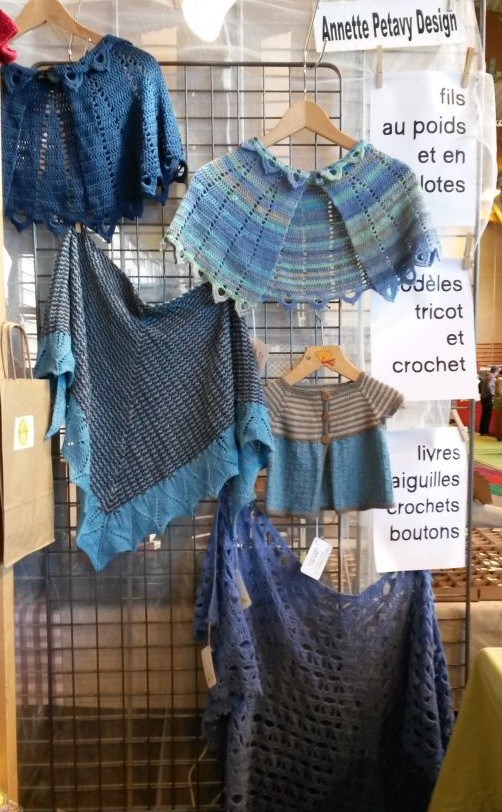 Hello from a show in Chadrac.
 Photos from the National Wool Days in Felletin, France – a event you shouldn’t miss next year!
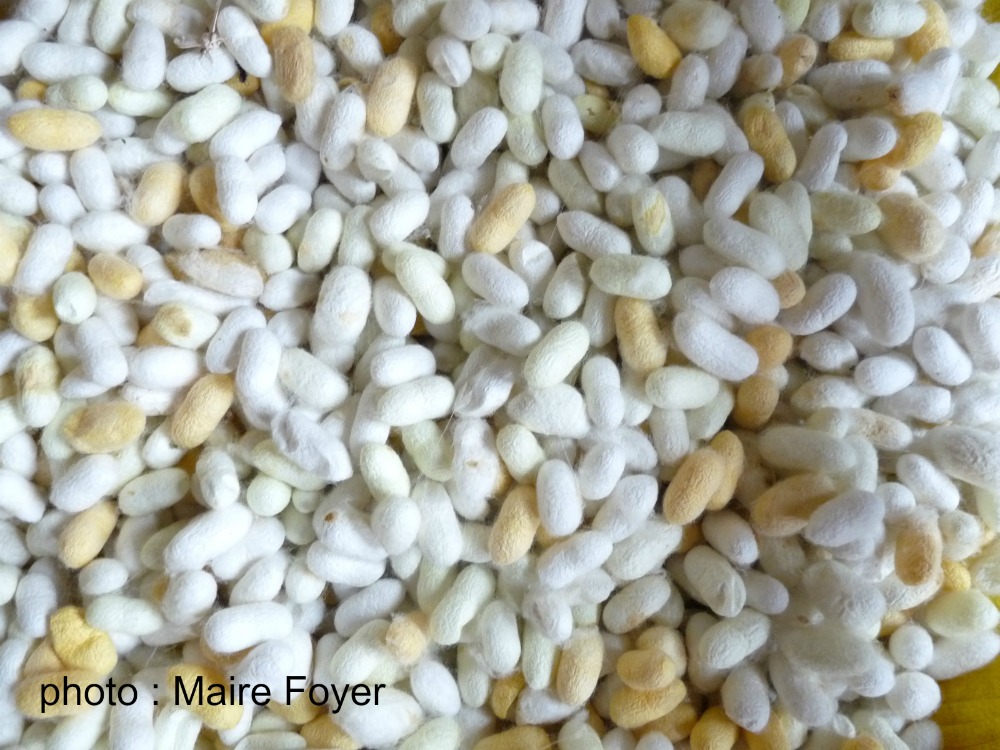 And the latest episode of my podcast in French, in which Marie Foyer explains facts about silk that you have probably never heard of.
Upcoming:
Check my blog often in the coming weeks – I will suggest many, many gift ideas for the upcoming holidays, to make or to give as is.
Projects using the Jämtland stitch:
In last month’s newsletter I showed you the Jämtland stitch (also known as crocheted nalbinding).
I have since made a few small projects with this stitch. They have helped me better understand the stitch and how it can be used, and I hope they can also inspire you.
Cell phone covers
Two cell phone covers: a grey one for my daughter’s Nexus and a red one for my Samsung (the Nexus is a little larger).
Both covers were worked in DK weight merino using a 5 mm hook. The grey cover is the larger one and weighs exactly 25 grams. You should be able to make two covers with one ball of yarn, at least if they are the same size as the red cover.

Grey cover:
Ch 34 (for a final number of 32 sts per round). Work the first stitch and the following stitches as explained in the September newsletter.
At the end of the first row, join the beginning of the row to form a circle, taking care not to twist the row. Use the first stitch in the row as the next stitch in which to insert your hook. As soon as you have worked this stitch, thus closing the work into a round, place a marker in the stitch just made to mark the beginning of the second round.
Continue working in a spiral, moving up the marker every round, to a total height of approx 15 cm (6″).
At the end of the last round, remove the marker. To even out the top edge, work 1 sc in each of next two sts, then 1 sl st in next stitch. Fasten off.
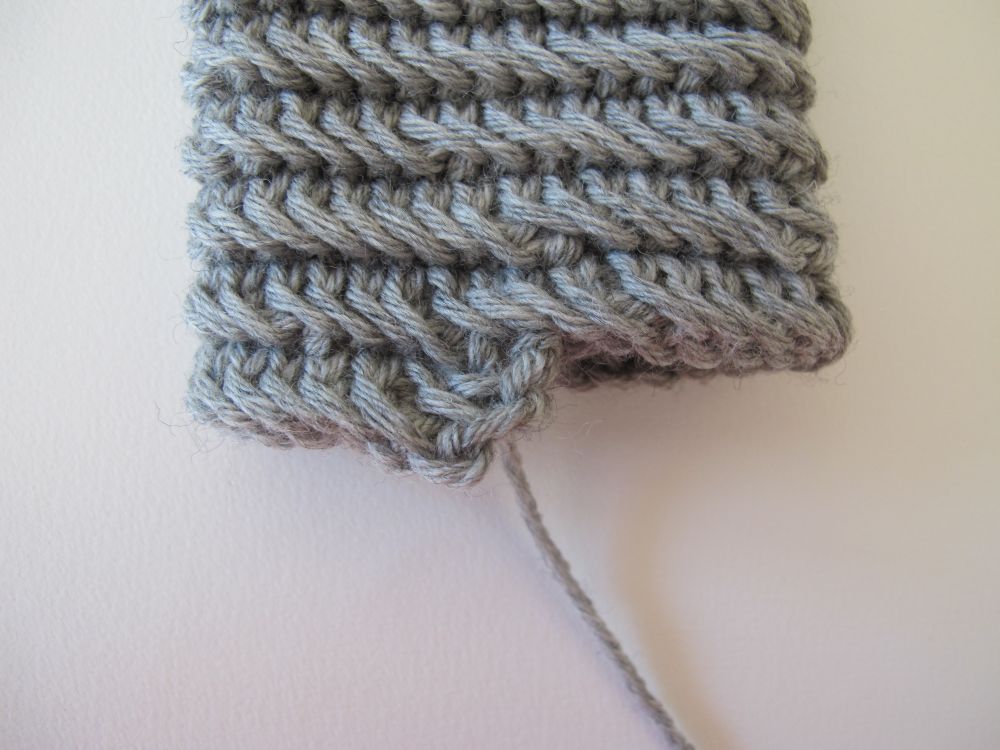
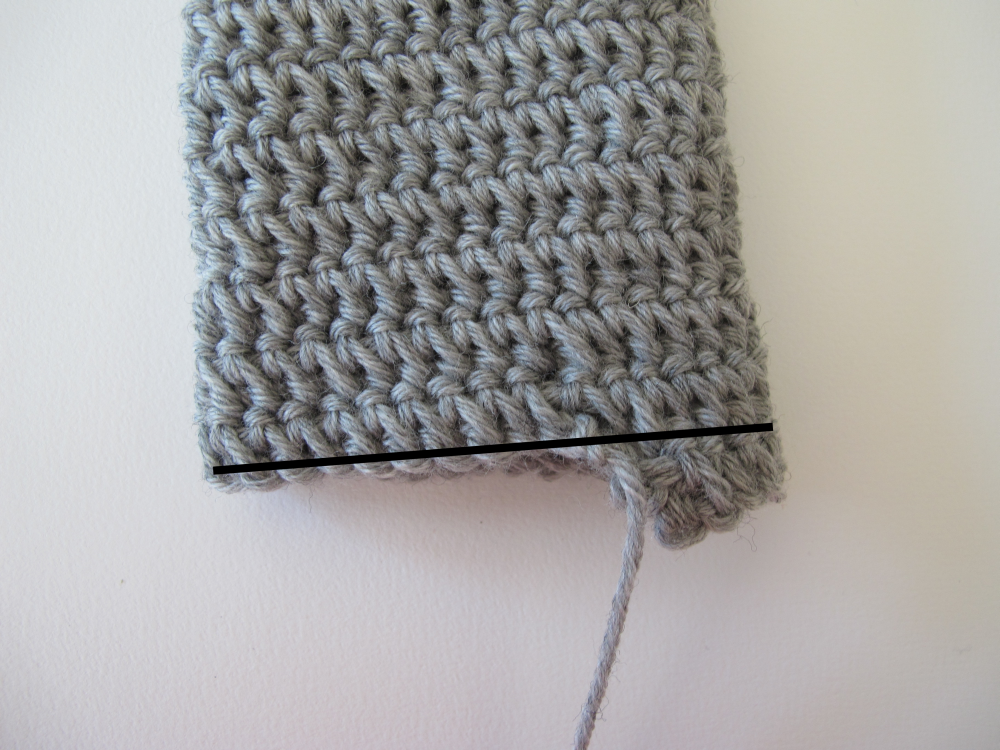
As discussed last month, this start creates a « bump » at the beginning of the work.
For this cover, I hid the bump when sewing up the bottom. I turned the piece inside out, and made my seam as indicated by the line drawn in this picture:
To close the cover, I simply attached the yarn with a slip stitch at the middle of the top edge on the side I decided to be the back. I chained approximately 15 sts before closing the loop with another slip stitch. When weaving in the ends, I reinforced the spot where the loop was attached to the cover.
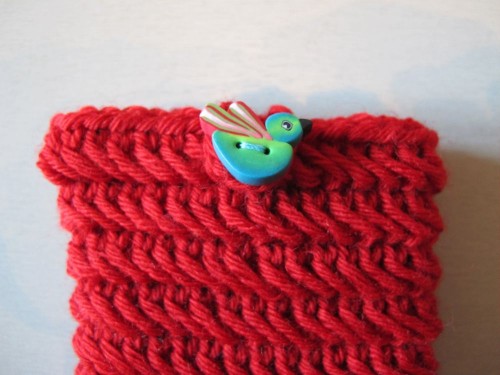
A large bird button to close, and I was done!

Red cover:
When making the red cover I wanted to see if I could eliminate the « starting bump ».
Ch 30 (for a final number of 28 sts per round) and work the first row exactly as for the grey cover. At the end of the row, close in a round with a slip stitch in the first stitch (take care not to twist the first row).
To start the next round, ch 2. Insert the hook in the 2nd ch from the hook and pull up a loop, then insert the hook in the first stitch in the round and pull up a loop. Yo, pull through all 3 loops. Continue in Jämtland stitch.
At the end of this 2nd round, continue working in a spiral, as described for the grey cover. When the work measures 14 cm (5.5″) – this phone being slightly smaller – finish as for the grey cover.
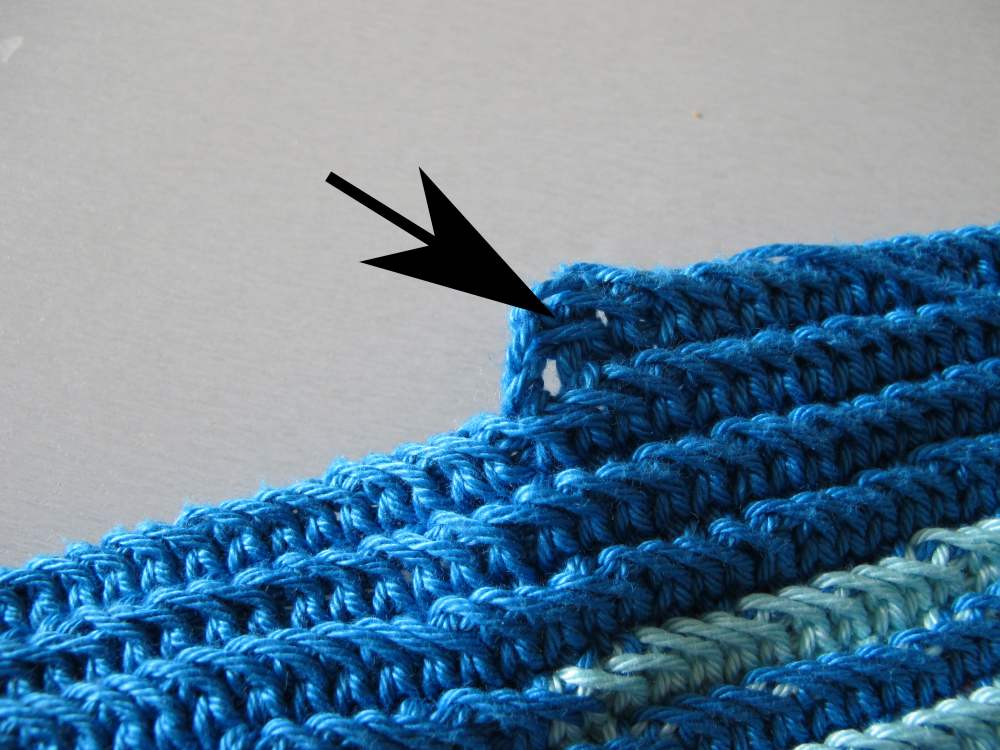
So this eliminated the bump at the beginning:
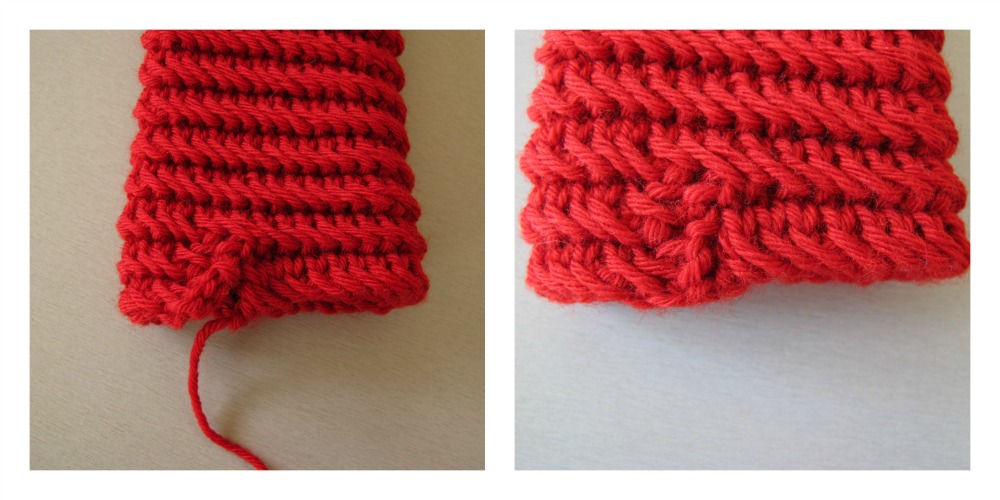
However, the stitch pattern was disrupted, and even after weaving in the end and closing the opening at the same time, I don’t find the look very neat.
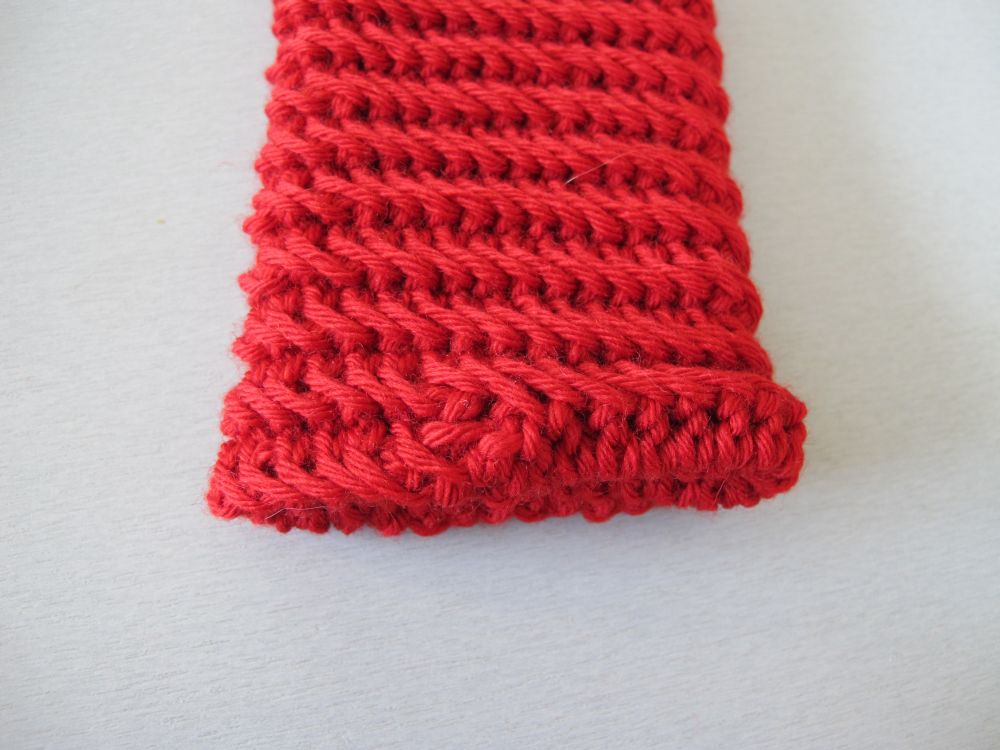
The seam closing the bottom of the cover hides part of the problem, but I’m still doubtful. To each one’s own – but I think that I prefer wrangling the bump.
I worked the loop at the top in the same way as for the grey cover, with a dozen chains (but I think I should have made as many as for the grey cover, so that the button would sit better on the finished item), and I finished off the work with another (smaller) bird button.
Potholder

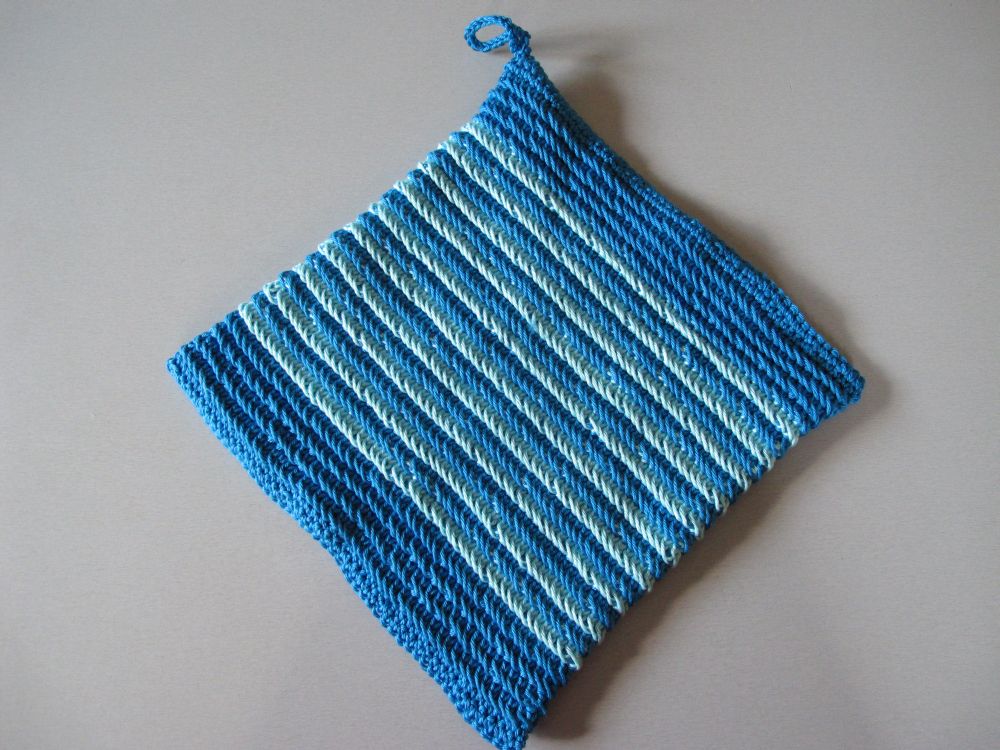
Next, I made a cotton potholder. I used vintage Phildar cotton yarn in DK weight (125 m / 136 yds per 50 g). I used about 1.5 balls of dark turquoise yarn and 1 ball of light turquoise. Hook: 4.5 mm (US 7).
Ch 102 with the darker yarn (for a final number of 100 sts per round). Start as described for the grey cell phone cover above. Work 4 rounds in the same colour, and then start switching colours every round.
The colour changes give quite an intriguing look that I think can be used for interesting experiments:
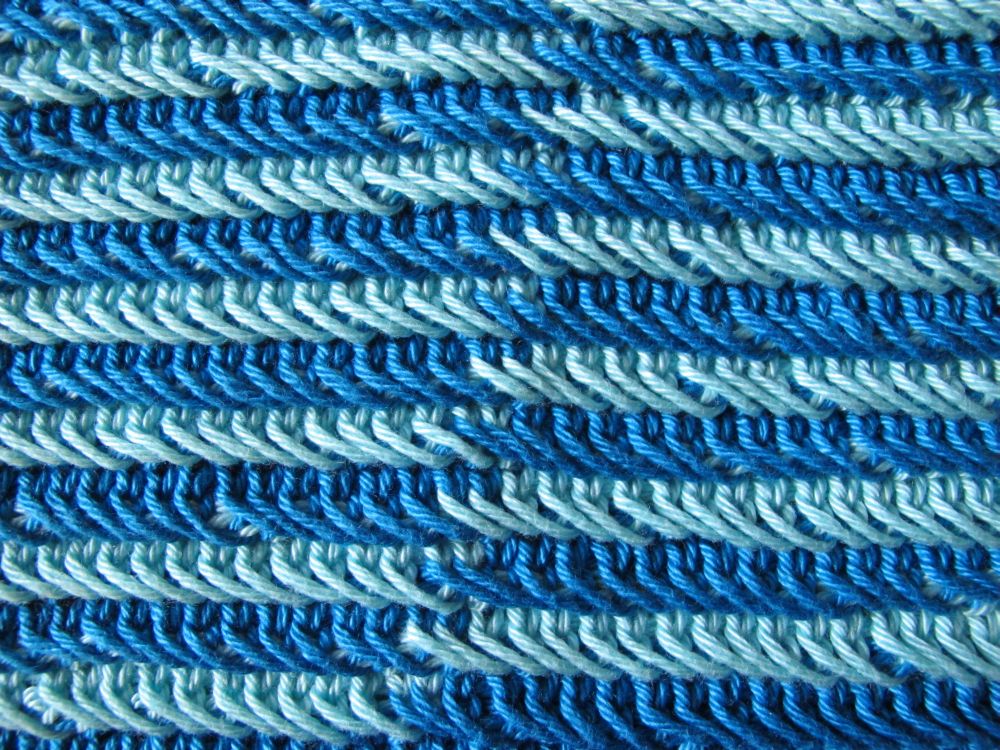
I worked until I had finished the ball of lighter-coloured yarn, and finished the potholder with 4 rounds in the darker yarn.

If you examine the stripes closely, you can see that the cotton yarn behaves differently from wool. It’s less lofty, and sometimes lets the colour in the previous round show through the bottom of the stitch. Since it’s a much less elastic yarn, all minor irregularities in the work show clearly. My conclusion is that cotton is less suitable than wool for the Jämtland stitch (but I must admit that it’s a great way to make a double-sided potholder).
At the end of the last round in the potholder, continue in sc (1 sc per stitch), marking the first stitch in the round. When 14 stitches are left at the end of the round, work 1 sl st in each of next 2 stitches, and fasten off.
Rotate the potholder 180 degrees, and attach the yarn with a slip stitch at the « tip » of the bottom bump:
Work 1 sc in each st until 14 sts remain at end of the round. As at the top of the potholder, work 1 sl st in each of next 2 sts and fasten off.
This smoothes out the top and bottom edges of the potholder. Since it’s still shaped like a tube, you will need to « flatten » it by joining first the top edges and then the bottom edges with a row of sc. Add a loop in a corner so that you can hang up your potholder. I used the cord technique explained in the newsletter for November 2014.
Small bag
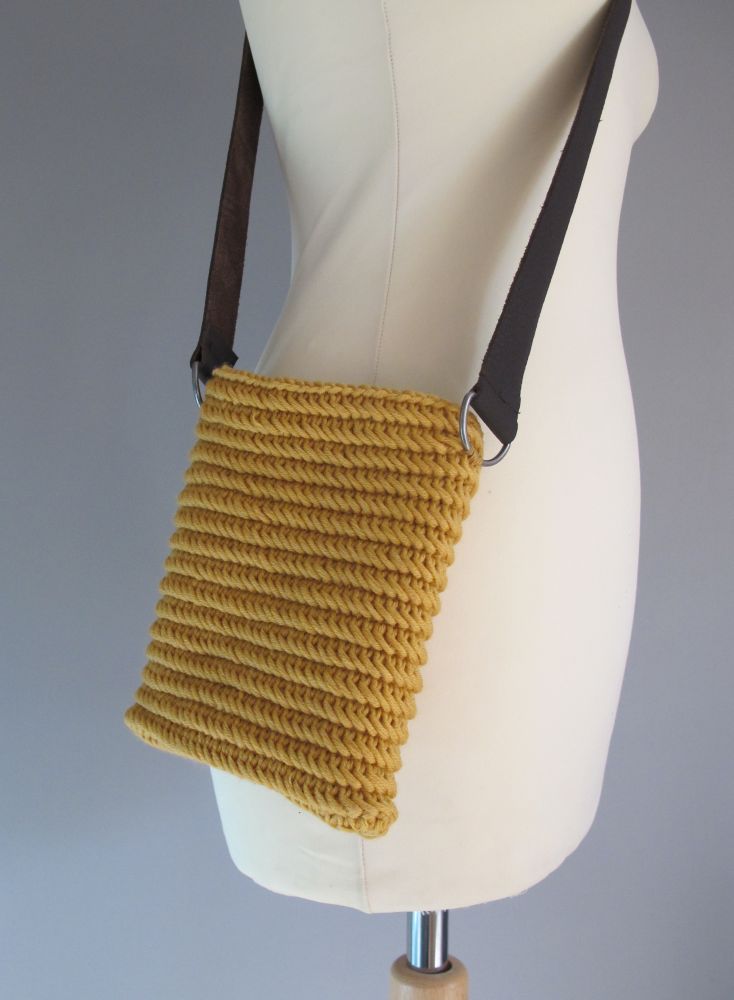
The last little project is a small bag.
Yarn: approx 75 g of worsted weight merino (colour: sun)
Hook: 5 mm (US H-8).
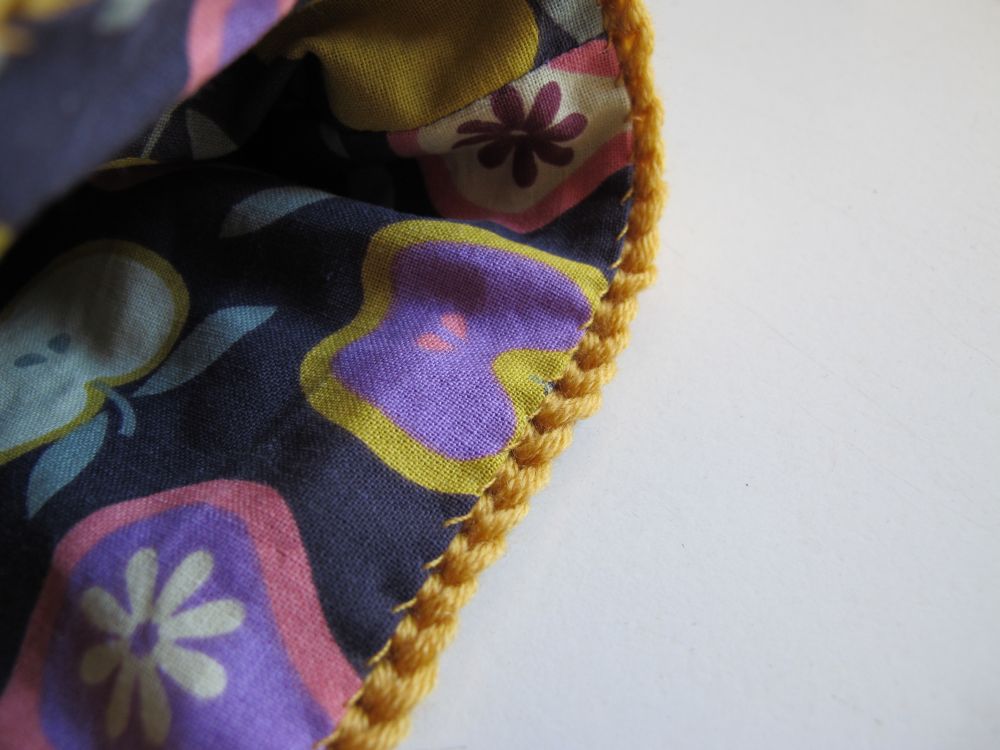
Ch 64 (for a final number of 62 sts per round). Start as for the grey cover. Work to a total height of approx. 18 cm (7″). Finish off the top with 1 sc in each of the 4 first sts in the round, then 1 sl st in each of next 2 sts. Fasten off.
Turn the bag inside out and close the bottom with a seam as for the grey cover above. Weave in all ends and turn the bag back to the right side.
Measure the bag.

I found the final size to be 14.5 cm (5.75″) wide x 17 cm (6.75″) high.
Now, you will need to make a small pattern for the lining. You must add a seam allowance to the size of the bag – I suggest 1 cm (3/8″) all around.
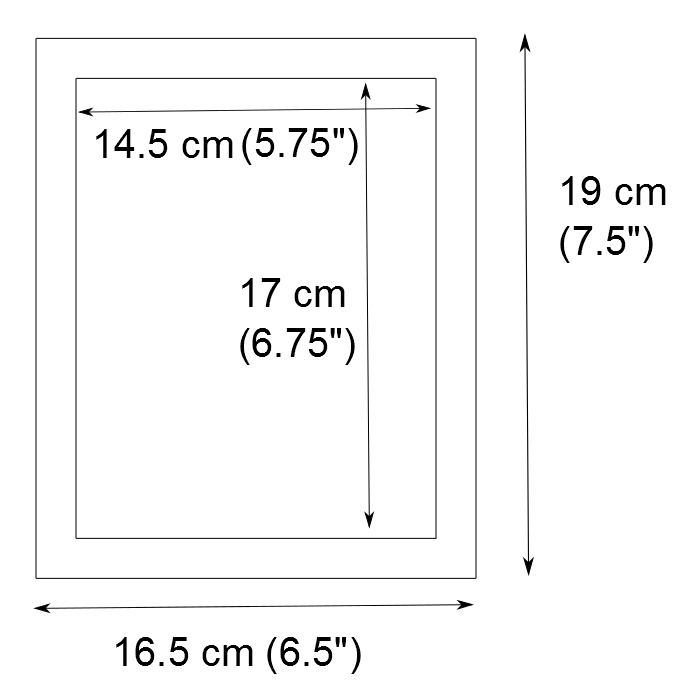
If you are not the happy owner of a quilting ruler, I suggest cutting out a paper pattern in this size. I used my ruler to skip this step.

In any case, cut out two pieces of fabric with the same measurements as the finished pattern. I cut my fabric folded double, wrong sides out.
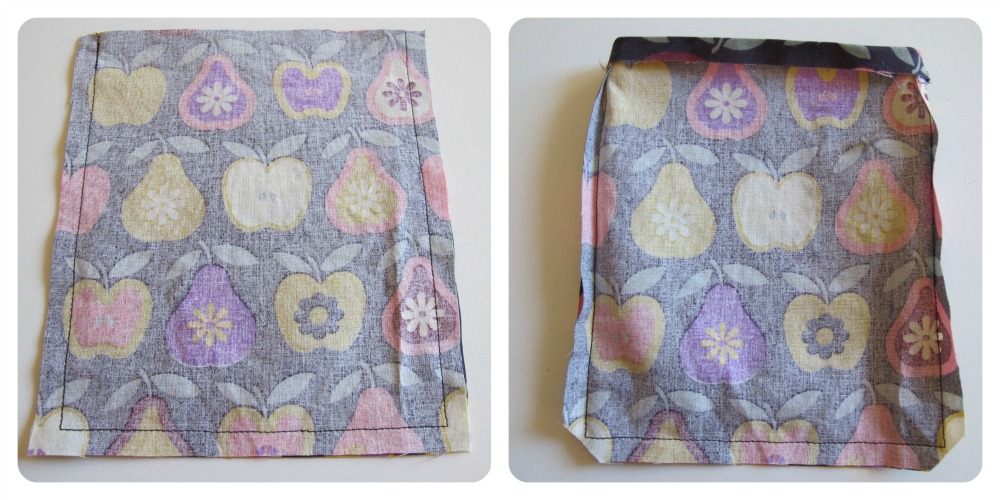
Sew at 1 cm (3/8″) from the edge along three sides of the lining (sides and bottom). Trim the bottom corners diagonally, iron the side seams open (the bottom seam is hard to get to), then fold and iron a 1 cm (3/8″) hem towards the wrong side of the fabric around the top opening.

Slip the lining into the bag, wrong sides together.
Handsew the lining to the top opening of the bag. Attach the bottom of the lining by sewing a few stitches from the outside through the bottom of the bag, along the bottom seam.

I wanted to try an idea for a leather strap. Even if this strap is a little large for the size of the bag, I think I want to continue working on the idea. If I hadn’t had any leather on hand, I would probably have made a strap or a handle in fabric. Simple crocheted handles tend to stretch out.
For more ideas on bag handles, see the lovely pattern Italian Travels by EclatDuSoleil.
I also suggest you check out Geneviève’s very creative use of the Jämtland stitch.
And what about you, have you tried the stitch? Do you have ideas on how to use it? Please feel free to share in the comments below.
See you soon,
