
News
I’m happy to introduce my new crochet shawl design: Pyramidal.
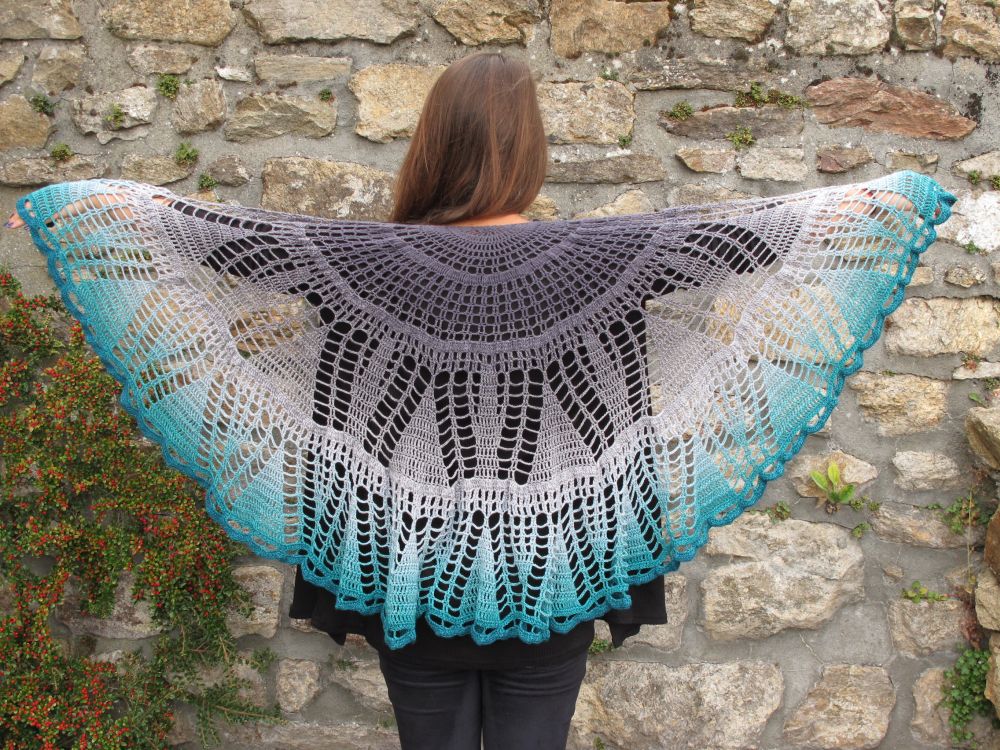
I worked the shawl with a single ball of Scheepjes Whirl (1,000 m/1,100 yds) and constructed it as a half-circle « pi shawl », where increases are concentrated in specific rows. It makes for a spectacular design that’s still easy to crochet
In this rounded shawl, I came back to the triangle motif, a shape I really love!
The pattern for Pyramidal is available both on Ravelry and in my online shop.
I’m also back at work on my YouTube channel in English – this is my latest podcast episode:
Please feel free to subscribe so you don’t miss the next episode!
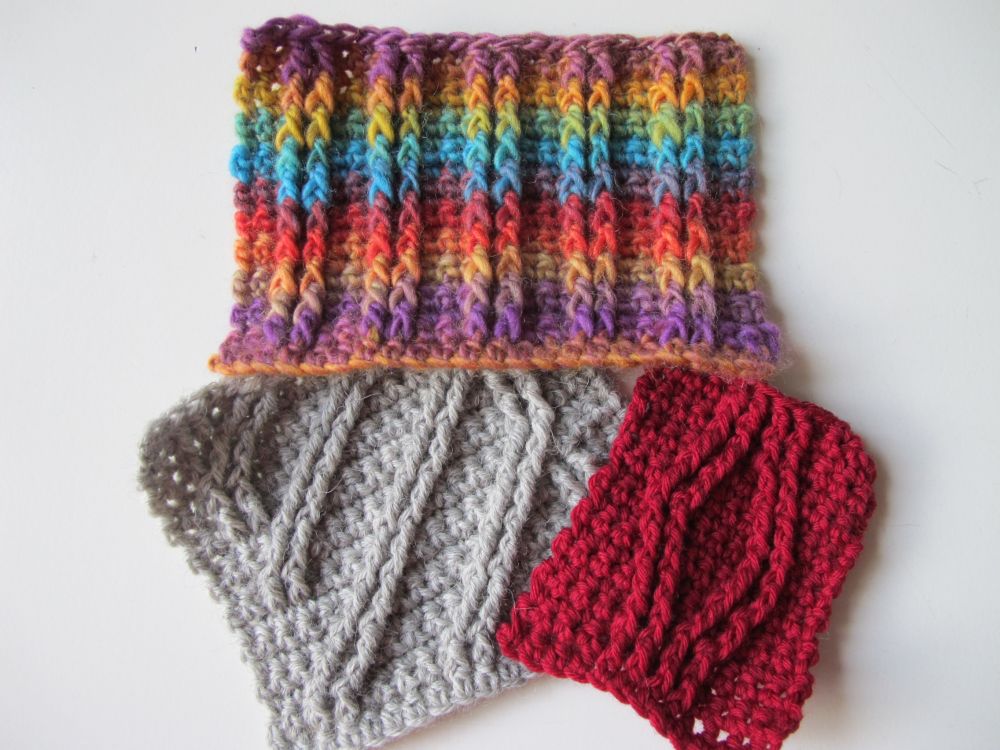
Crochet cables (2)
This newsletter is part of a series on the topic of crocheted post stitches.
Previous issues were published in May 2017, June 2017 and July/August 2017.
In my last newsletter, I discussed mini cables worked over 2 stitches. This was the opportunity to show several tips and tricks that are useful for all post stitch cables you may encounter.
I would like to get back to crocheted cables once more to underline a few ideas that are very useful for larger cables (and perhaps for other projects, too!).
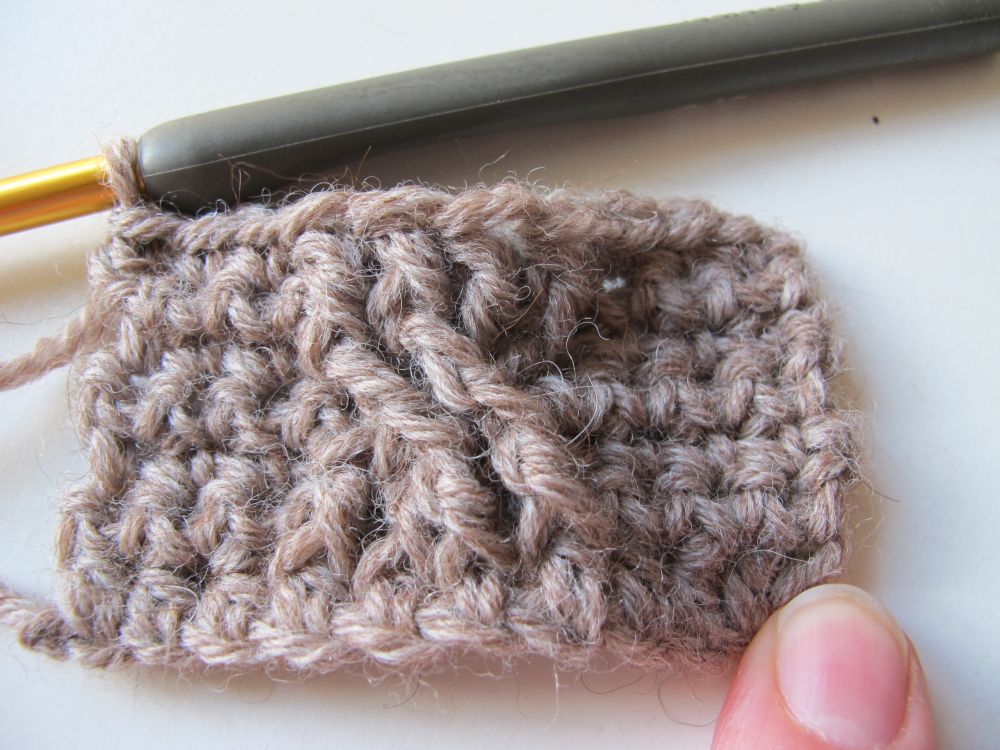
As an example, I will use a cable worked over 4 stitches, but the information given is valid for larger cables, too. The « backdrop » for the cables is always worked in sc’s, exactly as for the mini cables.
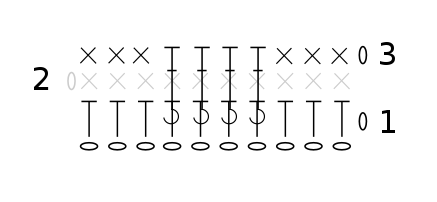
First, let’s prepare our cable with vertical front post dc’s.
When we worked the mini cables, we started crossing the dc’s on the first row of post stitches (row 3).
This is harder to do when you work larger cables since you need to pull more at the stitches. There is also some logic to starting with vertical post stitches because the 4-stitch cable is worked by alternating crossed and vertical stitches (more about that later).
So let’s work vertical FPdc’s at the start of our cable on row 3.

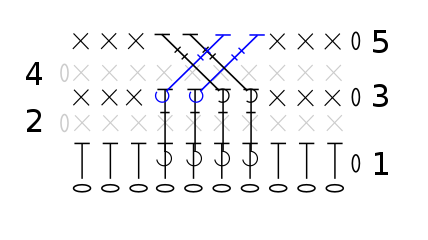
When we made mini cables, our stitches « traveled » only one stitch to either side when we crossed them. In this cable, the crossing stitches will have to travel farther, since we are crossing 2 stitches over 2.
Since the stitch has to go farther, we will need it to be taller. Here, in our 4-stitch cable, we are going to use FPtr’s.

Have you ever noticed that your taller stitches, trebles or more, often have a looser top than other stitches? Mine do, too.
When you make multiple yarnovers, often the loop that was on the hook when starting the stitch tends to stretch out and loosen. Since this is the loop that becomes the top of the stitch, it is really visible.
But there is a way to mitigate the problem.

You know that annoying tendency the previous stitch has to want to come and roll itself around your hook when you work multiple yarnovers at the start of the next stitch? Don’t be annoyed anymore, and let it do its thing. You might even want to keep your finger on it while you finish the stitch you’ve started. Once you have pulled through all your loops and finished the stitch, you will see that the top of it will look much neater and less loose.
This tip is useful for all tall stitches, even if you never make cables!
After crossing our stitches, on the next right side row we let the cable settle with vertical FPdc’s.
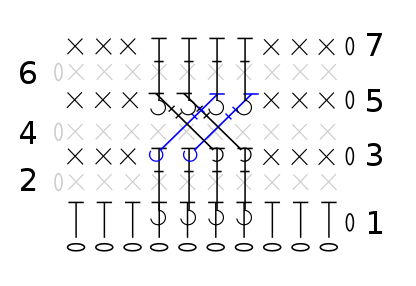
Continue repeating rows 6 to 9 in the chart below, and watch your cable grow.

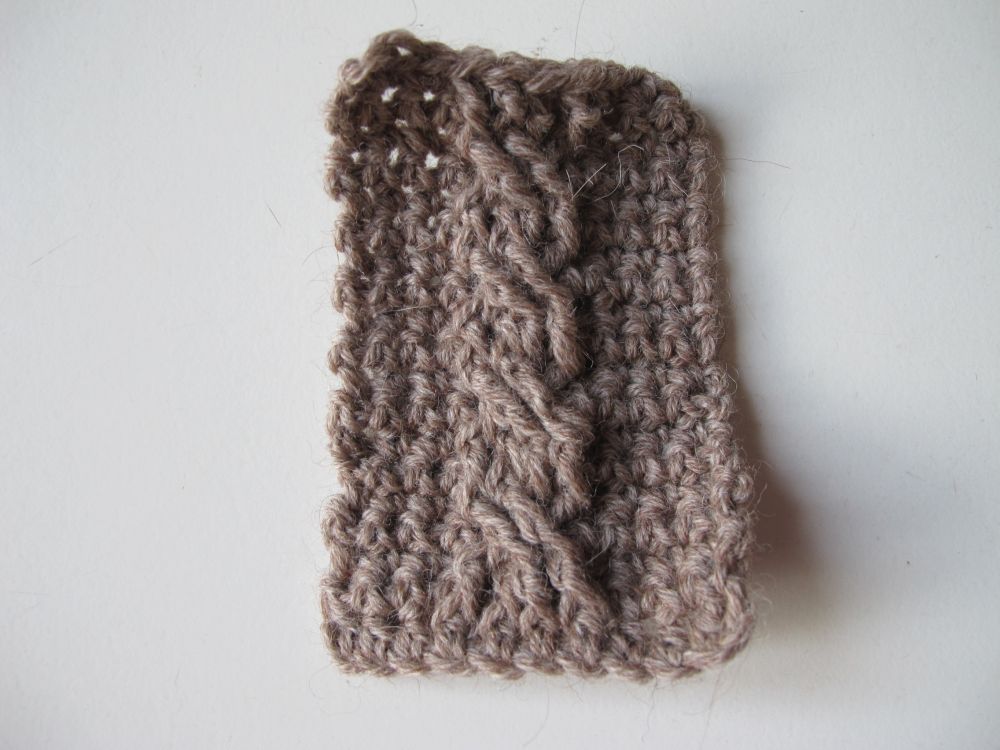
Don’t want to make cables? Let your post stitches run as they please over your sc backdrop!
I’m looking forward to hearing from you in the comments below!
Next time, I will discuss the sweet encounter between post stitches and openwork.
See you soon,
