Newsletter April 2013: Continuous joinNews:Two new patterns since last time – one in crochet and one in knitting.In crochet, the latest design by EclatDuSoleil, Bluebird: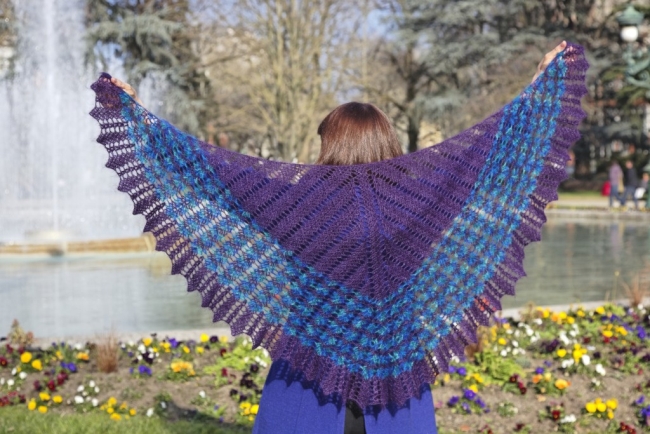 This gorgeous two-coloured shawl is worked in a mohair blend in the photos. You can also try a smooth laceweight yarn – and of course, any colour combination of your liking for the stripes.More information in the shop.The hat fairy, Laurence Bertolle, has a lovely knitted design to offer – also in two colours – Ilona.
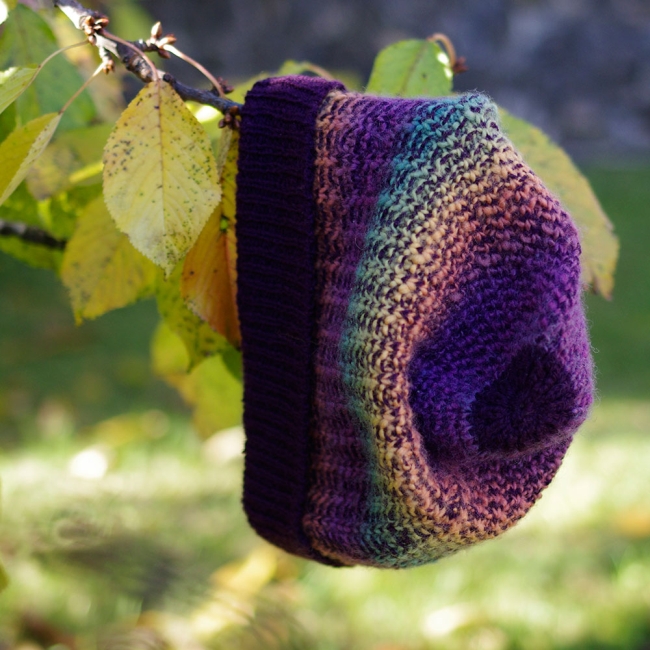 Laurence very generously offers this pattern as a gift with any purchase of 1 ball of Mini Mochi yarn and 50 g of fingering weight merino (the yarns needed to make the hat). The hat is worked from the brim up, in the round, using an interesting stitch pattern that is simple to knit.More information in the shop.Continuous joinI still have motifs on the brain, so here comes another method for assembling them!The continuous join seems to be popping up here and there lately as a popular alternative to traditional techniques for assembling crocheted motifs. However, the technique isn’t brand new. It was described in The Elmore Method by William E Elmore, published more than twenty years ago – and was perhaps used by crocheters well before that.This type of technique can be used in many ways, some of them rather complex. What I want to show here is a basic method for assembling granny-style squares. Once you get the hang of this method, you can develop it further and apply it in other situations.But first, the square! As usual, I didn’t find exactly what I wanted in my books, so I mixed and modified until I came up with this:
 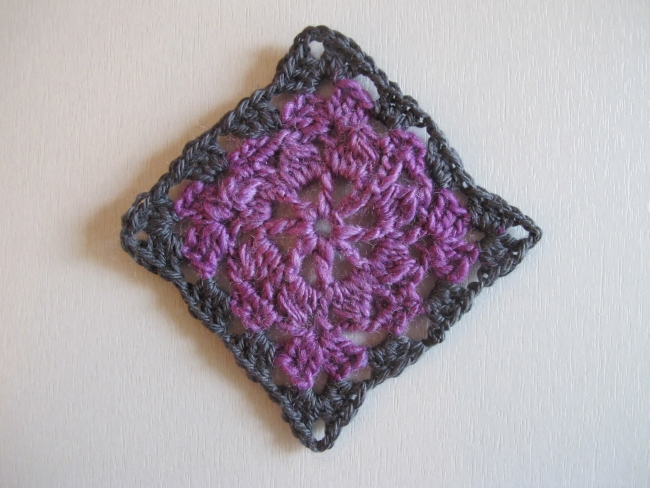 In the square I used something I’d like to call a « 4-dc petal » – a mix between a Japanese bobble and a dc4tog:[Yo, insert hook in indicated space, draw up a loop, yo and pull through 2 loops on hook] 4 times. There are 5 loops on the hook. Yo, draw through 4 loops on hook, yo, draw through remaining 2 loops.
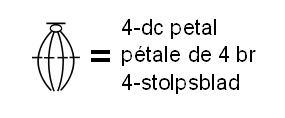 Instructions for square:Ch 5, close to a ring with a sl st in first ch.Round 1: Ch 6 (counts as 1 dc + 3 ch), [1 dc in ring, ch 3] 7 times, sl st in 3rd ch at beg of round. There are 8 dc and 8 3-ch spaces. Round 2: Ch 5 (counts as 1 dc + 2 ch), [4-dc petal in next 3-ch space, ch 2, 1 dc in next dc, ch 2] 7 times, 4-dc petal in next 3-ch space, ch 2, sl st in 3rd ch at beg of round. There are 8 4-dc petals, 8 dc’s and 16 2-ch spaces.Round 3: Ch 2 (counts as 1 hdc), 1 hdc in 2-ch space, [ch 2, (3 dc, ch 3, 3 dc) in next dc, ch 2, skip 4-dc petal, 1 hdc in next 2-ch space, 1 hdc in dc, 1 hdc in next 2-ch space] 3 times, ch 2, [3 dc, ch 3, 3 dc] in next dc, ch 2, skip 4-dc petal, 1 hdc in next 2-ch space, sl st in 2nd ch at beg of round.Round 4: This round is worked in charcoal in the picture. Below, it is not included in the motif – it is part of the join. Work 3 dc in any 2-ch space following a 3-hdc group in previous round, [ch 1, (3 dc, ch 3, 3 dc) in next 3-ch space in corner, (ch 1, 3 dc in next 2-ch space) twice] 3 times, ch 1, [3 dc, ch 3, 3 dc] in next 3-ch space in corner, ch 1, 3 dc in next 2-ch space, ch 1, sl st in first dc in round. Fasten off.The last round in the square is a traditional granny square round. The chain spaces will be used for joining the motifs.
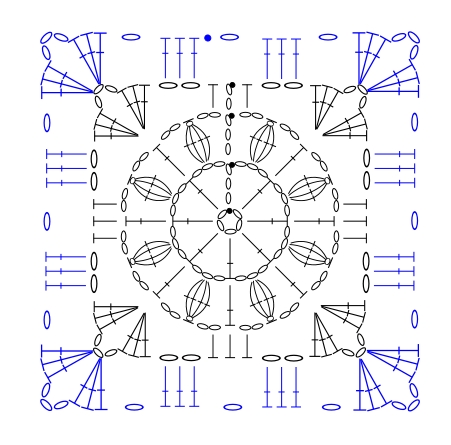 Work the desired number of motifs, ending after round 3. Here, I worked 9 motifs.
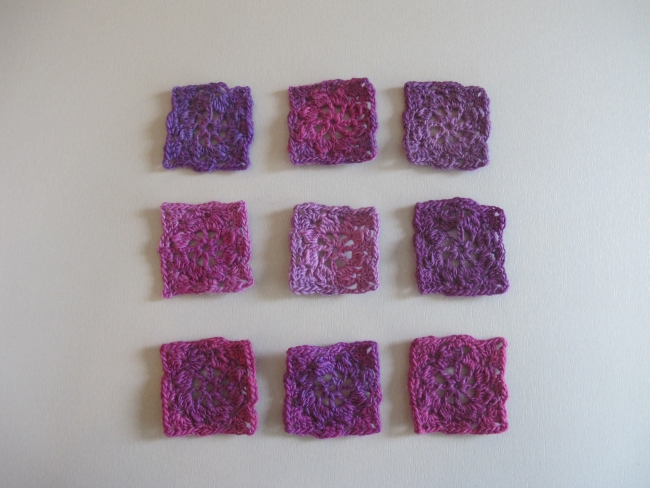 You need to plan your join (which is also the last round of each motif) so that you work along each side of every motif once. This is a game in which you need to draw a continuous line around your motifs without crossing it or passing twice along the same motif edge.You can imagine several solutions to this. This one is William E Elmore’s and Edie Eckman’s (in the book Connect the Shapes Crochet Motifs). It consists in joining the motifs column by column, starting at the top right hand corner.The start will look something like this:
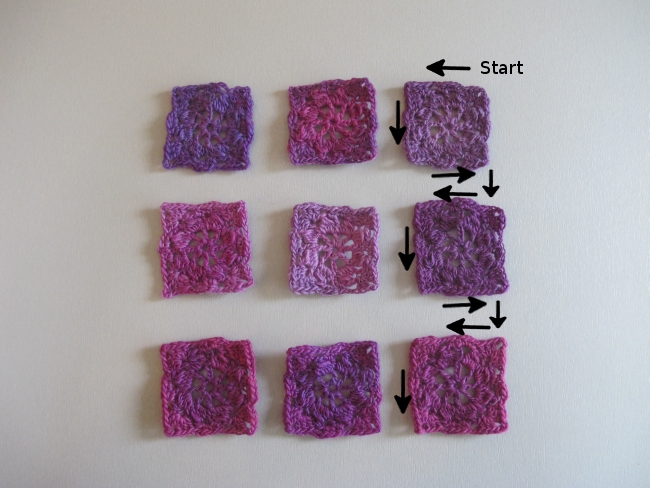 The motifs in the first column are linked together, and only the right edges and the bottom edge of the bottom motif are left unworked.The next step will look something like this, joining the right edges of the motifs in the middle column to the first column:
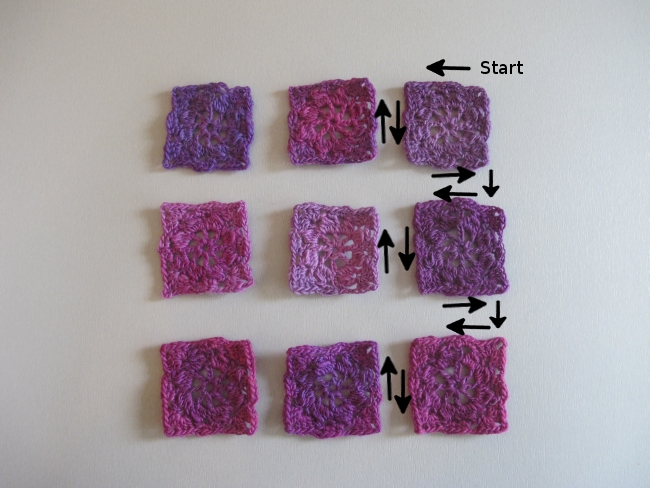 Perhaps it will be easier to comprehend with some step-by-step pictures in crochet!
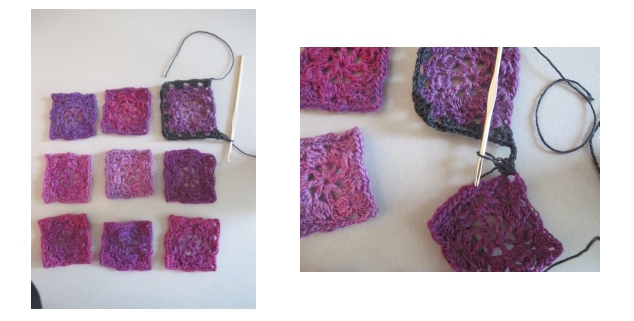 Start at the top right corner, working only one of the two 3-dc groups normally placed in the corner. Work around three edges of the first motif, ending with only one 3-dc group at the bottom right corner. Ch 3, and start working along the top edge of the motif below.
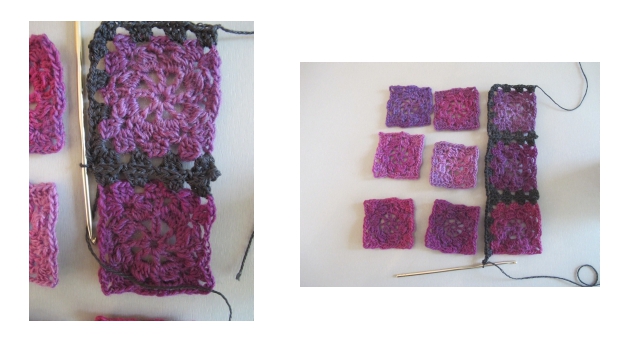 When reaching a corner where there is a completed corner in the opposing motif, join as you would usually do (replacing the second of the 3 ch in the corner with a sl st in the adjoining 3-ch space).
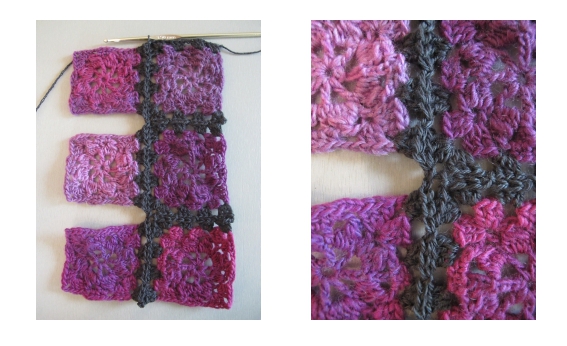 Join the motifs in the next column along the right-hand edge.
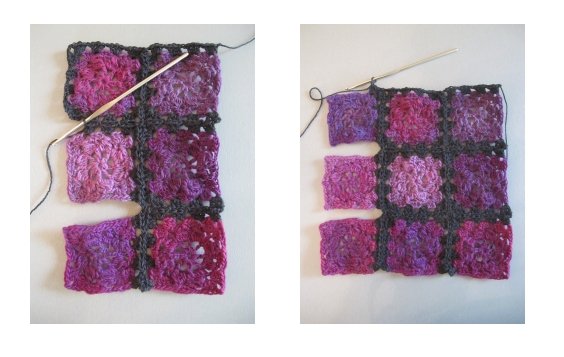 Work the joins between the motifs as in the first column. When all the motifs in the second column are joined, work back upwards joining the right-hand edges of the motifs in the third column.
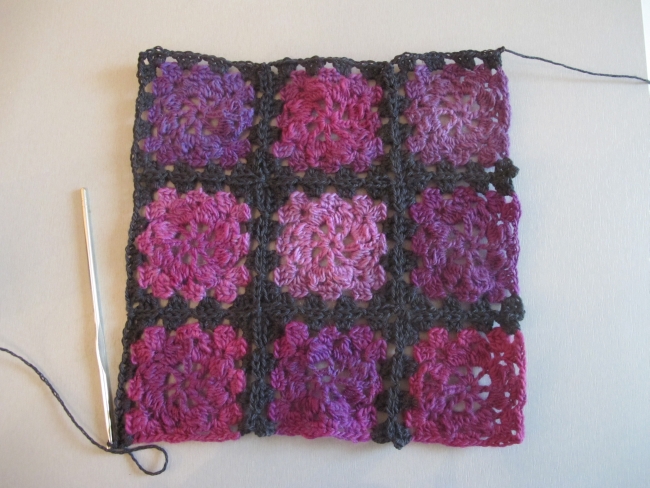 All the motifs have been joined. Only the bottom and right edge of the assembled block are left.
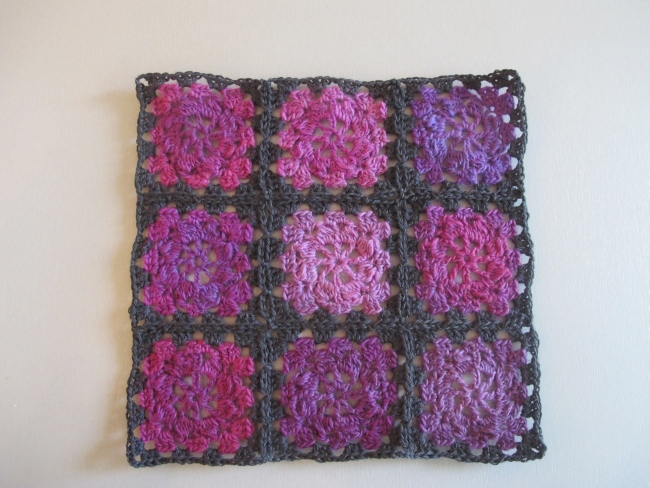 Only two ends to weave in after having joined 9 motifs – not bad!There are of course many ways to lay out motifs, even simple squares. I’ll let you think about how you could work a continuous join for this layout:
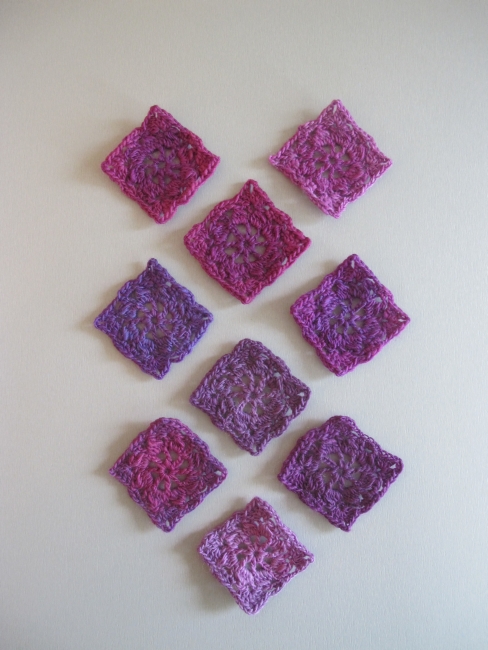 Start drawing arrows!The motifs in this newsletter were crocheted using Mini Mochi col Grateful Grapes and fingering weight merino col charcoal.
See you soon!