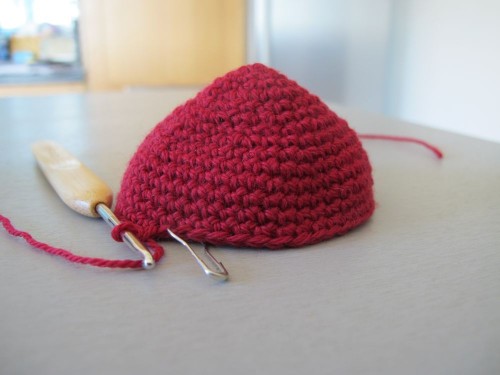
Après l’étape d’hier, vous devriez avoir une forme arrondie comme sur la photo ci-dessus.
After yesterday’s step, you should have a rounded shape as in the picture above.
Passons à l’étape no 3 !
Let’s continue to step 3!
Tours 16 – 19 : Travailler sans augmentations.
Rounds 16 – 19 : Work straight without increases.
Pour les tours suivants, nous allons travailler des diminutions d’une manière spécifique.
On the following rounds, we are going to make decreases in a specific way.
Pour diminuer d’une maille, rép 2 fois (piquer le crochet sous le brin avant de la m suivante) , 1 jeté, ramener le fil à travers deux boucles [il reste deux boucles sur le crochet], 1 jeté, écouler les deux boucles.
To increase one stitch, repeat (insert hook under front loop of next stitch) twice, yo, pull through two loops on hook [two loops remain], yo, pull through last two loops.
Faisons un petit pas-à-pas en photos :
Let’s do it step-by-step with photos:
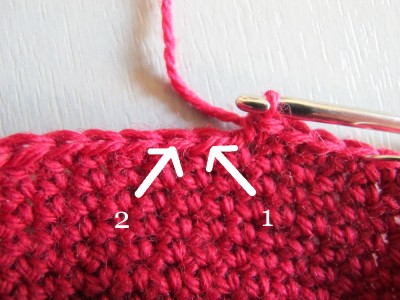
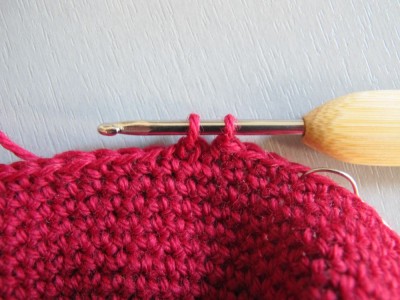
Piquer le crochet d’abord sous le brin avant 1, puis sous le brin avant 2.
Insert the hook first under front loop 1, then under front loop 2.
J’ai piqué sous le premier brin, et j’incline mon crochet pour piquer sous le deuxième.
I have inserted the hook under the first front loop, and I’m tilting my hook downwards to insert it under the second.
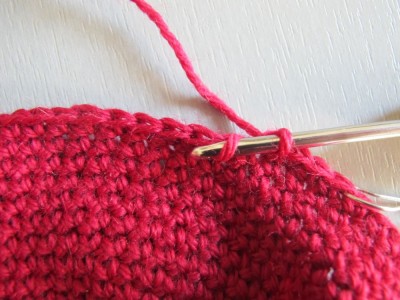
J’ai piqué sous les deux brins. Je dois faire un jeté et ramener le fil à travers ces brins, qui apparaissent comme les deux premières boucles sur le crochet.
Both front loops are on my hook. I am now going to yarn over and pull through these front loops, that are the first two loops on my hook.
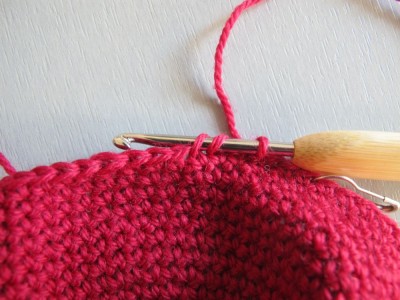
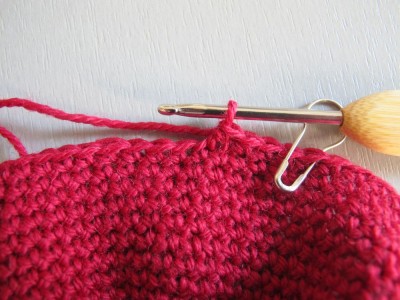
C’est fait, il me reste deux boucles sur le crochet. Je dois maintenant faire un jeté et écouler ces deux boucles.
Done, two loops remain on the hook. Now, I’m going to make a yarn-over and pull through these two loops.
Les deux dernières boucles sont écoulées, la diminution est terminée.
I have through the last two loops, the decrease is completed.
Cette technique permet de faire une diminution en mailles serrées pratiquement invisible. Je l’ai appris de June Gilbank, alias PlanetJune, une créatrice d’amigurumis très talentueuse. Sur son site, vous trouverez une vidéo montrant la technique ainsi qu’un tuto en photos – si vous êtes gaucher, descendre la page et vous trouverez tout ce qu’il vous faut.
This technique allows you to work nearly invisible decreases in sc. I learned it from June Gilbank, alias PlanetJune, a very talented amigurumi designer. On her site you will find a video showing the technique as well as a photo tutorial. If you are left-handed, scroll down her page and you will find what you need.
En repartissant ces diminutions de la même manière que les augmentations en début d’ouvrage, continuer comme suit :
Distributing these decreases over each round in the same way as the increases above, continue as follows :
Tour 20 : Diminuer de 6 m – on a 44 m
Round 20 : Decrease 6 sts – there are 44 sts.
Tours 21 – 24 : Diminuer de 4 m sur chaque tour – on a 28 m.
Rounds 21 – 24 : Decrease 4 sts on each round – there are 28 sts.
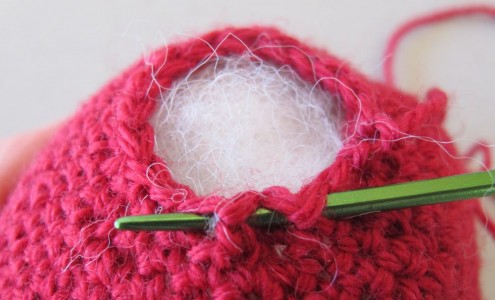
Maintenant il faut rembourrer votre boule, sinon le trou sera trop petit et la tâche trop compliquée !
Now you need to stuff your bauble, before the hole gets too small !
Pour les derniers tours, essayez d’appuyer sur le rembourrage pour ne pas attraper des fibres avec votre crochet.
Work the last few rows pressing down the filling material so as not to catch on it with the crochet hook.
Tour 25 : Diminuer de 6 m – on a 22 m.
Round 25 : Decrease 6 sts – there are 22 sts.
Tour 26 : Diminuer de 4 m – on a 18 m.
Round 26 : Decrease 4 sts – there are 18 sts.
Arrêter le fil. Rentrer le bout du fil en le passant dans le dernier tour. Resserrer, sans chercher à fermer le trou en haut de la boule complètement.
Fasten off. Weave in the end through the last round. Tighten, without trying to close the hole entirely.

Un commentaire pour “3 décembre 2013 : Boule no 1, étape 3 – Dec 3rd 2013 : Bauble no 1, step 3”