
In the shop
Note: There is currently a problem with the Paypal module not showing up in the English language shop. When shopping, select the option « bank wire », and I will send you a Paypal invoice – or place your order via email. I am so sorry for the inconvenience, and I hope to solve the problem soon.
A new knitted shawl designed by EclatDuSoleil/Hélène Marcy – I’m very happy to present Firebird!
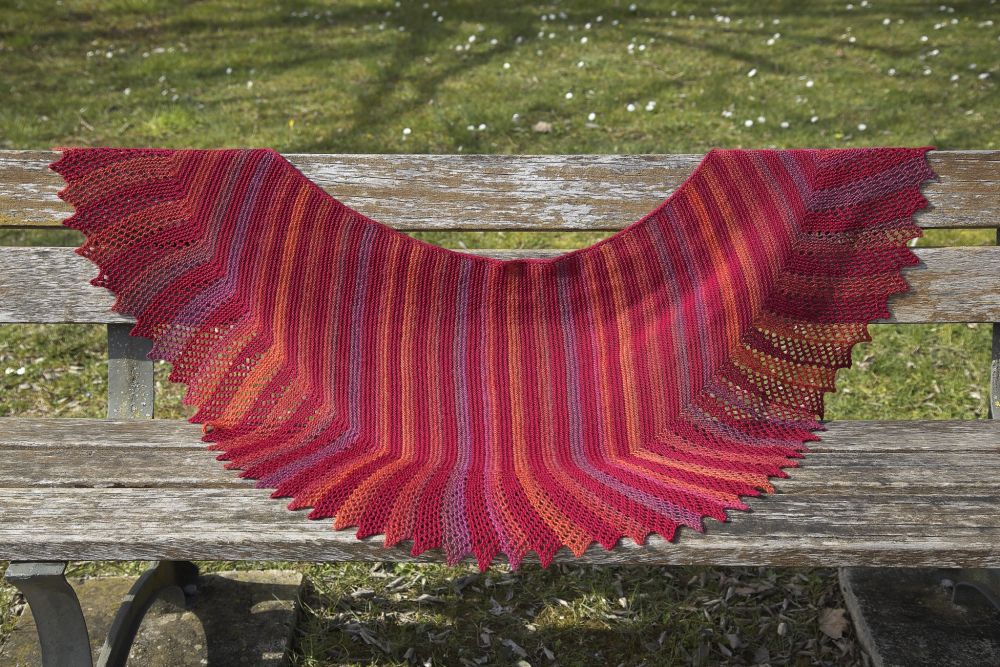
Hélène has used a superb combination of fingering weight merino and Mini Mochi to create this beautiful shawl, worked from side to side and totally reversible. You can also use organic cotton in solid and multicolour for a summer version.
When it comes to yarns, I have two new and beautiful things to show!
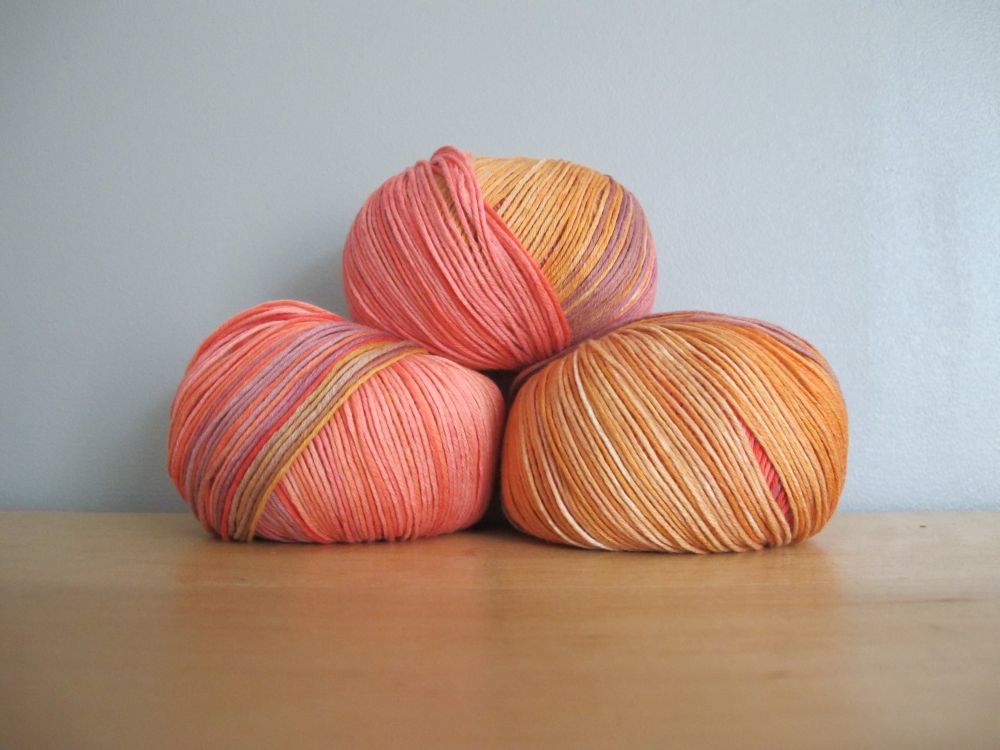
A new colourway in multicoloured organic cotton, named Sorbet on the Beach after a major brainstorming session on Facebook.
It’s a good idea to check the page for multicoloured cotton in the weeks to come; more colourways are about to hit the shelves!
And the latest addition to the shop, a truly splendid yarn: Covent Garden.
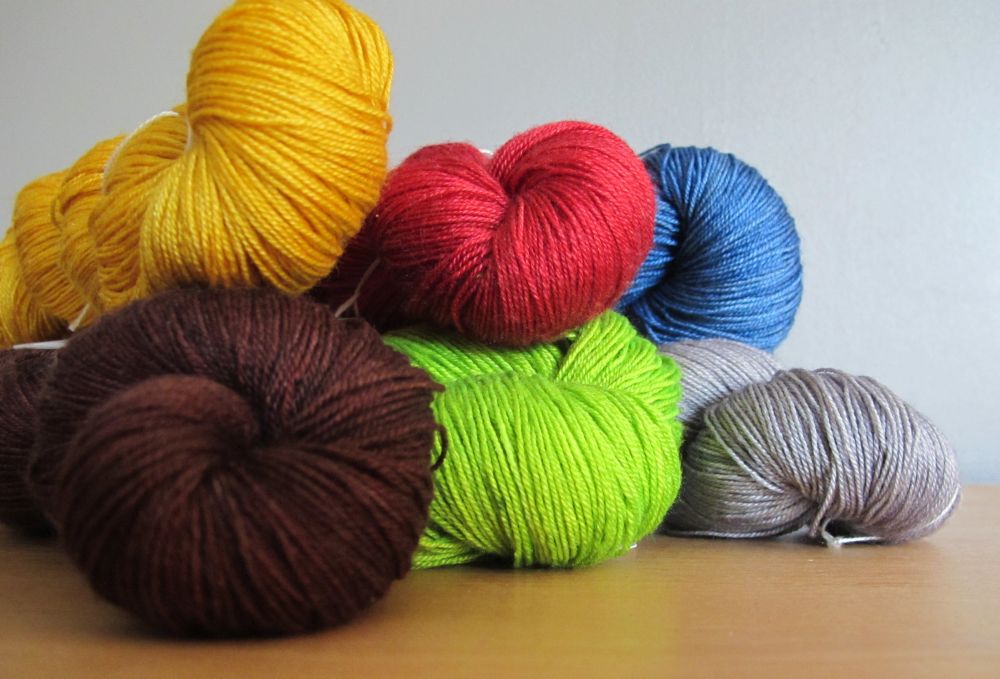
This is the same yarn base as my London yarn, a laceweight wool and silk blend. For the limited collection named Covent Garden, this yarn has been handdyed by my dear friend Muriel from Le Jardin des Fibres. I’m so proud to be able to offer this magnificent yarn.
I will talk more about Covent Garden on the blog in the weeks to come, but all the information you need is already available in the shop.
On the blog

To find the right combination of solid-coloured and multicoloured organic cotton, check out this little article.

Inspired by the publication of the Firebird shawl, I showed you the crocheted « baktus » shawls available in the shop, all sprung from the talented mind of EclatDuSoleil!
Hairpin lace – tips and tricks for the basic strip
This month we are discussing useful little details, applicable to the basic strip, that will allow you to work efficiently and comfortably.
Many of you commented last month that so-called guidelines are very helpful to keep your loops in order once you have slipped them off the frame. Don’t worry, I didn’t forget: here they are!
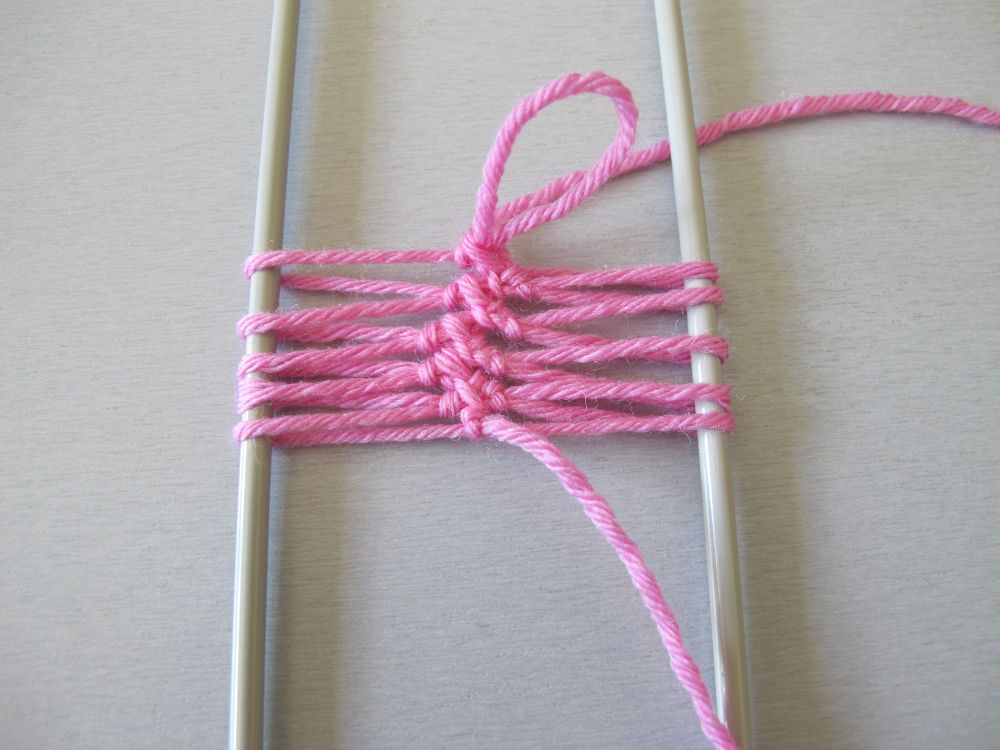
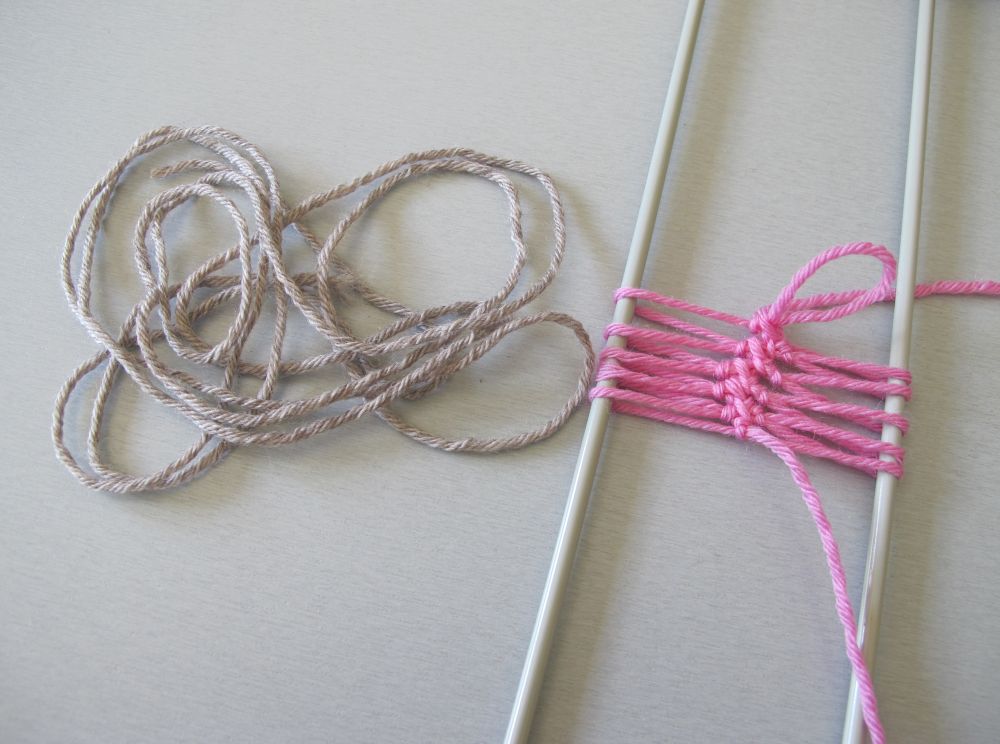
Guidelines are simply lengths of yarn that run inside the loops you make. Personally, I don’t enjoy starting my work with extra yarn lengths that tend to hang all over the place. That’s why I first make approximately 5 loops around each rod before I add the guidelines.
Inspired by Jennifer Hansen of Stitch Diva Studios I cut a single length of yarn for my guidelines. More specifically, this yarn should measure approximately twice the length of the finished strip, plus a little. The exact measurement is not something you should lose sleep over. The loops can be bunched up more tightly on the guidelines than in the final project, and if the doubled-up yarn length is a little longer than the finished strip, it doesn’t really matter.

I thread one of the ends on a tapestry needle and pass the needle through the loops on the left rod, from bottom to top.
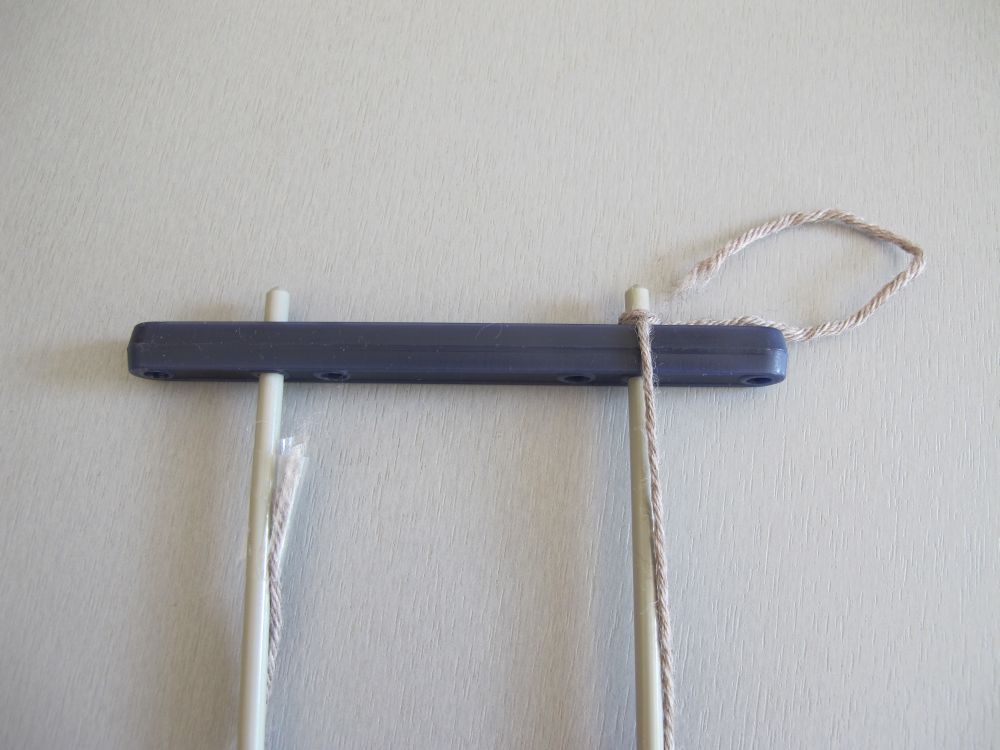
I need to fix the yarn end at the top of my frame. This can be done with a piece of tape (to the left) or a knot (to the right). The disadvantages of the tape are that it can sometimes be a little difficult to remove, and might leave some sticky residue on the rod. The drawback of the knot method is that the yarn end that hangs from the frame can annoy the less patient among us (like me). Try and see which method you prefer – and if you have a better one, please let us know in the comments below!
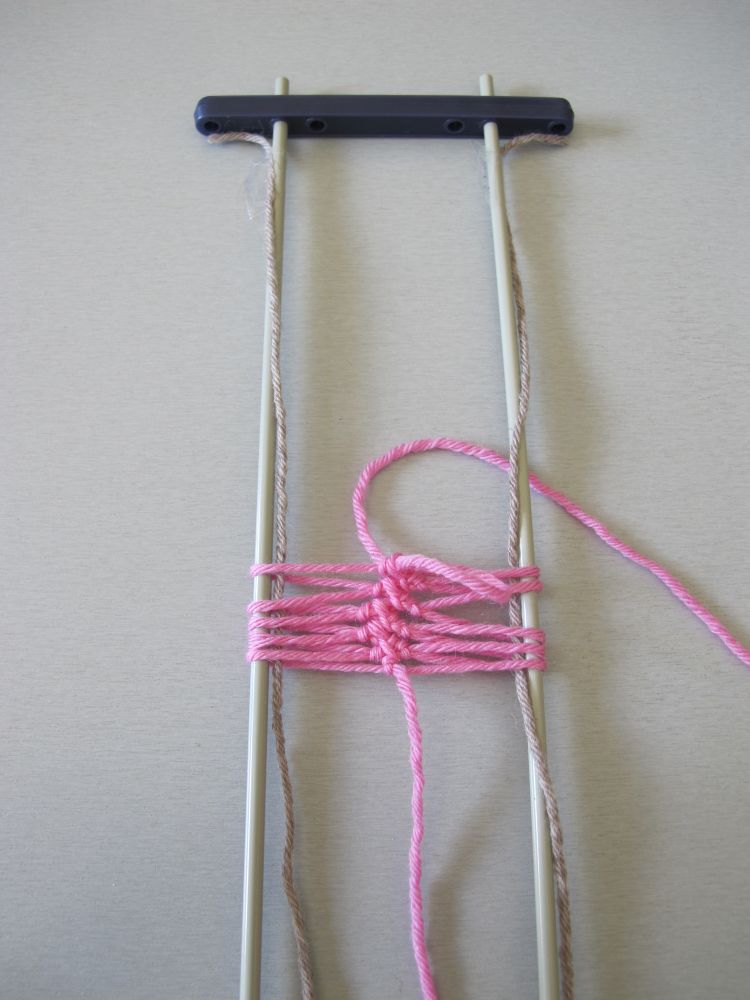
Next step is to thread the other end of the guideline on the tapestry needle and to pass it through the loops on the right rod from bottom to top. I fix this end at the top of my frame as well.

This means I have quite some length of yarn hanging from the bottom of my frame. By now, you may understand that I find it annoying to handle extra yarn that gets in the way and might even get tangled up with the working yarn. This is why I roll the guideline yarn around the ends of the rods at the bottom of the frame, and make it stay put with a rubber band.
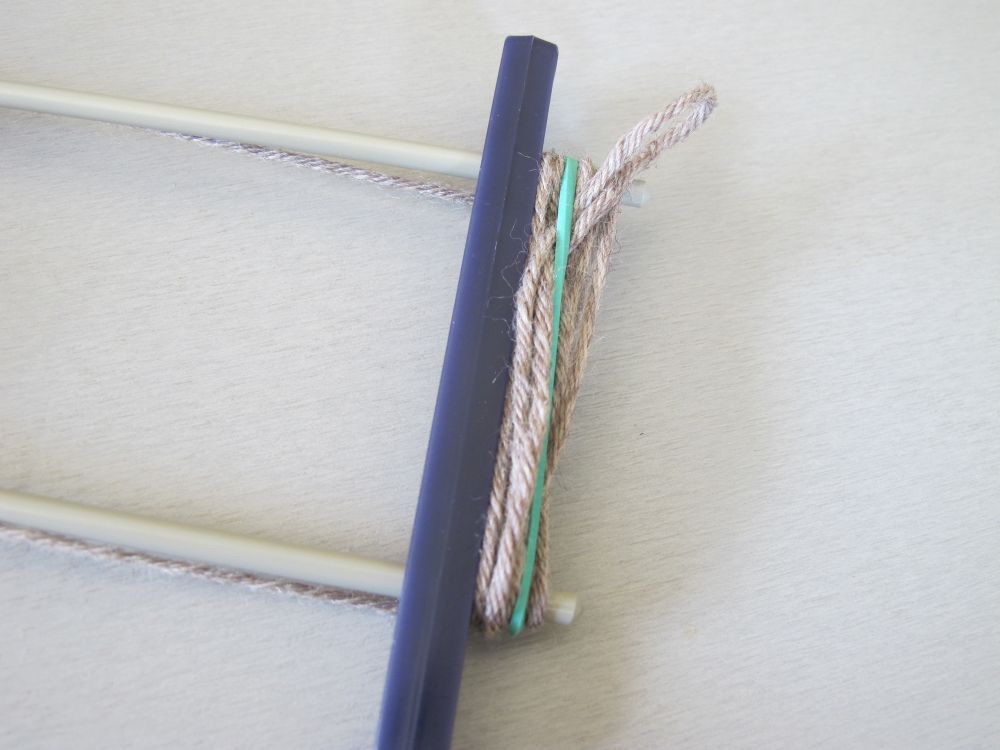
I take care to tuck the end loop safely under the rubber band. This is much easier to do with a short rubber band that will not need to be wound several times around the rods. As I work, it’s easy to take off the rubber band when I need to slip part of my strip off the frame and down on the guideline.
The advantage of using a single length of yarn as your guideline is that it forms a loop at the starting end of the strip. At the end of the strip, you will knot the two ends of the guideline together. This makes it very easy to see in which direction the strip has been worked, and eventually to assemble all strips in the same direction.
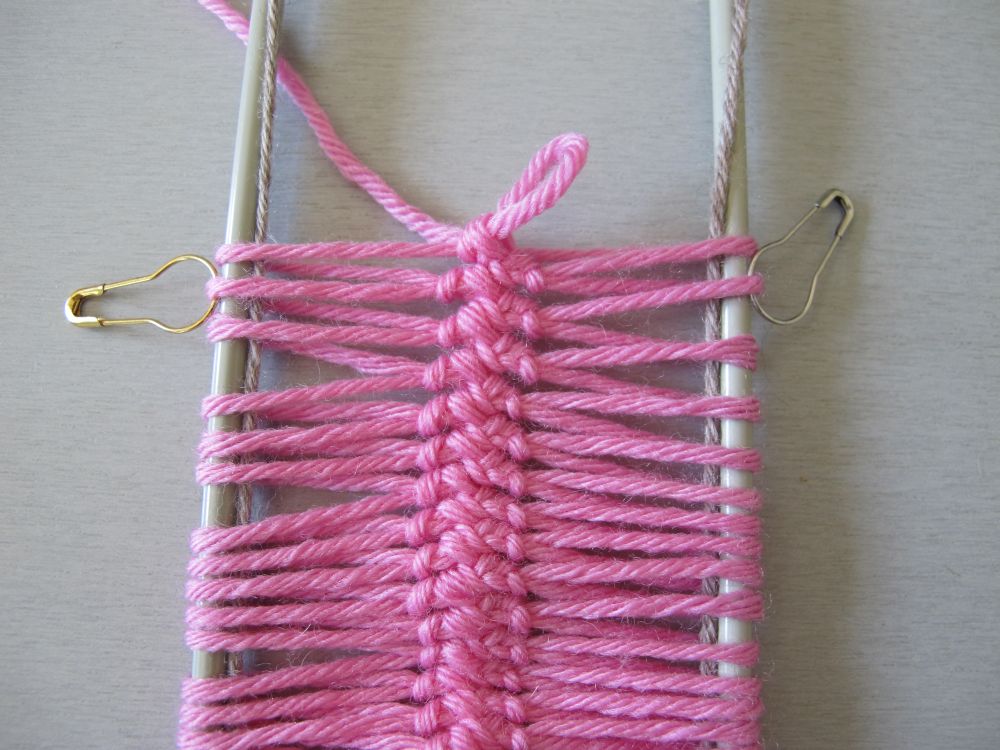
The guideline will keep your loops in order, but you also need to know that you have made the right number of loops. To count all the loops from the beginning every time you want to check, perhaps having released part of the strip from the frame, is a very efficient way to lose your calm. To preserve your serenity, I recommend counting your loops while they’re still stretched on your frame and placing a marker (such as a safety pin) around every 25th loop, on each rod.
You can of course modify this number depending on your own preference. I simply suggest that you choose an interval of loops small enough so that you can keep the last markers on the rods every time you need to slip off part of the strip. It’s so much easier to count the loops while they are still on the rods.
A final little tip for zenlike hairpinning: make sure that you know how to start again when you set down your work in the middle of a strip.
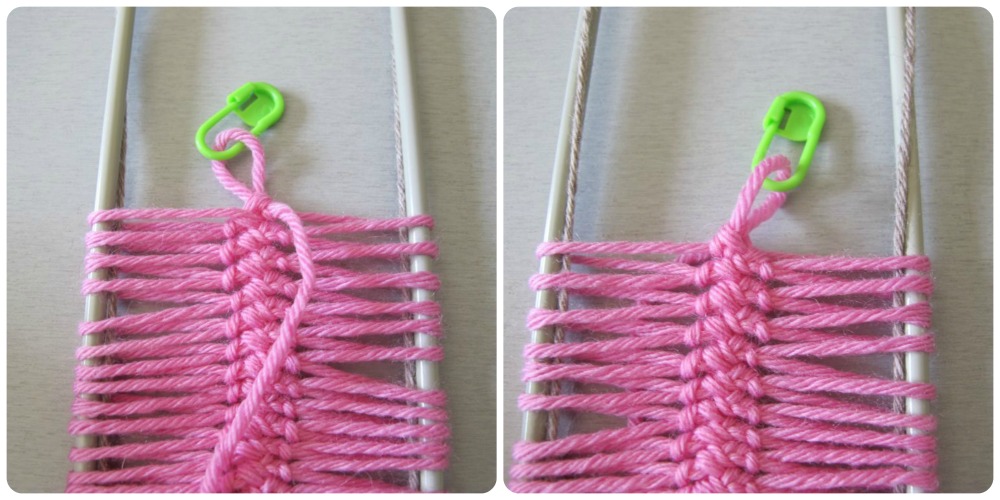
Hold the frame in front of you with the last stitch at the top (you can place a safety pin in the loop when you put down your work to make sure it doesn’t accidentally unravel). If the yarn coming out of the last stitch is in front of the frame, visible to you (left), turn the frame over so that the yarn is in the back (right).
Now, you’re in the same place as when you’ve just finished a stitch. Insert your hook in the loop at the top and turn your frame as usual to make the next stitch.
These are the little tips I’ve found to facilitate the making of the basic strip. If you have other tricks up your sleeve, please feel free to share them in the comments below.
Next time we will start making things with our finished strips!
See you soon!
