
In the shop
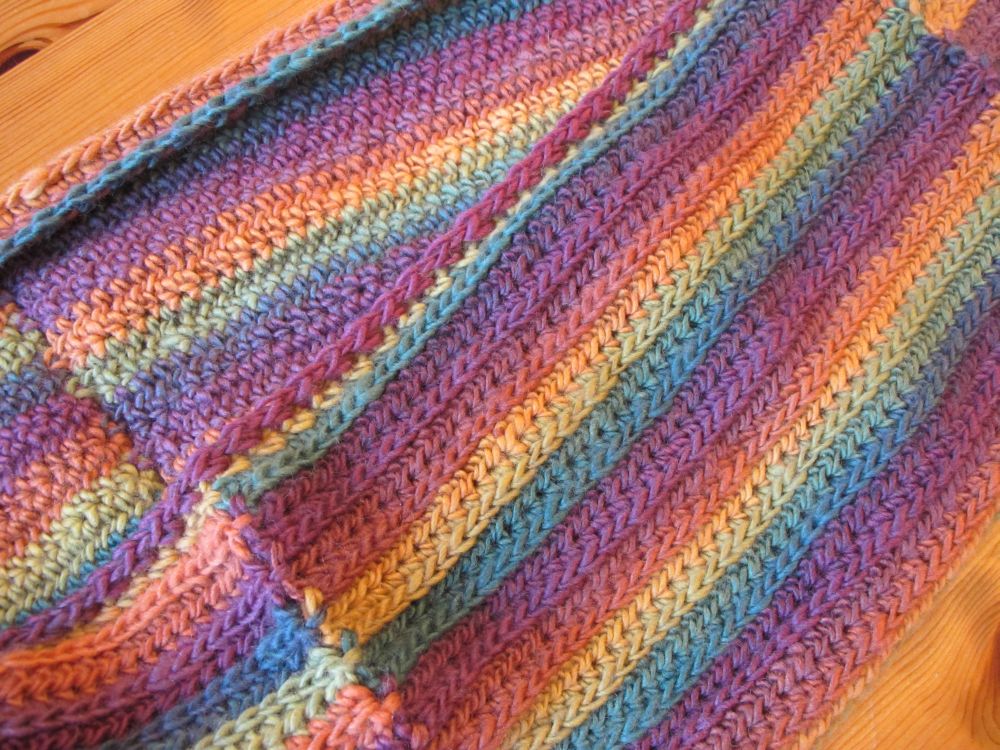
You caught a glimpse of it in the last newsletter of 2015, but now the pattern is available in the shop: I’m happy to introduce my new knitted design, Rytmik.

In both the short version (shoulder warmer) and the long version (poncho), the stripes in stockinette and garter stitch beat the rhythm of this little piece, fun to knit and fun to wear. I admit that I have a special fondness for the shorter version which I like to wear either over a long-sleeved T-shirt and a pair of jeans or over a dress.
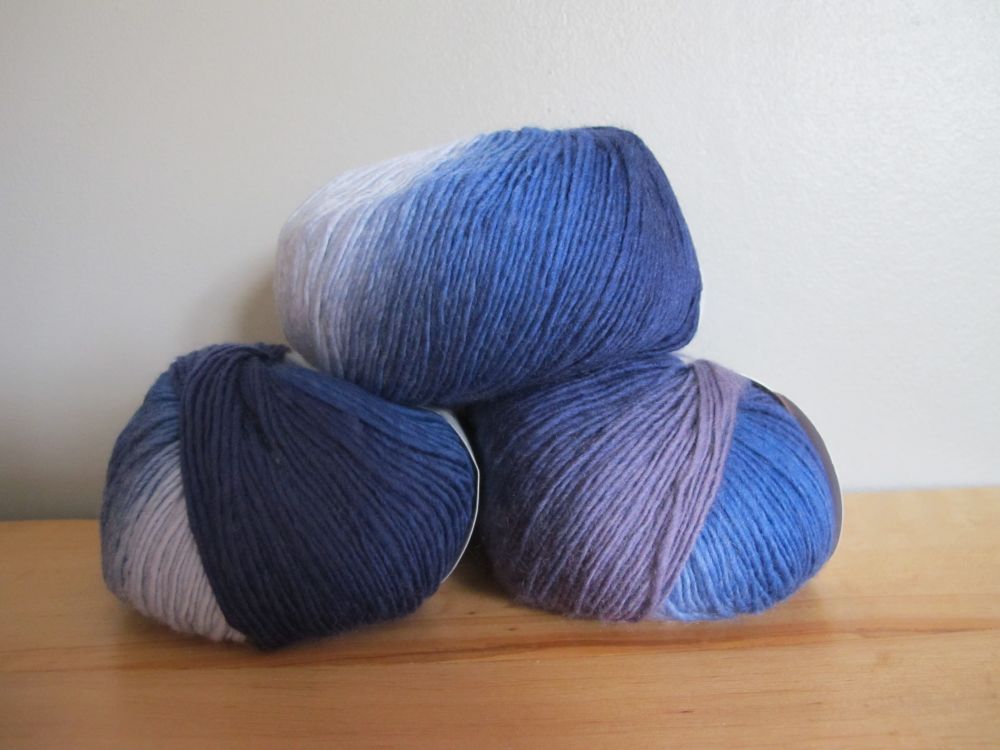
New colourway in the Mini Mochi yarn – Perwinkle Shadows.
On the blog
To follow up the publication of the 5 rectangles snood, I discussed loops in stitches here and found a video on the « third loop » of the half double crochet here.
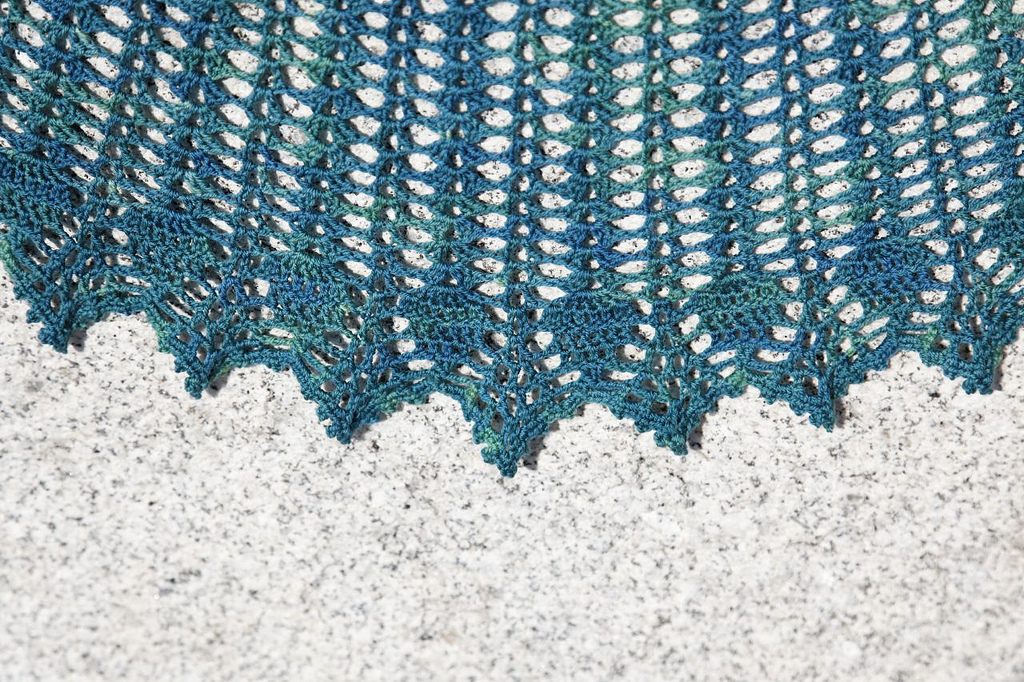
I also looked back on patterns published five years ago, among which the ever popular Victoria shawl, designed by EclatDuSoleil.
There was also a new episode of my podcast in French, Mon crochet et moi.
C2C: colour changes
Last month I discussed the basics of C2C. This month we’ll continue to explore this technique and focus on working with different colours.
Multicoloured work is probably the most popular way to work C2C currently. You can achieve beautiful gradient effects with stripes in different colours, or work entire afghans with complex multicoloured motifs using charts. If you want to do this kind of work, you will need to know how to change colours. I also think that a couple of ideas on how to handle all the different yarns can come in handy.
Since one of the basic principles of C2C is to treat each block (see last month’s newsletter) as a whole, we are going to change colours between two blocks, and not inside a block (this is possible, of course, but let’s not complicate things too much!).
The change can be made between the last block in a row and the first block in the next row, to work stripes. It can also be done somewhere along a row, to create a motif. Often, this is done to make an afghan – you can search the Internet for « graphghans » to see many examples.
Let’s start with simple stripes!
The colour change will happen at a different place depending on whether the next row is an increase row or a decrease row.
To change colours when the next row is an increase row:
At the end of the row, stop before the last « yo and pull through » in the last dc. There are 2 loops on the hook. Use the colour for the next row to finish the dc.
Then simply turn your work and start the next row with an increase block (ch 6, 1 dc in 4th ch from the hook, 1 dc in each of next 2 ch).
To change colours when the next row is a decrease row:

Turn work. Continuing with the same yarn as the previous row, make 1 sl st in each of the first 3 dc. With new colour, make 1 sl st in ch space.

Continue row with the new colour.
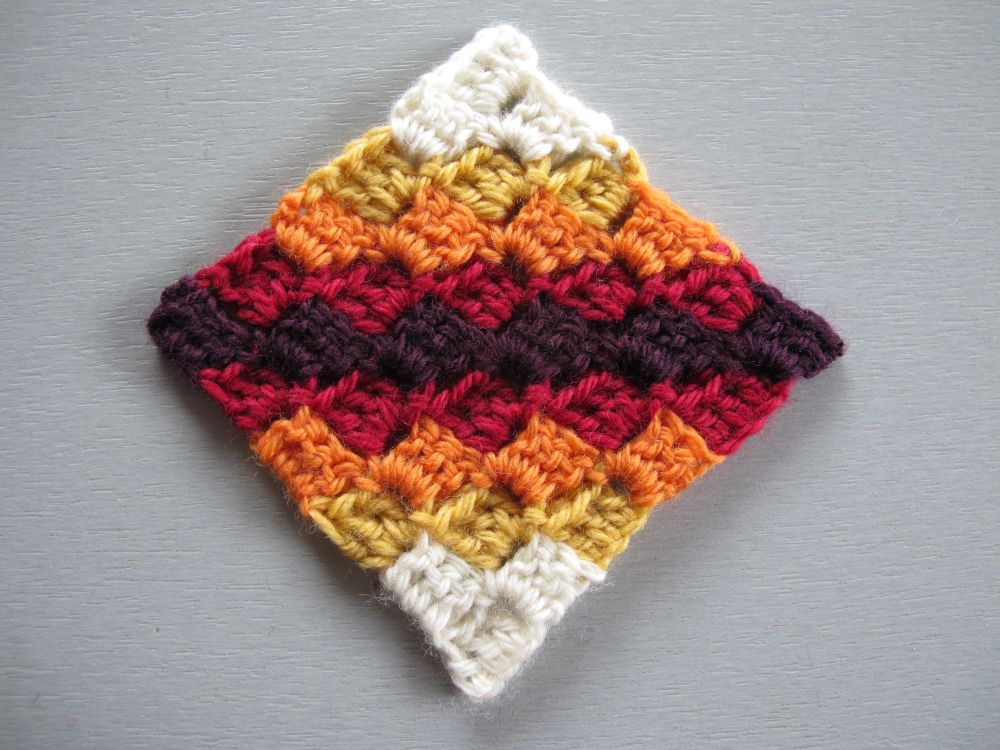
Here is my little striped C2C swatch:
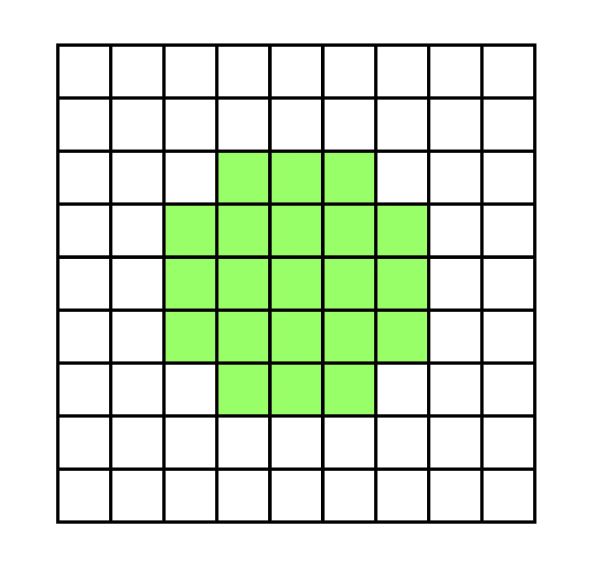
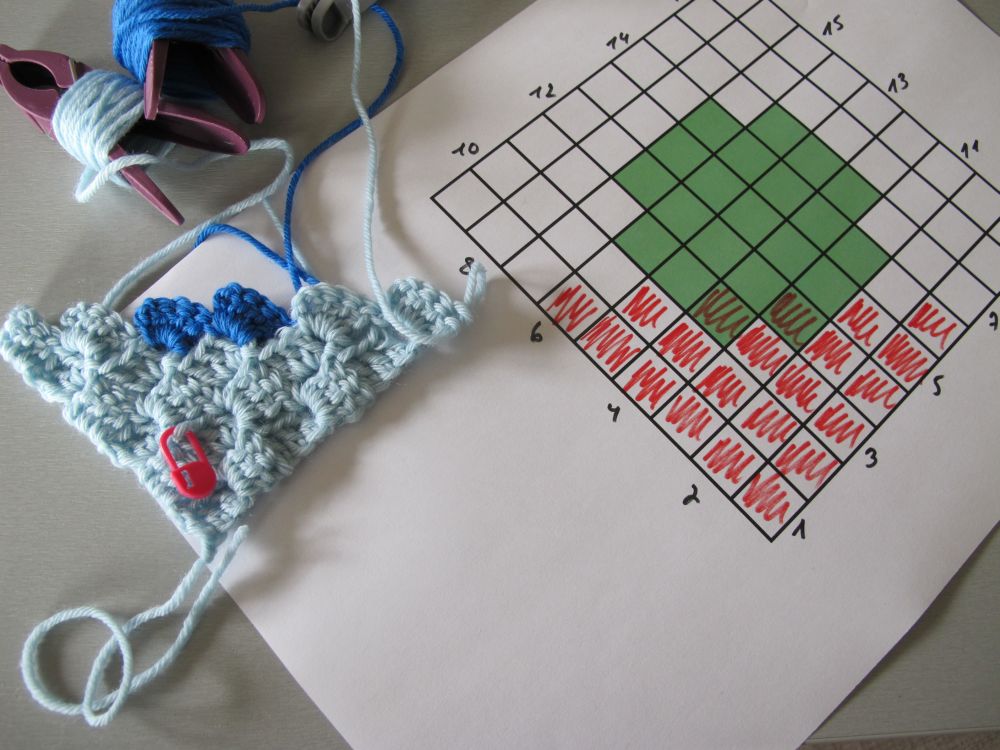
Now let’s discuss colour changes inside the row, to make a motif. We are going to work with a very simple chart, this one:
 There are lots of ways to create your chart, and there are also many available on the Internet. I made my chart in a spreadsheet and printed it out.
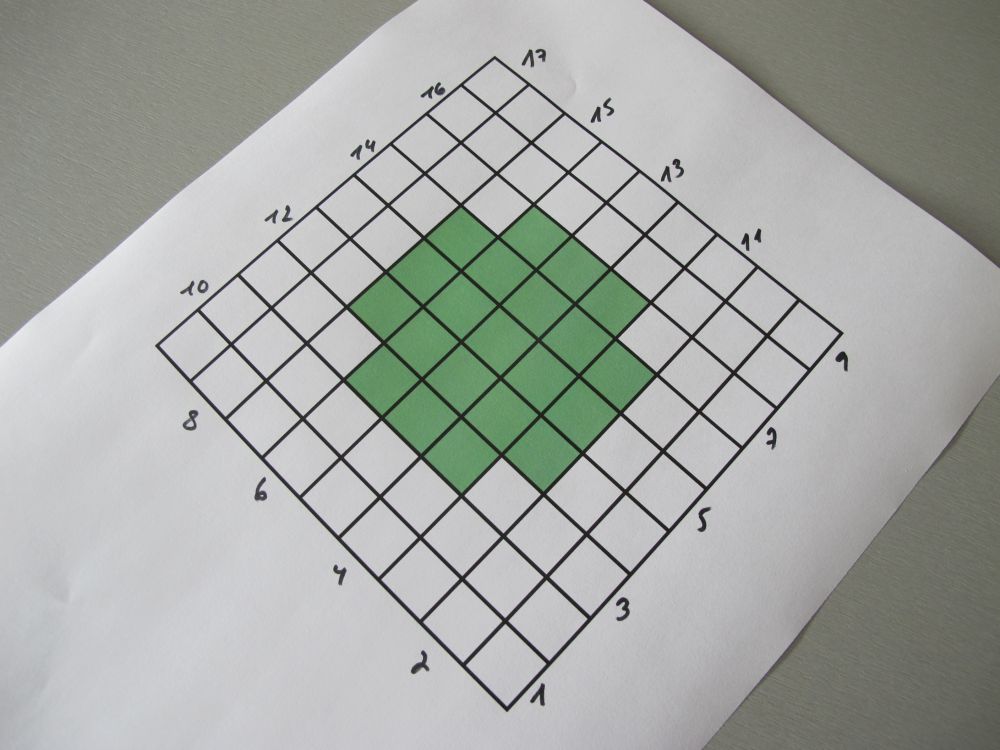
Since the chart is to be read diagonally, I tilt my paper. To make reading the chart easier, I number the rows.

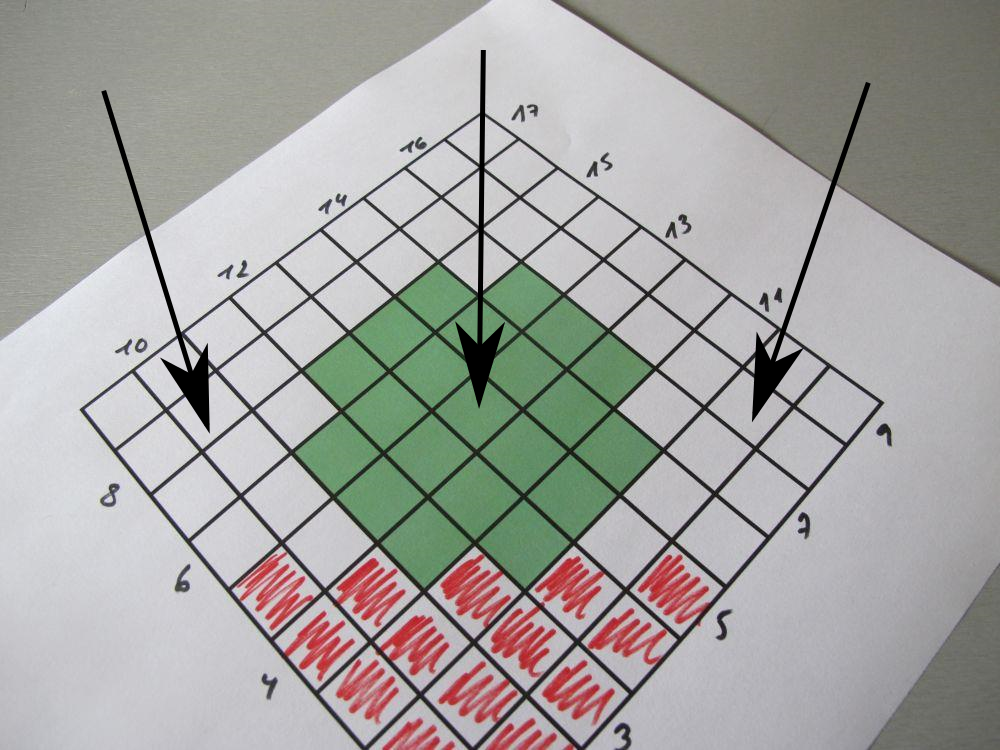
The arrows added to this photo show the direction of the work in different rows.
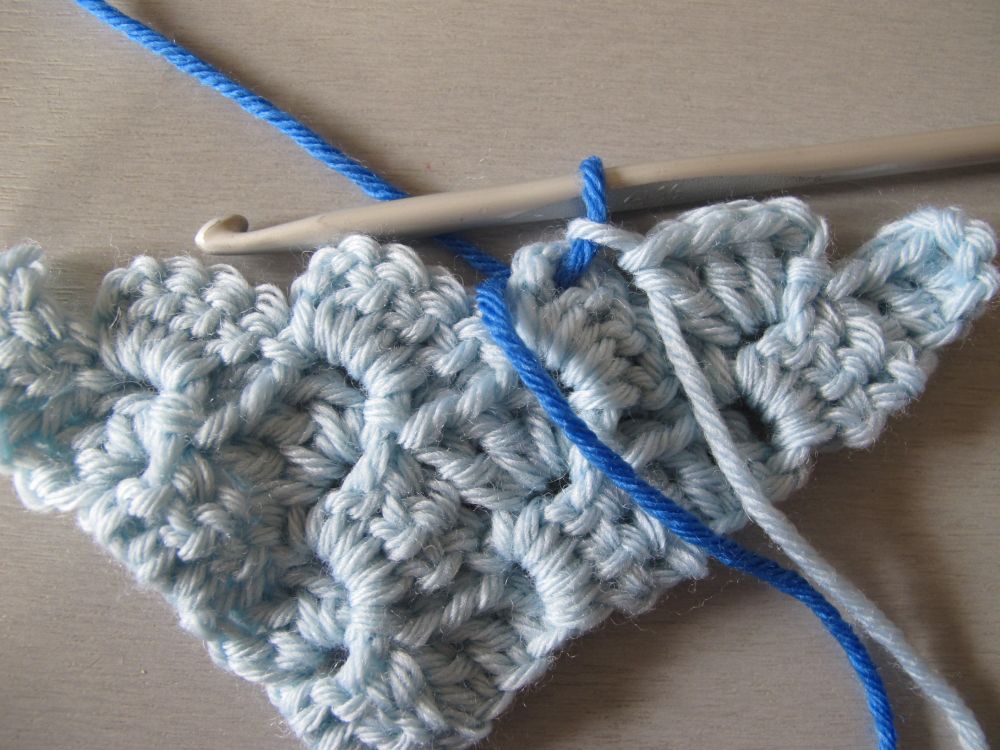
Since the first five rows are in a single colour, I can work them without thinking too much about the chart.

Here are the first five rows (in light blue DK weight merino, worked with a 4.5 mm hook). I place a marker on the right side of my work. This is useful to find your place in complex designs and to handle yarns and colour changes (see below).
I also mark the rows already worked in my chart, to make it easier to follow.
At this point I start to use several colours. On the chart, you can identify three colour zones: the background colour to the left, the background colour to the right, and the motif colour in the middle. This is a simple motif – with a more complex picture, you can have many, many more colour zones.
Each colour zone will have its own little ball of yarn. The unused yarn is not carried along the row.
To prepare your little yarn balls, I recommend an exclusive and very specific tool, available only in my web shop… well, actually not, I suggest you use simple clothespins.
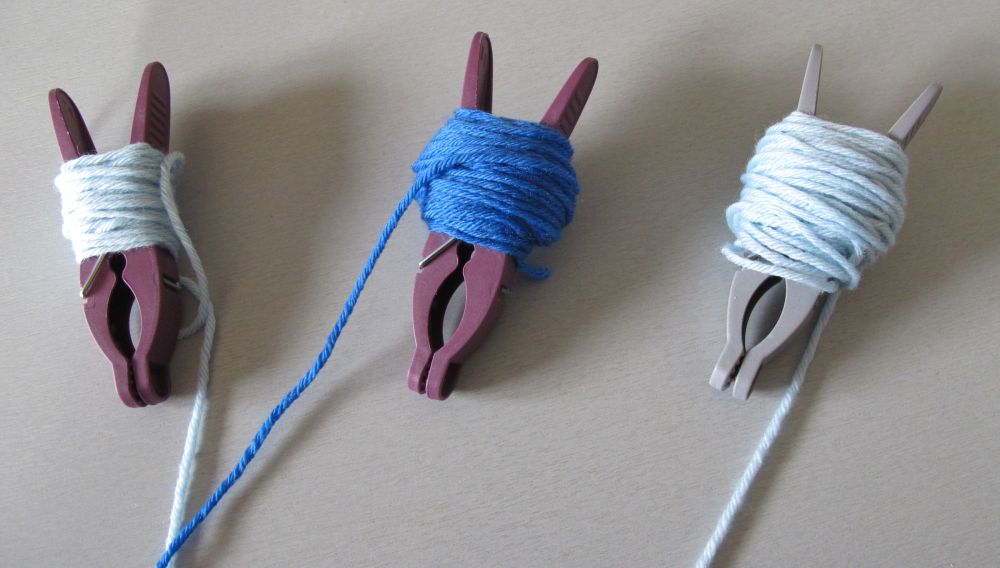
Just make sure that you dont wind the yarn too tightly and not too far down on the clothespin. You will need to be able to open it (I will show you why).
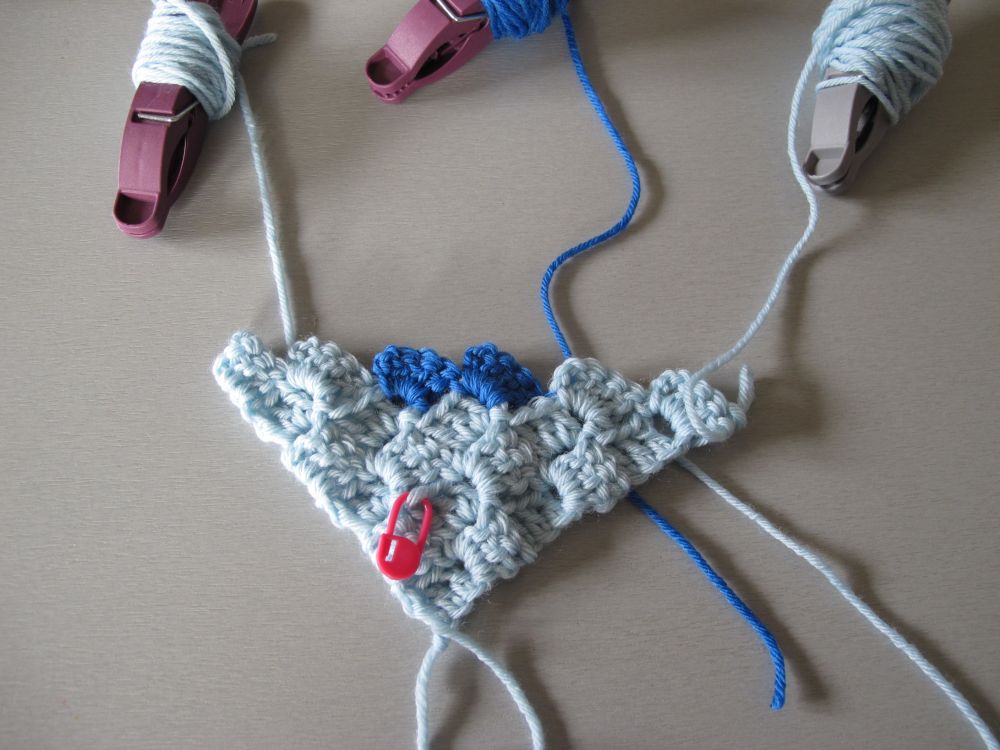
I’m going to start the first row using the colour of the motif. It’s row number 6, on the wrong side of the work.
To change colours, I work the 3 dc in the block just before the colour change. I bring my working yarn towards me (to make sure it stays on the wrong side), and I work the sl st in the ch space in the new colour. I continue my row and make the second colour change in the same way.
Once the row is finished, I need to turn my work. Thanks to the clothespins, I can do this without tangling all my yarns.
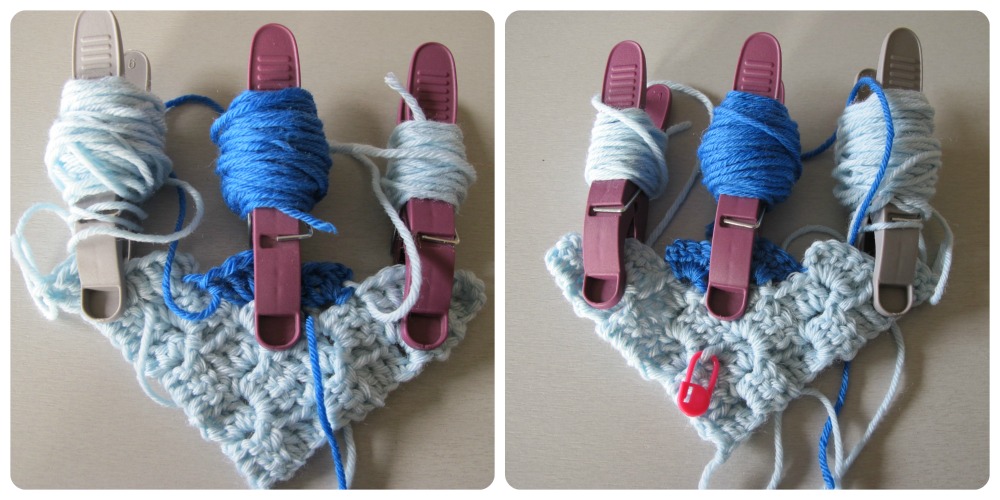
I clip each clothespin to its colour zone, and I turn my work.
Tadaa, no tangles!
Once more: this is a simple motif with only three separate balls of yarn. With a more complex design, there will be many, many more, and the time spent winding yarn onto your clothespins is quickly saved by not having to untangle everything every time you turn your work.
I mark the row just made on my chart. The next row is a right-side row, which means that I will make my colour change a little differently.
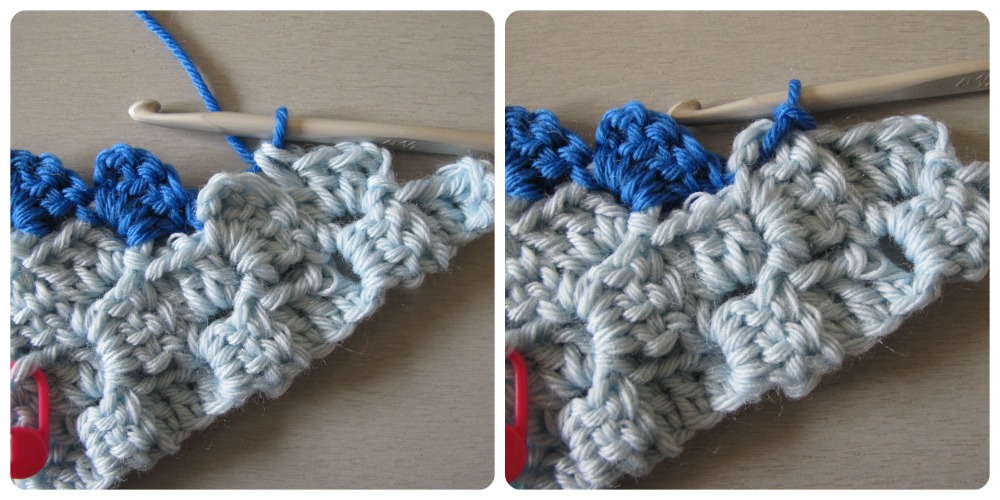
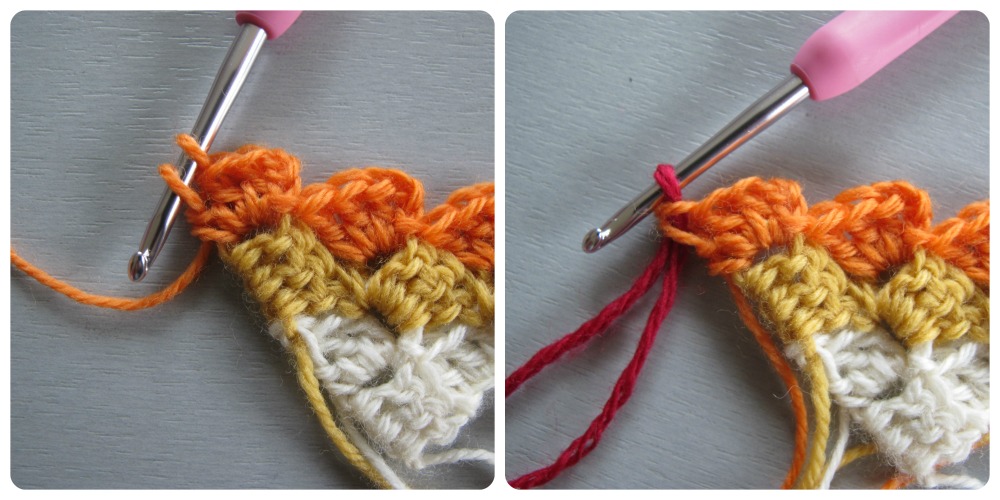
In the last block before the colour change, I work the last dc to the next to last step, where I have two loops on the hook. At this point, I take the new colour and finish my dc with « yo and pull through » (photo to the left above). The slip stitch that attaches this block to the chain space will naturally be done with the new colour (photo to the right). I continue my row and make the next colour change in the same way.
In most of the instructions I’ve found, only one way to change colours is used: either the one I indicated for changes on the wrong side or the one just shown for changes on the right side. When testing both methods, I found that varying the technique between the right and the wrong side gives the best and neatest result – try both ways to see if this is true for you as well!
In any case, just after the colour change you will need to pull a little on both yarns to tighten things up. This will improve the look of the colour change.

Now you have an entire month to try out different ways of changing colours when working the C2C technique. Next month we’ll discuss how you can shape your work!
See you soon,

merci pour le tuto j ai fait le changement de couleur j ai hate de voir la suite