
In the shop
I’m truly sorry, but the payment issues in the English language shop have not been solved yet. Please select « bank wire » as your payment, and I will send you a Paypal request via email.
The book The Haapsalu Shawl is now available in the French shop.
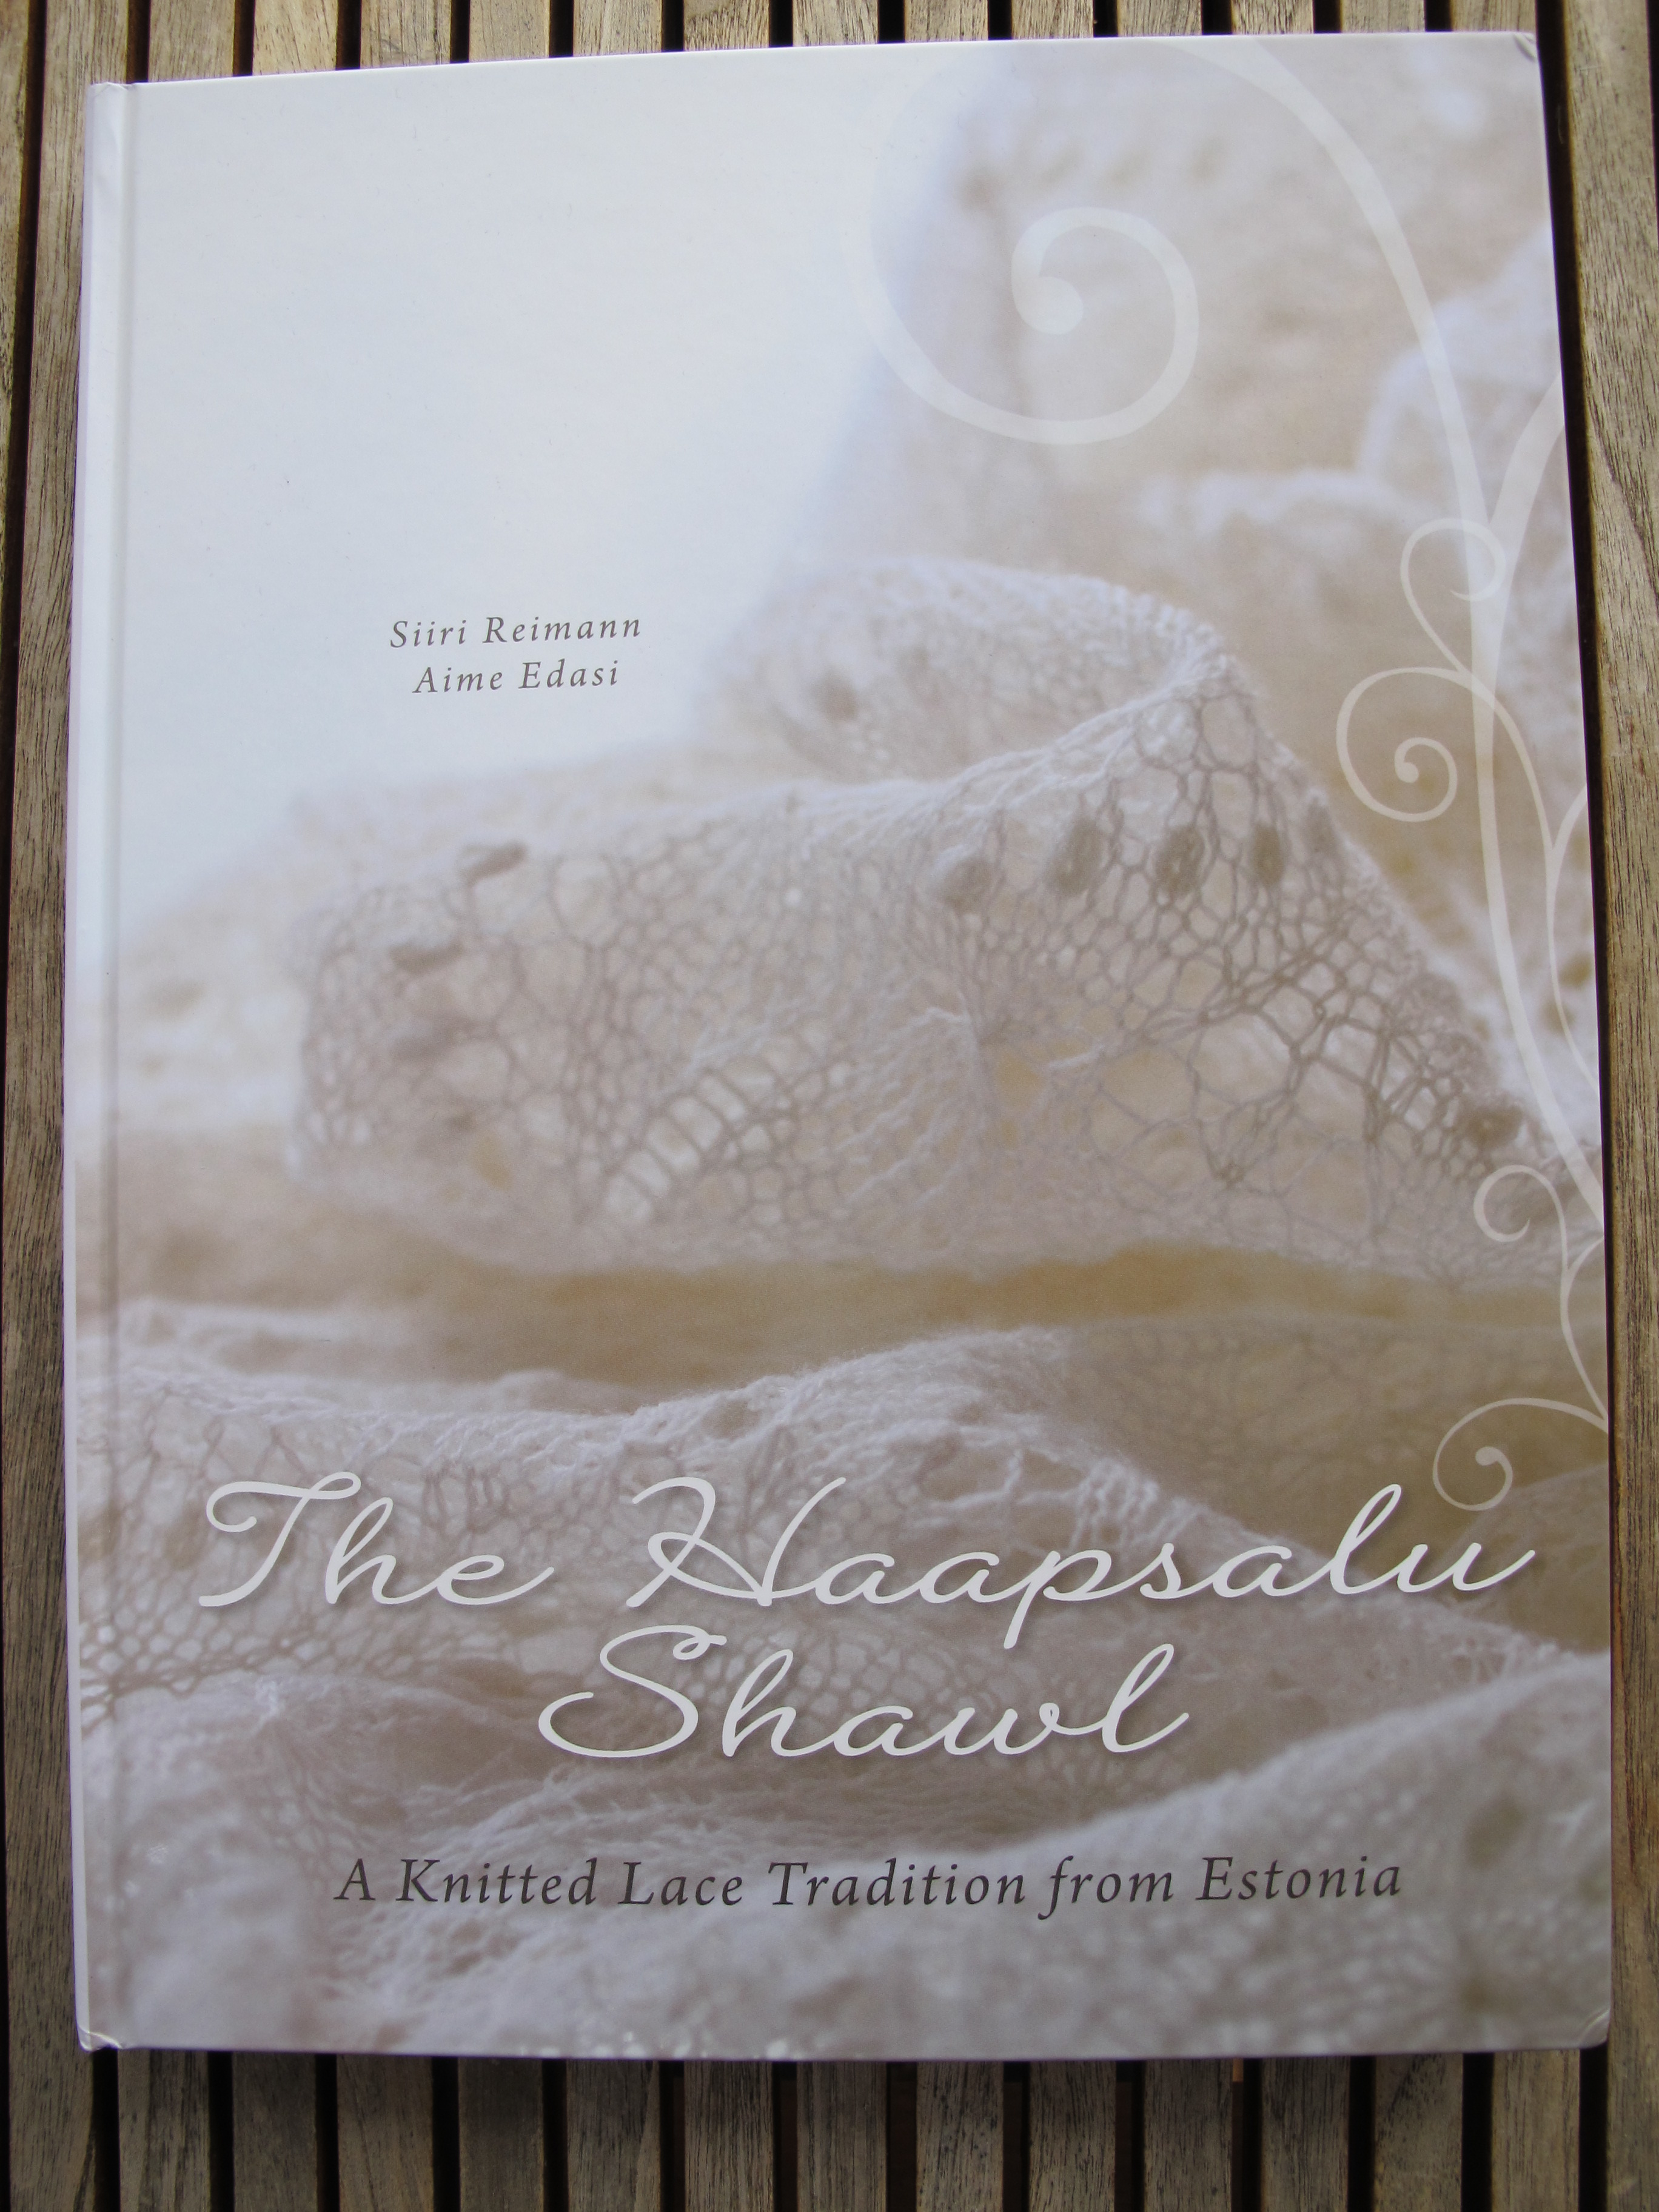
Shipping outside France is quite expensive, but if you are interested in this beautiful book, please send me an email indicating the country where the book should be delivered, and I will calculate the total cost.
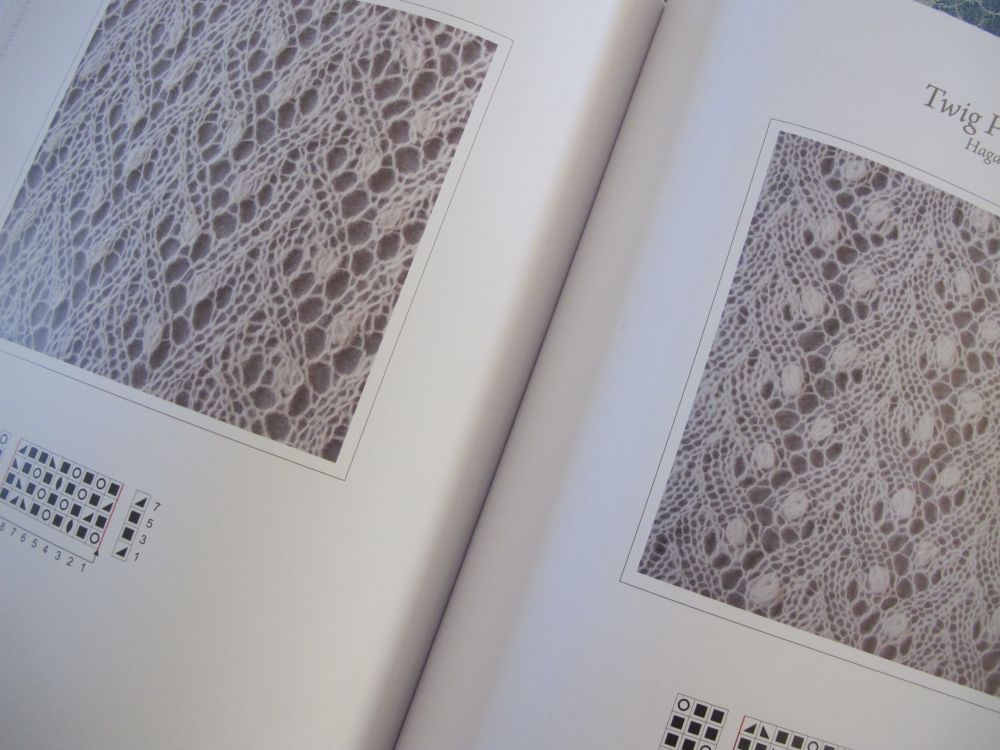
This book is a treasure trove for anyone interested in lace knitting. It contains more than 120 traditional Estonian stitch patterns, all explained via charts. The text is in Estonian and English, and gives interesting information about the history and techniques of the Haapsalu shawls.
You will find more pictures from the book The Haapsalu Shawl in the French shop.
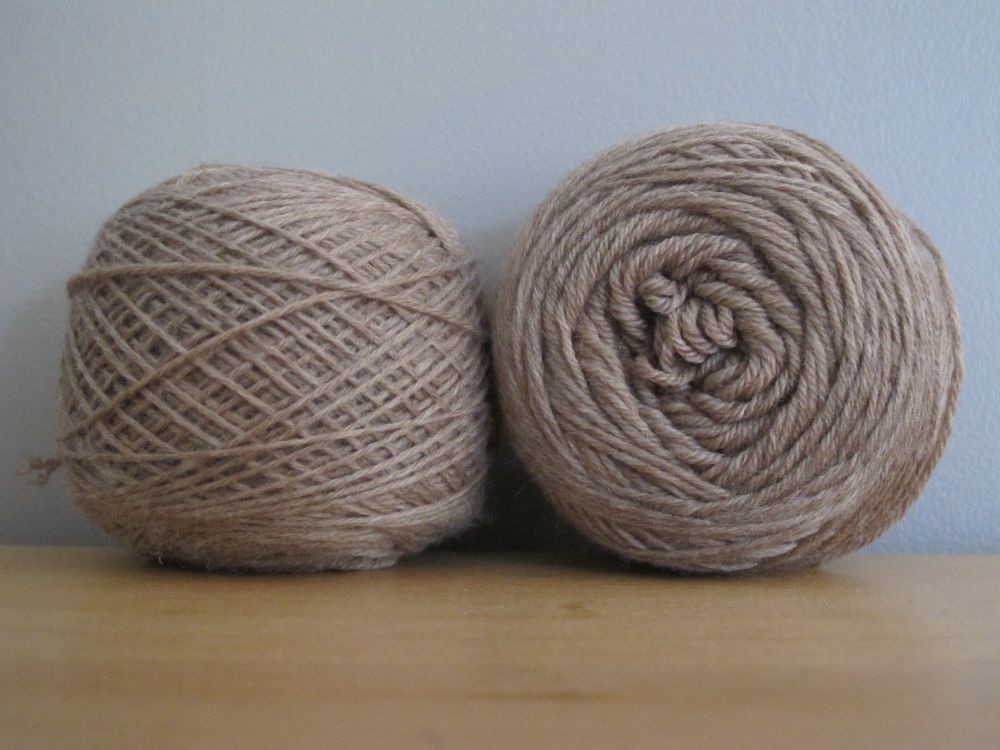
The fingering weight merino range has been completed with the colour gianduia.
On the blog
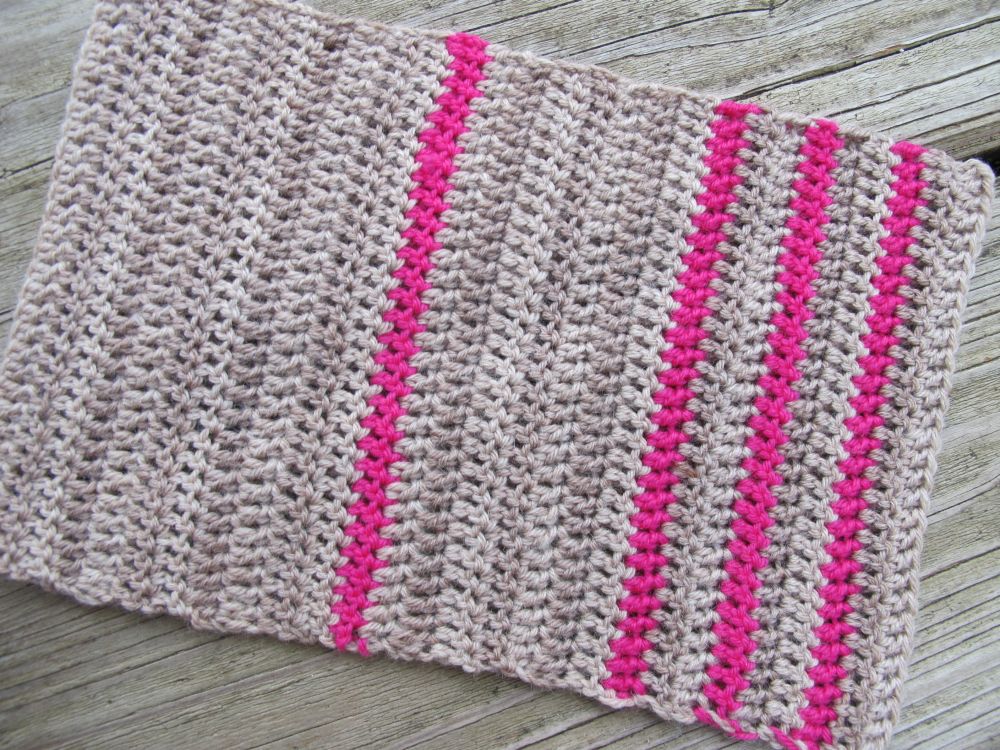
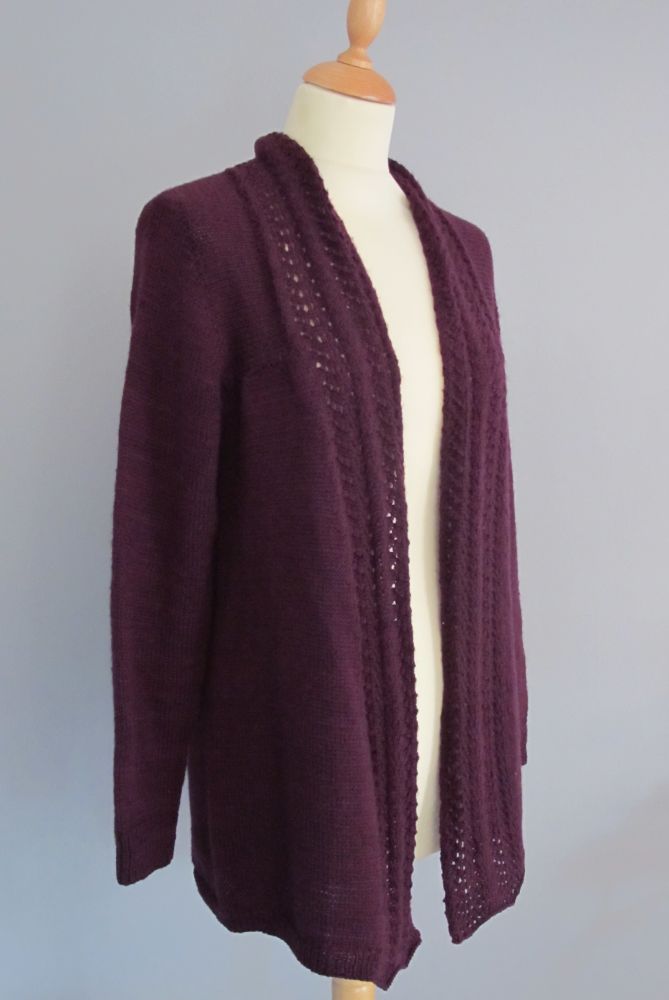 I showed you my last finished knitting project, made from the Old Town pattern designed by Carol Sunday (English version available directly from the designer). I knitted it in fingering weight merino in the damson colour.
 Lili Marlaine showed us her beautiful version of the Silk Scarf pattern, designed by EclatDuSoleil, crocheted in laceweight bamboo.
Hairpin lace: Around the bend
This is the fourth newsletter on the topic of hairpin lace. The first three are the newsletter for May, the one for June and the one for July/August.
The strips made with hairpin lace are very supple and pliable when they come off the loom. It’s a bit disconcerting when you begin working with them, but it’s also this pliability that makes it possible to bend them into different shapes, by applying a simple or more complicated border.
The possibilities are endless, but in this newsletter, we are going to discuss only how to shape our strips into zigzags of different types. These undulating strips are a very common application of hairpin lace.
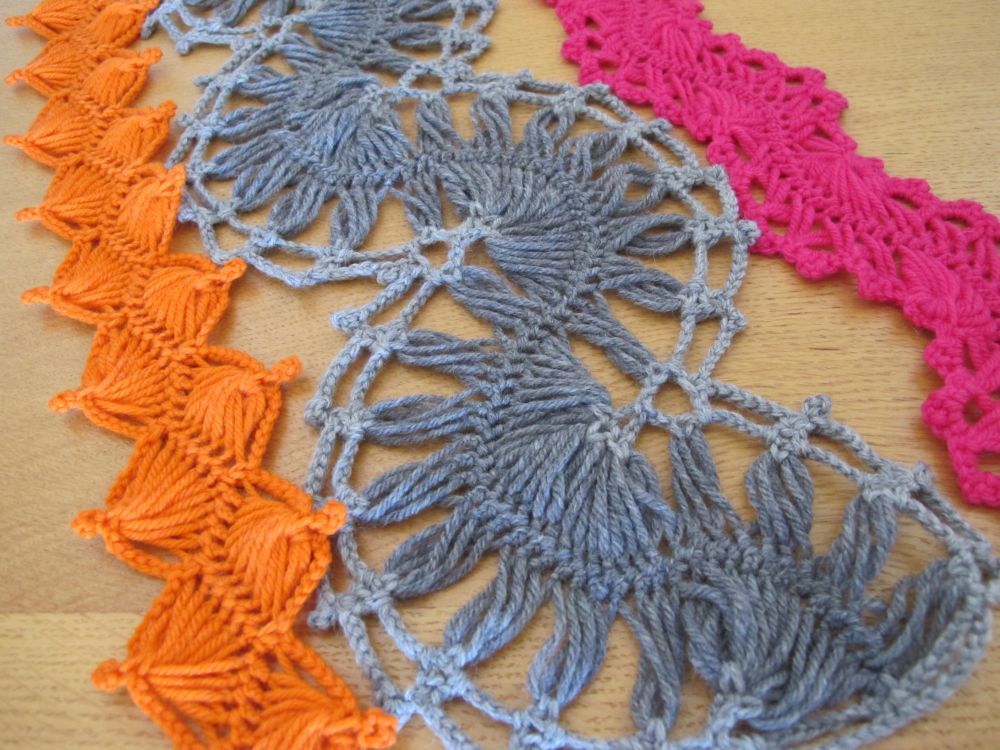
To test this technique and understand how it works, I made a few examples of zigzag strips from the book My First Hairpin Lace by Yoshiko Ariizumi. I found a French translation of this book – unfortunately it doesn’t seem to have been translated into English.
As you can see in the picture, the elasticity of the strip combined with varying numbers of loops worked together and added borders makes it possible to obtain very different results depending on the choices you make.
However, the basic principle for a strip worked into a zigzag is always the same. You start by choosing a multiple of loops. In the photo above, the orange strip is a multiple of 10 loops, the pink one a multiple of 20 and the grey one a multiple of 24.
With a bigger multiple of loops, the strip will curve more – but the way the loops are assembled on each side of the strip is also very important for the final look.
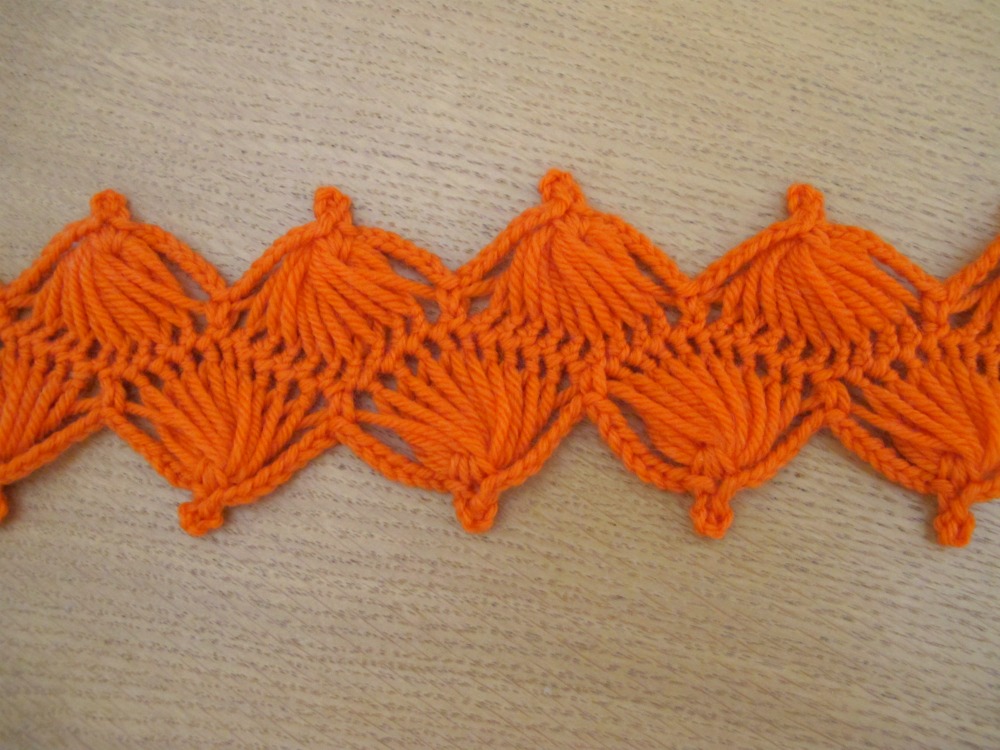
Let’s take a closer look at the orange strip. The loops are worked in the same way on both sides of the center. They are assembled into groups of 10 loops (with a sc to hold the loops together), but the groups are set off (at one side of the strip, you start with a sc in 10 loops, while on the other side you start with a sc in 5 loops). If you look at the center of the strip, the zigzags clearly show, but the overall shape is a straight band.
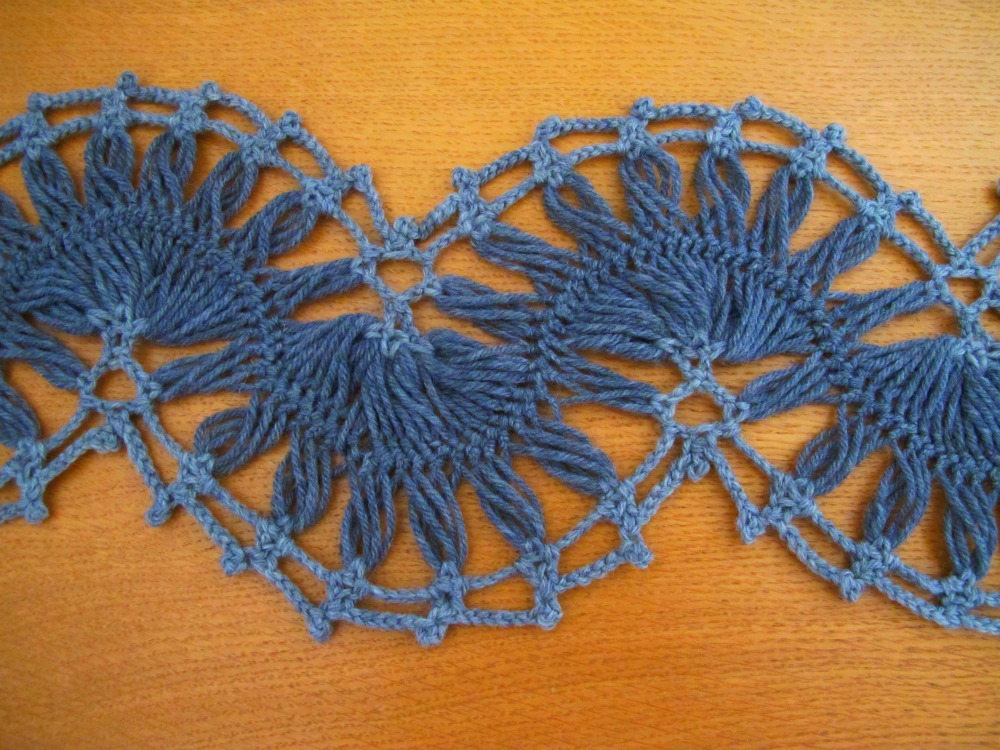
In the grey strip, the loops are treated differently on the two sides. On one side there are 8 groups with 3 loops in each, separated by several chains. On the other side there are 3 groups with 8 loops in each, and no chains between the groups. If you look at the center of the strip, it curves much more widely and softly than the orange strip, and the strip as a whole is shaped into large, rounded curves.
Of course, simply replicating patterns from a book wasn’t enough for me. Just to see if I had grasped the concept, I made two simple strips that I will explain in detail.
For both strips, I set my loom to a width of 5 cm (2″) and used the fingering weight merino from my shop with a 3.5 mm hook.
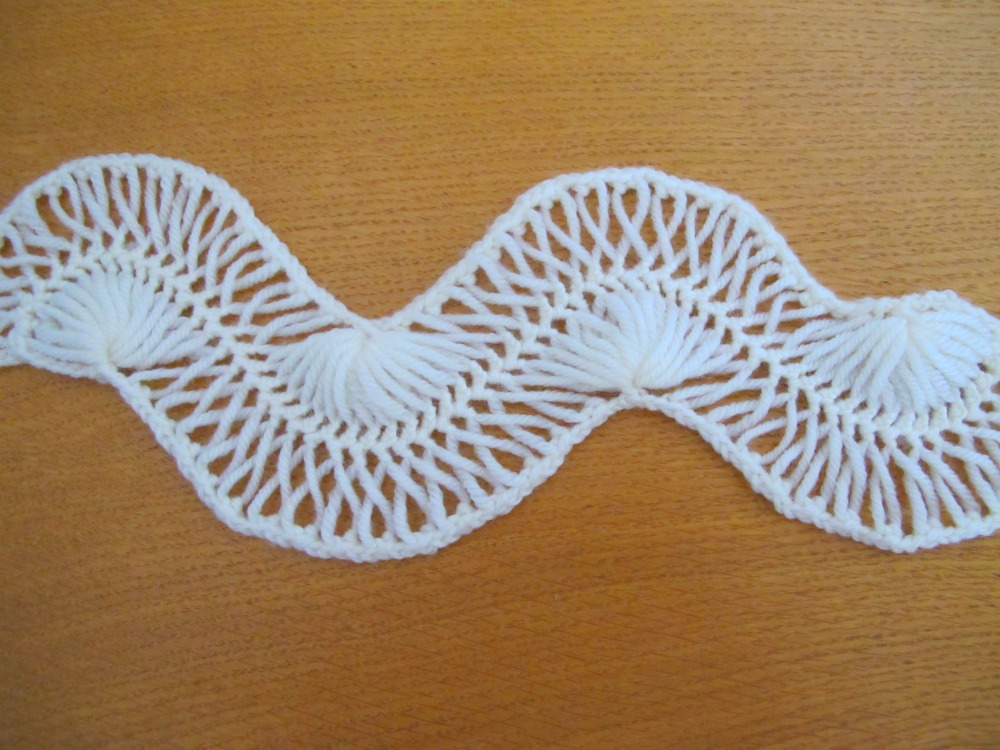
For my first strip, I chose to work with a multiple of 15, and made a strip with 60 loops.
Starting at the top right corner (with the strip laid horizontally in front of me), I worked as follows:
*1 sc in 15 loops, (ch 2, 1 sc in 1 loop) 15 times, ch 2*, repeat from * to * to end of strip, finishing with ch 7, 1 sc in the end of the « spine », ch 7. Rotate the strip to work on the other side.
Repeat the same thing on the other side of the strip, taking care to do the opposite of what you did on the first side. If you finished the first side by working into the loops one by one, you start the other side with a 15-loop group.
This is a simple diagram of the strip, showing 2 repeats = 30 loops:
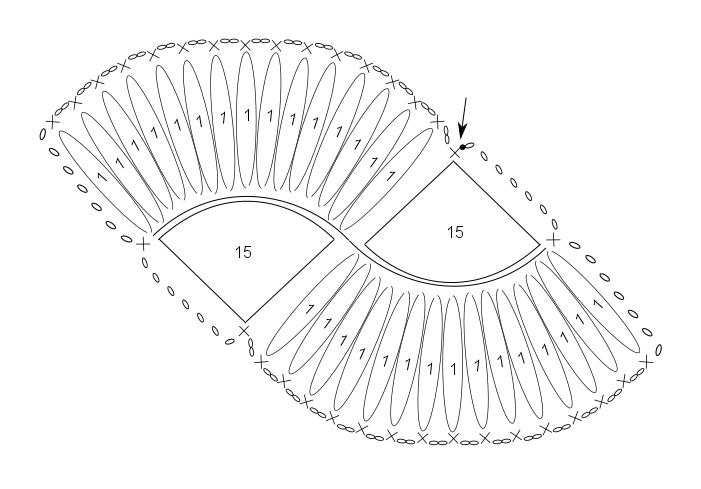 The border starts (and ends) at the arrow.
It seems difficult to make anything simpler than this first strip. I decided to do a second one with a little more detail.
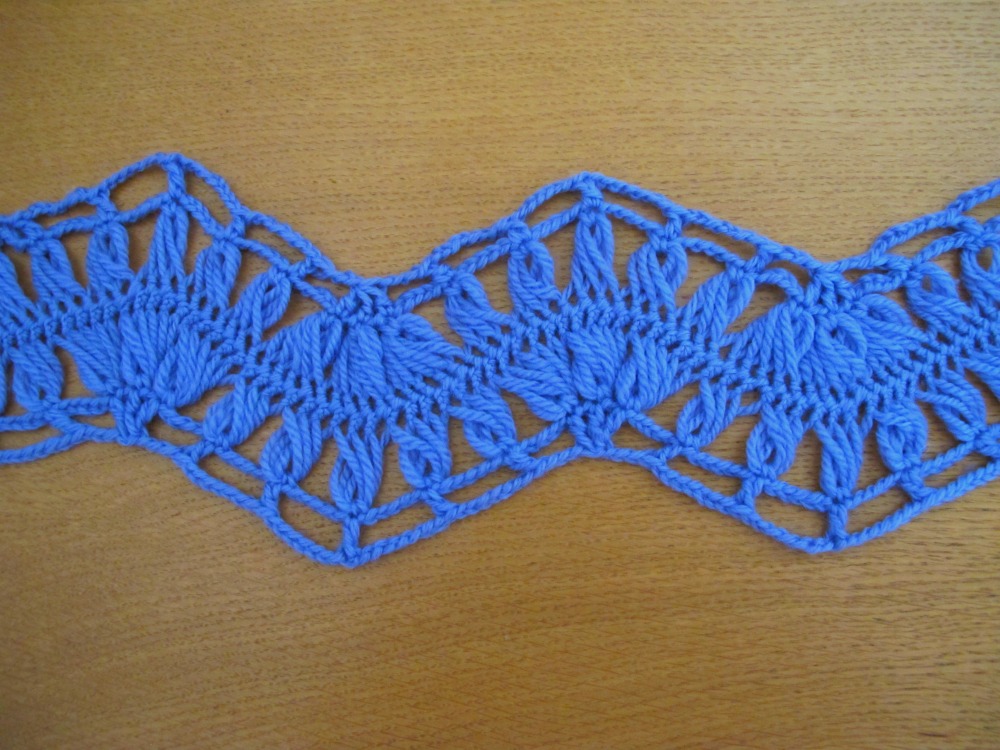
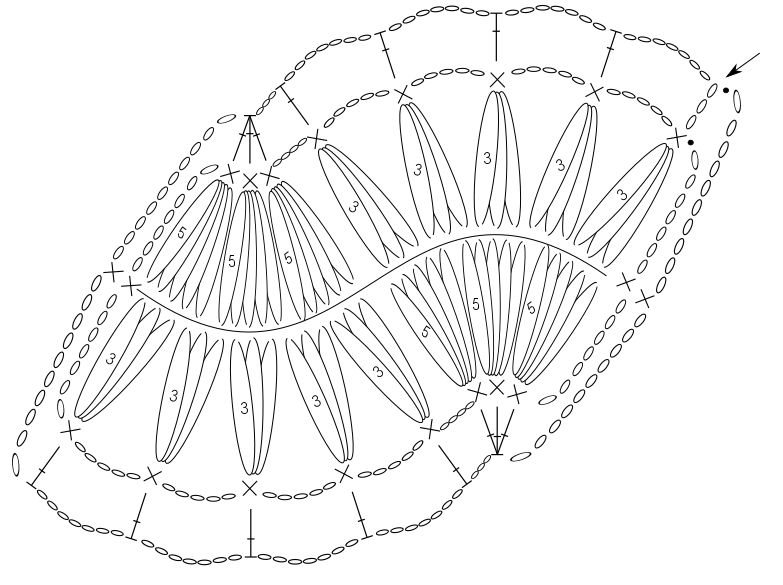
I decided to continue with my multiple of 15, and worked a basic strip with 90 loops.
Round 1 in the border (starting at the top right corner of the band): *1 sc in 3 loops, (ch 5 , 1 sc in 3 loops) 4 times, ch 4, (1 sc in 5 loops) 3 times, ch 4*; repeat from * to * to end, finishing with ch 7, 1 sc in the end of the « spine », ch 7; rotate strip to work on the other side; repeat again from * to * to end, finishing with ch 7, 1 sc in the end of the « spine », ch 7, close the round with 1 sl st in first sc.
Round 2 in the border: Ch 3 (count as a dc), *(ch 7, 1 dc in next sc) 4 times, ch 3, dc3tog in the next 3 sc, ch 3, 1 dc in next sc*; repeat from * to * to end, finishing with a dc3tog, ch 10, 1 sc in next sc, ch 10; rotate strip to work on the other side; 1 dc in first sc, repeat again from * to * to end, finishing with a dc3tog, ch 10, 1 sc in next sc, ch 10, close the round with 1 sl st in 3rd ch at beg of round. Fasten off.
To round off this visit in the land of hairpin lace, two thoughts:
- I love the possibility of changing the aspect of the strip with the border, worked in one or several rounds. Using picots or other decorative stitches, the border will underline the soft and romantic aspect that especially the more complex zigzag strips have. With a simpler, stricter border (like the one in my second strip), this is toned down.
- It would be very interesting to integrate hairpin lace in projects using classic crochet. A strip with a pretty border on one side could be attached on the other side to a shawl or a cowl worked in the traditional way.
For now, my exploration of hairpin lace ends here. To go more deeply into the topic, I recommend the tutorials and patterns by Jennifer Hansen (Stitch Diva). Also, look up hairpin lace on your favourite book site and see what you can find.
As usual, feel free to share your ideas, suggestions or questions in the comments below!
See you soon!
